Table of Contents
Advertisement
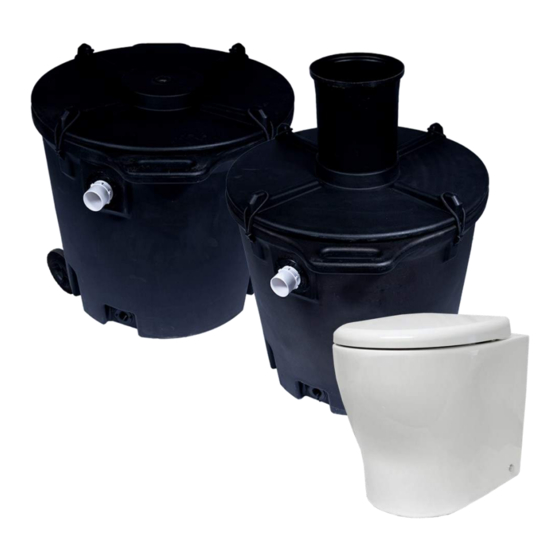
Quick Links
Advertisement
Table of Contents

Related Manuals for clivus multrum CM HP


Summary of Contents for clivus multrum CM HP
- Page 1 CM HP ▪ Thank you for purchasing the Clivus Multrum HP. Please read this manual carefully before installation. ▪ “Clivus Multrum” is a brand of Ecoflo Wastewater Management Pty Ltd. ▪ Visit our website at ecoflo.com.au IMCM-204.20.01.17 © Ecoflo Wastewater Management Pty Ltd...
- Page 2 Copyright © 2020 Ecoflo Wastewater Management Pty Ltd Please call your local distributor or Ecoflo Wastewater Management for support if required. Ecoflo Wastewater Management Pty Ltd ecoflo.com.au clivusmultrum.com.au Phone: 1300 138 182 Phone: 07 3889 6144 Email: info@ecoflo.com.au Proudly Designed and Assembled in Australia by Ecoflo Wastewater Management Page 2 IMCM-204.20.01.17...
-
Page 3: Table Of Contents
Table of Content WHAT’S IN THE BOX? ........................ 4 CM LP SCHEMATICS ........................5 INSTALLATION ..........................6 Step 1: Positioning the Pedestal Diagram ................. 6 Step 2: Positioning the Waste Chute ..................7 Step 3: Installing the Waste Chute .................... 8 Step 4: Installing the Wheels to the Composting Chamber ............ -
Page 4: What's In The Box
WHAT’S IN THE BOX? Please check the packing slip to ensure everything has been delivered. If anything is missing, please notify your supplier within 72 hrs of receipt. Items you will need to complete your installation: Wall brackets to fix the vent pipe to the building ... -
Page 5: Cm Lp Schematics
CM HP SCHEMATICS Chamber Dimensions [without Lid] Diameter = 780mm. Height = 620mm. Handle to Handle max = 950mm If you are planning to excavate an area under the house for the compost chambers, please ensure the area is well-drained and any retaining walls are built to the satis- faction of the local authority. -
Page 6: Installation
INSTALLATION Step 1: Positioning the Pedestal Diagram Locate the approximate area where you want the pedestal to go before cutting the hole. The usual position for pedestals is centred between side walls. Page 6 IMCM-204.20.01.17 © Ecoflo Wastewater Management Pty... -
Page 7: Step 2: Positioning The Waste Chute
Step 2: Positioning the Waste Chute A 240mm hole must be cut in the toilet room floor to accommodate the waste chute. Page 7 IMCM-204.20.01.17 © Ecoflo Wastewater Management Pty... -
Page 8: Step 3: Installing The Waste Chute
Step 3: Installing the Waste Chute First ensure the pad or ground level on which the ‘In-service’ chamber will reside is at its final level beneath the toilet room. Page 8 IMCM-204.20.01.17 © Ecoflo Wastewater Management Pty... - Page 9 Extra Length Required for Under-floor Areas If the Underfloor height exceeds 1200mm (floor-to-floor), you will require additional lengths of chute, fixed together with small stainless steel self-tapping screws below the flange of the Ad- ditional Waste Chute. As the Chute joints are Tappered, the top Waste Chute must be inserted through the toilet room floor first with Additional Waste Chutes added from below.
-
Page 10: Step 4: Installing The Wheels To The Composting Chamber
To assist composting in colder climates, we recommend the purchase of an optional heater pad which is perma- nently fixed inside the chamber. The Pad will be factory installed. The Heater Pad runs on 12 Volt Power. (Refer to the supplementary manual.) Note : The Heater Pad should not be submerged –... -
Page 11: Step 5: Compost Mixer
Step 4: Composting Chamber Step 5: Installing the Compost Chamber Slide the ‘In-service’ compost chamber lid (with Pre-Cut Hole) up onto the waste chute from under- neath (A brush seal is supplied & fitted to the ‘In-service’ lid and acts as a seal to prevent any odour emitting from the chamber.) 1. -
Page 12: Step 7: Connecting The Vent Pipe And Fan To The 'In-Service' Chamber
Step 6: Connecting the Vent Pipe and Fan to the ‘In-service’ Chamber The fan runs 24 hours a day to continuously circu- late air through the compost heap. Air is drawn down the toilet pedestal through the compost chamber and out the vent pipe. -
Page 13: Connect The Flexible Air Hose & Excess Fluid Hose To The Chambers
Connect the Flexible Air Hose & Excess Fluid Hose to the Chambers: Page 13 IMCM-204.20.01.17 © Ecoflo Wastewater Management Pty... -
Page 14: Powering Your Fan
POWERING YOUR FAN Mains Power A 240/12 volt regulated transformer is included to run the fan from mains power. Connect the fans to the transformer as follows: We recommend a spare fan is kept on hand at all times, particularly after a year of use. Go to Ecoflo Online Store or call 1300 138 182 for... -
Page 15: Composting Accelerators
COMPOSTING ACCELERATORS Whilst Clivus Multrum users report successful composting without the use of any addi- tives, we strongly recommend the use of the following in order to optimise composting, particularly when the toilet is in permanent use by more than two people. -
Page 16: Care & Maintenance
CARE & MAINTENANCE Daily or Weekly • Clean restroom & toilet fixtures using only biodegradable cleaners. • Add 1 cup of bulking agent to toilet after every solid use. • Turn the Compost Mixer Anti Clockwise 3-5 times weekly; or possibly more often, once the pile is above the bottom Mixer Blades. -
Page 17: Rotation Of Chambers
(gloves and old clothes). Do not attempt to move the chambers on your own. The Clivus Multrum composting toilet chambers will need to be changed on a regular basis. A suf- ficient number of chambers must be purchased to allow the ‘Out-of-service’ chamber a minimum 5 months;... -
Page 18: Trouble Shooting
1300 138 182. Clivus Multrum toilets have proven themselves to be one of the easiest systems to manage. However, be- ing a natural process, reliant on a number of factors beyond our control, it can occasionally need some help to maintain an appropriate balance. - Page 19 The odour from the ‘Out-of-service’ chamber is unpleasant: If the ‘Out-of-service’ chamber is not connected to the vent pipe it may smell immediately after it has been taken ‘Out-of-service’. Odours can be greatly reduced or eliminated by covering the top of the pile with straw or dry grass clippings. You may wish to do this before disconnecting the chamber.
-
Page 20: Product & Component Warranty
PRODUCT & COMPONENT WARRANTY Ecoflo will furnish new parts to a customer whose toilet fails within the allotted warranty period for the particular component, provided that our inspection shows such failure is due to defective material or workmanship. Any part supplied is warranted for the balance of the original warranty period. The war- ranty period for a part begins from the date the original product was dispatched (plus 10 working days for transportation). -
Page 21: Maintenance Schedule
Please place this maintenance schedule close to your ‘In-service’ Chamber and complete the table as you rotate your chambers. Model: CM HP Date First Put into Service: _____/_____/________ The ‘Out-of-service’ chamber must compost for a minimum of 5 months from the date it was first rotated ‘Out-of-service’. - Page 22 APPENDIX 1 Page 22 IMCM-204.20.01.17 © Ecoflo Wastewater Management Pty...
Need help?
Do you have a question about the CM HP and is the answer not in the manual?
Questions and answers