
Related Manuals for Ravas iForks-32 XT


Summary of Contents for Ravas iForks-32 XT
- Page 1 PRESENTED BY JPBOWLIN.COM 817.332.8116 J.P. Bowlin is a quality-driven Calibration Company that has provided calibration, repair and sales of all types of weighing and measurement products since 1931.
- Page 2 USER MANUAL iForks-32 (XT) We would like to inform you about the fact that this RAVAS product is 100% recyclable on the basis that the parts are processed and disposed of in the right manner. More information can be found on our website: www.ravas.com...
- Page 3 PLEASE RETAIN THESE INSTRUCTIONS FOR FUTURE REFERENCE If you have any queries concerning the duration and terms of the guarantee, please contact your supplier. We would also refer you to our General Sale and Supply Conditions, which are available on request. The manufacturer accepts no liability for any damage or injury caused by failure to follow these instructions, or from negligent operation or assembly, even if this is not expressly stated in this instruction manual.
-
Page 4: Table Of Contents
5.9 Adding & reset 5.10 Changing the time and date (on the printout) 5.11 LB-KG switch 5.12 User settings 5.12.1 Overview power save settings (auto shut-off) 5.13 Supervisor menu 5.14 Relay function 5.15 Alibi memory 6. RAVAS WeightsApp USER MANUAL – iForks-32 (XT) -
Page 5: Introduction
No weighing operations are allowed if any persons or objects are in the vicinity; around, under or close to the load; • RAVAS is not responsible for any physical harm done to the operator because of the presence of the indicator in the cabin; •... -
Page 6: Lithium Ion Battery
2.1 Lithium Ion Battery Important Safety Information DANGER • Use the specific Li-ion charger and observe the specified charging conditions when charging the battery. • Avoid influences of high temperature and keep away from fire. • Do not deform, modify or disassemble the battery. •... - Page 7 Disposal information for countries outside the European Union This symbol is only valid within the European Union. Follow local regulations when disposing used batteries. If you are not sure, consult the place of purchase or a RAVAS dealer. USER MANUAL – iForks-32 (XT)
-
Page 8: System Setup
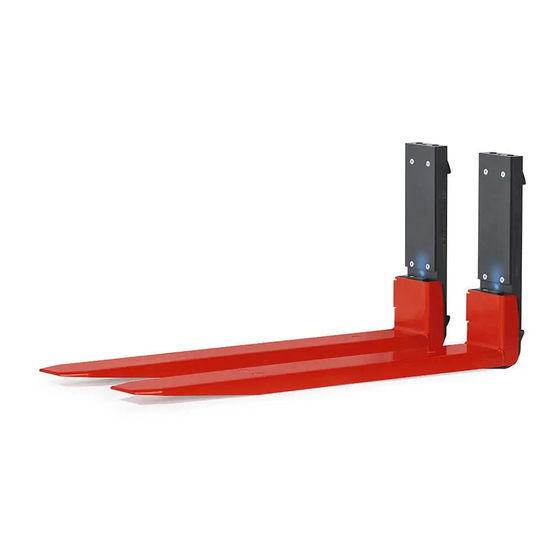
3. System setup 3.1 Installing the iForks-32 (XT) The standard forks must be taken off the carriage plate. The iForks-32 (XT) are placed on the carriage plate. 3.2 Locking the iForks-32 (XT) USER MANUAL – iForks-32 (XT) -
Page 9: Installing The Indicator
3.3 Installing the indicator Find a suitable position for the indicator: 1. at the cabin’s roof. 2. on the right side of the cabin, mounted onto a side-rail. 3. on the dashboard. Installation of the indicator bracket & support. USER MANUAL – iForks-32 (XT) -
Page 10: Placing The Battery Packs In The Iforks-32 (Xt)
3.4 Placing the battery packs in the iForks-32 (XT) 1. Push the red locking clips down to unlock the battery holders. 2. Open the battery holders of both forks. 3. Position the battery packs in the battery holders of both forks until the red locking clip shifts up again. -
Page 11: Connecting And Switching On The Iforks-32 (Xt)
3.5 Connecting and switching on the iForks-32 (XT) ID CODE TOTAL KG/LB Start up the indicator. Press the on/off key. Switch on the iForks-32 (XT): Move the iForks-32 (XT) quickly in upwards or downwards direction. ID CODE TOTAL KG/LB The Bluetooth link between the indicator and the forks will connect automatically. -
Page 12: Switching Off The System
3.6 Switching off the system ID CODE TOTAL KG/LB 3 sec. Switch off the indicator by pressing the on/off key for 3 seconds. Both forks will switch off automatically. The blue LED’s “SLEEP” on both iForks (1 & 2) will start blinking automatically. USER MANUAL –... -
Page 13: Changing Batteries
4. Changing batteries 4.1 Low battery indication iForks-32 (XT) Exchangeable battery packs supply power to the iForks-32 (XT). When the voltage level of the battery packs is running low, the low battery indicator will light up and the pointer of the relating fork - “F1”, ”F2” or both - will start blinking in the display. The blue LED (LOW BATTERY) on the relating fork will start blinking very slowly (twice every 10 sec). -
Page 14: Changing The Battery Packs Of The Iforks-32 (Xt)
4.2 Changing the battery packs of the iForks-32 (XT) Take out both battery packs. 4.3 Charging the rechargeable battery packs The system is equipped with rechargeable battery packs and a smart charger. After charging for at least 8 hours, the charger will shut off when the battery packs are completely full. The red LED on the adapter will change tot green once the batteries are fully charged. -
Page 15: Changing The Batteries Of The Indicator
4.4 Changing the batteries of the indicator As standard, the new indicator is equipped with 4 AA batteries. ID CODE TOTAL KG/LB Replace batteries as soon as the low battery Remove the battery cover of the indicator starts blinking. indicator housing by turning the screw counter-clockwise. -
Page 16: Use
5. Use 5.1 Use (accurate weighing) 3 - 5 min. After 3 to 5 minutes the load cells have reached the operational temperature. Don’t lift loads before the zero-point correction has been executed. max 40°C min -10°C 105°F 15°F USER MANUAL – iForks-32 (XT) -
Page 17: Level Correction (Option)
5.1.1 Check the zero reading before each weighing Check the zero reading before each weighing! ID CODE TOTAL KG/LB Before each weighing it is necessary to check whether the system is unloaded and free. If the indicator does not determine the zero point automatically, it must be done manually using the >0<... -
Page 18: Bluetooth Communication
5.3 Bluetooth communication 5.3.1 Establish Bluetooth communication and weigh! ID CODE TOTAL KG/LB Start up the indicator. Press the on/off key. Switch on the iForks-32 (XT): Move the iForks-32 (XT) quickly in upwards or downwards direction. ID CODE TOTAL KG/LB ID CODE TOTAL KG/LB... -
Page 19: Auto-Reconnect Function
5.3.2 Auto-reconnect function If the Bluetooth link between the indicator and forks is lost, the indicator will show this error message. < 20 sec. Just wait for maximum 20 seconds. The Bluetooth link will re-connect automatically. ID CODE TOTAL KG/LB >... -
Page 20: Auto Shut-Off Indicator
5.4 Auto shut-off indicator 20 sec. ID CODE TOTAL KG/LB 2 min. No action ! Countdown starts: Press any key during countdown to cancel auto-shut-off and go back to the weighing mode. ID CODE TOTAL KG/LB ID CODE TOTAL KG/LB ID CODE TOTAL KG/LB... -
Page 21: Auto Shut-Off Iforks-32 (Xt)
The display automatically returns to its normal weighing mode. 5.5 Auto shut-off iForks-32 (XT) ID CODE TOTAL KG/LB ID CODE TOTAL KG/LB -iForks-32 (XT) off 2 hour No weighing! -Indicator off ID CODE TOTAL KG/LB Switch on the iForks-32 (XT): Restart the indicator: Move the iForks-32 (XT) quickly in upwards Press the on/off key. -
Page 22: Indicator Functions
5.6 Indicator functions KG/LB ID CODE TOTAL the weighing system (including load) is stable the weight shown is negative ZERO the weight shown is within the zero range the display is showing the net weight displayed weight is in range 1 (option multi range) displayed weight is in range 2 (option multi range) displayed weight is in range 3 (option multi range) Fork 1 Low battery... - Page 23 Key functions Each key has 2 operational and one entry function. Standard function Special function Value entering (short key press) (long key press) function (entry mode) ID CODE Zero setting code entry enter automatic tare pre-set tare decrease the value of the digit flashing print weight and add to check subtotal and...
-
Page 24: Error Messages
(only legal for trade version) automatic SCALL audit trail no out of range Contact RAVAS Service department Er_F1 too few samples for measurement Wait for improvement of the bluetooth connec- tion (try moving the mast to lower position) -
Page 25: Net / Tare / Gross Weight
5.8 Net / Tare / Gross weight EXPLANATION: Net(1) + Tare(2) = Gross(3) 5.8.1 Net weighing: automatic tare ID CODE TOTAL KG/LB ID CODE TOTAL KG/LB ID CODE TOTAL KG/LB The indicator is set to zero. The “NET” pointer shows that the tare weight is activated. - Page 26 ID CODE TOTAL KG/LB 1000 The display shows the net value of the weighed load. ID CODE TOTAL KG/LB ID CODE TOTAL KG/LB The gross weight is displayed again. NOTE: for NTEP iForks-32 (XT) the tare will be erased automatically when the weight returns to gross zero! For the next weighing the tare must be activated again.
-
Page 27: Net Weighing: Manual Tare (Pt)
5.8.2 Net weighing: manual tare (PT) ID CODE TOTAL KG/LB 3 sec. 1000 Press the >T< key for 3 seconds. ID CODE TOTAL KG/LB ID CODE TOTAL KG/LB Press the up or down key until the desired value is reached. ID CODE TOTAL KG/LB... - Page 28 ID CODE TOTAL KG/LB 1000 The ‘NET’ pointer lights up. ID CODE TOTAL KG/LB ID CODE TOTAL KG/LB 1000 When the iForks-32 (XT) are completely unload- ed, the tare value is displayed negatively. NOTE: for NTEP iForks-32 (XT) the tare will be erased automatically when the weight returns to gross zero! For the next weighing the tare must be activated again.
- Page 29 ID CODE TOTAL KG/LB ID CODE TOTAL KG/LB The gross weight is displayed again. NOTE: The last used preset tare value will remain in the preset tare memory. For re-using preset tare value hold the >T< key for 3 seconds than press Enter. USER MANUAL –...
-
Page 30: Adding & Reset
5.9 Adding & reset ID CODE TOTAL KG/LB ID CODE TOTAL KG/LB Press the TOTAL key to add the weight load to the total weight. If a printer is installed, a printout will be made. The gross, net and tare weights are printed. - Page 31 ID CODE TOTAL KG/LB ID CODE TOTAL KG/LB 3 sec. The subtotal can be checked by pressing the TOTAL key for 3 sec. 3 sec. TOTAL = RESET TOTAL & PRINT KG/LB = RESET TOTAL NOTE: In case the total is not manually used or reset, the system will do this automatically as soon as the total number has reached 99 or as soon as the total weight has reached a value of 99999 kg.
-
Page 32: Changing The Time And Date (On The Printout)
5.10 Changing the time and date (on the printout) ID CODE TOTAL KG/LB ID CODE TOTAL KG/LB 10 sec. Press enter to Select. The user menu can be entered by pressing the TOTAL key for 10 sec. ID CODE TOTAL KG/LB Press enter to change the time. - Page 33 ID CODE TOTAL KG/LB ID CODE TOTAL KG/LB Press the up / Press < to change down key until the next digit. the desired value is reached. ID CODE TOTAL KG/LB To accept the new value press enter. Repeat the procedure to accept or change: - the minute setting ‘m_00’...
-
Page 34: Lb-Kg Switch
5.11 LB-KG switch test USER MANUAL – iForks-32 (XT) -
Page 35: User Settings
5.12 User settings ID CODE TOTAL KG/LB ID CODE TOTAL KG/LB Press enter to 10 sec. Select. The user menu can be entered by pressing the TOTAL key for 10 sec. EXIT & SAVE 3 sec. Back to weigh mode. These user settings can be changed if desired. - Page 36 Set the auto shut-off time indicator (delay time in minutes) for saving setting see 3a 0 min = indicator always on Set backlight (intensity in %) for saving setting see 3a 0 % = backlight off USER MANUAL – iForks-32 (XT)
-
Page 37: Overview Power Save Settings (Auto Shut-Off)
5.12.1 Overview power save settings (auto shut-off) Overview of Auto shut-off and Sleep settings. The settings mentioned below are the standard settings and advised by RAVAS for optimal use. These settings can be changed in the user menu, as described above. -
Page 38: Supervisor Menu
5.13 Supervisor menu (password protected ID CODE TOTAL KG/LB Press to change to 10 sec. Supervisor menu. The user menu can be entered by pressing the TOTAL key for 10 sec. ID CODE TOTAL KG/LB Press enter to Select. Select to change the setting. -
Page 39: Relay Function
*1 The Supervisor menu is password protected since version 1.01. Earlier versions of the software are not password protected. Please contact RAVAS Service department for the password. 5.14 Relay function - optional The 3200 indicator has the possibility to setup limit values for relay settings. The different... -
Page 40: Alibi Memory
5.15 Alibi Memory The indicator 3200 has the possibility of an alibi memory. The alibi memory will only be used when parameter 13 is set for OIML or NTEP. If parameter 13 is set for ‘NONE’ the alibi memory will remain unused. The indicator stores every weighing in its alibi memory and adds a unique number to it. - Page 41 For reading out the data saved in the alibi memory please follow next steps: ID CODE TOTAL KG/LB ID CODE TOTAL KG/LB > 10 sec. Press enter to Select. The user menu can be entered by pressing the TOTAL key for at least 10 sec.
- Page 42 The display now shows the date (first day, then month and year) and the time (first hours, Press enter to then minutes) of the weighing continue to the year. with alibi number 02. Press enter to continue to the month. Press enter to Press enter to continue to the hour.
- Page 43 For 0,5 sec the display shows the text For 0,5 sec the display shows the text ‘Net’ or ‘Net_C’. ‘tArE’ or ‘PtArE’. Next the display shows the net weight. Next the display shows the tare weight. Net: weight is measured. tare: weight is measured.
-
Page 44: Ravas Weightsapp
IDs. In addition the app makes it possible to download a log file from the RAVAS indicator and send it for technical analysis as a CSV file in the event of malfunctionin.
Need help?
Do you have a question about the iForks-32 XT and is the answer not in the manual?
Questions and answers