Table of Contents
Advertisement
Quick Links
1455 Kleppe Lane Sparks, NV 89431-6467 (888) 909-4297
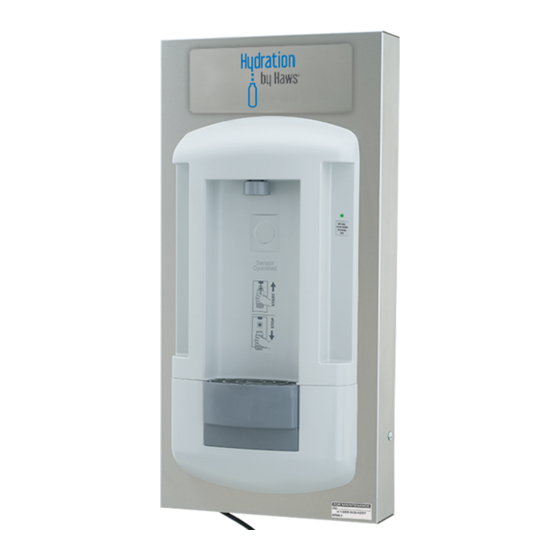
Bottle Filler with Lifecycle Control
NOTE: A Class A ground-fault circuit interrupter
(GFCI) shall be installed in the branch-circuit
supplying power to this unit.
SHOULD YOU EXPERIENCE DIFFICULTY WITH THE INSTALLATION OF THIS
MODEL, OR REQUIRE REPLACEMENT PARTS, PLEASE CALL:
HOURS OF OPERATION: MON-THURS 7:00a.m. - 4:30p.m PT, FRI 7:00a.m.- 11:00a.m. PT
PARTS LIST: 1 Bottle Filler, 1 filter cartridge, 1 plastic drain basin, 1 hex key, 1 grommet.
RECOMMENDED TOOLS: Phillips screwdrivers, level.
REQUIRED PARTS (NOT SUPPLIED): 1/2" screwdriver stop, 3/8" tubing (to be used for water
supply inlet), 6 1/8" x 3" zinc-plated steel toggle bolts, 6 zinc-plated steel 1/8" fender washers.
PRODUCT INSTALLATION: When installing this product, local, state or federal codes should be
adhered to. This unit is certified for indoor use only.
SUPPLY LINE: Minimum recommended line size is 1/2" IPS with 30-90 PSI (2-6 ATM) flowing
pressure; supply water is to be cold water supply. Intended for municipal water only.
PLUMBING CONNECTIONS: Inlet is 3/8" O.D. push-in type fitting. If a waste is desired, the Haws
6470 retrofit 1-1/4" O.D. waste kit may be used.
ELECTRICAL CONNECTIONS: 115VAC, 60HZ, approx. 0.14A. Unit is equipped with a standard
115VAC plug.
RATED SERVICE FLOW: 0.5 GPM (2725L/day)
OPERATING TEMPERATURE: 35–100
OPERATING PRESSURE: 30-90 PSI
FILTER CAPACITY: 2500 gallons (9460L) or 1 year
REPLACEMENT FILTER CARTRIDGE: Electronic Lifecycle Control Filter Model 6423
®
© 2018 Haws
Corporation – All Rights Reserved
®
HAWS
and other trademarks used in these materials are the exclusive property of Haws Corporation.
08/18
website:
www.Hawsco.com
Model 2000SMS
TECHNICAL SUPPORT:
1-800-766-5612
QUICK START REFERENCE
°
F (1.7–37.8
Model 2000SMS
INSTALLATION GUIDE
CAUTION! Prior to making any electrical
connections, verify with a voltmeter that power
from the service panel is off.
°
C)
No. 0510000664 (3)
Page 1 of 6
Advertisement
Table of Contents

Related Manuals for Haws 2000SMS


Summary of Contents for Haws 2000SMS
- Page 1 SUPPLY LINE: Minimum recommended line size is 1/2" IPS with 30-90 PSI (2-6 ATM) flowing pressure; supply water is to be cold water supply. Intended for municipal water only. PLUMBING CONNECTIONS: Inlet is 3/8” O.D. push-in type fitting. If a waste is desired, the Haws 6470 retrofit 1-1/4” O.D. waste kit may be used.
- Page 2 5. There is an opening in the bottom of the unit to accommodate a plumbed waste. If a plumbed waste is desired, the Haws model 6470 retrofit kit may be used. Step 1: To open the unit, slide the supplied hex key into the notch in the left-hand side of the hinged upper plastic panel and press the key firmly in that same direction.
- Page 3 Firmly screw the filter cartridge into the filter head (see Step 4 Diagram). NOTE: the bottle filler will work only if a filter cartridge is installed and its wiring is plugged in (see Step 7). Step 4 Diagram (Back View) 08/18 Model 2000SMS Page 3 of 6...
- Page 4 30 pounds. As such, attach the mounting bracket using six 1/8” x 3” zinc-plated steel toggle bolts (not supplied) in conjunction with six appropriately-sized zinc-plated steel 1/8” fender washers (not supplied). Use a level to verify horizontal and vertical frame mounting. Steps 5 & 6 Diagram 08/18 Model 2000SMS Page 4 of 6...
- Page 5 (both of these are normal occurrences after a filter change). Check the system for leaks. Place hex key in a secure location. 08/18 Model 2000SMS Page 5 of 6...
- Page 6 Diagram). Remove the adhesive backing from the logo plate and carefully place into the window of the alignment template. Press firmly to secure the logo plate. Remove and discard the cardboard template. Step 11 Diagram 08/18 Model 2000SMS Page 6 of 6...
Need help?
Do you have a question about the 2000SMS and is the answer not in the manual?
Questions and answers
We are looking for the price and availability for a solenoid valve, for the Haws 2000s serial # 2000S20163