Advertisement
Table of Contents
- 1 Table of Contents
- 2 Foreword
- 3 Safety Information
- 4 Introduction
- 5 Presentation
- 6 Instruments and Controls
- 7 Starting
- 8 Operation
- 9 Engine Shutdown
- 10 Fault Handling
- 11 Fault Code Register
- 12 Maintenance Schedule
- 13 Maintenance
- 14 Storage
- 15 Technical Data
- 16 Alphabetical Index
- Download this manual
Advertisement
Table of Contents

Subscribe to Our Youtube Channel
Related Manuals for Volvo Penta TAD1640GE


Summary of Contents for Volvo Penta TAD1640GE
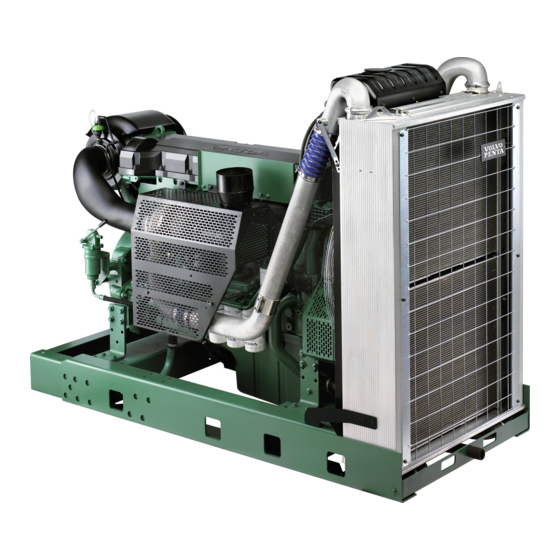
- Page 1 OPERATOR’S MANUAL Generating set and industrial engines 16 liter (EMS 2)
- Page 2 12 månader efter leverans. kadar İnternet yoluyla ücretsiz olarak farklı bir dilde sipariş edilebilir. http://vppneuapps.volvo.com/manual/coupon/ http://vppneuapps.volvo.com/manual/coupon/ Kontakta din Volvo Penta-återförsäljare om du inte har till- gång till internet. İnternet mümkün değilse, lütfen Volvo Penta yetkili satıcınızla tmasa geçin. 本操作手册可通过互联网以不同的言进行订...
-
Page 3: Table Of Contents
Content Foreword ...................... 2 Safety Information ..................3 Introduction ....................7 Presentation ....................9 Instruments and Controls ................ 11 Starting ...................... 22 Operation ....................26 Engine Shutdown ..................27 Fault Handling ................... 30 Fault Code Register .................. 36 Maintenance Schedule ................49 Maintenance .................... -
Page 4: Foreword
Foreword Volvo Penta engines are used all over the world. They are used in all possible operating conditions. This is not a coincidence. After 100 years as an engine manufacturer the Volvo Penta name has become a symbol of reliability, technical innovation, top of the range performance and long service life. -
Page 5: Safety Information
This chapter describes how safety precaution is presented in the Operators Manual and on the product. It also gives you an introduction to the basic safety rules for using and looking after the engine. If there is still something which is unclear or if you feel unsure about it, please contact your Volvo Penta dealer for assistance. - Page 6 Safety Information Safety rules for operation and maintenance Daily checks Starting lock Make it a habit to give the engine and engine bay a If the instrument panel does not have a key switch, visual check before starting (before the engine is the engine room must be lockable, to prevent unau- started) and after operation (once the engine has thorized persons from starting the engine.
- Page 7 Never do a job if you are not entirely sure about how bocharger can cause severe injury. There is also a to do it. Please contact your Volvo Penta dealer and risk that foreign bodies could be sucked in and cause ask for assistance instead.
- Page 8 Safety Information Electrical System Disconnect the power Batteries Before any work is done on the electrical system, the Batteries contain a highly corrosive electrolyte. Pro- engine must be stopped and the power removed by tect your eyes, skin and clothes during charging and switching off the main switch(es).
-
Page 9: Introduction
The Operator's Manual contains the information required for the correct, safe operation and maintenance of your Volvo Penta engine. We recommend therefore that you read the manual carefully and learn to handle the engine and other equipment in a safe manner before starting the engine. - Page 10 This places special demands on the care and main- is a natural cornerstone of our product development. tenance you provide your engine in that Volvo Penta currently has a broad engine program in • the maintenance and service intervals recom- which great progress has been made in reducing mended by Volvo Penta must be complied with.
-
Page 11: Presentation
Presentation Engines This Operator's Manual contains industrial engines TAD1640GE, TAD1641GE, TAD1642GE, TWD1643GE, TAD1650GE, TAD1651GE, TAD1641VE, TAD1642VE, TAD1643VE and TAD1650VE. TAD1650GE and TAD1651GE have internal EGR (Exhaust Gas Recirculation). These are in-line, directly injected, 6-cylinder industrial diesel engines. All engines are equipped with elec-... - Page 12 EMS (Engine Management System) EMS (Engine Management System) is an electronic system with CAN communication (Controller Area Network) for diesel engine control. The system has been developed by Volvo Penta and includes fuel control and diagnostic function. Input signals Output signals...
-
Page 13: Instruments And Controls
Instruments and Controls DCU (Display Control Unit) The DCU (Diesel Control System) control panel is available as an optional accessory for the EMS (Engine Management System) electronic control sys- tem. The DCU is a digital instrument panel which commu- nicates with the engine control unit. The DCU has sev- eral functions, such as engine control, monitoring, diagnostics, and parameter setting. - Page 14 Instruments and Controls Menus There are several sub-menus under each main menu. There is not space for all the menu choices on the dis- play. To scroll through the menus, use the 7 and 9 but- tons on the display. Press the SEL button 8 to make a selection.
- Page 15 Instruments and Controls Preheat manual activation of pre-heating. When it is activated, the EMS system senses at start-up if pre-heating is needed. For automatic pre-heating, refer to the Setup / Preheat on ignition menu. NOTICE! Must be activated with temperatures below 0°C (32°F).
- Page 16 Instruments and Controls Setup parameter setting in the engine's control systems. Dif- ferent menus appear under Customer parameter, depending on whether Versatile or Gen set has been selected from Set application. See below. The parameters that can be set/selected (choice is made with the SEL button) are: Set application, setting Versatile or Gen set.
- Page 17 Instruments and Controls Customer parameter / Gen set • Primary engine speed - selection of engine rpm, 1500 or 1800 rpm. • Preheat on ignition - activation of automatic pre- heating. The engine control system senses if pre- heating is needed and activates it directly at switch- •...
- Page 18 Instruments and Controls Display setting settings for the display. Adjustment is made with the 7 and 9 buttons; see DCU panel illustration. • Set contrast (%) - contrast setting. • Set backlight time (sec) - time setting (in seconds) for display backlighting on, lighting is then shut off if the panel is not used.
- Page 19 Instruments and Controls DU (Display Unit) The DU is an computerized instrument panel which shows engine working values on an LCD screen. In the display it is possible to show multiple windows with dif- ferent information, i. g. engine rpm, coolant tempera- ture, fuel consumption and fault messages.
- Page 20 Instruments and Controls Engine Rpm and coolant temperature is shown in the upper part of the display. In the lower part it will show trip computer and a fuel level indicator, if these function are installed. Multi In the multi mode, button 2, the information can be shown in four windows,analogue or digital.
- Page 21 Instruments and Controls Graph The information is shown as graphs. Press button 4 repeatedly to choose what information will be shown. The time interval is set in the Configuration menu. If the connection is broken there will be a straight line in the display.
- Page 22 Instruments and Controls Alarm Status List of active alarms, refer to Fault Han- dling page 33 Settings - LANGUAGE; setting of what language is to be used in the display. - BLEEP; On/Off, setting if pressing the instrument buttons will be followed by a beep or not. - DISPLAY;...
- Page 23 Instruments and Controls CIU (Control Interface Unit) The CIU is a "translator" between the control unit (EMS) and the customer's own control panel. The CIU has two serial communication links, one fast and one slow. The fast one is a so-called CAN link. All data related to instruments, indication lamps, connectors and poten- tiometers is controlled by this link.
-
Page 24: Starting
Starting Make it a habit of giving the engine and engine room a visual check before starting. This will help you to discover quickly if anything abnormal has happened, or is about to happen. Also check that instruments and warning displays show normal values after you have started the engine. WARNING! Never use start spray or similar products as starting aid. - Page 25 Starting Starting the Engine EMS (Engine Management System) The pre-heating time is adjusted to suit the engine temperature, and can last for up to 50 seconds both before and after starting. The starter motor connection time is maximized to 20 seconds.
- Page 26 Starting Starting in Extreme Cold Certain preparations must be made to facilitate engine starting, and in some cases to make starting possible at all: Use a winter grade fuel (of a well-known make) • which has been approved for the relevant tempera- ture.
- Page 27 Starting Starting Using Auxiliary Batteries WARNING! Explosion hazard. Batteries contain and give off an explosive gas which is highly flammable and explosive. A short circuit, open flame or spark could cause a vio- lent explosion. Ventilate well. 1 Check that the auxiliary batteries are connected (series or parallel) so that the rated voltage corre- sponds to the engine system voltage.
-
Page 28: Operation
Operation Correct operating technique is very important for both fuel economy and engine life. Always let the engine warm up to normal operating temperature before operating at full power. Avoid sudden throttle openings and operation at high engine rpm. Reading the Instruments Check all instruments directly after starting, and then regularly during operation. -
Page 29: Engine Shutdown
Engine Shutdown During longer breaks in operation, the engine must be warmed up at least once every two weeks. This prevents corrosion in the engine. If you expect the engine to remain unused for two months or more, it must be laid up: Refer to the chapter Storage page 78. - Page 30 Engine Shutdown Extra Stop For location of the extra stop, please refer to Location of Sensors page 55. WARNING! Working with or going close to a running engine is a safety risk. Watch out for rotating components and hot surfaces. 7748681 12-2011...
-
Page 32: Fault Handling
Fault Tracing A number of symptoms and possible causes of engine malfunctions are described in the table below. Always contact your Volvo Penta dealer if any problems occur which you can not solve by yourself. IMPORTANT! Read through the safety advice for care and mainte- nance work in the chapter Safety precautions for boat operation before you start work. - Page 33 Fault Handling 1 Discharged batteries 2 Poor contact/open circuit in electrical wiring 3 Main switch turned off 4 Main fuse faulty 5 Faulty ignition lock 6 Faulty main relay 7 Faulty starter motor/-solenoid 8 No fuel: – fuel cocks closed –...
- Page 34 Fault Handling Diagnostic Function The diagnostic function monitors and controls the engine. The diagnostic function has the following tasks: • detecting and locating disturbances • reporting detection of disturbances • providing guidance when fault tracing A fault message in the form of a fault code is always generated when a disturbance is the detected by the diagnostic function.
- Page 35 Fault Handling If the diagnostics button is pressed after the fault has been rectified and the fault codes have been erased, code 1.1 “No fault” will be displayed. DU (Display Unit) 1 When the system detects a fault, a pop-up is shown on the display.
- Page 36 Fault Handling Display Control unit (DCU) 1 When a fault is detected the following text is dis- played: !! ENGINE WARNING !! alternating with Press SEL for information. 2 Reduce engine speed to idle or shut down the engine. 3 Press the SEL button to get to the fault list. The fault list shows: –...
- Page 37 Fault Handling Erasing fault codes The memory of the diagnostic function is reset when the power to the engine is disconnected. When the power is switched on again the diagnostic function will check if there are any malfunctions in the system.
-
Page 38: Fault Code Register
Fault Code Register No fault (Code 1.1) Cause Reaction Remedy There are no active faults. Preheating Relay (Code 5.4, PID 45/SPN 626) Cause Reaction Remedy • Short circuit to positive (+) or • Preheating can not be acti- • Check that the relay input earth (ground) (–). - Page 39 Fault Code Register Oil Level Sensor (Code 5.9, PID/SPN 98) Cause Reaction Remedy • Shorted to plus (+) or minus • None • Check that the cable harness to the oil level sensor has not been damaged • Break • Check the oil level sensor function Oil Pressure Sensor (Code 3.1, PID/SPN 100)
- Page 40 Fault Code Register Boost Pressure Sensor (Code 3.4, PID/SPN 102/106) Cause Reaction Remedy • Short circuit to positive (+) or • Engine smokes more than • Check that the boost pressure earth (ground) (–) normally during acceleration/ sensor connector is correctly load increase installed •...
- Page 41 Fault Code Register Coolant Temperature Sensor (Code 3.3, PID/SPN 110) Cause Reaction Remedy • Short circuit to positive (+) or • Preheating is also activated • Check that the coolant tem- earth (ground) (–) when the engine is hot perature sensor connector is correctly installed •...
- Page 42 Fault Code Register Crankcase Ventilation Pressure Sensor (Code 7.8, PID/SPN 153) Cause Reaction Remedy • Shorted to plus (+) or minus • None • Check that the crankcase ventilation pressure sensor contact is correctly installed • Break • Check that the cable harness to the crankcase ventilation pressure sensor has not been damaged...
- Page 43 Fault Code Register TWD1643GE Exhaust Temperature (Code 1.9, PID 173/SPN 1184) Cause Reaction Remedy • Exhaust temperature to high • Warning lamp lights up • Insufficient air supply • Engine is shutdown • Low coolant level • Air in the coolant system •...
- Page 44 Fault Code Register Engine Speed (Code 2.6, PID/SPN 190) Cause Reaction Remedy • Engine speed too high • None • After the engine has stopped, look for the reason for the high speed Starter Input CIU (Code 5.2, PPID 4/SPN 520194) Cause Reaction Remedy...
- Page 45 • Mechanical fault on the IEGR • Check the IEGR • Contact a Volvo Penta authorized workshop TAD1650GE, TAD1651GE, TWD1643GE ECU Temperature (Code 8.4, PPID 55/SPN 1136) Cause Reaction Remedy • Control unit too hot, incorrect •...
- Page 46 Fault Code Register Injector, Cylinder #2 (Code 7.2, SID 2/SPN 652) Cause Reaction Remedy • Electrical fault • Engine runs on 5 cylinders • Check that the injector cables are not damaged • Faulty compression or injec- • Abnormal sound •...
- Page 47 Fault Code Register Injector, Cylinder #6 (Code 7.6, SID 6/SPN 656) Cause Reaction Remedy • Electrical fault • Engine runs on 5 cylinders • Check that the injector cables are not damaged • Faulty compression or injec- • Abnormal sound •...
- Page 48 Fault Code Register TAD1650VE, TWD1643GE Preheating Sensor (Code 8.6, SID 70/SPN 729) Cause Reaction Remedy • Fault in cable harness • Preheating can not be acti- • Check the cable harness vated • Fault in preheating relay • Check the preheating relay Data Link (CAN), CIU (Code 6.4, SID 231/SPN 639) Cause Reaction...
- Page 49 Fault Code Register Power Supply Sensor (Code 9.3, SID 232/SPN 620) Cause Reaction Remedy • Shortcut • Faulty values in oil pressure • Check that the cable harness and boost pressure sensors to oil pressure and boost • Fault in sensor pressure sensor has not been •...
- Page 50 Fault Code Register TAD1650VE, TWD1643GE Fan actuator (SID 33/SPN 975) Cause Reaction Remedy • Short circuit to positive (+) or • Warning lamp lights up • Check that the fan actuator is negative (-) properly mounted • Open circuit • Check that the wiring to the fan actuator is not damaged •...
-
Page 51: Maintenance Schedule
Maintenance Schedule Your Volvo Penta engine and its equipment are designed for high reliability and long life. It is built so as to have minimal environmental impact. If given preventive maintenance, according to the maintenance schedule, and if Volvo Penta original spares are used, these properties are retained and unnecessary malfunctions can be avoided. - Page 52 Maintenance Schedule Every 500 hours At least every (month) Fuel Tank (sludge trap), Drain ● Inspection with VODIA (Diagnostic Tool) ● Fuel pre-filter, draining condensed water ● Air Filter Inserts (Indicator), Engine ● Radiator ● Drive Belts ● Batteries, electrolyte level ●...
-
Page 53: Maintenance
Maintenance This chapter describes the most common maintenance items, see Service program for service intervals. NOTICE! Service points which are not described here must be performed by authorized Volvo Penta workshop. CAUTION! Read the chapter on Maintenance before starting work. It contains instructions on how to carry out maintenance and service operations in a safe and correct manner. - Page 54 Maintenance Orientation TAD1640GE, TAD1641GE, TAD1641VE, TAD1642GE, TAD1642VE, TAD1650GE, TAD1651GE 1 AC generator 2 Control unit EMS 2 3 Air Filter 4 Oil dipstick 5 Fuel filter, with fuel pressure monitor 6 Fuel prefilter with water monitor 7 Expansion tank 8 Charge air cooler (TAD)
- Page 55 Maintenance TWD1643GE 1 Control unit, EMS 2 Charge air cooler, HP-turbo 3 Oil filler 4 Oil dipstick 5 Fuel filter with fuel pressure monitor 6 Fuel pre-filter with water monitor 7 Air filter 8 HP-turbo 9 LP-turbo 10 Expansion tank 11 Starter motor, located behind charge air cooler 12 Charge air cooler, LP-turbo 13 Oil filter...
- Page 56 Maintenance TAD1650VE 1 Control unit, EMS 2 Oil filler 3 Oil dipstick 4 Fuel filter, to be installed separately 5 Fuel pre-filter with water monitor, to be installed separately 6 Starter motor 7748681 12-2011...
- Page 57 Maintenance Location of Sensors TAD1640GE, TAD1641GE, TAD1641VE, TAD1642GE, TAD1642VE, TAD1643VE, TAD1650GE, TAD1651GE P0002058 1 Coolant level sensor, in expansion tank 8 Water in fuel sensor 2 Charge air pressure and temperature sensor 9 Oil level and temperature sensor 3 Air filter indicator...
- Page 58 Maintenance Location of Sensors TWD1643GE P0002059 1 Coolant level sensor, in expansion tank 9 Oil level and temperature sensor 2 Charge air pressure and temperature 10 Crankhouse pressure sensor sensor 3 Oil pressure sensor 11 Coolant temperature sensor 4 Airfilter indicator 12 Exhaust temperature sensor 5 Aux stop 13 Piston cooling pressure sensor...
- Page 59 Maintenance Location of Sensors TAD1650VE P0005187 1 Crankhouse pressure sensor 7 Oil level and temperature sensor 2 Charge air pressure and temperature sensor 8 Water in fuel sensor 3 Flywheel position and engine speed sensor 9 Fuel pressure sensor 4 Fuse 10 Coolant temperature sensor 5 Aux stop 11 Piston cooling pressure sensor...
- Page 60 Maintenance Engine, General General inspection Make it a habit to give the engine and engine bay a visual inspection before starting the engine and after operation once the engine has stopped. This will help you to discover quickly if anything abnormal has hap- pened, or is about to happen.
- Page 61 Maintenance Charge Air Pipe, Leakage Check Inspect the condition of the charge air hoses, hose unions and clamp condition for cracks and other dam- age. Change as necessary. IMPORTANT! Clamps must be tightened using a torque wrench to 9 ±2 Nm (6.6 ±1.5 lbf.ft.). P0002083 7748681 12-2011...
- Page 62 5 Insert a 1/2” square wrench in the belt tensioner (2). Press the wrench down and remove the alternator belts. P0002084 TAD1640GE, TAD1641GE, TAD1642GE, TAD1650GE, TAD1651GE, TAD1641VE, 6 Check that the pulleys are clean and undamaged. TAD1642VE, TAD1643VE, TAD1650VE 7 Press the 1/2” wrench in the belt tensioner (2) down and install the new alternator drive belt.
- Page 63 8 Lift the 1/2" wrench and install the new drive belt. 9 Install the belt guards. P0002086 10 Install the fan guard and fan ring round the cooling TAD1640GE, TAD1641GE, TAD1642GE, TAD1650GE, TAD1651GE, TAD1641VE, fan. TAD1642VE, TAD1643VE, TAD1650VE 11 Start the engine and do a function check.
- Page 64 Maintenance Lubrication System Oil change intervalls may vary according to the lubri- cation oil grade and fuel sulfur content. Refer to Tech- nical data, Lubrication system. NOTICE! Oil change intervals must never exceed a period of 12 months. If longer oil change intervals than those given in Tech- nical data are required, the condition of the oil must be checked by the oil manufacturer via regular oil tests.
- Page 65 Maintenance Engine Oil, Change WARNING! Hot oil and hot surfaces can cause burns. Oil changes must be done when the engine is warm. 1 Connect the drain hose to the oil drain pump and check that no leakage can occur. 2 Pump the oil out (or remove the bottom drain plug and drain the oil).
- Page 66 Maintenance Fuel System WARNING! Fire hazard. When carrying out work on the fuel system make sure the engine is cold. A fuel spill onto a hot surface or an electrical component can cause a fire. Store fuel soaked rags so that they can not cause fire. Only use the grades of fuel recommended in the fuel specification below, please refer to Technical Data page 83.
- Page 67 Maintenance Fuel Pre-filter, Change 1 Undo the cable from the water trap sensor. 2 Remove the water trap filter from the filter housing. Collect any spilled fuel in a container. 3 Remove the lower part of the water trap from the filter.
- Page 68 The use of anti-corrosion agents alone is not permitted in Volvo Penta engines. Never use water alone as a substitute for coolant. IMPORTANT! •...
- Page 69 Maintenance Ready Mixed Ready mixed coolant contains 40% Volvo Penta Cool- ant / Volvo Penta Coolant VCS and 60% water. This mixture protects the engine against internal corrosion, cavitation and bursts due to freezing down to –28°C (– 18 F).
- Page 70 NOTICE! Only use coolant recommended by Volvo Penta. NOTICE! Open only the filler cap (1). Do not open the pressure cap (2). TAD1640GE, TAD1641GE, TAD1642GE, TAD1650GE, TAD1651GE, TAD1641VE, TAD1642VE, TAD1643VE, TAD1650VE NOTICE! TWD1643GE: The cap (2) is both filler cap and pressure cap.
- Page 71 1 Check that all drain points are closed. 2 Open filler cap (1). Do not open the pressure cap TAD1640GE, TAD1641GE, TAD1642GE, TAD1650GE, TAD1651GE, TAD1641VE, (2). TAD1642VE, TAD1643VE, TAD1650VE 3 Fill with coolant, so that the level is between the MIN and MAX marks.
- Page 72 The coolant contains corrosion inhibiting additives. 1 Stop the engine before draining the cooling sys- TAD1640GE, TAD1641GE, TAD1642GE, TAD1650GE, TAD1651GE, TAD1641VE, TAD1642VE, TAD1643VE, TAD1650VE temand remove the expansion tank cap. 2 Remove the filler cap (1).
- Page 73 70. 2 Put a hose into the expansion tank filling hole and flush with clean water, as specified by Volvo Penta– refer to section Water quality in Technical Data page 84 until the water draining out is com- pletely clear.
- Page 74 8 below. 8 When the cooling system is completely free from contamination, close the drain taps and plugs. 9 Fill up with Volvo Penta recommended coolant, fol- lowing the instructions in the chapters entitled Maintenance page 66and Coolant Level, Checking and Topping Up page 68.
- Page 75 Maintenance Cooling air filter WARNING! Stop the engine before doing any maintenance work. A newly-installed cooling air filter reduces cooling per- formance by 4 %. Installation 1 Slide one half of the filter over the fan cover (as in fig.1). 2 Turn the half filter until it is able to hang loosely on the fan cover (see fig.
- Page 76 The circuit breaker is located on the left-hand side of the engine Location of Sensors page 55. The engine stops if the fuse trips. If the circuit breaker trips frequently, an authorized Volvo Penta workshop should be contacted to investigate the cause of the overload.
- Page 77 Maintenance Battery, Maintenance WARNING! Risk of fire and explosion. Never allow an open flame or electric sparks near the battery or batteries. WARNING! P0002107 Never confuse the positive and negative poles on the batteries. Risk of arcing and explosion. WARNING! The battery electrolyte contains extremely corrosive sulfuric acid.
- Page 78 Maintenance Filling The electrolyte level should be 5–10 mm (0.2– 0.4”) above the cell plates in the battery. Top up with distilled water as required. After filling, the battery should be charged for at least 30 minutes by running the engine at idle. Some maintenance-free batteries have special instructions, which must be followed.
- Page 79 Maintenance • Charge batteries if they have become discharged. During charging, unscrew the cell plugs but leave them in the plug holes. Ventilate well, especially if the batteries are charged in an enclosed space. • If the engine is not used for a longer period of time, the batteries should be fully charged, then possibly trickle charged (please refer to the battery manu- facturer’s recommendations).
-
Page 80: Storage
Before the engine is taken out of service for a long period of time, an authorized Volvo Penta workshop should check it over. Have any faults and deficiencies attended to, so that the equipment is in order, ready for the next start. - Page 81 Storage Bringing out of storage • Remove any covers from the engine, air filter • Close the drain taps and install any drainplugs. and exhaust pipe. • Check the coolant level. Top up as necessary. • Put the correct grade of oil into the engine, if •...
-
Page 82: Technical Data
Technical Data Engines Type designation TAD1640GE TAD1641GE TAD1642GE TWD1643GE Power, prime/stand-by Refer to the sales literature Torque, Prime/Standby Refer to the sales literature No. of cylinders Bore, mm (inch) 144 (5.67) 144 (5.67) 144 (5.67) 144 (5.67) Stroke, mm (inch) 165 (6.50) - Page 83 Technical Data Type designation TAD1641VE TAD1642VE TAD1650VE TAD1643VE Power, prime/stand-by Refer to the sales literature Torque, Prime/Standby Refer to the sales literature No. of cylinders Bore mm (inch) 144 (5.67) 144 (5.67) 144 (5.67) Stroke mm (inch) 165 (6.50) 165 (6.50) 165 (6.50) 16,12 (983.9) 16,12 (983.9)
- Page 84 Technical Data Lubrication System Change volume, including filter change 48 liter (12.68 US gal) TAD1650VE 53 liter (14 US gal) Oil pressure, hot engine at operating speed 300-650 kPa (44–94 psi) TAD1650VE 400–650 kPa (58–94 psi) Oil filter Full flow filter By-pass filter Lube oil pump Type...
- Page 85 Vegetable oil esters (Fatty Acid Methyl Esters, FAME), also called "biodiesel", are increasingly available as a blending component in diesel fuels. Volvo Penta accepts the same FAME content as in major on-road fuels EN 590 and ASTM D975; i.e. today up to 7%, without any specific additional service requirements. Please contact your Volvo Penta Dealer for futher information.
- Page 86 86 °C (186.8 °F) TAD1650VE, TWD1643GE 82 °C (179.6 °F) Coolant Volvo Penta Coolant VCS and VCS Ready Mixed (yel- low colour) are based on Organic Acid Technology, OAT. Volvo Penta Coolant and Coolant Ready Mixed (green colour) are silicate based.
- Page 87 Technical Data Electrical System System voltage Alternator voltage/max. current 28V/80A power app. 2200W Alternative generating equipment (optional) voltage/max. current 28V/110A power app. 2800W Battery capacity 2 pcs. series connected 12 V, max. 220 Ah Battery electrolyte density at +25°C ° fully charged battery 1,28 g/cm (1,24 g/cm...
- Page 88 Technical Data Identification Numbers Chassis and serial number A Engine designation B Engine power, net, (without fan) C Max. engine speed D Main software E Dataset 1 F Dataset 2 P0002052 G Product number 1 Engine designation 2 Serial number 3 Specification number 7748681 12-2011...
- Page 89 Declaration for the installation of partially-completed machinery in accordance with Machinery Directive 2006/42/EC Engine Manufacturer: AB Volvo Penta Gropegårdsgatan SE 405 08 Göteborg Sweden Description of engine: 4-cycle diesel engine Engine types covered by this declaration: TAD1660VE TAD1640GE TWD1643GE TAD1641VE...
-
Page 91: Alphabetical Index
Alphabetical index After Engine Shutdown..........27 Reading the Instruments.......... 26 Air Filter, Check and Change........58 Alarms..............26 Service program............49 Alternator Belt, Change..........60 Starting in Extreme Cold.......... 24 Starting the Engine........... 23 Battery, Charging............. 76 Starting Using Auxiliary Batteries......25 Battery, Maintenance.......... - Page 93 © 2011 AB VOLVO PENTA Volvo reserves the right to make changes Printed on environmentally friendly paper...
Need help?
Do you have a question about the TAD1640GE and is the answer not in the manual?
Questions and answers