Table of Contents

Related Manuals for Ballard Designs Newport Demilune Table with Shelf TC352


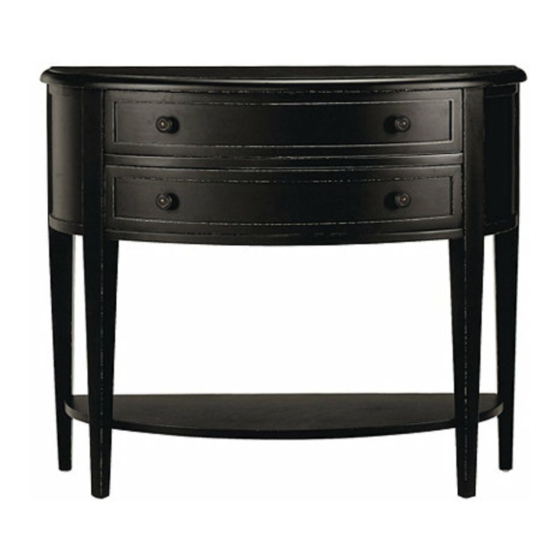
Summary of Contents for Ballard Designs Newport Demilune Table with Shelf TC352
- Page 1 Customer Service: 800-367-2810 Online: www.ballarddesigns.com PRODUCT NAME: Newport Demilune Table with Shelf ITEM NUMBER: TC352 ASSEMBLED DIMENSIONS : 32”H x 38”W x 14 1/4”D PRODUCTS ARE NOT INTENDED MADE IN CHINA FOR COMMERCIAL USE. UPDATED: 4-3-2020 Page 1 of 5...
- Page 2 Assemble in location for intended use. REQUIRED TOOLS: Phillips Screwdriver, Allen Wrench (inlcuded) -Two person assembly suggested. Remove all parts, hardware and protective packaging from carton and carefully arrange on a clean, level, padded surface. NOTE: To avoid accidentally discarding small parts or hardware, retain all carton contents until assembly and installation are complete.
- Page 3 STEP 1: Invert Body (I) onto a soft, level surface and attach Right Leg (J) and Left Leg (K) using Allen Bolt (C) with Lock Washer (D) and Flat Washer (E) as illustrated below. NOTE: Assemble components, hand tighten bolts THEN fully tighten all using Allen Wrench (G). (G) (C) (C) (D) STEP 2: Carefully insert Shelf (L) into notches in Legs.
- Page 4 STEP 3: Slightly pull out Drawers and insert Dowel (F) drawer stops into pre-drilled holes as illustrated. Customer Service: 800-367-2810 Page 4 of 5 Online: www.ballarddesigns.com...
- Page 5 ANCHORING HARDWARE (ANTI-TIP) Ltr. Qty. Hardware Included Large Screw WARNING Small Screw Tip-Over Hazard Bracket Serious or fatal crushing injuries can occur from a furniture tip-over Prevent tipping accidents. Anchor your furniture. Retention Belt Installation: 1. Locate and mark a Wall Stud behind unit at location for installation. 2.
Need help?
Do you have a question about the Newport Demilune Table with Shelf TC352 and is the answer not in the manual?
Questions and answers