
Related Manuals for Salini SOB-9395B


Summary of Contents for Salini SOB-9395B
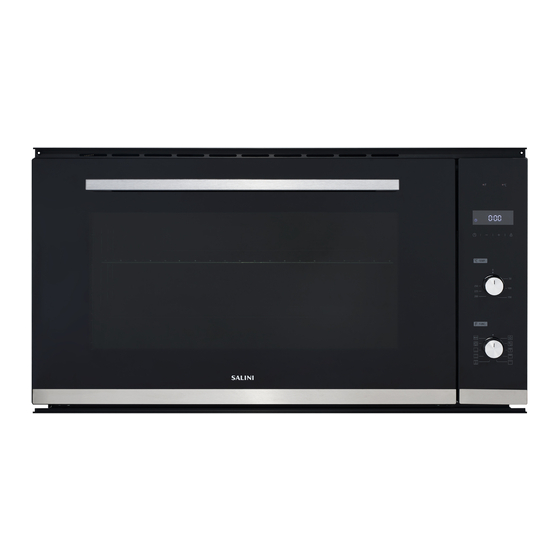
- Page 1 BUILT IN OVEN User Manual & Installation Instructions SOB-9395B W W W. S AL IN I .CO M . AU...
-
Page 2: Table Of Contents
TABLE OF CONTENTS IMPORTANT SAFETY INFORMATION INSTALLATION 8-10 APPLIANCE OPERATION 10-15 PREPARING FOR FIRST USE CLEANING & MAINTENANCE 16-20 TROUBLESHOOTING COOKING GUIDE 22-24 TECHNICAL DATA & SPECIFICATION DECLARATION OF CONFORMITY Installation of the appliance must be only be undertaken by a licensed electrician. This manual contains important information including safety, operational, maintenance &... -
Page 3: Important Safety Information
IMPORTANT SAFETY INFORMATION IMPORTANT INFORMATION • Carefully read the following important information regarding installation safety and maintenance. Keep this information booklet accessible for further consultations. • This appliance is designed for domestic household use and designed be built into a standard kitchen cabinet or housing unit. - Page 4 away from children. • Cleaning & Maintenance should be carried out in accordance with the “Cleaning and Maintenance” section to avoid possible hazards or potential damage to the appliance. WARNING AND SAFETY FOR USE • CAUTION: During use the appliance becomes hot. Care should be taken to avoid touching heating element inside the oven.
- Page 5 WARNING AND SAFETY FOR CLEANING AND MAINTENANCE CAUTION! Cleaning & Maintenance operations must only be carried out when the appliance is cool and disconnected from the power supply. • Check that the appliance is cold. There is a risk that the glass panels might break if not cool. •...
- Page 6 • We decline any responsibility for injury or damage, to person or property, as a result of improper use or installation of this appliance. • Heat, steam and moisture will be created during use of the appliance, take care to avoid injury and ensure that the room is adequately ventilated.
-
Page 7: Installation
INSTALLATION CAUTION! This product must be installed & serviced by a suitably qualified person. • Any work on electric equipment and systems may only be carried out by a qualified electrician. • Before obtaining access to terminals, all supply circuits must be disconnected. •... - Page 8 MOUNTING 1) Insert the appliance into the allocated cabinet space. 2) Fix the body to the cabinet with the 2 screws provided using the holes in the upper profile of oven. CONNECTING TO POWER The oven is provided with a three-pole power cable with free terminals. If the oven is connected permanently to the mains, install a device ensuring disconnection from the mains, with a contact opening distance (of at least 3 mm) that allows complete disconnection in the conditions of overvoltage category III.
-
Page 9: Appliance Operation
• All electric household appliances must be connected to earth. • This wire, in its turn, is connected to an earth plate (formed by metal poles stuck deep into the ground), whose task is to disperse the current that may accidentally be present on the surface of the user appliances. - Page 10 CONTROL FUNCTIONS With the functions selector you can set the type of heating, the “F” switch indicator symbol warning light and the lamps inside the oven light up. When the knob is on position ‘Off’ the oven does not heat up. NOTE : In ECO mode the oven lights are off;...
- Page 11 TEMPERATURE CONTROL The temperature selector is used to set the internal chamber cooking temperature. When the knob is on position zero the oven does not heat up. The temperature range is between 50 to 250°C. The warning light with the °C indicator symbol lights up when the oven element is in operation;...
- Page 12 DURATION & END TIME COOKING Duration cooking allows you to pre-set the duration of cooking time. Press the function button, then choose the duration function and the icon will begin to flash and [ 0:00 ] will display. End time cooking allows you to pre-set the end of cooking time. Press the function button, then choose the duration function and the icon will begin to...
- Page 13 ACCESSORIES The oven includes the following accessories: • Wire Rack • Dripping tray These accessories can used in the oven placed on the 5 different rack position levels on the shelf supports installed on both sides of the cavity. When inserting the rack or tray into the shelf supports, take care to make sure they are correctly inserted.
-
Page 14: Preparing For First Use
PREPARING OVEN FOR FIRST USE CAUTION! Read the important safety information before proceeding with use. Before first use, the oven must undergo initial cleaning and an initial operation cycle. We also recommend setting the current time on the clock function. INITIAL CLEAN All accessories should be removed and cleaned with soapy water, then returned to their original position. -
Page 15: Cleaning & Maintenance
CLEANING & MAINTENANCE CAUTION! Cleaning & Maintenance operations must only be carried out when the appliance is cool and disconnected from the power supply. Ensure that you have read and understood the important safety information before proceeding. Regular cleaning after each use will help protect finishes and reduce risk of debris catching fire. Surfaces of the appliance are susceptible to scratches and abrasions, so it is important to follow the cleaning instructions to avoid damage to any surface. - Page 16 To avoid damaging the surfaces DO NOT use the following cleaning products: detergents containing soda, ammonia, acids or chlorides, descaling products on the front of the oven, abrasive detergents, such as powders, milk or abrasive pastes, products containing solvents, detergents for stainless steel, detergents for dishwashers, detergents for glass, detergents for ceramic hobs,...
- Page 17 REMOVING THE DOOR & GLASS PANELS REMOVING THE DOOR It is recommended that the oven door is removed from the oven before removing the internal glass panels to clean them as the oven door could close again if you try to remove the glass panels before taking off the oven door.
- Page 18 Push the double glazing in the direction of the arrow (Figure 5) and pull it completely out in order to proceed with cleaning. At this point you can also remove the middle glazing in the oven door (follow the procedure of Figure 6) and proceed with cleaning. When cleaning is completed, fit the parts back on by following the reverse procedure to that described above to put the oven door back into its original condition.
-
Page 19: Troubleshooting
To reassemble the convection motor cover, perform the operations described above in reverse. TROUBLESHOOTING Any electrical repairs to this appliance must conform to your local, state and federal regulations. If in any doubt, please contact the service center. • CAUTION: Always disconnect the unit from the power source when troubleshooting the unit. •... - Page 20 Problem Possible Cause Solution Oven is not heating Oven is not turned on Turn oven Temperature is not set Set the temperature Cooking function not set Set a cooking function Power failure Check the power to the appliance Grill and top element is not Cooking function Check the cooking function is correct working...
-
Page 21: Cooking Guide
COOKING GUIDE ENERGY SAVING This appliance is equipped with functions & features to help you save energy during everyday cooking. Below are some other tips to help with reduce energy consumption when cooking: • Ensure that the oven door is closed properly when the appliance is in operation and keep it closed as much as possible during cooking. - Page 22 COOKING GUIDE TABLE Dishes Weight Accessories Preheating Rack Function Temperature Time (kgs) (minutes) Position (°C) (minutes) Cheesecake 1.5-4 Ovenware, 50-70 uncovered on rack Roast Beef Ovenware, 25-30 uncovered on rack Meat Loaf Baking tray on 45-60 rack Lasagna Ovenware, 45-60 uncovered on rack Baked Pasta...
- Page 23 COOKING GUIDE TABLE Dishes Weight Accessories Preheating Rack Function Temperature Time (kgs) (minutes) Position (°C) (minutes) Pizza Baking tray on 20-30 rack Bread 0.8-1 Baking tray on 200-210 30-40 rack Flat Bread 0.5-1 Baking tray on 215-225 15-25 rack Ciambella 0.8-1.6 Ovenware, 40-45...
-
Page 24: Technical Data & Specification
TECHNICAL DATA & SPECIFICATION Specification Model SOB-9395B Appliance Multifuction Oven (10 Function) External dimensions (height/width/depth) 900 x 545 x 480 mm Installation dimensions (height/width/depth) 860x560x477 mm Oven Capacity 93L Nett 103L Gross Door Glazing 3 Layer Glass Energy Efficiency Oven Lamp... -
Page 25: Declaration Of Conformity
DECLARATION OF CONFORMITY AUSTRALIAN STANDARDS This product has been designed and manufactured to comply with all relevant Australian and New Zealand Standards. AS/NZS 60335.1 General Requirements for Domestic Electrical Appliances AS/NZS 60335.2.6 Specific Requirements for Domestic Electrical Cooking Appliances This appliance is SAA certified. Installation of the appliance must be only be undertaken by a licensed electrician who can provide a compliance certificate. - Page 26 Copyright (C) SALINI Appliances 2020. All rights reserved. The product specifications in this booklet apply to the specific products and models described at the date of issue, these specifications or recommendations may change at any time. You should check with your Dealer for the latest issue, or visit our website for more information.
Need help?
Do you have a question about the SOB-9395B and is the answer not in the manual?
Questions and answers