
Summary of Contents for Earth Networks AXIS Q6155-E
- Page 1 High Definition Pan Tilt Zoom Camera (Axis HD PTZ) System Installation, Operation, and Maintenance Manual...
-
Page 2: Copyright
All Rights Reserved. Information in this document is subject to change without notice and does not represent a commitment on the part of Earth Networks, Inc. FCC Compliance This equipment has been tested and found to comply with the limits for a Class A digital device, pursuant to Part 15 of the FCC Rules. -
Page 3: Disclaimer
Any questions not covered within this manual should be directed to Earth Networks Support at (800)624-4205 or email support@earthnetworks.com. All procedures, methods, and hardware used to install a Earth Networks HD PTZ Camera system must conform to all applicable building codes (national, state, and local). Installation subcontractors are responsible for complying with all applicable codes. -
Page 4: Table Of Contents
Table of Contents Copyright ............................. 2 Disclaimer ............................3 Table of Contents ..........................4 Thank You! ............................5 Plan Ahead ............................5 Safety! ..............................6 Getting Started ............................ 7 Camera System Parts ........................7 Tools Needed ........................... 9 Installation ............................11 Indoor Preliminary Setup ...................... -
Page 5: Thank You
Earth Networks HD PTZ Camera captures images of local weather conditions with the advantage of a much higher resolution and the flexibility of changing viewpoints as often as desired. The quality of the images from the Earth Networks HD PTZ Camera is sure to enhance your weather system. -
Page 6: Safety
This would not only damage the camera, but could injure anyone standing nearby. If needed, Earth Networks may be able to provide professional installers and an estimate of the cost. If this is desired, please call Earth Networks Support at 800-624-4205 or email... -
Page 7: Getting Started
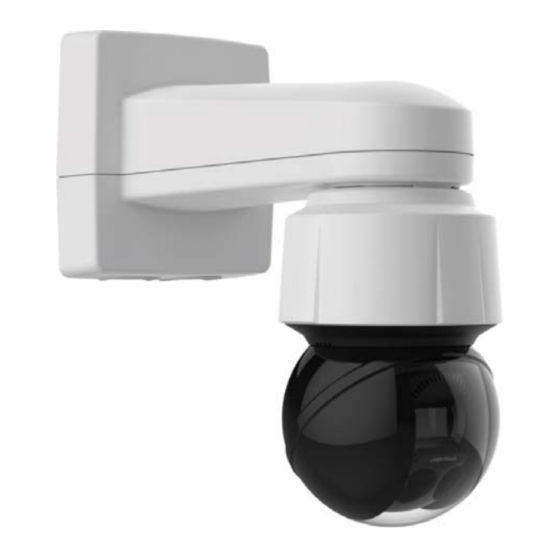
HD PTZ PoE+ Injector 5530 Network Surge Suppressor 8550 10 ft Ethernet Cable 5452 Cable Ties 1168 Please carefully unpack and identify each part and inspect for damage. If any damage is noticed, please call Earth Networks Support at 800-624-4205 or email support@earthnetworks.com... - Page 8 Outdoor Components HD PTZ Camera Mounting Armand backplate Cable Ties Indoor Components 200 ft Ethernet Cable Network Surge Suppressor 10 ft Ethernet Cable PoE+ Power Injector...
-
Page 9: Tools Needed
Tools Needed (Not supplied by Earth Networks) Wire cutters and pliers T30 Torx Bit or Driver Heavy-duty drill with bits sized up to 1-1/4” – bits must be appropriate for material being drilled into (masonry, wood, metal, etc.) and must be long enough to penetrate the support walling from exterior to interior (possibly as much as 10”... - Page 10 Site Evauluation All sites will have certain building restrictions. To get the most out of the camera, a location needs to be chosen that will present the least restrictions. The sky, sun, and clouds are important elements in the captured images. A “perfect” picture includes about 50% sky and about 50% earth.
-
Page 11: Installation
Installation Indoor Preliminary Setup SETTING THE HD PTZ CAMERA UP INDOORS ON THE NETWORK IS ESSENTIAL FOR THE SUCCESSFUL OUTDOOR INSTALLATION OF YOUR CAMERA. Network Requirements: Port 21 TCP outbound for FTP images must be open for the internal IP address of the camera. Port 80 TCP inbound must be open in order to operate the camera and view streaming data from any computer. - Page 12 First we need to remove the lid off of the mounting arm to do the indoor setup: 1. Take the mounting Arm and remove the black rubber cap using a pair of plyers or a small screwdriver. 2. Uncrew the T30 screw that was located under the black cap using your driver. 3. Remove the lid which should allow you to see the circuit board of the mounting arm.
- Page 13 4. Inside the housing you will see one side labeled RJ45 and a white connector disconnected floating in the housing. Connect that conector into the RJ45 slot as shown below. 5. The mounting arm is now ready to be used for the indoor test. Indoor Test Setup 1.
- Page 14 9. Once everything is connected, wait a couple of minutes for the camera to power on completely then skip to the next section titled “Viewing Live Video and Captured Images” to confirm camera setup.
-
Page 15: Viewing Live Video And Captured Images
3) Scroll down and click on cameras 4) Under the “How to” Section of the page click on the link named: “Where can I download the Earth networks Camera Finder Tool?” 5) Click on the link for the Axis Camera Model 6) Open up the .exe and follow the steps to install the IP Utility program on your... - Page 16 If you do not see the camera’s MAC ID/Serial number listed and are unable to find the camera, refer to the “Troubleshooting” section. 8) Once done locating the camera, to access the camera, simply double click on the Name of the camera. 9) To access the live stream of the camera, click on the play button that is on the black image Please Note: Utilization of the pan/tilt/zoom functionalities of the HD PTZ is NOT possible through the page pictured above. A username and password is needed to access the camera which is in the next section “How to Login and Move the HD PTZ Camera”...
-
Page 17: Captured Images
In order to obtain captured images Port 21 TCP outbound must be open for FTP and Earth Networks Support must be contacted by calling 800-624-4205 or by emailing support@earthnetworks.com. The camera must be enabled through Earth Networks Support in order for captured images to be available. -
Page 18: Routing The Cable
Routing the Cables It is best to work with a team of at least two people, as cable will have to be handled from both the inside and the outside of the building. Keep in mind the standard HD PTZ Package contains 200 feet of Ethernet cable. This cable must reach from the camera to the corresponding PoE Injector Note: The HD PTZ Ehernet Cable is not UV rated. -
Page 19: Outdoor Installation
Outdoor Installation For the following steps, the items listed below will be needed: HD PTZ Camera Camera Mounting Arm w/ backplate Cable Ties T30 Driver Level Install Sealant 1. Make sure the mounting arm will be mounted high enough so that the camera pan/tilt/zoom features can be utilized. - Page 20 2. Run the ethernet cable through the hole 3. Next attach the bottom of the mounting arm by securing the two T30 screws to the backplate 4. Next run the ethernet cable from the wall through the black water toght plug and into the RJ45 Jack...
- Page 21 5. Attach the Camera to the bottom mount securing the three T30 Screws. Please Note: The indented line on the top ring of the camera should face you when attaching the camera. 6. Plug in the Axis RJ45 Cable coming from the mounting arm into the camera.
- Page 22 7. Place the top part of the mounting arm onto the bottom half and secure the screw in the top using a T30 driver. 8. Place the black rubber piece on top of the screw. DO NOT push this down into the hole.
-
Page 23: Indoor Connections
Camera setup is now complete. If the camera is installed using DHCP and confirmation of image transmission has been completed by calling Earth Networks Support at 800-624-4205, the camera is fully operational. If the camera requires a static IP address, adjust the camera... - Page 24 Setting a Static IP Address If the internal IP address of the HD PTZ is not known, please refer to the Live Video section of “Viewing Live Video and Captured Images”. Once the Camera Finder Tool is installed, configure the IP address as shown below as long as the camera is directly connected to the computer through a switch. If the IP address is known, open a web browser and enter the IP address in the address bar of the window and hit enter. Log into the camera per the instructions shown in the “How to login and move the Camera” section Once Logged in click on the Yellow Settings button in the bottom right hand corner This will pop up another menu from the bottom.
- Page 25 Click on the “System” Tab Next Click on the TCP/IP icon in the bottom left For IPv4: Change the drop down menu from Automatic IP(DHCP) and DNS (DHCP) to Manual IP and Manual DNS, and enter in the desired ethernet settings. For IPv6 Click on the toggle switch to turn the option on and IPv4 off...
- Page 26 Shaking the Water off of the Dome To shake water off of the camera dome, you will need to be logged into the camera with your credentials which can be done following the steps in the “How to login and move the Camera” section After logging in, you will find that some settings on the bottom task bar appear. Simply click on the second icon from the left called speed dry. This will cause the camera to shake for about 5 seconds. This is not recommended to be done with the indoor setup, and needs to be done after the camera is secured to the wall after the install is complete.
-
Page 27: Troubleshooting
Captured Images Not Visible If the station power has been verified and images are available locally but captured images are not retrievable by Earth Networks, then most likely FTP is blocked. Live Video Not Available IMPORTANT: Once power is connected to the camera, make sure 2 full minutes have passed before attempting to access live video from the camera. -
Page 28: Maintenance
Maintenance There is little maintenance needed for the HD PTZ. As long as the camera housing remains tightly closed, there should rarely be a need to clean anything . The clear dome surrounding the camera may be very loosely wiped with a dry, soft cloth to remove dust and debris. The dome can then be wiped with the cloth using a very small amount of water. -
Page 29: Additional Information
Be sure to follow all general safety precautions. In case of a system breakdown, discontinue use, unplug the unit and the PoE+ Injector, and contact Earth Networks Support at 800-624-4205 or email support@earthnetworks.com. In case of abnormal operation: ... -
Page 30: Specifications
Specifications Item Specification Frame Transfer Up to 25/30 fps (50/60 Hz) in 1080p Up to 50/60 fps (50/60 Hz) in 720p Electronic Shutter Speed 1/60000 s to 2 s Lens Type 4.3–129 mm, F1.6–4.7 Horizontal field of view: 66.7˚–2.36˚ Vertical field of view: 39.5˚–1.37˚ Laser focus, auto-iris Video Compression H.264 (MPEG-4 Part 10/AVC) Baseline,...
Need help?
Do you have a question about the AXIS Q6155-E and is the answer not in the manual?
Questions and answers