
Related Manuals for Axis Camera Station S22 Appliance Series


Summary of Contents for Axis Camera Station S22 Appliance Series
- Page 1 AXIS Camera Station S22 Appliance Series AXIS Camera Station S2208 Appliance AXIS Camera Station S2212 Appliance AXIS Camera Station S2216 Appliance AXIS Camera Station S2224 Appliance User Manual...
- Page 2 AXIS Camera Station video management software including licenses plus all necessary system software. AXIS Camera Station offers an intuitive user interface that allows users to take full advantage of Axis wide range of video surveillance cameras and other IP products. With the operating system stored on a solid-state drive (SSD) and 3-year hardware...
- Page 3 The built-in switch’s DHCP server is enabled by default. As soon as you plug the cameras into the PoE ports, the cameras will power on and obtain an IP address and be accessible via AXIS Camera Station.
- Page 4 You can create a surveillance network within an existing network. This means that the surveillance network is separated from the existing network. Difficulty level Advanced Benefits Ability to use an AXIS Camera Station client to connect to S22 series over the network. Network segregation Limitations May require you to follow corporate network polices...
- Page 5 AXIS Camera Station S22 Appliance Series Setup examples Actions needed Change the default password for the built-in switch Register the AXIS Camera Station license PoE enabled network connectors, port 1-12 Connectors used RJ 45 server network (for connection to network) (Optional) USB 2.0 connector x2 (for keyboard and mouse)
- Page 6 5. Register you AXIS Camera Station licenses. License a system with Internet connection on page 22 License a system without Internet connection on page 22 6. Connect your system to the AXIS Camera Station mobile viewing app. See Configure AXIS Secure Remote Access...
- Page 7 AXIS Camera Station S22 Appliance Series Install your device Install your device...
- Page 8 AXIS Camera Station S22 Appliance Series Install your device...
- Page 9 AXIS Camera Station S22 Appliance Series Install your device...
- Page 10 AXIS Camera Station S22 Appliance Series Install your device...
- Page 11 AXIS Camera Station S22 Appliance Series Install your device...
- Page 12 AXIS Camera Station S22 Appliance Series Install your device...
- Page 13 AXIS Camera Station S22 Appliance Series Install your device...
- Page 14 AXIS Camera Station S22 Appliance Series Install your device...
- Page 15 AXIS Camera Station S22 Appliance Series Install your device...
- Page 16 AXIS Camera Station S22 Appliance Series Install your device...
- Page 17 To connect to the servers from a server list, select a server list from the drop-down list of the Server list field. Click create or edit the server lists. To import a server list file that has been exported from AXIS Camera Station, click Import server list at the bottom right and browse to a .msl file.
-
Page 18: Add Devices
AXIS Camera Station Service Control automatically starts after the installation is complete. Double-click the AXIS Camera Station Client icon to start the AXIS Camera Station client. When starting the client for the first time, it automatically attempts to log on to the AXIS Camera Station server installed on the same computer as the client. - Page 19 AXIS Camera Station S22 Appliance Series Configure your device 3. If you want to enable continuous recording: 3.1 Select a camera. 3.2 Turn on Continuous. 3.3 Click Apply. Live view cameras 1. Click the Live view tab to navigate to the camera live view.
- Page 20 Click Browse to select the location to export the recordings. Select Include Axis File Player, Include notes, and Add digital signature. 7. Click Export. 8. Select Use password and enter your password for the digital signature. Click OK.
-
Page 21: Network Configuration
AXIS Camera Station S22 Appliance Series Configure your device In this example, the exported files include the recordings in the .asf format, the notes in the .txt format, and AXIS File Player. 2. Double-click AXIS File Player. The exported recordings will be automatically played. - Page 22 License a system with Internet connection Both the AXIS Camera Station client and the server must be connected to the internet. 1. In the AXIS Camera Station client, go to Configuration > Licenses > Management and click Go to AXIS Camera Station License Portal.
- Page 23 Note For AXIS Network Video Recorders, your license details are generated automatically and can be found under the License keys section. We recommend that you write them down, or save them in a digital format on a USB flash drive for future reference.
- Page 24 AXIS Camera Station S22 Appliance Series Manage Windows® user accounts Manage Windows® user accounts Create a user account To help keep your personal data and information more secure, we recommend that you add a password for each local account. Important Once you create a password for a local account, don't forget it.
- Page 25 AXIS Camera Station S22 Appliance Series Manage Windows® user accounts 1. Go to Settings > Accounts > Other people. 2. Go to the account you want to remove and click Remove. Change a user account's password 1. Log in with an administrator account.
- Page 26 Manage AXIS Camera Station user accounts Manage AXIS Camera Station user accounts Configure user permissions Go to Configuration > Security > User permissions to view a list of the users and groups that have been added to AXIS Camera Station. Note •...
- Page 27 3. Select Users or Groups to search for only users or groups. 4. The list of users or groups is displayed. Users and groups that have already been added to AXIS Camera Station are not listed. If there are too many users or groups, the search result is not displayed. Use the Type to search field to refine the search and find a specific user or group.
- Page 28 Views The following access privileges are available for users or groups with the Operator or Viewer role. • Access: Allow access to the views in AXIS Camera Station. • Edit: Allow to edit the views in AXIS Camera Station. Playback The following access privileges are available for users or groups with the Operator role.
- Page 29 AXIS Camera Station S22 Appliance Series Manage your device Manage your device Update Windows® Windows® 10 periodically checks for updates. When an update is available, your device automatically downloads the update but you've to install it manually. Note Recording will be interrupted during a scheduled system restart.
- Page 30 AXIS Camera Station S22 Appliance Series Manage your device 3.1 Enabled 3.2 Click OK. Reset your server You can use the server reset button to reset your server. It will take more than one hour to reset your server. 1. Power off your device.
- Page 31 Manage the built-in switch About the built-in switch The AXIS Camera Station S22 Appliance Series comes with an integrated Power over Ethernet (PoE) switch. You can configure and manage the built-in switch. The purpose of the switch is to segregate traffic on the network so that security cameras and related traffic managed by the switch (PoE ports and U1 network connections) are not shared with other networks.
- Page 32 AXIS Camera Station S22 Appliance Series Manage the built-in switch Port list Item Description Port The port number that the device is connected to. Device The name of the device connected to the port. IP address The IP address of the device connected to the port.
-
Page 33: Power Management
AXIS Camera Station S22 Appliance Series Manage the built-in switch Lock all ports 1. In the switch’s management page, click Overview. 2. Click and select Lock all ports. Unlock a port 1. In the switch’s management page, click Overview. In the Lock column, click to unlock the port. - Page 34 AXIS Camera Station S22 Appliance Series Manage the built-in switch To change the power allocation method: 1. In the switch’s power management page, go to Power management. 2. Select PoE Class, Manual, or LLDP-MED under Allocate power. 3. If you have selected Manual, go to the Power allocated column and change the power allocated to the connected device.
-
Page 35: Configure Network Settings
AXIS Camera Station S22 Appliance Series Manage the built-in switch The power requested is manually adjusted to 20 W for PoE class 4 devices. The switch can power 5 PoE class 4 devices and 3 PoE class 2 devices. The total power requested is (5 x 20) + (3 x 7) = 121 W. The actual power consumed is (5 x 15) + (3 x 5) = 90 W. In this way, all connected devices are guaranteed enough power and the priority is less important. -
Page 36: Configure Snmp
Important If the switch’s DHCP server is enabled and your AXIS Camera Station S22 Appliance is connected to an external network with its own DHCP server, you will have IP address conflicts. This might result in the corporate network not working. -
Page 37: Manage Certificates
You can change the switch's default password to a password you choose yourself. Important Ensure you select a password you remember. If you have forgotten the new password, contact Axis support. 1. In the switch’s management page, go to Maintenance > Change password. -
Page 38: Reset To Factory Default Settings
AXIS Camera Station S22 Appliance Series Manage the built-in switch 2. Enter the current password and your new password as required. 3. Click Save. Reset to factory default settings 1. In the switch’s management page, go to Maintenance > Reset to factory default settings. -
Page 39: Front Side
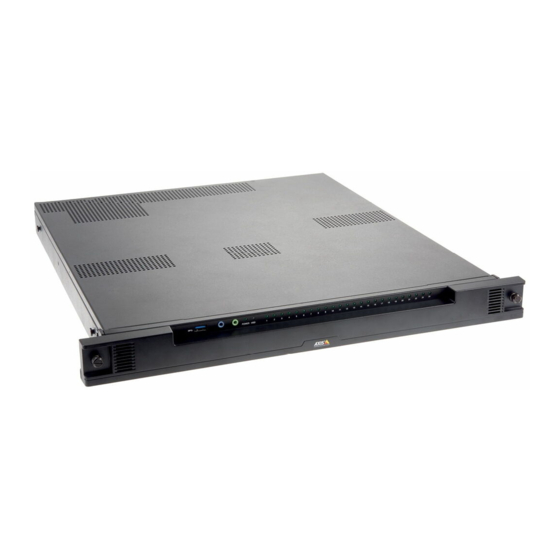
AXIS Camera Station S22 Appliance Series Product overview Product overview Front side Audio in Audio out System power LED Disk activity LED Status LEDs of PoE ports USB 3.0... -
Page 40: Rear Side
AXIS Camera Station S22 Appliance Series Product overview Rear side Power connector PoE ports Switch uplink, SFP Switch uplink, RJ45 Switch reset button Server reset button USB 2.0 x2 Server network, RJ45 HDMI port 10 Displayport 11 Power button... -
Page 41: Specifications
AXIS Camera Station S22 Appliance Series Product overview Specifications Front LEDs LED indicator Color Indication Power Green Server on Network ports Green Link state Hard drive Blinks amber Hard drive activity Blinks red Possible hard drive failure Rear LEDs Network speed and activity... - Page 42 6. When you see the AXIS splash screen, press F12. 7. Click UEFI: USB Drive. 8. Navigate to your USB drive and press ENTER. The system boots into the AXIS Recovery Kit. 9. Click Reinstall Operating System. The recovery takes roughly 10 to 15 min to complete. You find detailed instructions in the download for the recovery kit.
-
Page 43: Useful Links
AXIS Camera Station S22 Appliance Series Need more help? Need more help? Useful links • AXIS Camera Station user manual • Configure AXIS Secure Remote Access • What to include in an Antivirus white list for AXIS Camera Station Contact support Contact support at axis.com/support. - Page 44 User Manual Ver. M4.2 AXIS Camera Station S22 Appliance Series Date: February 2020 © Axis Communications AB, 2018 - 2020 Part No. T10134965...
Need help?
Do you have a question about the Camera Station S22 Appliance Series and is the answer not in the manual?
Questions and answers