
Related Manuals for Welker Inloop Ace


Summary of Contents for Welker Inloop Ace
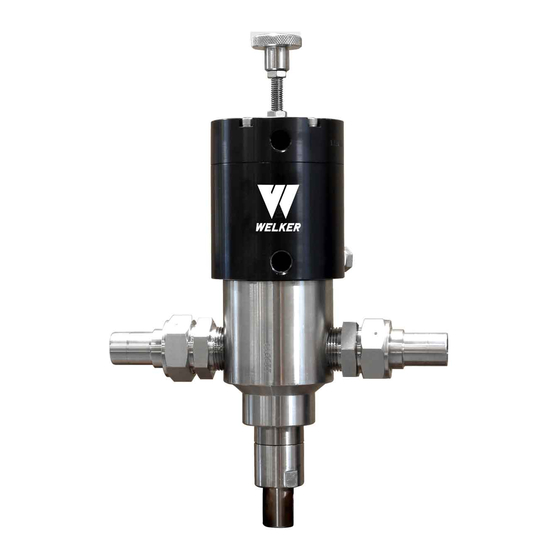
- Page 1 INSTALLATION, OPERATION, AND MAINTENANCE MANUAL WELKER INLOOP™ ACE CRUDE OIL SAMPLER DRAWING NUMBER AD905BQ MANUAL NUMBER IOM-224 REVISION Rev. A, 8/8/2019...
-
Page 2: Table Of Contents
APPENDIX A: Referenced or Attached Documents Copyright © 2019 Welker, Inc. All rights reserved. Welker®, W Welker®, W logo, WelkerScope®, Welker Jet®, and OdorEyes® are registered trademarks of Welker, Inc. IOM-224 MODEL: INLOOP™ ACE REV: A 13839 West Bellfort Street, Sugar Land, TX 77498 welker.com... -
Page 3: Safety
Warning messages appear before procedures that could result in personal injury if not observed. This manual is intended to be used as a basic installation and operation guide for the Welker inLoop™ ACE Crude Oil Sampler. For comprehensive instructions, please refer to the IOM Manuals for each individual component. A list of relevant component IOM Manuals is provided in Appendix A of this manual. -
Page 4: Product Information
If you have any questions, please call Welker at 1-281-491-2331. *The following procedures have been written for use with standard Welker parts and equipment. Assemblies that have been modified may have additional requirements and specifications that are not listed in this manual. -
Page 5: Specifications
1.3 Specifications The specifications listed in this section are generalized for this equipment. Welker can modify the equipment according to your company's needs. Please note that the specifications may vary depending on the customization of your equipment. Table 1: inLoop™ ACE Specifications... -
Page 6: Equipment Diagrams
1.4 Equipment Diagrams Figure 2: Standard inLoop™ ACE Diagram IOM-224 MODEL: INLOOP™ ACE REV: A 13839 West Bellfort Street, Sugar Land, TX 77498 welker.com Service Department 281.491.2331... - Page 7 Figure 3: inLoop™ ACE With Optional External Sand Relief Diagram IOM-224 MODEL: INLOOP™ ACE REV: A 13839 West Bellfort Street, Sugar Land, TX 77498 welker.com Service Department 281.491.2331...
- Page 8 Figure 4: inLoop™ ACE With Optional Purge Diagram IOM-224 MODEL: INLOOP™ ACE REV: A 13839 West Bellfort Street, Sugar Land, TX 77498 welker.com Service Department 281.491.2331...
- Page 9 Figure 5: inLoop™ ACE With Optional VCO Connection Diagram IOM-224 MODEL: INLOOP™ ACE REV: A 13839 West Bellfort Street, Sugar Land, TX 77498 welker.com Service Department 281.491.2331...
- Page 10 Figure 6: inLoop™ ACE With Optional Flanged Connection Diagram IOM-224 MODEL: INLOOP™ ACE REV: A 13839 West Bellfort Street, Sugar Land, TX 77498 welker.com Service Department 281.491.2331...
-
Page 11: Installation & Operation
SECTION 2: INSTALLATION & OPERATION 2.1 Before You Begin After unpacking the unit, check the equipment for compliance and any damage that may have occurred during shipment. Immediately contact a Welker representative if you received damaged equipment. When sealing fittings with PTFE tape, refer to the proper sealing instructions for the brand used. - Page 12 (Figure 2, Figure 3, Figure 4, Figure 5, or Figure 6 and Table 2). If the inLoop™ ACE is not equipped with a valve on the sample outlet, Welker recommends installing a valve to the sample outlet. This will be outlet valve A.
- Page 13 Once the desired volume is set, the sample volume can be changed at any time externally without removing the inLoop™ ACE from the fast loop. Welker can pre-set the sample volume if noted at the time of order. IOM-224 MODEL: INLOOP™ ACE...
-
Page 14: Operating The Unit
2. As necessary, adjust the hydraulic or pneumatic supply to 5–200 psig (Figure 8). Figure 8: Minimum Actuation Pressure Graph IOM-224 MODEL: INLOOP™ ACE REV: A 13839 West Bellfort Street, Sugar Land, TX 77498 welker.com Service Department 281.491.2331... - Page 15 Minimum Actuation Time for 1 Stroke Product Viscosity (cP) 2 Seconds 1000 2000 3000 4000 5000 6000 7000 3 Seconds 8000 9000 10,000 IOM-224 MODEL: INLOOP™ ACE REV: A 13839 West Bellfort Street, Sugar Land, TX 77498 welker.com Service Department 281.491.2331...
- Page 16 Collect a sample from the sample outlet to ensure that the sample volume collected is the same as the desired sample volume. See Section 2.4, Verifying the Sample Volume, for instructions. Welker recommends the Welker Checkpoint™ Sample Bite Verification Panel for use with this unit. IOM-224 MODEL: INLOOP™ ACE...
-
Page 17: Verifying The Sample Volume
1. Ensure that the Welker Checkpoint™ Sample Bite Verification Panel has been installed correctly. Refer to the Installation, Operation, and Maintenance (IOM) Manual for the Checkpoint™ for installation instructions. 2. Using appropriately sized customer-supplied tubing, connect from the sample outlet on the inLoop™ ACE to the sample inlet on the Checkpoint™... -
Page 18: Purging The Unit
1. If the inLoop™ ACE is not equipped with the optional purge, Welker recommends installing a customer-supplied tee fitting with valve(s) to the sample outlet so that the inLoop™ ACE can be purged (Figure 10). Figure 10: Recommended Arrangement for Purge ... -
Page 19: Maintenance
2. Welker recommends replacing the poppets in the internal check valves weekly or semi-annually, depending on sample outlet pressure (Table 6). Note that sample rate and product abrasiveness also impact the frequency of poppet replacement. -
Page 20: Maintenance
5. Welker recommends having the following tools available for maintenance. Please note that the exact tools required may vary by model. a. 6"–8" Crescent Wrench (Qty. 2) b. 14" Crescent Wrench c. Hex Key Set d. Medium Strength Thread-locking Fluid e. - Page 21 As necessary, maintain the valve(s) (Figure 11). Refer to the Installation, Operation, and Maintenance (IOM) Manual for the valve(s) for maintenance instructions. 16. Reassemble the optional equipment, and then set the assembly aside. IOM-224 MODEL: INLOOP™ ACE REV: A 13839 West Bellfort Street, Sugar Land, TX 77498 welker.com Service Department 281.491.2331...
- Page 22 27. Examine the spring for damage or wear. Replace as necessary. 28. Examine the poppet for damage or wear. Replace as necessary. IOM-224 MODEL: INLOOP™ ACE REV: A 13839 West Bellfort Street, Sugar Land, TX 77498 welker.com Service Department 281.491.2331...
- Page 23 35. Examine the spring for damage or wear. Replace as necessary. 36. Examine the poppet for damage or wear. Replace as necessary. IOM-224 MODEL: INLOOP™ ACE REV: A 13839 West Bellfort Street, Sugar Land, TX 77498 welker.com Service Department 281.491.2331...
- Page 24 Loosen the setscrew in the adjustment piston, and then separate the adjustment piston from the adjustment screw. 44. Unscrew the adjustment screw from the top cap. 45. Replace the O-rings on the top cap. IOM-224 MODEL: INLOOP™ ACE REV: A 13839 West Bellfort Street, Sugar Land, TX 77498 welker.com Service Department 281.491.2331...
- Page 25 Apply medium strength thread-locking fluid to the lock screws, and then secure the retaining plate to the piston using the lock screws. 60. Set the actuation piston subassembly aside. IOM-224 MODEL: INLOOP™ ACE REV: A 13839 West Bellfort Street, Sugar Land, TX 77498 welker.com Service Department 281.491.2331...
- Page 26 64. Liberally lubricate inside the motor housing. Welker recommends a silicone-based lubricant, such as Molykote® 111, for use with this unit. 65. Insert the actuation piston assembly into the motor housing, and then use a rubber mallet to gently tap the piston assembly down into the motor housing.
- Page 27 If the inLoop™ ACE is equipped with optional equipment, install the assembly to the cylinder base (Figure 11). 79. If applicable, replace the O-ring in each VCO connection. 80. The unit is now ready for installation. IOM-224 MODEL: INLOOP™ ACE REV: A 13839 West Bellfort Street, Sugar Land, TX 77498 welker.com Service Department 281.491.2331...
-
Page 28: Troubleshooting
Ensure that the sample outlet valve on the be open. sample container is closed during sampling. The inLoop™ ACE is not collecting the Welker recommends the Welker The sample container is not filling. correct sample volume. Checkpoint™ Sample Bite Verification Panel for verifying the sample volume of the inLoop™... - Page 29 (Figure 8). The inLoop™ ACE is not collecting the Welker recommends the Welker correct sample volume. Checkpoint™ Sample Bite Verification Panel for verifying the sample volume of the inLoop™...
-
Page 30: Appendix
APPENDIX A: REFERENCED OR ATTACHED DOCUMENTS Welker Installation, Operation, and Maintenance (IOM) Manuals suggested for use with this unit: IOM-105: Welker NV-1 and NV-2 Instrument Valves IOM-117: Welker TCC-1 Transportable Crude Oil Container IOM-134: Welker Checkpoint™ Sample Bite Verification Panel ... - Page 31 ____________________________________________________________________________________________________ ____________________________________________________________________________________________________ ____________________________________________________________________________________________________ ____________________________________________________________________________________________________ ____________________________________________________________________________________________________ ____________________________________________________________________________________________________ ____________________________________________________________________________________________________ ____________________________________________________________________________________________________ ____________________________________________________________________________________________________ ____________________________________________________________________________________________________ ____________________________________________________________________________________________________ 13839 West Bellfort Street Sugar Land, TX 77498 Phone: 281.491.2331 welker.com IOM-224 MODEL: INLOOP™ ACE REV: A 13839 West Bellfort Street, Sugar Land, TX 77498 welker.com Service Department 281.491.2331...
Need help?
Do you have a question about the Inloop Ace and is the answer not in the manual?
Questions and answers