
Related Manuals for Welker INLOOP ACE


Summary of Contents for Welker INLOOP ACE
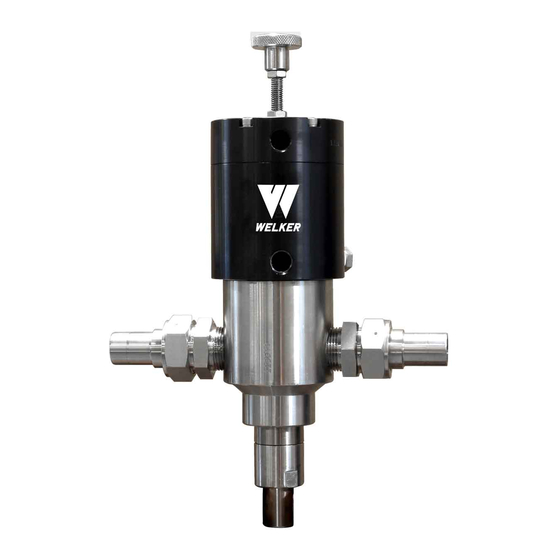
- Page 1 INSTALLATION, OPERATION, AND MAINTENANCE MANUAL WELKER INLOOP™ ACE CRUDE OIL SAMPLER DRAWING NUMBER AD905BL MANUAL NUMBER IOM-195 REVISION Rev. B, 10/10/2019...
-
Page 2: Table Of Contents
A: Referenced or Attached Documents B: D-Style Collection Head Maintenance Copyright © 2019 Welker, Inc. All rights reserved. Welker®, W Welker®, W logo, WelkerScope®, Welker Jet®, and OdorEyes® are registered trademarks of Welker, Inc. IOM-195 MODEL: INLOOP™ ACE REV: B 13839 West Bellfort Street, Sugar Land, TX 77498 welker.com... -
Page 3: Safety
Warning messages appear before procedures that could result in personal injury if not observed. This manual is intended to be used as a basic installation and operation guide for the Welker inLoop™ ACE Crude Oil Sampler. For comprehensive instructions, please refer to the IOM Manuals for each individual component. A list of relevant component IOM Manuals is provided in Appendix A of this manual. -
Page 4: Product Information
If you have any questions, please call Welker at 1-281-491-2331. *The following procedures have been written for use with standard Welker parts and equipment. Assemblies that have been modified may have additional requirements and specifications that are not listed in this manual. -
Page 5: Important Information
3. After Welker Great Barrier Sealant™ has been injected into the lubrication port, the grease fitting must be removed and the plug reinstalled before the sampler can be exposed to pipeline pressure and returned to operation. -
Page 6: Equipment Diagrams
1.5 Equipment Diagrams Figure 1: inLoop™ ACE Diagram IOM-195 MODEL: INLOOP™ ACE REV: B 13839 West Bellfort Street, Sugar Land, TX 77498 welker.com Service Department 281.491.2331... - Page 7 Figure 2: inLoop™ ACE Connections Diagram IOM-195 MODEL: INLOOP™ ACE REV: B 13839 West Bellfort Street, Sugar Land, TX 77498 welker.com Service Department 281.491.2331...
-
Page 8: Installation & Operation
SECTION 2: INSTALLATION & OPERATION 2.1 Before You Begin After unpacking the unit, check the equipment for compliance and any damage that may have occurred during shipment. Immediately contact a Welker representative if you received damaged equipment. When sealing fittings with PTFE tape, refer to the proper sealing instructions for the brand used. - Page 9 Begin with the upper external adjustment ring at the top of the external adjustment body (Figure 4). Welker recommends using a felt tip pen to mark the front of both external adjustment rings so that it is clear when the adjustment rings have made a full rotation.
-
Page 10: Preparing The Unit For Installation
Position an appropriately sized gasket on the mating flange connection for the product inlet spool flange (Figure 2). 3. Install the product inlet spool flange to its mating flange connection. IOM-195 MODEL: INLOOP™ ACE REV: B 13839 West Bellfort Street, Sugar Land, TX 77498 welker.com Service Department 281.491.2331... - Page 11 Following a cross-bolting sequence, install the bolts and nuts to the product return spool flange (Figure 7). 8. Using ¼" tubing, connect from the sample outlet to an appropriate customer-supplied sample container, such as a Welker TCC Transportable Crude Oil Container. Customer-supplied ¼" tubing must slope downward from the inLoop™ ACE to the sample container.
-
Page 12: Operating The Unit
Collect a sample from the sample outlet to ensure that the sample volume collected is the same as the desired sample volume. Welker recommends the Welker Checkpoint™ Sample Bite Verification Panel for use with this unit. IOM-195 MODEL: INLOOP™ ACE... -
Page 13: Purging The Unit
Welker PNP Plug & Purge Panel. To prevent cross-contamination between samples, Welker recommends that the inLoop™ ACE be evacuated, or purged, following each sample batch to inject all sampled product remaining in the unit into the sample container. ... -
Page 14: Emergency Shutoff
If leaking becomes evident elsewhere on the inLoop™ ACE, turn OFF the hydraulic or pneumatic supply to the motor, and then tighten the packing adjustment nut to stop the leak until the unit can be removed for service. IOM-195 MODEL: INLOOP™ ACE REV: B 13839 West Bellfort Street, Sugar Land, TX 77498 welker.com Service Department 281.491.2331... -
Page 15: Maintenance
3. All maintenance and cleaning of the unit should be performed on a smooth, clean surface. 4. Welker recommends having the following tools available for maintenance. Please note that the exact tools required may vary by model. a. Hex Key Set b. -
Page 16: Maintenance
Remove the nuts and bolts from the flange, and then carefully remove the inLoop™ ACE from the spool. 6. Lay the inLoop™ ACE on a smooth, clean surface Collection Head Assembly Welker recommends noting the position of the jam nut on the flange to ease reassembly. 7. - Page 17 Screw the external sand relief into emergency shutoff valve E (Figure 10). 20. Screw the flexline into the elbow in the external sand relief (Figure 10). IOM-195 MODEL: INLOOP™ ACE REV: B 13839 West Bellfort Street, Sugar Land, TX 77498 welker.com Service Department 281.491.2331...
- Page 18 28. Carefully pull the insertion shaft out through the motor housing. IOM-195 MODEL: INLOOP™ ACE REV: B 13839 West Bellfort Street, Sugar Land, TX 77498 welker.com Service Department 281.491.2331...
- Page 19 Inspect the wiper ring and shaft bearing in the motor housing. Replace them if they shows signs of wear or damage. 34. Inspect the polished portion of the insertion shaft. If any scratches or damage are present, repair or replace as necessary. IOM-195 MODEL: INLOOP™ ACE REV: B 13839 West Bellfort Street, Sugar Land, TX 77498 welker.com Service Department 281.491.2331...
- Page 20 42. Screw the packing adjustment nut into the packing gland body. 43. Replace the O-ring in the packing gland body. IOM-195 MODEL: INLOOP™ ACE REV: B 13839 West Bellfort Street, Sugar Land, TX 77498 welker.com Service Department 281.491.2331...
- Page 21 Remove the plug from the lubrication port, and then install an appropriately sized grease fitting (Figure 14). 60. Inject Welker Great Barrier Sealant™ into the grease fitting. 61. Once properly lubricated, remove the grease fitting, and then reinstall the plug to the lubrication port.
-
Page 22: Troubleshooting
Ensure that the sample outlet valve on the be open. sample container is closed during sampling. The inLoop™ ACE is not collecting the Welker recommends the Welker correct sample volume. Checkpoint™ Sample Bite Verification Panel for verifying the sample volume of The sample container is not filling. - Page 23 Table 2: inLoop™ ACE Troubleshooting (Continued) Issues Possible Causes Solutions The inLoop™ ACE is not collecting the Welker recommends the Welker correct sample volume. Checkpoint™ Sample Bite Verification Panel for verifying the sample volume of the inLoop™ ACE. See Section 2.2, Setting the Sample Volume, for instructions on...
-
Page 24: Appendices
APPENDIX A: REFERENCED OR ATTACHED DOCUMENTS Welker Installation, Operation, and Maintenance (IOM) Manuals suggested for use with this unit: IOM-105: Welker NV-1 and NV-2 Instrument Valves IOM-117: Welker TCC-1 Transportable Crude Oil Container IOM-134: Welker Checkpoint™ Sample Bite Verification Panel ... -
Page 25: B: D-Style Collection Head Maintenance
Inspect the nickel-plated cylinder for scratches or other damage. Polish or replace as necessary. 10. Unscrew the cylinder base and relief cap from the cylinder. 11. Replace the O-ring on the cylinder. IOM-195 MODEL: INLOOP™ ACE REV: B 13839 West Bellfort Street, Sugar Land, TX 77498 welker.com Service Department 281.491.2331... - Page 26 If a replacement safety wire is not available, ensure that the relief cap is securely tightened so that it can withstand the pressure of the flowing stream. IOM-195 MODEL: INLOOP™ ACE REV: B 13839 West Bellfort Street, Sugar Land, TX 77498 welker.com Service Department 281.491.2331...
- Page 27 ____________________________________________________________________________________________________ ____________________________________________________________________________________________________ ____________________________________________________________________________________________________ ____________________________________________________________________________________________________ ____________________________________________________________________________________________________ ____________________________________________________________________________________________________ ____________________________________________________________________________________________________ ____________________________________________________________________________________________________ ____________________________________________________________________________________________________ ____________________________________________________________________________________________________ ____________________________________________________________________________________________________ 13839 West Bellfort Street Sugar Land, TX 77498 Phone: 281.491.2331 welker.com IOM-195 MODEL: INLOOP™ ACE REV: B 13839 West Bellfort Street, Sugar Land, TX 77498 welker.com Service Department 281.491.2331...
Need help?
Do you have a question about the INLOOP ACE and is the answer not in the manual?
Questions and answers