
Related Manuals for llaza SPLENBOX 400


Summary of Contents for llaza SPLENBOX 400
- Page 1 SPLENBOX 400 Manual de Fabricación Assembly manual REF. 45098014001 Fecha / Date: 31 Enero 2019 / 31st January 2019 REV.
- Page 2 SPLENBOX 400...
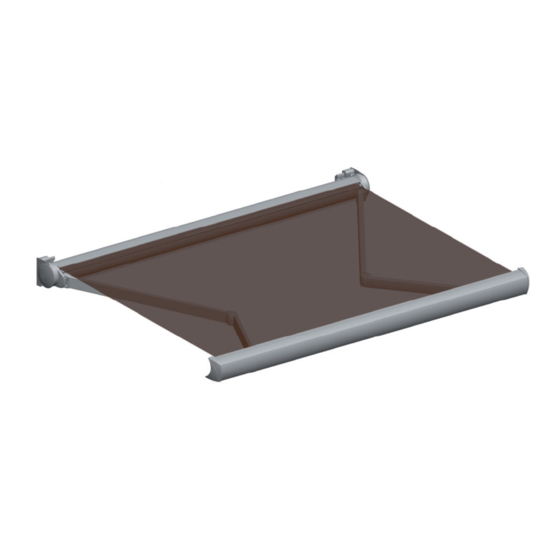
- Page 3 El accionamiento del cofre Splenbox 400 es siempre motorizado. Diseñado completamente metálico, por lo que ofrece un aspecto impecable de alto valor estético y gran calidad. Splenbox 400 cassette awning with adjustment of slope using an independent rack system. ...
- Page 4 SPLENBOX 400 1.1.– Línea/ Width Línea máxima / Maximum width: 6,00 m Línea total accionamiento motor / Total width for motor operation 1.2.– Salida/ Projection Proyección máxima / Maximum projection: 4,00 m 1.3..– Secciones acotadas / Section dimensions Placa de sustentación Frontal / Techo...
- Page 5 SPLENBOX 400 2.1.- Despiece del producto / Product parts 2.2.– Nomenclatura / Nomenclature ESTE CONJUNTO TAMBIÉN SE PUEDE CONFIGURAR CON BRAZOS ONYX THIS MODEL CAN ALSO BE ASSEMBLED WITH ONYX ARMS...
- Page 6 SPLENBOX 400 3.1.– Compatibilidades / Compatibilities Brazos / Arms B.carga / Front profile 4.1.– Tablas de corte de perfiles y tejido / Allowances for profiles and fabric Descuentos Confección / Allowances Motor Perfil cofre tejadillo/ Cassete-top profile L-130 Perfil cofre/...
- Page 7 SPLENBOX 400 5.1- Tablas de selección motor / Selection motor table Tubo enrolle Ø70 / Linea / Width (m) Ø70 Rolling tube 2,00 2,50 3,00 3,50 4,00 4,50 5,00 5,50 6,00 1,50 2,00 Salida / 2,50 Projection 3,00 3,50 4,00 Linea / Width (m) Tubo enrolle Ø80 /...
- Page 8 SPLENBOX 400 8.1.– Instrucciones de fabricación / Assembly instructions Verificar componentes de ambos soportes / Check components of both brackets 8.2.– Instrucciones de fabricación / Assembly instructions Fijación accionamiento motor / Fixation for motor operation 8.3.– Instrucciones de fabricación /...
- Page 9 SPLENBOX 400 9.1.– Instrucciones de fabricación / Assembly instructions Colocar el rodamiento en su alojamiento / Place the bearing in its housing 9.2.– Instrucciones de fabricación / Assembly instructions IMPORTANTE / IMPORTANT Observar la posición final del citado protector de lona /...
- Page 10 SPLENBOX 400 9.4.– Instrucciones de fabricación / Assembly instructions Accionamiento motor / Motor operation Sujetar el cabezal mediante el clip de fijación Fasten the motor head with the fixing clip 9.5.– Instrucciones de fabricación / Assembly instructions Fijación soporte lado punta /...
- Page 11 SPLENBOX 400 9.7.– Instrucciones de fabricación / Assembly instructions Para unir ambas partes del soporte emplear los tornillos M10 (A) / Use the M10 screws to join both support parts 9.8.– Instrucciones de fabricación / Assembly instructions Extraer los dos espárragos de sujeción...
- Page 12 SPLENBOX 400 10.1.– Instrucciones de fabricación / Assembly instructions Introducimos la vaina del tejido en el perfil delantero de carga / Insert the fabric with the slender stick along the front profile 10.2.– Instrucciones de fabricación / Assembly instructions Colocar en ambos extremos, y en la forma que se indica en el dibujo, los patines de deslizamiento (Ñ)
- Page 13 Patin Codo / Elbow slippers Patin horquilla / Fork slippers Posicionamiento del patín Horquilla y del patín codo en el perfil frontal del Cofre Splenbox 400 / Position of the fork slipper and the elbow slipper inside the Splenbox 400 front profile.
- Page 14 SPLENBOX 400 10.5.– Instrucciones de fabricación / Assembly instructions Utilizar los tornillos avellanados para sujetar las tapas circulares laterales de aluminio / Use the countersunk screw to secure the aluminium round side caps Accionamiento motor / Motor operation 10.5.– Instrucciones de fabricación / Assembly instructions Finalmente insertar a presión las tapas embellece-...
- Page 15 SPLENBOX 400...
- Page 16 LLAZA WORLD, S.A. Tramuntana, 1. Pol.Ind. Roques Roges 43460 ALCOVER Tel. +34 990 600 / Fax +34 977 990610 e-mail: info@llaza.com / Export@llaza.com...
Need help?
Do you have a question about the SPLENBOX 400 and is the answer not in the manual?
Questions and answers