
Subscribe to Our Youtube Channel
Related Manuals for MSA FireHawk Ultra Elite 10048814


Summary of Contents for MSA FireHawk Ultra Elite 10048814
- Page 1 Ultra Elite Facepiece ® M INTEN NCE ND REP IR TAL 805 (L) Rev. 4 © MSA 2008 Prnt. Spec. 10000005389 (I) Mat. 10042830 Doc. 10000015248...
- Page 2 ULTRA ELITE FACEPIECE ULTRA ELITE FACEPIECE COMPONENTS Item Part No. Description 804804 Upper Lens Ring 10031102 SpeeD-ON Head Harness Assembly 804806 1/4 Turn Screw Kit (4 Req’d) 805020 Lens Super Hardcoat 804805 Lower Lens Ring 10034500 Slide Cover 10033115 Component Housing Cover (Push-to-Connect) 04 19 Component Housing Cover (1/4 Turn) 494297...
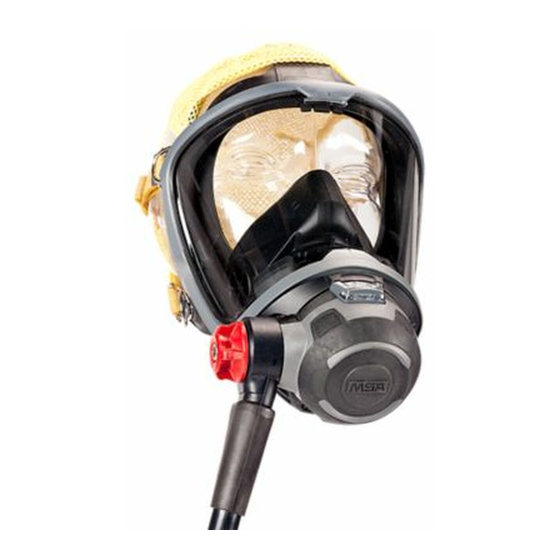
- Page 3 ULTRA ELITE FACEPIECE pressure demand facepiece NFPA Facepiece Components 12-27 in. lbs. Facepiece Blank Type Small Medium Large Hycar 10048814 10048813 10048815 Silicone 805581 805580 805582 TAL 805 (L) Rev. 4 - 10042830...
- Page 4 TAL 805 (L) Rev. 4 - 10042830...
- Page 5 ANSI standards suggest that users should be trained in the cleaning procedure. Confidence Plus Cleaning Solution (P/N 10009971) from MSA is recom- REMOVING THE SPEED-ON ® HEAD HARNESS mended.
- Page 6 ULTRA ELITE FACEPIECE 2. Refer to Kit 817088 Head Harness Installation instruc- Note: Be careful that you do not damage internal parts of tions to attach the harness. the component housing assembly (exhalation valve, spring, retainer, or speaking diaphragm) once the cover is removed.
- Page 7 ULTRA ELITE FACEPIECE of component housing. c. Ensure that the spring is centered on the exhalation valve. c. The bayonets must 4. Inspect the slots in the component housing. If either be in a horizontal ori- appears to be damaged or distorted replace the dam- entation.
- Page 8 ULTRA ELITE FACEPIECE 6. Install the phillips screws and tighten. INSTALLING THE FACEPIECE LENS AND RING 7. Verify each of the following features. a. The adapter bayonets are locked into a horizontal 1. Remove any dirt, lens fragments, or other debris from position, if applicable, and CANNOT be rotated.
- Page 9 ULTRA ELITE FACEPIECE REMOVING THE COMPONENT HOUSING ASSEMBLY 4. Insert the narrow end of the ring into the space between the lower lens ring and the facepiece housing Note: Remove the adapter assembly and the component area. housing cover. 1. Use a small phillips screwdriver to remove the compo- nent housing ring screw.
- Page 10 ULTRA ELITE FACEPIECE REPLACING THE INLET GASKET AND DISC VALVE 1. Remove the component housing cover and the adapter assembly. 2. Remove the disc from the gasket and inspect both for 9. Install the screw and wear. The disc should be very soft and pliable. Install tighten using a small a new disc valve if it is damaged or hardened.
- Page 11 6. If dullness, discoloration, cracks, or breaks are noted, position and CANNOT be rotated. do not use the facepiece. Call MSA Customer Service ii. The slip nut is threaded completely into the face at 1-877-MSA-3473 to make arrangements to return piece and locked securely.
- Page 12 5. For Firehawk push-to-connect (PTC) facepieces: Note: For questions regarding this procedure, please a. Insert the component housing cover tab into the contact MSA Customer Service at 1-877-MSA-3473. lens ring slot, leave the cover loose. b. Place the PTC adapter through the facepiece com- ponent housing cover and thread the adapter assembly into the facepiece hand tight.
- Page 13 ULTRA ELITE FACEPIECE PUSH TO CONNECT (PTC) 3. Tighten facepiece adapter until the top flat on the CONTENTS octagon is horizontal. P/N 10033115 PTC Adapter Note: The octagon flats on the facepiece adapter must P/N 637070 Screw (2) align with octagon flats of component housing. P/N 490134 Spider Valve BEFORE USE...
Need help?
Do you have a question about the FireHawk Ultra Elite 10048814 and is the answer not in the manual?
Questions and answers