Roland V-Drums TD-27 Quick Start Manual
Drum sound module
Hide thumbs
Also See for V-Drums TD-27:
- Reference manual (67 pages) ,
- Data list (58 pages) ,
- Midi implementation manual (52 pages)
Table of Contents
Advertisement
Quick Links
Quick Start
Quick Start (this document)
This explains basic use of the TD-27, such as playing the drums and practicing.
PDF Manuals (download from the web)
5 Reference Manual
In addition to the content of this document, this explains
all the functionality of the TD-27, such as functions for live
performance and for recording.
5 Data List
This explains all of the TD-27's parameters and how to edit
them.
5 MIDI Implementation
This is detailed information about MIDI messages that you
can use when connecting the TD-27 with MIDI devices.
Video Manual
You can view a quick start video.
Before using this unit, carefully read "USING THE UNIT SAFELY" and "IMP
(p. 29). After reading, keep the document(s) where it will be available for immediate reference.
© 2020 Roland Corporation
To obtain the PDF manuals
1.
Enter the following URL in your
computer.
https://www.roland.com/support/
2.
Search for TD-27.
3.
Download the manual as directed by the
screen.
To access the "Video Manual"
http://roland.cm/td-27qs
ORTANT NOTES" (the leaflet "USING THE UNIT SAFELY" and the Owner's Manual
Advertisement
Table of Contents

Related Manuals for Roland V-Drums TD-27


Summary of Contents for Roland V-Drums TD-27
- Page 1 ORTANT NOTES” (the leaflet “USING THE UNIT SAFELY” and the Owner’s Manual Before using this unit, carefully read “USING THE UNIT SAFELY” and “IMP (p. 29). After reading, keep the document(s) where it will be available for immediate reference. © 2020 Roland Corporation...
- Page 2 Display Graphic LCD 256 x 80 dots Power Supply AC adaptor (DC 9 V) * This document explains the specifications of the product at the time that the document was issued. For the latest information, refer to the Roland website.
-
Page 3: Table Of Contents
Contents Panel Descriptions Editing a Drum Kit ......4 ......20 Editing with the Sound Modify Knobs . -
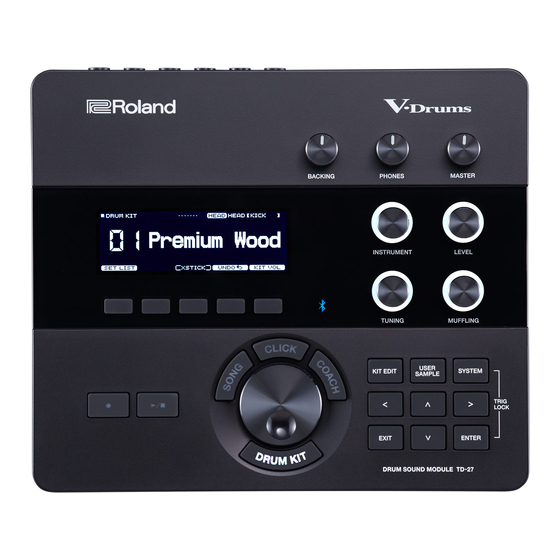
Page 4: Panel Descriptions
Panel Descriptions Display This shows various information depending on the operation. A short time after you turn on the power, the DRUM KIT screen (basic screen) appears. & “Selecting a Drum Kit” (p. 12) Function button ([F1]–[F5]) The function of these buttons will change depending on the screen. - Page 5 Panel Descriptions [BACKING] knob [PHONES] knob [MASTER] knob Adjusts the volume of the built-in Adjusts the volume of headphones Adjusts the volume of amplified song or the click (metronome), and the connected to the PHONES jack. speakers etc. connected to the MASTER volume of a smartphone connected to OUT jacks.
-
Page 6: Connect Your Equipment
Connect Your Equipment Rear Panel MIDI connector (IN, OUT/ MIX IN jack DIRECT OUT jack (1, 2) [POWER] switch THRU) Connect your audio player Connect these to your mixer Turns the power on/off. Connect these to external or smartphone here. You etc. -
Page 7: Side Panel
Connect Your Equipment Side Panel SD CARD slot Insert a commercially available SD card (SDHC cards (up to 32 GB) are supported). You can use an SD card to store songs for backing (accompaniment) or to store settings of the TD-27 itself. You can also use it to import user samples and or save performance data that you recorded. -
Page 8: Getting Ready
(e.g., MDS Series; sold separately). Use the included wing bolts to attach the plate as shown in the illustration. * Use only the included wing bolts. Using any other bolts will cause malfunctions. Roland logo faces * When turning the unit over, be careful so as to protect the buttons and knobs from outward damage. -
Page 9: Making Hi-Hat Settings
Getting Ready Making Hi-Hat Settings If you’re using the hi-hat (VH-10/VH-11 or VH-13), adjust the offset on the TD-27. This adjustment is required for hi-hat pedal movements such as open or close to be detected correctly. &If you want to make fine adjustments to the hi-hat sensitivity etc., refer to “Reference Manual” (PDF). Settings for the VH-10 / VH-11 Settings for the VH-13 With the hi-hat completely separated from the... -
Page 10: About Performance Techniques
About Performance Techniques The TD-27 lets you use various performance techniques just as on acoustic drums. NOTE 5 Use only wooden or plastic sticks. Using a carbon or metal stick may cause the sensor to malfunction. 5 Use nylon brushes. Using metal brushes may cause the sensor to malfunction, and may scratch the pad. Snare / Toms Playing method Explanation... -
Page 11: Hi-Hat
About Performance Techniques Hi-Hat Playing method Explanation The hi-hat tone changes smoothly from open to closed in response to how far the pedal is pressed. You can also play a foot-close sounded by pressing the pedal, or a foot-splash Open/closed sounded by pressing the pedal and then immediately opening it. -
Page 12: Selecting A Drum Kit
Selecting a Drum Kit What Are “Drum Kits” and “Instruments”? On the TD-27, a set of drums is called a “drum kit. ” The sounds that play when you Drum kit strike each pad of the drum kit are called “instruments. ” Instrument The illustration below shows the structure of a drum kit. -
Page 13: Performing Along With A Song
Performing Along with a Song You can enjoy playing the drums along with songs on your smartphone or other mobile device (subsequently called “smartphone”) or songs that can be played back on the TD-27 itself. Performing Along with a Song from Your Smartphone Turn on the Bluetooth function of your Connecting via a Cable to the MIX IN Jack smartphone. -
Page 14: Performing Along With A Song
(INTERNAL) this folder. backing (audio data) Songs saved on an SD card Audio files (WAV/MP3) saved to an Roland folder SD card for backing (SD CARD) TD-27’s backup data is saved here. Songs recorded on an SD A TD-27 performance saved... -
Page 15: Practicing
Practicing Sounding a Click (Metronome) Practicing in Coach Mode You can sound a click and practice drumming at a steady This unit provides practice modes called “Coach Mode” tempo. which are designed to make your practicing as effective as possible. This provides three menus: “TIME CHECK, ”... -
Page 16: Developing Internal Timing Sense (Quiet Count)
Practicing Press the [EXIT] button to finish. Strike the pad in time with the click. 5 The click will sound during the first few measures. When TIME CHECK settings you reach the last measure during which the click will sound, the screen will indicate “Ready.. ” In the TIME CHECK screen, you can press the [F2] (SETUP) button to change the pads that are evaluated and the number of measures that are scored. -
Page 17: Warm Ups
Practicing Overall evaluation WARM UPS This grades your performance at each step, and displays the overall evaluation. In this mode you’ll successively practice steps 1–3, be To resume practicing, press the [F5] (RETRY) button. graded on your performance at each step, and then receive a final evaluation. -
Page 18: Recording
Recording Recording a Performance Recording Your Performance Along with a Song You can easily record your own performance and play it You can record your performance along with one of the back. TD-27’s built-in backing (accompaniment) songs or a song saved on the SD card. -
Page 19: Recording On A Connected Computer
TD-27 and your computer software. In order to transmit and receive audio as USB AUDIO, you must install the USB driver. USB cable (commercially available) MEMO For details on downloading and installing the USB driver, refer to the Roland website. http://www.roland.com/support/... -
Page 20: Editing A Drum Kit
Editing a Drum Kit The TD-27 lets you shape your sounds in a wide variety of ways, from customizing the drum itself by changing the head type or shell depth, to adjusting the reverberation. If you want to make changes intuitively, use the sound modify knobs. If you want to make precise settings while viewing the values in the screen, start your editing from the [KIT EDIT] button. -
Page 21: Editing With The [Kit Edit] Button
Editing a Drum Kit Editing with the [KIT EDIT] Button Press the [DRUM KIT] button. Use the dial to change the settings. The DRUM KIT screen appears. Press the [DRUM KIT] button to return to the DRUM KIT screen. Turn the dial to select the drum kit that you want to edit. -
Page 22: Importing And Playing Audio Files (User Sample)
Editing a Drum Kit Importing and Playing Audio Files (USER SAMPLE) Audio files that you created on your computer can be imported from an SD card into the TD-27, and played as instruments (User Sample function). You can edit the sound of a user sample or apply effects to it in the same way as other instruments. Audio files that can be loaded by the TD-27 WAV file Format (extension) -
Page 23: Assigning A User Sample To An Instrument And Playing It
Editing a Drum Kit Assigning a User Sample to an Instrument and Playing It Press the [DRUM KIT] button. The DRUM KIT screen appears. Turn the dial to select the drum kit that you want to edit. Press the [KIT EDIT] button. The KIT EDIT screen appears. -
Page 24: Various Settings (System)
Various Settings (SYSTEM) Basic Operation in SYSTEM Settings that are common to the entire unit, such as functions related to backing up the TD-27’s settings and the power supply settings, are called “system” settings. Press the [SYSTEM] button. The SYSTEM screen appears. Use the cursor buttons to select the menu that you want to edit, and press [ENTER] button. -
Page 25: Backing Up Data
Various Settings (SYSTEM) Press the [F5] (EXECUTE) button. Backing Up Data A confirmation message appears. All settings stored in the TD-27 can be saved (backed up) to an SD card, or restored (loaded) into the TD-27. MEMO You can also back up and load individual drum kits. If you decide to cancel, select “CANCEL”... -
Page 26: Setting The Auto Off Function
Various Settings (SYSTEM) Use the cursor buttons to select “OK,” and press Restoring the Factory Settings the [ENTER] button. The backup data is loaded from the SD card. The “Factory Reset” operation returns all data and settings stored in the TD-27 to their factory-set condition. Setting the AUTO OFF Function NOTE When you execute this operation, all data and settings... -
Page 27: Troubleshooting
Troubleshooting Trouble Items to check Action Page Troubles with sound Is the product correctly connected to the external Check the connections. p. 6 devices? Use the [PHONES] or [MASTER] knob to adjust the Could the product’s volume be lowered? – volume. - Page 28 Troubleshooting Trouble Items to check Action Page Troubles with USB Is the USB cable connected correctly? Check the connections. p. 6 In order to transmit and receive audio as USB AUDIO, Install the USB driver on your computer. p. 19 the USB driver must be installed.
-
Page 29: Using The Unit Safely
(MDS Series etc. ) manufactured adaptor supplied with the unit. has passed since it was last used by Roland. If used in combination Also, make sure the line voltage for playing music, or its buttons with other stands, you risk at the installation matches the or controls were operated (Auto Off function). -
Page 30: Important Notes
• Roland assumes no liability concerning the of distributing recorded medium of said restoration of any stored content that has content or making them available on a been lost.
Need help?
Do you have a question about the V-Drums TD-27 and is the answer not in the manual?
Questions and answers