
Subscribe to Our Youtube Channel
Related Manuals for Cornelius ENERGIZE 6


Summary of Contents for Cornelius ENERGIZE 6
- Page 1 ENERGIZE 6 Installation Manual Release Date: October 22, 2012 Publication Number: 621058457INS Revision Date: August 8, 2013 Revision: A13 Visit the IMI Cornelius web site at www.cornelius.com for all your Literature needs.
- Page 2 Commercial Warranty. Cornelius will not be responsible for any repair, replacement or other service required by or loss or damage resulting from any of the following occurrences, including but not limited to, (1) other than normal and proper use and normal...
-
Page 3: Table Of Contents
TABLE OF CONTENTS Safety Instructions..............1 Read and Follow ALL Safety Instructions . - Page 4 Connecting the Carbonated Lines to the Unit ........18 Connecting Power to the Unit .
-
Page 5: Safety Instructions
Do not let anyone operate the unit without proper training. This appliance is not intended for use by very young children or infirm persons without supervision. Y oung children should be supervised to ensure that they do not play with the appliance. © 2012, IMI Cornelius Inc. - 1 - Publication Number: 621058457INS... -
Page 6: Qualified Service Personnel
Strict attention MUST be observed in the prevention of CO gas leaks in the entire CO and soft drink system. If a CO gas leak is suspected, par- Publication Number: 621058457INS - 2 - © 2012, IMI Cornelius Inc. - Page 7 IMMEDIATELY ventilate the contaminated area before attempting to repair the leak. Personnel exposed to high concentrations of CO experience tremors which are followed rapidly by loss of consciousness and DEATH. © 2012, IMI Cornelius Inc. - 3 - Publication Number: 621058457INS...
-
Page 8: System Overview
• Intelligent variable speed recirculation • Syrup conditioning at the point of dispensing • Improved water bath insulation for more unit efficiency • Individual supply shutoffs • SMART Capable • Snooze mode Publication Number: 621058457INS - 4 - © 2012, IMI Cornelius Inc. -
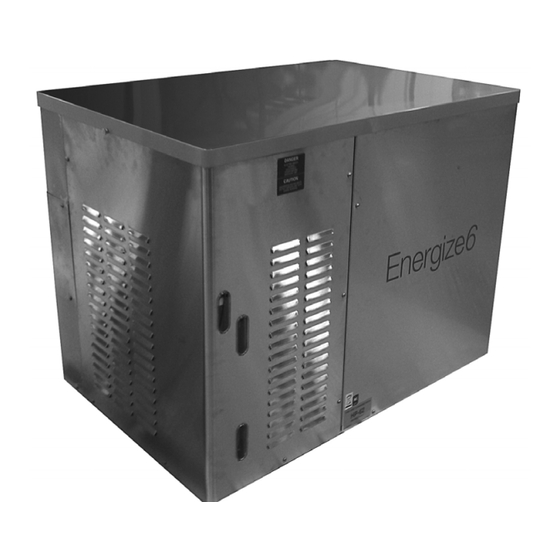
Page 9: Unit Arrangement
The Energize system identifies when drinks are dispensed, automatically switching to maximum power to supply the required amount of cooling capacity. After dispensing, Energize switches back to standby mode automatically. © 2012, IMI Cornelius Inc. - 5 - Publication Number: 621058457INS... -
Page 10: Specifications
Pressure switch carbonator pump outlet (9 bar) Voltage 220V 60Hz 3 phase Height 31.8 in. (810mm) Depth 27.2 in. (690mm) Width 42.5 in. (1080mm) Shipping Weight approx 441 lbs. (200kg) Publication Number: 621058457INS - 6 - © 2012, IMI Cornelius Inc. -
Page 11: Installation
Bill of Lading. Locate all items according to the packing list and inspect for possible damage caused by shipping. Notify the appropriate carrier, if neces- sary, and contact IMI Cornelius immediately for replacement parts, if discrepancies exist. Dispose of all packaging in an environmentally safe and legal manner. -
Page 12: Environmental Requrements
8.3 bar). Water temperature to the BRP should not exceed 100° F (38° C). Electrical Refer to the unit nameplate for electrical information. All wiring must be installed according to national and local electrical codes. Publication Number: 621058457INS - 8 - © 2012, IMI Cornelius Inc. -
Page 13: Plumbing Requirements
FAILURE TO COMPLY COULD RESULT IN SERIOUS INJURY, DEATH OR EQUIPMENT DAMAGE. The Energize unit is installed on top of the BIB rack. To install the unit, perform the procedure in Table 4. © 2012, IMI Cornelius Inc. - 9 - Publication Number: 621058457INS... - Page 14 Connect 1/2” drain tubing to the barb fitting and route it to a floor drain, following all national and local plumbing codes. Mounting Slots Figure 3. Mount Bracket to Wall Stud Figure 4. Publication Number: 621058457INS - 10 - © 2012, IMI Cornelius Inc.
-
Page 15: Remote Condenser Installation
The connections to the Energize6 unit are shown in Figure 7. These connections are located at the lower lefthand corner on the rear of the unit. © 2012, IMI Cornelius Inc. - 11 - Publication Number: 621058457INS... -
Page 16: Pre-Charged Refrigeration Line Requirements
Connecting the Pre- charged Refrigeration Lines CAUTION: When the connections are made, the seals on the couplings are punctured and if removed for any reason, the refrigerant charge will be lost. Publication Number: 621058457INS - 12 - © 2012, IMI Cornelius Inc. -
Page 17: Installing The Backroom Package
2 must connect to line 2 and so on. 2. Recirculating carbonated water lines must be connected in a continuous recirculating circuit. The soda water coming from the trunk python must © 2012, IMI Cornelius Inc. - 13 - Publication Number: 621058457INS... -
Page 18: Installing The Heat Exchangers
Figure 9. Connect the syrup lines from the output side of the heat exchanger to the dispenser, as shown in Figure 10. Publication Number: 621058457INS - 14 - © 2012, IMI Cornelius Inc. - Page 19 Energize6 Installation Manual Figure 9. Figure 10. Figure 11. © 2012, IMI Cornelius Inc. - 15 - Publication Number: 621058457INS...
-
Page 20: Connecting The Water Lines
Figure 15. When the water bath is full, replace the cover on the unit or continue on to Table 7 to install the CO lines. Cover Attaching Screw Figure 13. Publication Number: 621058457INS - 16 - © 2012, IMI Cornelius Inc. -
Page 21: Connecting The Co2 Lines
When connection is complete, test the system for CO leaks. When the CO source is connected, replace the cover on the unit or continue on to Table 8 to install the carbonated water lines. © 2012, IMI Cornelius Inc. - 17 - Publication Number: 621058457INS... -
Page 22: Connecting The Carbonated Lines To The Unit
Connect the two 1/2” lines of return carbonated water to the appropriate lines in the unit, shown in Figure 17. Make sure all lines are clearly marked. Lines In Figure 17. Publication Number: 621058457INS - 18 - © 2012, IMI Cornelius Inc. -
Page 23: Connecting Power To The Unit
Connect the wires from the remote condenser to the bottom of the contactor, as shown in Figure 21. Dress the wires and replace the access plate. Power In Connection Power to Remote Condenser Figure 19. © 2012, IMI Cornelius Inc. - 19 - Publication Number: 621058457INS... -
Page 24: Initial Startup
There are three windows on the front service panel. Check the status of the LED indicator on the (top) master controller, shown in Figure 23. Table 11 shows the warnings and the actions required for each indicator (LED) status. Publication Number: 621058457INS - 20 - © 2012, IMI Cornelius Inc. - Page 25 Figure 22. Smart Indicator LED Status Indicator Figure 23. Table 11. Warning Required Action Green Voltage OK None No Power Check/Reset Power Blinks HIGH or LOW Voltage Check/Reset Power Yellow © 2012, IMI Cornelius Inc. - 21 - Publication Number: 621058457INS...
- Page 26 Figure 24. Relief Valve Figure 25. CAUTION: The circulation pump(s) run even if there is no water in the soda circuit. Running the pump(s) dry damages the soda recirculation pump(s). Publication Number: 621058457INS - 22 - © 2012, IMI Cornelius Inc.
- Page 27 Energize6 Installation Manual Figure 26. Agitator Mounting Bracket Figure 27. Agitator Mounting Bracket Figure 28. © 2012, IMI Cornelius Inc. - 23 - Publication Number: 621058457INS...
- Page 28 Energize6 Installation Manual Relief Valve Figure 29. Publication Number: 621058457INS - 24 - © 2012, IMI Cornelius Inc.
- Page 30 IMI Cornelius Inc. www.cornelius.com...
Need help?
Do you have a question about the ENERGIZE 6 and is the answer not in the manual?
Questions and answers