Advertisement
Quick Links
Vendor Stock NO.: XG1910200103
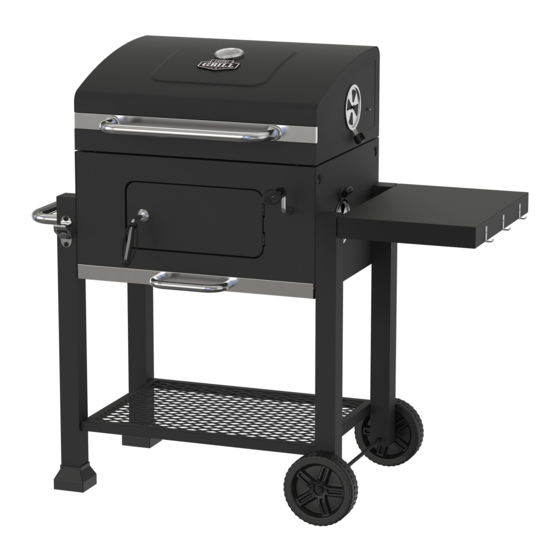
24-INCH HEAVY-DUTY CHARCOAL GRILL
ASSEMBLY INSTRUCTION MANUAL
FOR OUTDOOR USE ONLY.
PLEASE READ INSTRUCTIONS CAREFULLY BEFORE ASSEMBLY
RETAIN THIS MANUA FOR FUTURE REFERENCE.
If you have any
or problems, you can
our customer
service at
from 8:00am to
4:30pm eastern
, Monday through Friday for assistance.
DO NOT RETURN TO THE PLACE OF PURCHASE.
Advertisement

Related Manuals for EXPERT GRILL XG1910200103


Summary of Contents for EXPERT GRILL XG1910200103
- Page 1 Vendor Stock NO.: XG1910200103 24-INCH HEAVY-DUTY CHARCOAL GRILL ASSEMBLY INSTRUCTION MANUAL FOR OUTDOOR USE ONLY. PLEASE READ INSTRUCTIONS CAREFULLY BEFORE ASSEMBLY RETAIN THIS MANUA FOR FUTURE REFERENCE. If you have any or problems, you can our customer service at from 8:00am to 4:30pm eastern , Monday through Friday for assistance.
- Page 2 Parts List with graphic Description Part Image Part# ※Temperature 17221701 Gauge ※Lid Decorative 17221702 Plate 17221703 Hood Assembly Upper Hood 17221704 2pcs Hinge 17221705 Warming Rack 17221706 Cooking Grid 2pcs Lower Hood 17221707 2pcs Hinge Fire Box Back 17221708 Panel Fire Box Left 17221709 Panel...
- Page 3 No. Description Part Image QTY Part# Fire Box Front Panel with 17221711 11 1pc charcoal door (pre‐assembled) 17221712 12 Butterfly Damper 4pcs ※Butterfly 17221713 13 4pcs Damper Handle 17221714 14 Ash Pan 1pc ※Ash Pan 17221715 15 1pc Decorative Plate 17221716 16 ※Large Pipe Plug 4pcs 17221717 17 Left Back Leg 1pc ...
- Page 4 Part Image Part# Hood Handle 17221721 Spacers 4pcs 17221722 Charcoal Tray 17221723 Assembly 17221724 Right Sha 17221725 Support Bracket Fire Box Right 17221726 Panel ※Handle Locking 17221727 Bracket Crank Handle 17221728 ※Handle Grip 2pcs 17221729 Side Shelf 17221730...
- Page 5 Description Part Image Part# Door Locking 17221731 Lever 17221732 Trim Charcoal Door 17221733 Handle 17221734 Ash Pan Handle 17221735 Bottle Opener 17221736 Right Front Leg 17221737 Right Back Leg 17221738 Wheel 2pcs 17221739 Axle 17221740 Bottom Shelf ※ :NO ASSEMBLY REQUIRED...
- Page 6 HARDWARE KIT No. Description Part Image QTY A M6x12 mm Screw 22pcs B M6x35 mm Screw 8pcs C M6 Shoulder Screw 4pcs D M10 Nut 1pc E Hinge Pin 2pcs F Cotter Pin 2pcs ASSEMBLY PREPARATION Before beginning assembly of product, make sure all parts are present. Inspect contents of box to make sure all parts are included and not damaged. If any part is missing or damaged, do not attempt to assemble the product. NOTE: Some parts come with screws pre‐installed. Loosen and tighten for final assembly. Estimated Assembly Time: 1 hour by two people Tools required for assembly: * Phillips Head Screwdriver 1pc (not included); * Wrench 1pc ...
- Page 7 ASSEMBLY INSTRUCTIONS IMPORTANT: ASSEMBLE ON FLAT AND SOFT SURFACE TO AVOID SCRATCHING. 1. Loosen pre‐assembled Screws and leave the screw heads protruding approximately 1/5 inch. Hang the side panels onto the screws and tighten them as shown. 2. Put Leg End Cap (20) into Left Back Leg (17) and Left Front Leg (18). Make sure the Leg End Cap is locked into the square hole on the legs.
- Page 8 3. Use 8pcs A screws to attach legs to each corner of the Firebox as shown. A M6X12 mm Screw 4. Use 4pcs A Screws to attach the Bottom Shelf (40) to the 4 Legs. . A M6X12 mm Screw ...
- Page 9 5. Thread Axle (39) through the Wheels (38), Right Left Leg and Right Back Leg, and then fasten D Nut as shown. D M10 NUT 6. Remove the pre-assembled Self-Tapping Bolt from the tip of Crank Handle and loosen the handle from the bracket.
- Page 10 7. Rotate the Crank Handle (28) into the hole of the front panel and then fasten the Self-Tapping Bolt to the end of the Crank Handle (28). Note: Make sure to rotate the crank handle counterclockwise completely to the end. Self-Tapping Bolt...
- Page 11 8. Use 2pcs A screws to attach the Left Shaft Support Bracket (10) to the Firebox. A M6X12 mm Screw 9. Loosen the pre-assembled M6x70 screws from Cart Handle (19), and then assemble the handle together with spacer (22) to the Left side of the Cart according to the diagram as shown. M6x70 Screw...
- Page 12 10. Put the Bolts of the Shaft Assembly (24) into the slot of the Left & Right Fire box side panel. Fit the shaft onto the slot of the bracket of the fire box front panel.
- Page 13 11. Loosen the pre-assembled M6 screws, Φ6 Spring Washers and M6 Nuts from Butterfly Dampers (12), and then assemble the Butterfly Dampers to the side of Fire Box according to the diagram as shown. Screw Bolt 12 M6 Nut Screw Bolt Φ...
- Page 14 13. Loosen the pre-assembled M8 Nut and spring washer from the handle (33), and then assemble the handle to Charcoal Door according to the diagram as shown. M8 Nut Φ8 Spring Washer 14. Use 4pcs B screws to attach Lower Hood Hinges (7) to the firebox back panel. B M6X35 mm Screw...
- Page 15 15. Use 2pcs A screws to attach Bottle Opener (35) to Left Front Leg. A M6X12 mm Screw 16. Place the Cooking Grates (6) inside the firebox as shown.
- Page 16 17. Use 4pcs B screws to attach Upper Hood Hinges (4) to the back of the Hood. B M6X35 mm Screw 18. Loosen the pre‐assembled M6 screws, Φ6 Spring Washers and M6 Nuts from Butterfly Dampers (12), and then assemble the Butterfly Dampers to both sides of Hood according to the diagram as shown. M6 Nut M6 Screw Φ 6 Spring Washer M6 Nut ...
- Page 17 19. Loosen the pre-assembled M6x35 screws from Hood Handle (21), and then assemble the handle together with spacer (22) to the hood according to the diagram as shown. 20. Position Hood onto Firebox with hinges aligned as shown. Insert Hinge Pins (E) through hinges. Secure hinge pins with Cotter Pins (F) Hinge Pin Cotter Pin...
- Page 18 21. Insert M6 Shoulder Screw (C) into the top hole of each leg as shown. Tighten screws to leave the screws head protruding approximately 1/5 inch. Hang the Side Shelf Brackets onto the protruding bolt heads, and then fully tighten screws as shown.
- Page 19 22. Loosen the pre-assembled M5x12 Screws from Ash Pan Handle (34), and then assemble the handle to Ash Pan (14) according to the diagram as shown. Then insert the Ash Pan under the Firebox as shown.
- Page 20 23. Install the Warming Rack as shown. 24. Assembly is completed.
- Page 21 2‐YEAR LIMITED WARRANTY This warranty is non‐transferable and does not cover failures due to misuse of improper installation or maintenance. This warranty is for replacement of defective parts only. We are not responsible for incidental or consequential damages or labor costs. This warranty does not cover corrosion or discoloration after the grill is used, or lack of maintenance, hostile environment, accidents, alterations, abuse or neglect. This warranty does not cover damage caused by heat, abrasive and chemical cleaners, or any damage to other components used in the installation or operation of the charcoal grill. And paint is not warranted and may require touch‐up. Some states do not allow the limitation or exclusion of incidental or consequential damages, so the ...
Need help?
Do you have a question about the XG1910200103 and is the answer not in the manual?
Questions and answers
How do you season the grills before first use?
To season the EXPERT GRILL XG1910200103 before first use, follow these steps:
1. Clean the grates with warm water and mild dish soap.
2. Dry the grates with a clean towel.
3. Heat the grill grates to ensure they are completely dry, then let them cool.
4. Rub a thin layer of oil on the cooled grates using a basting brush, paper towel, or spray mister.
5. Fire up the grill and let it heat for 30 minutes.
6. Turn off the grill and let it cool completely.
This answer is automatically generated
How to use and adjust grill for cooking?
To use and adjust the EXPERT GRILL XG1910200103 for cooking:
1. Charcoal Loading: Open the charcoal access door and place charcoal in the charcoal pan.
2. Adjust Charcoal Height: Use the adjustable charcoal pan to raise or lower the charcoal for controlling cooking temperature.
3. Cooking Grates: Place food on the heavy-duty cast iron cooking grates. These retain heat well and give good sear marks.
4. Warming Rack: Use the 201 sq. in. warming rack to keep food warm without direct heat.
5. Temperature Monitoring: Check the built-in lid thermometer to monitor internal grill temperature.
6. Side Shelf: Use the foldable side shelf for holding platters or utensils. It also has hooks for tools.
7. Ash Pan: After cooking, remove the ash pan for easy cleaning.
8. Mobility: Use the wheels on the right legs to move the grill as needed.
Always follow safety guidelines and maintain the grill regularly for best performance.
This answer is automatically generated
Where can I buy a shaft assembly from
Cleaning the grill right and flavor bars is relatively easy. I see no convenient way to clean the box of the grill. I’m staying at a house that has one of these grills and there is a thick coating of grease, etc. of the box of the grill. There’s only a small hole at the base of the box where grit and grime could be scraped into that would be very laborious. Any suggestions?