Table of Contents
Advertisement
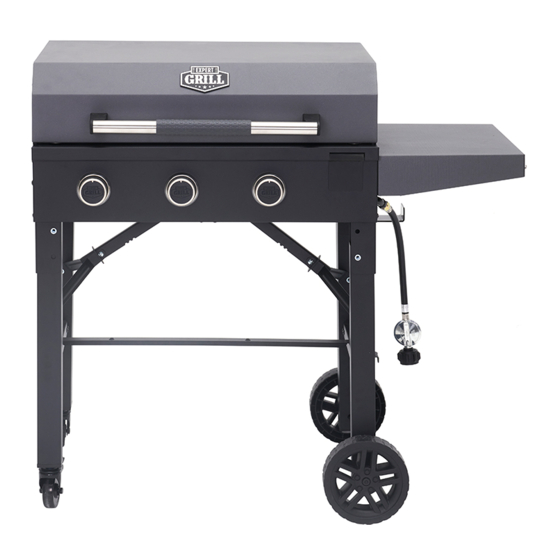
Expert Grill Pioneer
Read this Owner's manual carefully and be sure your
gas grill is properly assembled, installed and
maintained. Failure to follow these instructions could
result in serious injury and/or property damage.
For Outdoor Use Only
Owner's Manual
Model No.: XG1136224169001
1
Description:
• Parts
• Assembly
• Safety Rules
• Use and Care
• Troubleshooting
Important: Keep this Owner's Manual for
convenient reference and for part replacement.
If you have any questions or problems, you can
contact our customer service at 855-256-2160
or expertgrill@grillservices.net from 8
AM – 4:30 PM Eastern Time, Monday to Friday.
Please make sure the cylinder valve connection
device shall properly and safely mate with the
connection device attached to the inlet of the
pressure regulator.
Advertisement
Table of Contents

Related Manuals for EXPERT GRILL Pioneer


Summary of Contents for EXPERT GRILL Pioneer
- Page 1 Owner's Manual Model No.: XG1136224169001 Expert Grill Pioneer Description: • Parts • Assembly • Safety Rules • Use and Care • Troubleshooting Important: Keep this Owner’s Manual for convenient reference and for part replacement. Read this Owner’s manual carefully and be sure your...
-
Page 2: Safety Precautions
Safety Precautions WARNING DANGER Do not store or use gasoline or If you smell gas: other flammable liquids or Shut off gas to the appliance. vapors in the vicinity of this or Extinguish any open flame. any other appliance. Open hood. An LP gas cylinder not If odor continues, keep away connected for use shall not be... - Page 3 Safety Precautions • Let your LP gas cylinders be filled by reputable propane gas distributors and visually inspected and recertified each time you fill. Provided with a listed overfilling prevention 1) do not store a spare LP gas cylinder under or device.
-
Page 4: Burner Flame Check
WARNING Burner Flame Check A strong gas smell, or the hissing sound of gas indicates a serious problem with your gas grill or the LP gas cylinder. Failure to immediately follow the steps listed below could result in a fire or explosion that could cause serious bodily injury, death, or property damage. -
Page 5: Table Of Contents
Table of Contents Safety Precautions-------------------------------------2-4 Burner Flame Check-------------------------------------4 Expert Grill Pioneer Model Description------------- 6 Hardware--------------------------------------------------- 6 Tools Required for Assembly-------------------------- 6 Parts Diagram--------------------------------------------- 7 Parts List------------------------------------------------- 8-9 Assembly Steps------------------------------------- 10-18 Connecting LP Gas cylinder to LP Grill--------19-20 Grill Lighting Instructions-------------------------- 20-21... -
Page 6: Expert Grill Pioneer Model Description
Expert Grill Pioneer Model Description Each main grill burner is rated at 10000BTU; The grill burners are NOT fitted with a cross lighting channel between each neighboring burner; All burners are operated by individual plug type gas valves; The controls for all burners are mounted in the control panel of the appliance. The control valves are operated by means of coated plastic control knobs. -
Page 7: Parts Diagram
Parts Diagram... -
Page 8: Parts List
Parts List Hood Assembly Hood Handle Hinge Assembly Side Shelf Gas Cylinder Hook Wheel Strap Baffle of Cylinder... - Page 9 Parts List Firebox Body Grease Drawer Assembly Wheel Axle Small Bar Knob Cooking Griddle...
-
Page 10: Assembly Steps
Assembly Steps Parts Required: •Firebox Body (Part #9) x1 •Knob (Part #13) x3 Installation: •Insert 3 Knobs (Part #13) into Firebox Body (Part #9) Installation: • Open the right leg • Lock the buckle plate... - Page 11 Installation: • Open the left leg • Lock the buckle plate Parts / Hardware Required: • Wheel Axle (Part #11) x1 • Wheel (Part #6) x2 • (Hardware C) x1 Installation: • Insert Wheel Axle (Part #11) through Wheel (Part #6) and right legs.
- Page 12 Parts / Hardware Required: • Side Shelf (Part #4) x1 • Gas Cylinder Hook (Part #5) x1 • (Hardware A) x4 Installation: • Loosen the pre-assembly 2 screws with 0.2 inch of thread exposed • Hang Side Shelf (Part #4) on 2 screws (Hardware A).
- Page 13 Parts / Hardware Required: • Baffle of Cylinder (Part #8) x1 • Strap (Part #7) x1 • (Hardware A) x2 Installation: • Mount Baffle of Cylinder (Part #8) by using 2 screws (Hardware A) • Buckle the Strap (Part #7) Parts / Hardware Required: •...
- Page 14 Parts / Hardware Required: • Hinge Assembly (Part #3) x2 • (Hardware B) x8 Installation: • Mount Hinge Assembly (Part • Use 8 screws (Hardware B) Parts Required: •Cooking Griddle (Part #14) x1 •Grease Drawer Assembly (Part #10) x1 Installation: •Open the hood •Mount Cooking Griddle (Part #14) and Grease Drawer...
- Page 15 Portable Handling • Remove the thumb screw. • Remove small bar. • Unlock the buckle plate. • Continue supporting weight of griddle and fold the left leg as show.
- Page 16 • Remove R pin. • Remove Wheels and Wheel Axle. • Unlock the buckle plate. • Fold the right leg.
- Page 17 • Tie the Hood with Strap. Parts / Hardware Required: • Wheel Axle (Part #11) x1 • Wheel (Part #6) x2 • (Hardware C) x1 Installation: • Insert Wheel Axle (Part #11) through Wheel (Part #6) and then leg. • Place R Pin (Hardware C) onto Wheel Axle.
- Page 18 Parts Required: • Small Bar (Part 12) x1 Installation: • Put small bar into this place. • Hang it on the 2 screws. • Portable and ready to move.
-
Page 19: Connecting Lp Gas Cylinder To Lp Grill
Connecting LP Gas cylinder to LP Grill Regulator Connection 1. Please hang a 20lb LP gas cylinder on the hook of the gas cylinder on the right side of the oven, and Figure 1 fasten it with the gas cylinder Strap. (Fig.2). 2. -
Page 20: Grill Lighting Instructions
Checking for LP gas leaks Grill Lighting Instruction Check the hose before using the outdoor cooking gas appliance. If there is a significant excessive Grill Lighting Instructions for Main Burners wear, or if the hose is cut, it must be replaced before 1. - Page 21 If Grill Still Fails To Light WARNING 1. Check gas supply and connections for leaks. Check Never lean over the grill cooking area while that all wire connections are secure. lighting your gas grill. Keep your face and body a safe distance (at least 18 inches) 2.
-
Page 22: Cooking Instruction
MAX Cleaning and Seasoning setting for 3 to 5 minutes. FIRST TIME: Expert Grill Griddle are pre- Prepare before cooking seasoned with cooking oil to prevent rust and Before cooking food, evenly coat the surface of damage during shipping. -
Page 23: Cleaning And Maintenance
Cleaning and Maintenance Cleaning Exterior Stainless Steel Surfaces • Weathering and extreme heat can cause exterior stainless steel surfaces to turn tan in color. Machine Please do the following before use every year oils used in manufacturing process of stainless steel 1) keeping outdoor cooking gas appliance area clear can also cause this tanning color. -
Page 24: Troubleshooting
Regardless of which burner cleaning procedure you 3. Inspect each burner for damage (cracks or holes) use, we recommend you also complete the following and if such damage is found, order and install a new steps to help prolong burner life. burner. -
Page 25: Warranty
Warranty Two-Year Full Warranty on Grill If this grill fails due to a defecting material or workmanship within one year from the date of purchase, call 855-256-2160 to arrange for free repair (or replacement if repair proves impossible). All warranty coverage excludes igniter and grill part paint loss, discoloration or rusting, which are either expendable parts that can wear out from normal use within the warranty period, or are conditions that can be the result or normal use, accident or improper maintenance.
Need help?
Do you have a question about the Pioneer and is the answer not in the manual?
Questions and answers