Table of Contents
Advertisement
Vendor Stock NO.: VSN#XG1136207827002
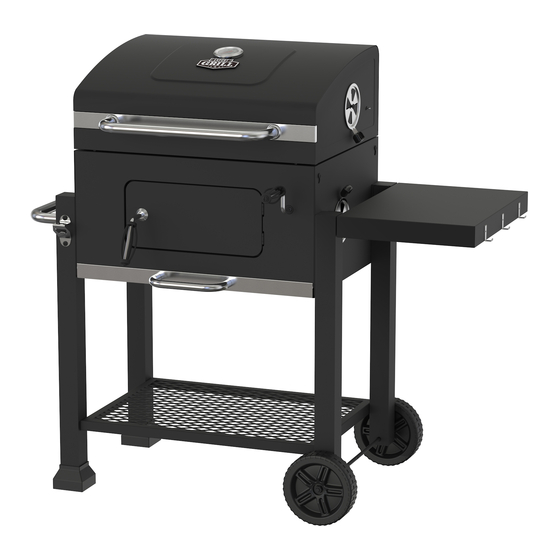
32-INCH HEAVY-DUTY CHARCOAL GRILL
INSTRUCTION MANUAL
FOR OUTDOOR USE ONLY.
PLEASE READ INSTRUCTIONS CAREFULLY BEFORE ASSEMBLY
RETAIN THIS MANUA FOR FUTURE REFERENCE.
If you have any
or problems, you can
our customer
service at
from 8:00am to
4:30pm eastern
, Monday through Friday for assistance.
DO NOT RETURN TO THE PLACE OF PURCHASE.
V01
Advertisement
Table of Contents

Related Manuals for EXPERT GRILL XG1136207827002


Summary of Contents for EXPERT GRILL XG1136207827002
- Page 1 Vendor Stock NO.: VSN#XG1136207827002 32-INCH HEAVY-DUTY CHARCOAL GRILL INSTRUCTION MANUAL FOR OUTDOOR USE ONLY. PLEASE READ INSTRUCTIONS CAREFULLY BEFORE ASSEMBLY RETAIN THIS MANUA FOR FUTURE REFERENCE. If you have any or problems, you can our customer service at from 8:00am to 4:30pm eastern , Monday through Friday for assistance.
- Page 2 TABLE OF CONTENTS Table of contents……………………………………….………………………………………..…….…….…..1 Safety Information…………...….……….………..………………………………….….……………..……..2 Use and Care………...….…………………………………………………..…..…..……….…………..….…...5 Exploded View…..…………...….………….………………………………………….……….……...………..9 Parts list with diagram………….……….………………………………………..………………..…..…….10 Hardware Kit…………..…………………….…………………..……………..………..……….……………..14 Assembly Instruction………...….……………………..………………..……….….……………………….15 Warranty………...….………………….………………...……………………….………………..……..….….29...
- Page 3 SAFETY WARNINGS – READ CAREFULLY Before assembling or using your new charcoal grill -- carefully read the inst manual and all safety warnings! Use c on and common sense when opera g grill to protect persons and property. Failure to follow safety warnings could result in bodily injury or property damage.
- Page 4 LIGHTING A FIRE Do not use gasoline, kerosene, or alcohol to light charcoal. Using any of these products (or similar products) could cause a flare up, flash fire, or explosion. Severe bodily injury could be result. If using lighter fluid to start fire, leave the hood open until briquettes are ashed over and lighter fluid has burned off.
- Page 5 To prolong grill finish and metal life, do not exceed a grill temperature of 400 ° F and do not let burning charcoal or wood come in contact with the walls of the grill. After normal operation, if the crank handle does not rotate smoothly, add some lubricating oils into the crank handle.
- Page 6 USE AND CARE USE OF COOKING GRATE First Time Use Before using a cast iron grate, wash it thoroughly with a mild dishwashing liquid to remove the protective wax coating applied for shipping. Rinse with hot water and dry completely with a soft cloth or paper towel.
- Page 7 according to those manufacturers’ instructions. Never use instant light charcoal or charcoal lighter fluid with any of these other starting methods. Allow the charcoal enough time to completely ash over before beginning to cook, so that the lighter fluid has enough time to burn off. Starting to cook too soon can leave your food tasting like lighter fluid.
- Page 8 Do not use lighter fluid or instant light charcoal when adding additional charcoal to an existing fire. This can be dangerous, and will leave a lighter fluid aftertaste on your food. Do not attempt to empty the ash pan of burning charcoal pieces or hot ash. Wait until the ashes and grill have completely cooled before emptying the grill.
- Page 9 USING CHARCOAL AND WOOD CHARCOAL Your charcoal grill is made to burn either charcoal briquettes or natural wood lump charcoal – both of which have different cooking attributes. Briquettes typically provide longer burn times than lump charcoal – but lump charcoal burns hotter than briquettes. Using the charcoal pan access door to add more charcoal makes both briquettes and lump easy and convenient for extended cooking times.
- Page 10 EXPLODED VIEW...
- Page 11 Parts List with graphic Part Image Part# ※Temperature 17223201 Gauge ※Lid Decora ve 17223202 Plate Hood Assembly 17223203 Upper Hood 2pcs 17223204 Hinge Warming Rack 17223205 Cooking Grid 3pcs 17223206 Lower Hood 2pcs 17223207 Hinge Fire Box Back 17223208 Panel Fire Box Le 17223209 Panel...
- Page 12 Description Part Image Part# Fire Box Front Panel with 17223211 charcoal door (pre-assembled) Butterfly Damper 4pcs 17223212 ※Butterfly 4pcs 17223213 Damper Handle Ash Pan 17223214 ※Ash Pan 17223215 Decorative Plate ※Large Pipe Plug 4pcs 17223216 Left Back Leg 17223217 Left Front Leg 17223218 17223219 Cart Handle...
- Page 13 Part Image Part# Hood Handle 17223221 Spacers 4pcs 17223222 Charcoal Tray 17223223 Assembly 17223224 Right Sha 17223225 Support Bracket Fire Box Right 17223226 Panel ※Handle Locking 17223227 Bracket Crank Handle 17223228 ※Handle Grip 2pcs 17223229 Side Shelf 17223230...
- Page 14 Part Image Part# Door Locking 17223231 Lever Trim 17223232 Charcoal Door 17223233 Handle Ash Pan Handle 17223234 Bo le Opener 17223235 Right Front Leg 17223236 Right Back Leg 17223237 Wheel 2pcs 17223238 Axle 17223239 Bo om Shelf 17223240 ※ :NO ASSEMBLY REQUIRED...
- Page 15 HARDWARE KIT Description Part Image M6x12 mm Screw 22pcs M6x35 mm Screw 8pcs M6 Shoulder Screw 4pcs M10 Nut Hinge Pin 2pcs Cotter Pin 2pcs ASSEMBLY PREPARATION Before beginning assembly of product, make sure all parts are present. Inspect contents of box to make sure all parts are included and not damaged.
- Page 16 ASSEMBLY INSTRUCTIONS IMPORTANT: ASSEMBLE ON FLAT AND SOFT SURFACE TO AVOID SCRATCHING. 1. Loosen pre-assembled Screws and leave the screw heads protruding approximately 1/5 inch. Hang the side panels onto the screws and tighten them as shown. 2. Put Leg End Cap (20) into Left Back Leg (17) and Left Front Leg (18). Make sure the Leg End Cap is locked into the square hole on the legs.
- Page 17 3. Use 8pcs (A) screws to attach legs to each corner of the Firebox as shown. A M6X12 mm Screw 4. Use 4pcs (A) Screws to attach the Bottom Shelf (40) to the 4 Legs. A M6X12 mm Screw...
- Page 18 5. Thread Axle (39) through the Wheels (38), Right Le Leg and Right Back Leg, and then fasten (D) Nut as shown. D M10 NUT 6. Remove the pre-assembled Self-Tapping Bolt from the p of Crank Handle and loosen the handle from the bracket.
- Page 19 7. Rotate the Crank Handle (28) into the hole of the front panel and then fasten the Self-Tapping Bolt to the end of the Crank Handle (28). Note: Make sure to rotate the crank handle counterclockwise completely to the end. Self-Tapping Bolt...
- Page 20 8. Use 2pcs (A) screws to a ach the Le Sha Support Bracket (10) to the Firebox. A M6X12 mm Screw 9. Loosen the pre-assembled M6x70 screws from Cart Handle (19), and then assemble the handle together with spacer (22) to the Le side of the Cart according to the diagram as shown. M6X70 Screw...
- Page 21 10. Put the Bolts of the Sha Assembly (24) into the slot of the Le & Right Fire box side panel. Fit onto the slot of the bracket of the fire box front panel.
- Page 22 11. Loosen the pre-assembled M6 screws, Φ6 Spring Washers and M6 Nuts from Bu erfly Dampers (12), and then assemble the Bu erfly Dampers to the side of Fire Box according to the diagram as shown. M6 Screw M6 Nut M6 Screw Φ...
- Page 23 13. Loosen the pre-assembled M8 Nut and spring washer from the handle (33), and then assemble the handle to Charcoal Door according to the diagram as shown. M8 Nut Φ 8 Spring Washer Charcoal Door 14. Use 4pcs (B) screws to a ach Lower Hood Hinges (7) to the firebox back panel. B M6X35 mm Screw...
- Page 24 15. Use 2pcs (A) screws to a ach Bo Opener (35) to Le Front Leg. A M6X12 mm Screw 16. Place the Cooking Grates (6) inside the firebox as shown.
- Page 25 17. Use 4pcs (B) screws to attach Upper Hood Hinges (4) to the back of the Hood. B M6X35 mm Screw 18. Loosen the pre-assembled M6 screws, Φ6 Spring Washers and M6 Nuts from Butterfly Dampers (12), and then assemble the Butterfly Dampers to both sides of Hood according to the diagram as shown.
- Page 26 19. Loosen the pre-assembled M6x35 screws from Hood Handle (21), and then assemble the handle together with spacer (22) to the hood according to the diagram as shown. M6 Screw 20. Pos on Hood onto Firebox with hinges aligned as shown. Insert Hinge Pins (E) through hinges. Secure hinge pins with Co er Pins (F) Hinge Pin Co er Pin...
- Page 27 21. Insert M6 Shoulder Screw (C) into the top hole of each leg as shown. Tighten screws to leave the screws head protruding approximately 1/5 inch. Hang the Side Shelf Brackets onto the protruding bolt heads, and then fully hten screws as shown.
- Page 28 22. Loosen the pre-assembled M5x12 Screws from Ash Pan Handle (34), and then assemble the handle to Ash Pan (14) according to the diagram as shown. Then insert the Ash Pan under the Firebox as shown. M5x12 Screw...
- Page 29 23. Install the Warming Rack (5) bas shown. 24. Assembly is completed.
- Page 30 2-YEAR LIMITED WARRANTY This warranty is non-transferable and does not cover failures due to misuse of improper installation or maintenance. This warranty is for replacement of defective parts only. We are not responsible for incidental or consequential damages or labor costs. This warranty does not cover corrosion or discoloration after the grill is used, or lack of maintenance, hostile environment, accidents, alterations, abuse or neglect.
Need help?
Do you have a question about the XG1136207827002 and is the answer not in the manual?
Questions and answers
How do I order a replacement part
@Rogers Williams