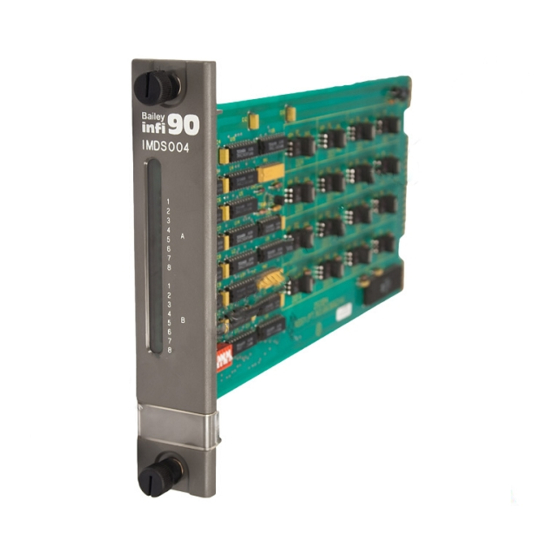
Bailey INFI 90 Instruction
Infi-net to computer interfaces
Hide thumbs
Also See for INFI 90:
- Instruction (124 pages) ,
- Hardware manual (103 pages) ,
- Instruction (77 pages)

Subscribe to Our Youtube Channel
Related Manuals for Bailey INFI 90


Summary of Contents for Bailey INFI 90
- Page 1 E96-610 ® ® INFI-NET to Computer Interfaces (INICI01/03) Process Control and Automation Solutions from Elsag Bailey Group...
- Page 2 The information contained in this document is subject to change without notice. Elsag Bailey, its affiliates, employees, and agents, and the authors and contributors to this publication specif- ically disclaim all liabilities and warranties, express and implied (including warranties of merchantability and...
- Page 3 INICI03 INFI-NET to Computer Interface. This instruction explains INFI-NET to computer interface fea- tures, specifications, and operation. It also includes installa- tion and troubleshooting procedures for each module. ® INFI-NET and INFI 90 are registered trademarks of Elsag Bailey Process Automation. I-E96-610A...
- Page 4 ® List of Effective Pages Total number of pages in this instruction is 94, consisting of the following: Page No. Change Date Preface Original List of Effective Pages Original iii through ix Original 1-1 through 1-8 Original 2-1 through 2-6 Original 3-1 through 3-20 Original...
- Page 5 ® Safety Summary GENERAL Equipment Environment WARNINGS All components, whether in transportation, operation or storage, must be in a noncorrosive environment. Electrical Shock Hazard During Maintenance Disconnect power or take precautions to insure that contact with energized parts is avoided when servicing. Special Handling This module uses electrostatic sensitive devices (ESD).
- Page 6 Sommaire de Sécurité AVERTISSEMENT Environment de l'Equipement D'ORDRE Nes pas soumettre les composants à une atmosphère corrosive GENERAL lors du transport, de l'entreposage ou l'utilisation. Possibilité de Chocs Électriques Durant l'Entretien Débrancher l'alimentation ou de prende les précautions pour éviter tout contact avec des composants sours tension durant l'entretien.
-
Page 7: Table Of Contents
Table of Contents Page SECTION 1 - INTRODUCTION ....................1-1 OVERVIEW ........................1-1 INTENDED USER ......................1-1 COMPUTER INTERFACE DESCRIPTION ...............1-1 INICI01 INFI-NET to Computer Interface ..............1-1 INICI03 INFI-NET to Computer Interface ..............1-1 MODULE DESCRIPTION ....................1-2 INNIS01 Network Interface Slave Module ..............1-2 INICT01 INFI-NET to Computer Transfer Module ............1-3 INICT03 INFI-NET to Computer Transfer Module ............1-3 IMMPI01 Multi-Function Processor Interface Module ..........1-4 FEATURES........................1-4... - Page 8 ® Table of Contents (continued) Page SECTION 3 - INSTALLATION (continued) INNIS01 MODULE INSTALLATION ................3-7 INICT01 INFI-NET TO COMPUTER TRANSFER MODULE CONFIGURATION ....3-8 Dipswitch Settings....................3-9 Dipswitch U72 - Options ................. 3-9 Dipswitch U73 - Serial Port Communication Rate .......... 3-10 Dipswitch U75 - Diagnostics .................
- Page 9 Table of Contents (continued) Page SECTION 5 - TROUBLESHOOTING ...................5-1 INTRODUCTION......................5-1 ERROR COUNTERS .....................5-1 INNIS01 MODULE ERROR CODES ................5-1 INICT01 AND INICT03 MODULE ERROR CODES ............5-2 SECTION 6 - MAINTENANCE .....................6-1 INTRODUCTION......................6-1 PREVENTIVE MAINTENANCE SCHEDULE ..............6-1 EQUIPMENT/TOOLS REQUIRED .................6-2 PREVENTIVE MAINTENANCE PROCEDURES...............6-2 Printed Circuit Board Cleaning ................6-2 General Cleaning and Washing ................6-3 Edge Connector Cleaning.................6-3...
- Page 10 ® List of Figures Title Page 1-1. INICI01 and INICI03 INFI-NET to Computer Interfaces ........... 1-2 3-1. INNIS01 Module Dipswitch and Jumper Locations ..........3-2 3-2. INNIS01 Module Jumper Settings ................3-7 3-3. INICT01 Module CPU Circuit Board Dipswitch Locations ........3-9 3-4.
- Page 11 List of Tables Title Page 1-1. Glossary of Terms and Abbreviations ..............1-6 1-2. Reference Documents ....................1-6 1-3. Nomenclature ......................1-7 1-4. Specifications......................1-7 3-1. NNIS01 Module Dipswitch SW1 Settings ..............3-3 3-2. INNIS01 Module Dipswitch SW2 Settings ...............3-3 3-3. INNIS01 Module Dipswitch SW3 Settings ...............3-4 3-4.
-
Page 12: Section 1 - Introduction
SECTION 1 - INTRODUCTION OVERVIEW INFI-NET is a unidirectional, high speed serial data highway shared by all INFI 90 nodes. INFI-NET utilizes sophisticated computer interfaces for data exchange. These computer inter- faces use state-of-the-art INFI 90 modules. INTENDED USER Personnel installing, operating, or maintaining the INFI-NET to computer interfaces should read this manual before performing any installation, operation, or maintenance procedures. -
Page 13: Module Description
INTRODUCTION ® INICI01 RS-232-C INNIS01 INICT01 INFI-NET IEEE488 LOOP (OPTIONAL) COMPUTER INICI03 RS-232-C INNIS01 INICT03 IMMPI01 SCSI COMPUTER T00388A Figure 1-1. INICI01 and INICI03 INFI-NET to Computer Interfaces MODULE DESCRIPTION A description of each module used in the INICI01 and INICI03 INFI-NET to Computer Interfaces follows. -
Page 14: Inict01 Infi-Net To Computer Transfer Module
NTMF01 Multi-Function Controller Termination Unit or NIMF01 Multi-Function Controller Termination Module. Power and I/O expander bus connections follow the same connector assignments common to most INFI 90 modules (connector P1 for power, connector P2 for I/O expander bus). INICT03 INFI-NET to Computer Transfer Module... -
Page 15: Features
RS-232-C port on the host computer. Power and I/O expander bus connections follow the same connector assignments common to most INFI 90 modules (connector P1 for power, connector P2 for I/O expander bus). IMMPI01 Multi-Function Processor Interface Module... -
Page 16: Instruction Content
Contains a maintenance schedule for the modules. Repair/Replacement Explains how to replace the modules. Procedures Support Services Explains the customer training Bailey Controls Company pro- vides and information about ordering replacement parts. Appendices Provides information on termination unit and module configu- ration. -
Page 17: Glossary Of Terms And Abbreviations
A point of interconnection to a network. NVRAM Nonvolatile random access memory. Retains stored information when power is removed. Termination Module Provides input/output connection between plant equipment and the INFI 90/ Net- ® work 90 modules. Termination Unit Provides input/output connection between plant equipment and the INFI 90/ Net- work 90 modules. -
Page 18: Specifications
IMMPI01 Communication Ports Two RS-232-C and one SCSI Power Requirements +5 VDC @ 415 mA; 2.08 W typical Mounting Occupies one slot in a standard INFI 90 module mounting unit INNIS01 Memory 208 kbytes RAM 64 kbytes ROM SPECIFICATIONS I-E96-610A... - Page 19 62,500 nodes in the system; 250 nodes on a loop. Any combination of PCU, MCS, OIS, or ICI interfaces. Communication Rates 2 Mbaud or 10 Mbaud Mounting Occupies one slot in standard INFI 90 module mounting unit. INICT01 Ports Two full duplex serial EIA standard RS-232-C Memory...
-
Page 20: Section 2 - Description And Operation
SECTION 2 - DESCRIPTION AND OPERATION INTRODUCTION INFI-NET is a unidirectional, high-speed serial data highway that can be used by all INFI 90 modules. The INNIS01 Network Interface Slave Module (NIS) and the INICT01 INFI-NET to Computer Transfer Module make up the INICI01 INFI-NET to Computer Interface. -
Page 21: Innis01 Network Interface Slave Module
DESCRIPTION AND OPERATION ® sends this message to other INFI-NET nodes. This process reduces the number of transmissions required, and adjusts the message size for maximum INFI-NET loop efficiency. Exception reports can have data values in the following for- mats: Boolean, analog, digital and status report. Exception reports are time stamped to reflect their processing sequence. -
Page 22: Message Transmission
DESCRIPTION AND OPERATION information field contains the message data. It can consist of multiple messages and vary in size to a maximum of 1,500 bytes. The control field contains time of origination, sequence, source, size, circulation count, message type, destinations, and checksum value. -
Page 23: Inict01 Infi-Net To Computer Transfer Module
Thus, it directs all interaction between the host computer and the INFI-NET system. The ICT module receives data from INFI 90 modules and then sorts, organizes, and stores it in its database. The NIS module receives frames from the INFI-NET system and passes them on to the ICT module for processing. -
Page 24: Infi-Net To Computer Interface Commands
Thus, it directs all interaction between the host computer and the INFI-NET system. The ICT module receives data from INFI 90 modules and then sorts, organizes and stores the data in a database. The NIS module receives frames from the INFI-NET system and passes them on to the ICT module for processing. -
Page 25: Configuration
The host computer is able to handle analog and dig- ital process requirements such as changing setpoints and con- trol outputs, supplying data values to INFI 90 module blocks as exception reports, controlling and setting digital remote switches and constants. -
Page 26: Section 3 - Installation
SPECIAL HANDLING Observe these steps when handling electronic circuitry: NOTE: Always use Bailey Controls field static kit (part number 1948385_1 - consisting of two wrist straps, ground cord assembly, alligator clip, and static dissipating work surface) when working with the modules. -
Page 27: Unpacking And Inspection
® UNPACKING AND INSPECTION 1. Examine the hardware immediately for shipping damage. 2. Notify the nearest Bailey Controls sales office of any such damage. 3. File a claim for any damage with the transportation com- pany that handled the shipment. -
Page 28: Dipswitch Sw1 - Node Address
INSTALLATION DIPSWITCH SW1 - NODE ADDRESS This dipswitch sets the node address. Valid node addresses are one through 250. Refer to Table 3-1. Pole one is the MSB bit with a binary weight of 128. Pole eight is the LSB bit with a binary weight of one. -
Page 29: Dipswitch Sw4 - I/O Module Address And Counters
Set pole one to zero for all other node types. Pole two enables or disables ROM checksumming. Bailey recommends that the NIS be installed with checksum- ming enabled to take full advantage of the on-board diagnos- tics. -
Page 30: Innis01 Module Address Settings
INSTALLATION displays using the group A and B faceplate LEDs. Table lists the event counters. Table lists the error counters. Record the dipswitch SW4 settings in the space provided. Counter 0A keeps track of the number of multicast messages Example of Counter Usage received excluding those originated. -
Page 31: Jumper Settings
INSTALLATION ® Table 3-5. INNIS01 Module Event Counters (continued) Dipswitch Position (Binary Value) Hexadecimal Description Value 4 5 6 7 8 (16) (8) (4) (2) (1) 1 0 1 0 1 Number of messages put into the receive buffer and retained. 1 0 1 1 0 Number of bytes originated by this node (including retries). -
Page 32: Power System Status
INSTALLATION must match the communication rate set by poles seven and eight of dipswitch SW3. Figure shows which pins to jumper for various loop modes. This figure shows placement of the pins when looking at the top of the NIS circuit board with the faceplate on the left. -
Page 33: Inict01 Infi-Net To Computer Transfer Module Configuration
INSTALLATION ® Disconnect power before installing dipshunts on the module WARNING mounting unit backplane. Failure to do so will result in contact with cabinet areas that could cause severe or fatal shock. Interrompez l'alimentation avant d'installer des dipshunts sur le fond de panier du châssis de montage des modules. Sinon, AVERTISSEMENT tout contact avec cette zone entraîne des risques d'électrocu- tion sérieuse ou fatale. -
Page 34: Dipswitch Settings
INSTALLATION Dipswitch Settings The INICT01 module consists of two circuit boards (a memory circuit board and a CPU circuit board). The memory board has no user-configurable operating options. The CPU circuit board has three dipswitches that set the module operating character- istics. -
Page 35: Dipswitch U73 - Serial Port Communication Rate
INSTALLATION ® Table 3-7. INICT01 Module Dipswitch U72 Settings (continued) User Pole Setting Function Setting Port 1 utility option. Port 1 option serial port to host computer. Modem password protection enabled. Modem password protection disabled. Port addressing mode enabled. Port addressing mode disabled. Checksumming option enabled. -
Page 36: Dipswitch U75 - Diagnostics
NOTE: 0 = CLOSED (ON), 1 = OPEN (OFF). DIPSWITCH U75 - DIAGNOSTICS Dipswitch U75 enables computer interface diagnostic func- tions that are meaningful to qualified Bailey Controls Company service personnel only. All poles on dipswitch U75 must be closed for normal operation. Table shows the dipswitch set- tings. - Page 37 INSTALLATION ® Disconnect power before installing dipshunts on the module WARNING mounting unit backplane. Failure to do so will result in contact with cabinet areas that could cause severe or fatal shock. Interrompez l'alimentation avant d'installer des dipshunts sur le fond de panier du châssis de montage des modules. Sinon, AVERTISSEMENT tout contact avec cette zone entraîne des risques d'lectrocu- tion sérieuse ou fatale.
-
Page 38: Inict03 Infi-Net To Computer Transfer Module Configuration
Early Network 90 systems applied -30 VDC to pins 3 and 4 of the module connector P1. This voltage is not required for INFI 90 mod- ules. In INFI 90 systems, pin 4 is used for the Controlway bus. If your system contains modules that require -30 VDC, set jumper J5 to the 30 VDC position. -
Page 39: Dipswitch Sw1 - Serial Port Communication Rate
NOTE: 0 = CLOSED (ON), 1 = OPEN (OFF). DIPSWITCH SW2 - DIAGNOSTICS Dipswitch SW2 enables computer interface diagnostics that are meaningful to qualified Bailey Controls Company service personnel only. All poles on dipswitch SW2 must be closed for normal operation. Table 3-11 shows the dipswitch settings. -
Page 40: Dipswitch Sw4 - Options
INSTALLATION Table 3-11. INICT03 Module Dipswitch SW2 Settings Pole Setting Function NIS module handshake time-out disabled. NIS module handshake time-out enabled. NIS module diagnostics enabled. NIS module diagnostics disabled. INFI-NET diagnostic utilities enabled. INFI-NET diagnostic utilities disabled. Hardware diagnostics enabled. Hardware diagnostics disabled. -
Page 41: Jumper Settings
INSTALLATION ® Table 3-13. INICT03 Module Dipswitch SW4 Settings User Pole Setting Function Setting ROM checksumming disabled. ROM checksumming enabled. Ports 0 and 1 data characteristics. 8 data bits, 1 stop bit, no parity 8 data bits, 1 stop bit, even parity 8 data bits, 1 stop bit, odd parity 8 data bits, 2 stop bits, no parity Port 1 utility option. -
Page 42: Hw Setup Socket Jumper
NOTES: Shaded areas designate normal operating positions. 1. This feature is used by Bailey Controls service personnel only. The jumper J1 setting does not affect the module during normal operation. 2. Defines the type of SRAM memory. Jumper J2 must be set to 4 - 3 for the current release. -
Page 43: Jumper Settings
INSTALLATION ® JUMPER SETTINGS The MPI module has two sets of jumpers that select handshake signal types: request to send (RTS) or clear to send (CTS). These signals leave the module through a cable connection to multi-function processor termination unit multi-function processor termination module. -
Page 44: Inict03 And Immpi01 Module Installation
INSTALLATION RTSB (+) RTSB/DIGOUT 2 (+) DUART P3-29 DIGOUT 2 (+) DUART RTSB (-) RTSB/DIGOUT 2 (-) DUART P3-14 DIGOUT 2 (-) DUART FOR RTSB HANDSHAKE TP25209A Figure 3-7. IMMPI01 Module Jumper J2 Settings INICT03 AND IMMPI01 MODULE INSTALLATION If the INICT03 and IMMPI01 modules are properly configured, they are ready to be installed in the module mounting unit. - Page 45 INSTALLATION ® 3. Connect the other end of the cable to connector P6 on the MPI module (see Figure 3-5). Disconnect power before installing dipshunts on the module WARNING mounting unit backplane. Failure to do so will result in contact with cabinet areas that could cause severe or fatal shock.
-
Page 46: Section 4 - Operating Procedures
SECTION 4 - OPERATING PROCEDURES INTRODUCTION After completing the configuration and installation steps detailed in Section 3, the INFI-NET to computer interface mod- ules are ready to be put into operation. This section provides the necessary information for daily operation of the INFI-NET to computer interface modules. -
Page 47: Status Led
OPERATING PROCEDURES ® INNIS01 GROUP A LEDS GROUP B LEDS T00270A Figure 4-1. INNIS01 Module Faceplate LEDs Stop pushbutton. • Two memory status LEDs. • Eight CPU LEDs. • Reset pushbutton. • Status LED The status LED is a two color (red and green) LED that displays the operating status of the ICT module. -
Page 48: Innis01 Module Error Codes
Troubleshooting the INICI01 and INICI03 INFI-NET to Com- puter Interfaces is limited to viewing the contents of the error counters and the module status report from any INFI 90 opera- tor interface. Refer to the instruction for your specific computer interface for information on module status reports. - Page 49 TROUBLESHOOTING ® INICT01 AND INICT03 MODULE ERROR CODES If errors occur while the ICT module is operating, the status LED turns red and the CPU LEDs on the ICT module faceplate display error codes. Table lists the ICT module error codes and associated corrective action.
-
Page 50: Innis01 Module Edge Connector P1 Pin Assignments
TROUBLESHOOTING Table 5-3. INNIS01 Module Edge Connector P1 Pin Assignments Signal Signal +5 VDC +5 VDC Unused Unused Common Common +15 VDC -15 VDC Power fail interrupt Power fail interrupt Unused Unused Table 5-4. INNIS01 Module Edge Connector P2 Pin Assignments Signal Signal Data bit 1... -
Page 51: Inict01 Module Edge Connector P1 Pin Assignment
TROUBLESHOOTING ® Table 5-6. INICT01 Module Edge Connector P1 Pin Assignment Signal Signal +5 VDC +5 VDC Unused Controlway B Common Common Unused Unused Power fail interrupt Power fail interrupt Controlway A/module bus Unused Table 5-7. INICT01 Module Edge Connector P2 Pin Assignments Signal Signal... -
Page 52: Inict01 And Inict03 Module Error Codes
TROUBLESHOOTING Table 5-9. INICT03 Module Edge Connector P1 Pin Assignment Signal Signal +5 VDC +5 VDC Power supply status Controlway B Common Common Unused -15 VDC Power fail interrupt Power fail interrupt Controlway A/module bus Unused Table 5-10. INICT03 Module Edge Connector P2 Pin Assignments Signal Signal... -
Page 53: Immpi01 Module Edge Connector P1 Pin Assignment
TROUBLESHOOTING ® Table 5-12. IMMPI01 Module Edge Connector P1 Pin Assignment Signal Signal +5 VDC +5 VDC Unused Unused Common Common Unused Unused Unused Unused Unused Unused Table 5-13. IMMPI01 Module Edge Connector P3 Pin Assignments Signal Signal SAC/DCS link A (-) SAC/DCS link A (+) SAC/DCS link B (-) SAC/DCS link B (+) -
Page 54: Stop Switch
OPERATING PROCEDURES INICT01 STATUS LED STOP RESET PUSHBUTTON T00386A Figure 4-2. INICT01 Module Faceplate LEDs and Controls Table 4-1. INICT01 Module Status LED States LED State Description No power to the ICT module. Solid Green The ICT module is in execute mode. Solid Red The ICT module diagnostics detect a hardware failure or configuration problem. -
Page 55: Inict03 Infi-Net To Computer Transfer Module Leds And Controls
OPERATING PROCEDURES ® INICT03 INFI-NET TO COMPUTER TRANSFER MODULE LEDS AND CONTROLS The faceplate of the INICT03 module has the following compo- nents (see Figure 4-3): Status LED. • 16 CPU LEDs. • Stop/reset pushbutton. • INICT03 RED/GREEN STATUS LED GROUP A LEDS GROUP B LEDS STOP/RESET... -
Page 56: Cpu Leds
OPERATING PROCEDURES CPU LEDs There are two groups of eight CPU LEDs. Group A LEDs dis- play a moving pattern to indicate the module is functioning. Group B LEDs, during normal operation, keep count of the commands and replies that pass through the INICT03 module. If an error occurs, these LEDs display an error code and the status LED turns red. -
Page 57: Hardware Checks
OPERATING PROCEDURES ® Hardware Checks The INICT01 and INICT03 modules do the following hardware checks: Error Detection and (INICT01 module only) Detects single bit and double bit errors Correction in the dynamic RAM memory. Corrects single bit errors but halts ICT module operation on double bit errors. Detecting an illegal address generates a bus error and the ICT Illegal Address Detection module halts operation. -
Page 58: Example Inict03 Module Utilities Menu
OPERATING PROCEDURES Utilities Menu, ICT01/SSM01 Revision F_0 Copyright (C) 1993 by Bailey Controls Company, all rights reserved 1—>TALK90 2—>Configure/View call-up password 3—>Computer command/reply sequence (off) 4—>Set local time/date 5—>Monitor mode (off) 6—>Real Value Conversion 7—>Port address (-1)8—Dump on halt (off) 9—>Time Sync Accuracy (6) -
Page 59: Example Talk90 Command Menu
OPERATING PROCEDURES ® TALK90 COMMAND MENU 1 Establish Point 2 Establish Report 3 Output Misc 4 Connect Pnt List 5 Discnct Pnt List 6 Read Value List 7 Read Status List 8 Read Exceptions 10 Output Value 11 Output Status 12 Module Operation 13 Read Block 14 Read Next Block 15 Read Default Blk 16 Write Block 17 Tune Block... -
Page 60: Configure/View Callup Password Option
OPERATING PROCEDURES The CPU LEDs on the ICT module will display the count of commands and replies that were sent and received. The NIS module should then go on-line and the computer interface will be able to communicate to INFI-NET nodes. The utilities menu will appear again. -
Page 61: Monitor Mode Option
OPERATING PROCEDURES ® CD 13 0A 00 1D 0D RS 00 CS 1B 1B 00 4D 0D RS 00 Figure 4-7. RESTART and DEMAND MODULE STATUS Commands and Replies Answering Y to the prompt causes the TIME Utilities menu to be displayed. -
Page 62: Example Time Utilities Menu
OPERATING PROCEDURES TIME Utilities 0—>Read Time 1—>Read Absolute Time 2—>Display Clock 3—>Set Absolute Time 4—>Set Wall Time 5—>Set Loop Time 6—>Convert Time Stamp to Date and Time Q—>Quit (to main menu) Select option: Figure 4-8. Example Time Utilities Menu REAL2 = D2 00 REAL3 = 02 80 00 REAL4 = 3F 80 00 00 REAL8 = 3F F0 00 00 00 00 00 00... -
Page 63: Port Address Option
ICT module NVRAM upon a fatal error (the ICT module status LED will be red). This data can be used by qualified Bailey Controls Company personnel to determine the cause of a module failure. -
Page 64: Preventive Maintenance Schedule
éclaboussures qui risquent d'atteindre les yeux. The reliability of any stand-alone product or control system is affected by the maintenance of the equipment. Bailey Controls recommends that all equipment users practice a preventive maintenance program that will keep the equipment operating at an optimum level. - Page 65 MAINTENANCE ® for tasks that require further explanation are covered under PREVENTIVE MAINTENANCE PROCEDURES. NOTE: The preventive maintenance schedule is for general pur- poses only. Your application may require special attention. Table 6-1. Preventive Maintenance Schedule Task Frequency Check cabinet air filters. Clean or replace them as necessary. Check the air filter more fre- 3 months quently in excessively dirty environments.
- Page 66 MAINTENANCE Do all cleaning and handling of the printed circuit boards at static safe work stations. Always observe the steps under SPE- CIAL HANDLING in Section 3 of this instruction when han- dling printed circuit boards. GENERAL CLEANING AND WASHING If the printed circuit board needs minor cleaning: Remove dust and residue from the printed circuit board sur- face using clean, dry, filtered compressed air or an antistatic...
- Page 67 MAINTENANCE ® Checking Connections Check all signal wiring, power and ground connections within the cabinet to verify their integrity. When checking connec- tions, always turn a screw, nut or other fastening device in the direction to tighten only. If the connection is loose, it will be tightened.
- Page 68 SECTION 7 - REPAIR/REPLACEMENT PROCEDURES INTRODUCTION Repair procedures are limited to module replacement. If an INFI-NET to computer interface module fails, remove and replace it with another. Verify that the replacement module dipswitch and jumper settings are the same as those of the failed module.
- Page 69 REPAIR/REPLACEMENT PROCEDURES ® TERMINATION UNIT OR MODULE REPLACEMENT PROCEDURES To replace the following termination devices, refer to the appro- priate instructions for step by step replacement procedures and spare parts information: NTCL01 Communication Termination Unit. • NICL01 Communication Termination Module. •...
-
Page 70: Spare Parts List
SECTION 8 - SUPPORT SERVICES INTRODUCTION Bailey Controls is ready to help in the use and repair of its products. Contact the nearest sales office to make requests for sales, applications, installation, repair, overhaul and mainte- nance contract services. REPLACEMENT PARTS AND ORDERING INFORMATION When making repairs, order replacement parts from a Bailey Controls sales office. -
Page 71: A-1. Ntcl01 Connector And Jumper Locations (Revision F Or Greater
APPENDIX A - NTCL01 TERMINATION UNIT CONFIGURATION INTRODUCTION The INNIS01 Network Interface Slave Module (NIS) can use the NTCL01 Communication Termination Unit (TCL) for termina- tion. Jumpers on the TCL unit select the type of cable used to connect the NIS module to an INFI-NET system. Refer to the NTCL01 instruction for complete information. -
Page 72: A-2. Ntcl01 Coaxial Cable Connections To Innis01 Modules
NTCL01 TERMINATION UNIT CONFIGURATION ® NTCL01 LOOP2 NKLS01 NKLS11 8 7 6 5 4 3 2 1 INNIS01 8 7 6 5 4 3 2 1 IN FROM LOOP +24 V LOOP1 NKTL01-3 NTCL01 LOOP2 NKCL01 NKLS01 NKCL11 NKLS11 8 7 6 5 4 3 2 1 INNIS01 8 7 6 5 4 3 2 1 NKTL01-3... -
Page 73: Ntcl01 Jumper Settings For Revision D And E
NTCL01 TERMINATION UNIT CONFIGURATION Table A-1. NTCL01 Jumper Settings for Revision D and E Twinaxial Cable Coaxial Cable Jumper Jumper Number Jumper Settings Settings J5 - J12 2 - 3 2 - 3 J13 - J18 1 - 2 2 - 3 Table A-2. -
Page 74: B-1. Nicl01 Connector And Jumper Locations (Revision D Or Greater
APPENDIX B - NICL01 TERMINATION MODULE CONFIGURATION INTRODUCTION The INNIS01 Network Interface Slave Module (NIS) can use the NICL01 Communication Termination Module (ICL) for termina- tion. Jumpers on the ICL module select the type of cable used to connect the NIS module to an INFI-NET system. Refer to the NICL01 instruction for complete information. -
Page 75: B-2. Nicl01 Coaxial Cable Connections To Innis01 Modules
NICL01 TERMINATION MODULE CONFIGURATION ® NICL01 LOOP 1 NKTL01-3 NKLS02/12 INNIS01 LOOP 2 NKCL01/11 NICL01 NKTL01-3 LOOP 1 LOOP 2 NKTT01/11 NICL01 LOOP 1 LOOP 2 T00333A Figure B-2. NICL01 Coaxial Cable Connections to INNIS01 Modules NICL01 LOOP 1 NKLS02 NKLS12 INNIS01 LOOP 2... -
Page 76: Nicl01 Jumper Settings For Revision C
NICL01 TERMINATION MODULE CONFIGURATION Table B-1. NICL01 Jumper Settings for Revision C Twinaxial Cable Coaxial Cable Jumper Jumper Number Jumper Settings Settings J5 - J12 2 - 3 2 - 3 J13 - J18 1 - 2 2 - 3 Table B-2. -
Page 77: Nimf01/02 Dipshunt Configuration For Direct Connection To A Host Computer
APPENDIX D - NIMF01/NIMF02 TERMINATION MODULE CONFIGURATION INTRODUCTION The INICT01 INFI-NET to Computer Transfer Module (ICT) uses the NIMF01 Multi-Function Controller Termination Module for termination. The NIMF02 Multi-Function Controller Termina- tion Module is required when terminating redundant inter- faces. The dipshunt configurations shown in Figures D-1, D-2, D-3, and apply to both NIMF01 and NIMF02 modules. -
Page 78: Nimf01/02 Dipshunt Configuration For Direct Connection To A Modem
NIMF01/NIMF02 TERMINATION MODULE CONFIGURATION ® Figure shows the dipshunt configuration required when connecting an ICT module (DCE) directly to the host computer (DTE). Figure shows the dipshunt configuration required when connecting an ICT module (DTE) to a modem (DCE). Fig- shows the dipshunt configuration required to interface to a mainframe computer (VAX). -
Page 79: Nimf01/02 Dipshunt Configuration For Direct Connection To Mainframe Computer
NIMF01/NIMF02 TERMINATION MODULE CONFIGURATION +24 VDC DB-25 PIN ASSIGNMENTS RI/22 FUNCTION 4 TO 5 J1-J11 STD/14 PORT 1 +V/9 -V/9 SRD/16 J1 PIN BASY/25 +24 VDC DB-25 PIN ASSIGNMENTS BASY/25 J2 PIN +V/9 -V/9 SRD/16 PORT 2 RI/22 FUNCTION 4 TO 5 J1-J11 STD/14 TERMINAL PORT... -
Page 80: Nimf01/02 Dipshunt Configuration For Diagnostic Terminal
NIMF01/NIMF02 TERMINATION MODULE CONFIGURATION ® +24 VDC DB-25 PIN ASSIGNMENTS BASY/25 +V/9 -V/9 SRD/16 J2 PIN PORT 2 RI/22 FUNCTION 4 TO 5 J1-J11 STD/14 TERMINAL PORT PORT 1 DIAGNOSTIC TERMINAL (PORT 2 ONLY) PORT 2 PRINTER PORT T00376A Figure D-4. NIMF01/02 Dipshunt Configuration for Diagnostic Terminal INTRODUCTION D - 4 I-E96-610A... -
Page 81: D-5. Nimf01/02 Db-25 Connector Pin Assignments And Rs-232-C Signals
NIMF01/NIMF02 TERMINATION MODULE CONFIGURATION TRANSMIT DATA RECEIVE DATA REQUEST TO SEND CLEAR TO SEND +24V RECEIVED LINE SIGNAL DETECT 2 TRANSMIT DATA 3 RECEIVE DATA 4 REQUEST TO SEND 5 CLEAR TO SEND 8 RECEIVED LINE SIGNAL DETECT 9 + VOLTS SDCE 12 SECONDARY RECEIVE SIGNAL DETECT 16 SECONDARY RECEIVE SIGNAL... -
Page 82: Dte Jumper Configuration For Ntmp01 Termination Unit
APPENDIX E - NTMP01 TERMINATION UNIT CONFIGURATION INTRODUCTION The INICT03 INFI-NET to Computer Transfer Module (through the IMMPI01 Multi-Function Processor Interface Module (MPI) can use the NTMP01 termination unit for termination. Jump- ers on the TMP unit configure the two RS-232-C ports for data terminal equipment (DTE) or data communication equipment (DCE). -
Page 83: Dce Jumper Configuration For Ntmp01 Termination Unit
NTMP01 TERMINATION UNIT CONFIGURATION ® J1 AND J2 DB25-3 TXD-A RXD-A DB25-2 RTS-A DB25-4 DB25-5 CTS-A TP25052B . Figure E-2. DCE Jumper Configuration for NTMP01 Termination Unit J1 AND J2 DB25-3 TXD-A RXD-A DB25-2 RTS-A DB25-4 DB25-5 CTS-A TP22115A Figure E-3. NTMP01 Nonhandshake Jumper Configuration INTRODUCTION E - 2 I-E96-610A... -
Page 84: E-4. Ntmp01 Loopback Jumper Configuration
NTMP01 TERMINATION UNIT CONFIGURATION J1 AND J2 DB25-3 TXD-A RXD-A DB25-2 RTS-A DB25-4 DB25-5 CTS-A TP22116A Figure E-4. NTMP01 Loopback Jumper Configuration +12 V J6 AND J8 DB25-6 J5 AND J9 DB25-8 J7 AND J10 DB25-20 J4 AND J3 PROT-GND DB25-1 DB25-7 NOTE:... -
Page 85: Ntmp01 Jumpers J14 Through J17 Configuration
NTMP01 TERMINATION UNIT CONFIGURATION ® DIGIN 1 (+) DIGIN 1 (+) CTSB (+) CTSB (+) DIGIN 1 (-) DIGIN 1 (-) CTSB (-) CTSB (-) HANDSHAKE DIGITAL I/O TP25216B Figure E-6. NTMP01 Jumpers J14 through J17 Configuration STATION MFP2 COM. B ACTIVE NTMP01 MFP2... -
Page 86: Dte Jumper Configuration For Nimp01 Termination Module
P7 is used instead of connector P5. NOTES: RS-232-C port connections on the IMP module are through DB-9 connectors. Use Bailey Controls cable NKMR02 to connect a standard piece of equipment (computer or printer with a DB-25 con- nector) to the IMP module. -
Page 87: Dce Jumper Configuration For Nimp01 Termination Module
NIMP01/NIMP02 TERMINATION MODULE CONFIGURATION ® J1 AND J2 TXD-A DB9-2 RXD-A DB9-3 RTS-A DB9-7 DB9-8 CTS-A TP22147A . Figure F-2. DCE Jumper Configuration for NIMP01 Termination Module J1 AND J2 DB9-2 TXD-A RXD-A DB9-3 RTS-A DB9-7 DB9-8 CTS-A TP22149A Figure F-3. NIMP01 Nonhandshake Jumper Configuration J1 AND J2 DB9-2... -
Page 88: Nimp01 Jumpers J5 Through J10 Configuration
NIMP01/NIMP02 TERMINATION MODULE CONFIGURATION +12 V J19 AND J20 DB9-8 J6 AND J8 DB9-6 J5 AND J9 DB9-1 J7 AND J10 DB9-4 NOTES: 1. JUMPERS J20, J8, J9 AND J10 RELATE TO CONNECTOR P6. DB9-5 2. JUMPERS J19, J6, J5 AND J7 RELATE TO CONNECTOR P5. - Page 89 NIMP01/NIMP02 TERMINATION MODULE CONFIGURATION ® CHASSIS GROUND SYSTEM COMMON +24 VDC TERMINAL PORT (RS-232-C) PRINTER PORT (RS-232-C) RS-485 PORT SPARE DIGITAL INPUT P8´ SERIAL LINK LINK B FOR STATIONS FUSE F1 LINK A IF REQUIRED NIMP02 REDUNDANCY CABLES ATTACH HERE TP50354B Figure F-7.
- Page 90 Index Abbreviations............. 1-6 Glossary..............1-6 Computer interface commands IMMPI01 Configuration ............2-6 Configuration............3-17 Data acquisition ........... 2-5 Description ............1-4 Process control ............ 2-6 Edge connectors ..........5-6 System status ............2-6 Installation ............3-19 Configuration Replacement procedures ........7-1 IMMPI01 ............
- Page 91 ® Index (continued) INNIS01 NIMP01/02 termination module ......... F-1 Configuration ............3-2 Nomenclature ............1-6 Description ........... 1-2, 2-1 NTCL01 termination unit..........A-1 Edge connectors ..........5-3 NTMF01 termination unit ........... C-1 Error codes............5-1 NTMP01 termination unit........... E-1 Installation ............3-7 LEDs..............
- Page 92 Telefax 39-10-6582-941 Telephone 49-69-799-0 Telefax 65-292-9011 Telefax 49-69-799-2406 Form I-E96-610A Litho in U.S.A. 1293 Copyright © 1993 by Elsag Bailey Process Automation, As An Unpublished Work ® Registered Trademark of Elsag Bailey Process Automation ™ Trademark of Elsag Bailey Process Automation...
Need help?
Do you have a question about the INFI 90 and is the answer not in the manual?
Questions and answers