
Subscribe to Our Youtube Channel
Summary of Contents for Zeroplus Arduino starter kit with Logic Analyzer
- Page 1 Arduino starter kit with Logic Analyzer The best kit to get started with Arduino, coding and electronics!
- Page 2 Subject to statuory exception and the provisions relevant collective licensing agreements, no reproduction of any part may take place without the written premission of Zeroplus. Graphics & Artwork: Alberto Piganti Layout: David Antón Sánchez 2017 Zeroplus Technology Co. Ltd Printed in Taiwan.
- Page 3 Index What Is a Logic Analyzer? Software Installation and Introduction Logic Acquisition and Software Tutorial Serial Interface Experiment 1: LED Experiment 2: Photoresistor Experiment 3: Sensors Experiment 4: Find the Key Experiment 5: Temperature Controlled DC Motor Experiment 6: LCD Experiment 7: Keyboard Experiment 8: I2C Protocol - Control the LEDs...
- Page 4 This book is intended for hobbyists, students and anyone who has an interest in electronics, Arduino programming, or logic acquisition. There are twelve chapters. The first two chapters present the logic analyzer and ZP Studio software. The third chapter teaches how to properly capture a digital signal.
-
Page 5: What Is Inside The Box
WHAT IS INSIDE THE BOX? The box contains a Zeroplus LAP Educator 8-channel logic analyzer bundled with an Arduino UNO and a number of modules, components and accessories that will allow you to do all the experiments in this book... -
Page 6: Modules & Accessories
MODULES & ACCESSORIES 1 x LAP Educator 8-channel PC-based logic analyzer 1 x Arduino UNO rev3 ATmega328P-based microcontroller board 1 x USB Bridge 1 x LCD1602 LCD Converts type-A to Display module type-B USB 1 x I2C RGB LED 1 x Sound Sensor I2C-controlled LEDs Detects sound... - Page 7 MODULES & ACCESSORIES 10 x Test hook Use them to connect to flying leads 1x8 and 1x2 and 1x1 Female to female jumpers Provided with the LAP Educator 1 x USB A-B Cable For the Arduino UNO 1 x Type A-mini B connector For the LAP Educator 20 x Male to male jumpers Breadboard to Arduino connections...
- Page 8 COMPONENTS 1 x 3V DC Motor 5 x LED 1 x Photoresistor 2 x 10⁴ μF Capacitor 1 x 1N4148 Diode 4 x Push-button 1 x LM335 1 x BC337 NPN Temperature Transistor 4 x 10kΩ Resistor Sensor 2 x 2.2kΩ Resistor 1 x 10kΩ...
- Page 9 BREADBOARD Breadboards perfect creating temporary prototypes experiments. • strips (bue red) provide power electronic components. There is one for ground (-) and one for a supply voltage (+). • Terminal links (in green) connect smaller areas together. 1 x Breadboard Links are connected together internally as shown here...
- Page 11 logic analyzer electronic instrument that captures and displays multiple signals from a digital circuit and helps monitor and analyze the operation of the system. How does a logic analyzer compare to oscilloscope? Oscilloscopes mainly used analyzing the characteristics of analog signals such as, waveforms, amplitude, frequency, or phase, but they can’t handle the complexity of digital circuits or a large number of signals.
- Page 12 LAP EDUCATOR The LAP Educator is a very simple 8-channel logic analyzer with an all-new UI. Users can easily learn Arduino programming and work with the sensors and modules included with the LAP Educator. CONNECTIONS WITH THE ARDUINO UNO...
-
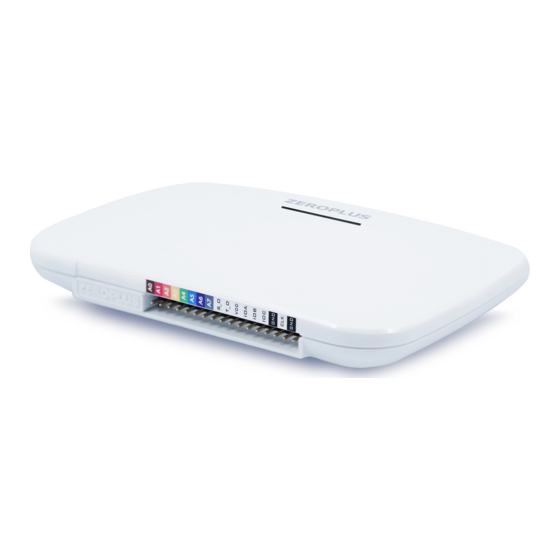
Page 13: Port Overview
PORT OVERVIEW... - Page 15 DOWNLOADING AND INSTALLING ZP-Studio Download the latest version of ZP-Studio from our website: www.zeroplus.com.tw/logic-analyzer_en/technical_support.php In the drop-down menu Product choose Arduino starter kit with logic analyzer. Click on Search and click on the Software download link.
- Page 16 Extract the files you have downloaded and open setup.exe Step1. Click on Next Step2. Accept the license agreement Step3. Enter your name and the name of your organization Step4. Click on Next Step5. Click on Install Once the installation is finished the Device Driver Installation Wizard will pop up Step6.
- Page 17 ARDUINO SKETCHES When you downloaded ZP-Studio you also downloaded the sketches needed for each experiment. Look for a folder named Arduino sketches. There is a total of 9 files. Each file corresponds to a particular chapter of the book (except for the chapter Keyboard which doesn’t require the Arduino).
-
Page 18: Getting To Know The Interface
GETTING TO KNOW THE INTERFACE Option menu Sampling settings Start capturing Waveform area Quick access panels Channels Tabs... -
Page 19: Sampling Settings
SAMPLING SETTINGS Trigger level: Sets threshold Sample rate: Set voltage. to Vpp/2. For it to minimum 4 example, if the voltage of the device is times the 0 - 5V, set the trigger level to 2.5V frequency of the signal to be Note: Vpp (peak-to-peak) is the differ- analyzed. - Page 20 GETTING TO KNOW THE INTERFACE At the top right corner of the screen you can Start Sampling Settings buttons. Start is used for starting an acquisition capture and Sampling Settings contains basic settings for the logic analyzer The Option Menu is located at the Protocols can be selected by top right corner, represented by clicking on the “+”...
-
Page 21: Begin Analyzing
BEGIN ANALYZING Set the sample rate, memory depth and trigger level Set the trigger condition Start capturing Decode protocols Check the decoded result on the tab Packet List... -
Page 22: Compression Function
COMPRESSION FUNCTION Many common protocols, including UART, SPI, I2C and CAN bus etc. rely on a simple communication architecture and have a wide application range. But when issues occur, you will need to track and analyze a lot of signals, which sometimes proves to be a difficult task due to insufficient memory depth. -
Page 23: Comparison Function
COMPARISON FUNCTION Files Comparison (located in the menu Option) examines how and where two files differ from each other . The number of differences between the two files is listed channel by channel in the dialog box, and new, curly traces in the waveform area evidence where the two signals differ . -
Page 24: Useful Tips
USEFUL TIPS Switch Repeated Capture Mode right-clicking on the Start Capture button You can choose what information to display right-clicking on the waveform area cursors are used for measuring the distance between two events (unit shown in seconds or number of sample points). - Page 25 ARDUINO PLATFORM & ARDUINO UNO BOARD Arduino is an open-source electronic prototyping platform based on flexible, easy- to-use hardware and software, and this is very good for beginners. The Arduino UNO is a microcontroller board based on the ATmega328. It has 14 digital input/output pins (of which 6 can be used as PWM outputs), 6 analog inputs, a 16 MHz ceramic resonator, a USB port, a power jack, an ICSP header, and a reset button.
- Page 26 DOWNLOADING AND INSTALLING THE ARDUINO IDE Download the Arduino IDE from www.arduino.cc/en/Main/Software Open the file you have downloaded. Step3. Click on Install Step1. Click on I Agree Step2. Click on Next Step4. Click on Close You can find more information about Arduino at www.arduino.cc...
- Page 27 THE ARDUINO IDE Verify: Checks your code and compiles it Upload: Compiles your code and Sketch Name: Name of the uploads it to the Arduino UNO sketch currently open New: Creates a new sketch Open: Opens an existing sketch Save: Saves the current Editor Window area: Edit your sketch in your sketchbook code in this area...
- Page 28 CONNECTING THE ARDUINO TO THE COMPUTER VIA THE IDE Each time you start the Arduino IDE you have to virtually connect your board to your computer. First, select Arduino/Genuino Uno in the menu Tools > Board. Second, choose the port to which your board is connected to. Sometimes the IDE fails to upload the code to the Arduino.
- Page 29 UPLOADING SKETCHES TO THE ARDUINO In this Book, you will have to follow the procedure below upload source code to the Arduino UNO Open the sketch file corresponding to the relevant chapter Verify and compile Upload to the Arduino UNO...
- Page 31 • Learn basic concepts of logic acquisition • Introduce import ant software functions...
- Page 32 PROCEDURE Step 1: • Connect a male-to-male jumper to one channel of the logic analyzer and to one pin of the Arduino Uno as shown on the diagram. Logic Analyzer Arduino UNO • Open the sketch containing the source code of this experiment and upload it to the Arduino Uno.
- Page 33 Sending 1 to the Arduino via the serial monitor generates a clock signal on the pin 8. • In ZP Studio you can see a signal on the channel A0. Note that the first rising edge (our trigger condition) is marked by the red trigger bar.
- Page 34 • In the serial monitor, enter 2 and click on Send. • In ZP Studio, set the trigger to rising edge on the channel A1 and keep other settings unchanged. • Now we need to group the channels into what is called a bus. Right click on the channel A1 and select Add channel/bus.
- Page 35 Result: We generated a 6 bits counter. Each channel represents one bit. The value of the counter is displayed on the bus channel. Step 3: • Connect the logic analyzer to the Arduino UNO as shown on the diagram. Logic Analyzer Arduino UNO •...
- Page 36 Result: In ZP Studio, zoom in on the bus when the signals transition. You should observe a spurious transition state for a brief period of time These transitional states are caused by the delay between the channels and they interfere with the decoding. You can use the Noise filter in the option menu to remove them.
- Page 37 bars, displayed in sample point or seconds depending on the unit you chose to display. This distance is the duration of the artifact that we want to filter. In the Noise Filter dialog box select the bus, click on the right arrow and enter the duration you measured. Verify that the transitional values have disappeared.
- Page 38 • In the Serial monitor, enter 4 and click on Send. • In ZP Studio’s Settings, click on the external clock icon. Set the frequency to 480KHz and select rising edge. • Set the trigger to rising edge on the channel connected to the pin 9 (channel A2).
- Page 39 state analysis we observe the behavior of the system as it is seen from the point of view of the logic gates. It is appropriate for capturing synchronous signals. In this type of acquisition, signals are sam pled on the edges of the device’s clock - either when rising, falling or both.
-
Page 40: Code Explanation
CODE EXPLANATION • DDRB = B11111111. Sets all the pins of the port B (pins 8 to 13) as outputs. REAL LIFE APPLICATIONS • Logic analyzers are used by engineers working with digital circuits, to observe signals, to ensure data are correctly transmitted, and to track down bugs. - Page 41 REMARKS 1. As a rule of thum b, sam ple a digital signal at a frequency at least 4 tim es the signal’s frequency. When the frequency of the target signal is unknow n, choose a sam ple rate so that there are a minim um of four sam ples points per cycle (2 when High, 2 when Low).
- Page 43 • Introduce the concept of protocol • Visualize packets with a protocol decoder • Communicate with the Arduino board via the serial monitor...
- Page 44 DESCRIPTION The serial monitor of the Arduino communicates with the computer using a serial protocol. A protocol is a set of rules that a signal follows in order to transmit data. If everyone agrees on the same set of rules (i.e protocol) it becomes easier to communicate with other devices.
- Page 45 PROCEDURE • Connect the logic analyzer to the pin Tx. Logic Analyzer Arduino UNO • in ZP Studio, add the UART decoder. Set the trigger to rising edge on the channel A0, then click on Run • In the menu Option m> Numeric base/Encoding, change how data are displayed (decimal, binary, hexadecimal, etc).
- Page 46 CODE EXPLANATION • pinMode(pin8, INPUT_PULLUP) The pin is “pulled up” so that by default it is at a logic 1. Connect it to the ground to force it to 0.
- Page 47 REAL LIFE APPLICATIONS • The serial port has slowly disappeared from consumer electronics, but is still in use in industrial applications. Also, most microcontrollers such as the one embedded on your Arduino board is equipped with a UART. • Pictured below, the RS-232 connector was widely used before USB became a standard.
- Page 49 • Familiarize yourself with the Arduino language • Connect the Arduino, the breadboard and a few basic components together to create your first circuit...
- Page 50 DESCRIPTION An LED is a component that shines when a current flows through it. Here we use the Arduino to light up an LED when a pushbutton is pressed down and switch it off when the button is released . The pins on the Arduino can be configured either as inputs to receive information from the outside world or as outputs to send signals to other devices and components.
- Page 51 Digital PIN 9 Digital PIN 8 10kΩ 330Ω...
- Page 53 CODE EXPLANATION • void setup(){} Configures the pins, initializes the variables, etc. It runs once. • pinMode(buttonPin, INPUT) A pin is either an input or an output. • void loop(){} Write your code between the brackets. It loops until the board is reset or powered off. •...
- Page 54 REAL LIFE APPLICATIONS • Pushbuttons LEDs everywhere. Think keys your keyboard, buttons on your Smartphone, lights indicating a received notification, LED flashlights, etc.
- Page 55 REMARKS 1. LEDs are polarized. In other words there is only one direction in which you can connect them, as opposed to non-polarized components which are symmetrical. The longest lead is called the anode (+) and the shortest lead the cathode (-). Sometimes the leads have been cut and for that reason they should not always be trusted.
- Page 57 • Use a photoresistor • Get and manipulate values Obtained from a sensor x 11...
- Page 58 DESCRIPTION A photoresistor is a resistor whose value varies when exposed to light. In this experiment we visualize in ZP Studio the variation of light sensed by the photoresistor. Because the logic analyzer captures only digital signals only and the sensor outputs an analog signal, we have to convert this analog signal into a digital signal that can be acquired by the logic analyzer.
- Page 59 Analog PIN A0 10kΩ...
- Page 61 PROCEDURE • Connect the logic analyzer to the pins 3 to 9. Logic Analyzer Arduino UNO • In ZP Studio, set the trigger to rising edge on the channel A0, the sample rate to 25KHz, the sample depth to 32kb, the trigger level to 2.5V and the trigger position to 10%.
- Page 62 • light = constrain(light, 0, 100) constrain() forces the value to remain within a certain range. REAL LIFE APPLICATIONS • Light sensors Smartphones automatically adjust screen brightness to the ambient light. HELLO HELLO ZEROPLUS! ZEROPLUS!
- Page 63 REMARKS • The Arduino can read analog waveforms on the pins A0 to A5 but it cannot generate analog signals.
- Page 65 • Capture light and sound with a photoresistor and a sound sensor • USE the function millis() as an alternative to delay() x 12...
- Page 66 DESCRIPTION Sensors allow computers and machines to interact with our world. In this experiment we provide eyes and ears to the Arduino board. We start by reading the value from each sensor. Then we compare it to a reference value and decide what to do based on the result.
- Page 67 Digital PIN 9 Digital PIN 4 Digital PIN 5 Sound Sensor Analog PIN A0 330Ω 10kΩ 330Ω...
- Page 68 Sound Sensor...
- Page 69 CODE EXPLANATION • unsigned long currentMillis = millis() When called, this function returns the number of milliseconds elapsed since the program started. • if(soundSensor == 1){ soundLed = HIGH; soundStartTime = currentMillis. If the sensor detects a sound, we set the flag SoundLed. We also save the time it occurred.
- Page 70 REAL LIFE APPLICATIONS • Microphones are sound sensors.
- Page 71 REMARKS • We could have called delay(), but delay() prevents the microcontroller to perform other tasks in the meantime. Using millis() the way we do leaves the processor free to monitor the photoresistor.
- Page 73 • Use the logic analyzer to solve a problem...
- Page 74 DESCRIPTION The LED lights up when a certain number is read on the inputs of the Arduino board. Our goal is to discover that number with the help of the logic analyzer. We opted for a photoresistor to sweep through the whole range of values[1].
- Page 75 Digital PIN 13 Analog PIN A0 10kΩ 330Ω...
- Page 77 PROCEDURE • Connect the components as shown on the schematic. • Connect the channel A0 of the logic analyzer to the anode of the LED and the channels A1 to A5 of the Logic Analyzer to the pins 3 to 7 of the Arduino UNO board. Logic Analyzer Arduino UNO •...
- Page 78 CODE EXPLANATION • unknownValue = random(0, 31) Generates a pseudo-random number • calibrate() This function calibrates the sensor to the light in your environment. It does so by calling adjustSentivity() several times and runs once in the setup() loop.
- Page 79 REAL LIFE APPLICATIONS • Most smartphones embed a proximity sensor that turns off the screen during a call when it approaches your ear. It avoids accidental touches. A light sensor is preferred over a capacitive sensing based solution in cost-effective projects. REMARKS •...
- Page 81 • Control a DC motor with a PWM • Retrieve the temperature FROM a temperature sensor x 11...
- Page 82 DESCRIPTION When it gets hot you surely like to turn on a fan. This experiment is based on the same principle. The sensor monitors the room temperature and turns the motor on or off if the room gets above or below a certain temperature. The motor’s rotation speed is controlled by a PWM and the power is delivered to the motor through a transistor...
- Page 83 Battery Pack 104uF 1N4148 Analog PIN A0 2.2kΩ Digital PIN 9 LM335 330Ω LM335 BC337...
- Page 84 1N4148 BC337 LM335...
- Page 85 CODE EXPLANATION • analogWrite(motorPin, 160) Although the Arduino board cannot generate an analog signal, the “analog pins” (A0 to A5) can generate a PWM. That’s why we use them in this experiment because DC motors can easily be controlled with a PWM. •...
- Page 86 REAL LIFE APPLICATIONS • Inside most computers there is a fan placed on top of the CPU, often coming with a radiator. That fan adjusts its rotation speed according to the temperature of the CPU. That is why your computer emits a hissing sound when you are watching a movie, playing a video game, or performing any task that causes the CPU to heat up.
- Page 87 REMARKS 1. PWM or pulse-width modulation is a type of digital signal used for encoding a message into a pulsating signal that is mainly used to allow the control of the voltage. Digital signals can only be High or Low, but using a PWM, changing the proportion of time the signal is High compared to when it is Low over a consistent time interval, the output voltage can be set to an in-between state.
- Page 89 Display characters on an LCD. Use the logic educator to capture and decode a bus with a protocol decoder. x 16...
- Page 90 DESCRIPTION We send a text to be displayed on the LCD screen via the serial monitor. At the same time we capture the signals and use a special function called Image Decode to decode and display the characters in ZP Studio.
- Page 91 LCD Contrast D0-D7 Data bits 0 to 7 Enable signal Read or Write Register select (com or data) Adjust LCD contrast Ground...
- Page 92 PROCEDURE • Connect the logic analyzer to the pins D4 to D7 and RS, R/W, EN of the LCD. Logic Analyzer • In ZP Studio, set the trigger to rising edge on the pin EN. • In ZP Studio, add the protocol decoder LCD1602. •...
- Page 93 • In the serial monitor, type a few words and click on Send. • Here is what you should see:...
- Page 94 You can use the table below to match the values shown in ZP studio with the characters.
- Page 95 ZP Studio has a function that decodes and displays the words you typed and sent to the LCD screen. Rightclick on the bus and select Image Decode. Then click on the button Image display and then on the play button. Result:...
- Page 96 CODE EXPLANATION • #include <LiquidCrystal.h> Calling a library allows us to use some functions to command the LCD. • LiquidCrystal lcd(12, 11, 5, 4, 3, 2) Maps the physical pins with the pins defined in the library. • Serial.begin(9600) Initializes the serial port. 9600 is the rate, in Bauds, at which data are transmitted over the bus.
- Page 97 REAL LIFE APPLICATIONS • Most displays surrounding us rely on LCD screens. For example, TV screens, the screen of a printer or of a camera.
- Page 99 • Capture USB packets • Use the mode Compression to extend the capture length.
- Page 100 DESCRIPTION Getting access to the I/Os of a device is not always a simple task. An extra board comes in handy to provide external pins for a measurement instrument. Suppose you are making a new USB keyboard and you want to make sure that your implementation of the USB protocol is faultless.
- Page 103 PROCEDURE • Connect your keyboard, your computer and the Logic Educator as shown on the previous page. • Connect the channel A0 of the logic analyzer to the pin D+ and the channel A1 to D- as shown below. Logic Analyzer Arduino UNO •...
- Page 104 • In ZP Studio, open the packet list and click on the icon DT0 (see right) to filter out irrelevant packets. • Your packets should be identical to those below except for the values in Data: • According documentation available Implementers Forum’s website the number 11 corresponds to the encoded value for ‘h’...
- Page 105 REAL LIFE APPLICATIONS • USB is ubiquitous in modern consumer electronics. Keyboards, mouse devices, USB sticks, countless gadgets, all rely on the USB port to either transmit data or to draw their power from it. REMARKS • See the conversion table, page 53: http://www.usb.org/developers/hidpage/Hut1_12v2.pdf...
- Page 107 • UNDERSTAND the protocol I2C. • Reverse engineer a protocol with a logic analyzer. x 13...
- Page 108 DESCRIPTION In this experiment we are going to learn how to decipher an unknown protocol. This procedure is called reverse engineering because we look at the results to understand the logic behind the signals. A logic analyzer is the perfect instrument for that type of tasks. Here we are going to use a very common protocol called I2C.
- Page 109 We are going to use the logic analyzer to visualize how the signals change when the buttons are pressed and correlate these changes with the response of the I2C LEDs device.
- Page 110 PROCEDURE Upload the code to the Arduino board. Connect the channel A0 of the logic analyzer to the pin SDA and the channel A1 to the pin SCL of the I2C RGB LEDs board. Logic Analyzer I2C RGB LED Board In ZP Studio, set the trigger condition on A0 to rising edge.
- Page 111 Save this new file under another name. 10. Open the first file. 11. Open the function File comparison (menu Option > File comparison). As a reference file choose the first file you saved, as a contrast file choose the last file you saved. Check the boxes ”Show files horizontally”, ”Synchronize...
- Page 112 You can see the differences highlighted by little orange wavelike shapes. might have noticed that color LEDs changed when pressed second button logic analyzer triggered when pressed first button. We can make the hypothesis that the first button used send commands requests second...
- Page 113 15. Notice that the color of the LEDs hasn’t changed even though we pressed the button Data. 16. Save file under name function File Comparison to compare it with the previously saved file. The result is as below:...
- Page 114 We can see that the new acquisiton (top) is shorter than the previous one. Note how the pattern looks rather similar at the beginning and at the end. We’re going to see why. 17. On the I2C module there is a 2-position blue DIP switch. Pull the two levers into this position: 18.
- Page 115 Observe that the message is now longer and there is only one segment highlighted. We can conclude that the LEDs receives or not the data depending on the position of the switches. This looks a lot like an address. Many protocols assign an address to each device connected on the same bus so they can communicate to each other easily because only the device matching with the address in the request will acknowledge that request.
- Page 116 25. Now press again the button connected to the pin 2 and press the button Data and Send. The color changed again. 26. Once again press the button connected to the pin 2 and the buttons Send. You can see another 4 digits number on the serial monitor, different from the previous one.
- Page 117 and when in position Write it allows to change the value of the LEDs, i.e. their color. Note also that there are 4 digits and 4 LEDs. So we can guess that each digit corresponds to the state of an LED. 28.
- Page 118 34. Use the function file comparison and compare the last two captures you’ve made. 35. See the result below. There are several things to observe. First in position Read (bottom) the frame is longer. Second, we remark a pattern in the data. There are 4 pulses equally spaced. Therefore, we can assume these four data correspond to the four digits printed on the serial monitor.
- Page 119 complete, add the I2C protocol decoder. 36. You should see something as below. What we didn’t have time to discover are the bits Start, Address acknowledge, Data acknowledge and Stop. Start and Stop delimit the beginning and the end of the message. The bits Acknowledge tell us whether the address, read/write bits and the data have been correctly received.
- Page 120 CODE EXPLANATION • setInterrupts() Enables interrupts on the pins connected to the buttons [1] [2] • ISR(PCINT0_vect) This is where we tell the microprocessor what actions to perform when an interrupt is called. It is best to keep it short so that the processor can quickly return to its normal state.
- Page 121 REAL LIFE APPLICATIONS • I2C is used in many systems. The Wiimote, for example, has a port that uses I2C to connect a peripheral device. REMARKS 1. An interrupt is an event which has the priority over the normal course of operations.
Need help?
Do you have a question about the Arduino starter kit with Logic Analyzer and is the answer not in the manual?
Questions and answers