Table of Contents
Advertisement
Quick Links
Welker
The information in this manual has been carefully checked for accuracy and is intended to be used as a guide for
the installation, operation, and maintenance of the Welker equipment described above. Correct operating and/or
installation techniques, however, are the responsibility of the end user. Welker reserves the right to make
changes to this and all products to improve performance and reliability.
© Copyright 2009, Welker Inc.
®
Instrument Regulators
Models
IR-1
IR-2
IR-4
IR-6
Installation,
Operation
Maintenance
Manual
13839 West Bellfort
Sugar Land, Texas 77498-1671
U.S.A.
Tel.: (800) 776-7267
Tel.: (281) 491-2331
Fax: (281) 491-8344
www.welkereng.com
&
Advertisement
Table of Contents

Related Manuals for Welker IR-1


Summary of Contents for Welker IR-1
- Page 1 Welker equipment described above. Correct operating and/or installation techniques, however, are the responsibility of the end user. Welker reserves the right to make changes to this and all products to improve performance and reliability.
- Page 2 This page intentionally left blank...
-
Page 3: Table Of Contents
3.2 Upper housing maintenance ................10 3.3 Lower housing maintenance ................11 ® ® ® Welker , Welker Jet , and WelkerScope are Registered Trademarks owned by Welker. IOM-025 Page 3 of 14 IR-1; IR-2; IR-4; IR-6 Rev: D Last Updated: 9/8/2009... -
Page 4: General
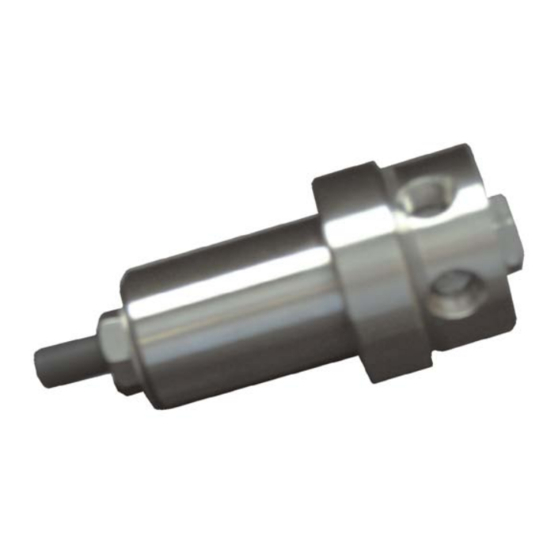
All ports are marked on the device accordingly. The IR-6, IR-2 and IR-1 series regulators are equipped with a piston, while the IR-4 is equipped with a diaphragm (see Figures 1 and 2). If the regulator is bolted together, it has a piston assembly. -
Page 5: Specifications
SPECIFICATIONS 1.3 Specifications The specifications listed in this section are generalized for this equipment. Welker can modify the equipment according to your company’s needs. However, please note that the specifications may vary depending on the customization of your product. Diaphragm Assembly... - Page 6 IR-2: 0-500 psi @ -20° F to 100 ° F (0-34 psi @ -29° C to 37° C) Output Range IR-1: 0-200 psi @ -20° F to 100 ° F (0-13 psi @ -29° C to 37° C) IR-4: 0-200 psi @ -20° F to 100 ° F (0-13 bar @ -29°...
-
Page 7: Installation & Operation Instructions
After unpacking the unit, check it for compliance and for any damages that may have occurred during shipment. Claims for damages caused during shipping must be initiated by the receiver and directed to the shipping carrier. Welker is not responsible for any damages caused from mishandling by the shipping company. - Page 8 Tighten the nut on the adjusting screw to secure it into place. 2.3.5 Check the entire system for leaks. 2.3.6 The regulator is now in operation. IOM-025 Page 8 of 14 IR-1; IR-2; IR-4; IR-6 Rev: C Last Updated: 9/8/2009...
-
Page 9: Maintenance Instructions
However, tools used will vary depending on model. • 3/16" Allen wrench • 1/4" Allen wrench • 6" adjustable wrench • Small screwdriver • Small, pointed instrument IOM-025 Page 9 of 14 IR-1; IR-2; IR-4; IR-6 Rev: C Last Updated: 9/8/2009... -
Page 10: Upper Housing Maintenance
Turn off the inlet supply pressure to the regulator inlet. 3.2.2 Disconnect the inlet supply from the regulator inlet port. 3.2.3 Disconnect the instrument from the regulator outlet port IOM-025 Page 10 of 14 IR-1; IR-2; IR-4; IR-6 Rev: C Last Updated: 9/8/2009... -
Page 11: Lower Housing Maintenance
Set the top spring guide (Part 16) back into place on top of the spring. 3.2.10 Reattach the spring housing (Part 7) securely. For the IR-4 series regulators, hand-tighten the housing. For the IR-1, 2, and 6 series, cross-bolt the eight socket head screws (Part 6). 3.3 Lower housing maintenance 3.3.1 Unscrew the flow ring (Part 15) from the regulator body (Part 13) (also see Figure 5). - Page 12 Guide the poppet into the seat. 3.3.9 Reattach the poppet spring and flow ring. 3.3.10 Tighten the flow ring securely. 3.3.11 The unit is now ready for reinstallation. IOM-025 Page 12 of 14 IR-1; IR-2; IR-4; IR-6 Rev: C Last Updated: 9/8/2009...
- Page 13 This page intentionally left blank.
- Page 14 13839 West Bellfort, Sugar Land, Texas 77498-1671 Phone: (281) 491-2331 Fax: (281) 491-8344 Toll Free: (800) 776-7267 Web Page: www.welkereng.com...
Need help?
Do you have a question about the IR-1 and is the answer not in the manual?
Questions and answers