Advertisement
Quick Links
OWNERS INSTRUCTION
MANUAL
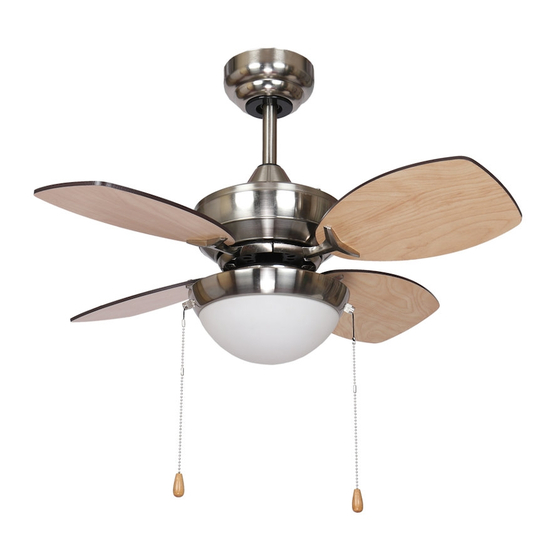
71CM/28"
Kompact
INSTALLATION
OPERATION
MAINTENANCE
CAUTION
READ INSTRUCTIONS CAREFULLY FOR SAFE
INSTALLATION AND FAN OPERATION. IF UNSURE CONSULT
A QUALIFIED ELECTRICIAN
SUITABLE FOR 230V/50 CYCLE ELECTRICAL SUPPLY
Enquiries on installing your fan please call our help line on
01959-564440
E-mail :
technical@fantasiaceilingfans.com
Advertisement

Subscribe to Our Youtube Channel
Related Manuals for Fantasia Kompact


Summary of Contents for Fantasia Kompact
- Page 1 OWNERS INSTRUCTION MANUAL 71CM/28” Kompact INSTALLATION OPERATION MAINTENANCE CAUTION READ INSTRUCTIONS CAREFULLY FOR SAFE INSTALLATION AND FAN OPERATION. IF UNSURE CONSULT A QUALIFIED ELECTRICIAN SUITABLE FOR 230V/50 CYCLE ELECTRICAL SUPPLY Enquiries on installing your fan please call our help line on...
- Page 2 IMPORTANT NOTES : Please minimise risk of electrical shock by switching off electricity supply at the main circuit breaker. And read the following point carefully. To ensure the success of the installation be sure to read the instructions and study the diagrams thoroughly before commencing.
- Page 3 Supplied Parts One fan motor assembly One hanger bracket fitted with termical block and top rubber washers One 6” drop rod & canopy One LED Light Kit One set of blade holders One set of wooden blade One screw-pack One installation booklet Tools and Materials Required Philips screwdriver Blade screwdriver...
-
Page 4: Part List
PART LIST Ceiling Hanger bracket Steel round washer Spring washer Wood screw Hanger ball Canopy Canopy ring Down rod Boss cover Upper housing Drop rod set screw Boss Motor Blade Blade holder Lower housing Switch housing Switch housing cap LED PCB Light kit Pull chain Glass... - Page 5 Installing the fan All electrical work should only be undertaken after disconnection of the power by removing fuses or turning off the circuit breaker to ensure all pole isolation of the electrical supply. Your fan can be installed in either of two options. It can be installed as a flush mount fan (Picture B), i.e.
- Page 6 2. Drop rod assembly Remove the cotter pin and cross pin from the drop rod boss of the fan. If a longer drop rod (12” to 72” rod) is going to be used transfer the ball joint and the earth wire to the longer rod.
- Page 7 2-1 Flush mount assembly Release 3 screws from upper housing, put the canopy onto the drop rod boss of the fan. Using the 3 upper housing screws to screw the canopy tight Please refer to the pictures . 3. Attaching the blades Attach the blade to the blade holder using the three blade set screws and fiber washers.
- Page 8 4. Attaching the light kit and glass Lossen the 3 screws on the switch housing. Connect the push connector of fan to connector of light wire. — Orange to orange — Blue to blue Attach the light kit to the switch housing and tighten it with the 3 screws.
- Page 9 FOR DROP ROD STYLE OF FAN: Lift the fan up to the hanger bracket, steer the ball in from the side of the bracket and lower it into the recess of the bracket. Rotate the ball around until the groove in the side of the ball aligns with the protrusion on the upper edge of the recess.
-
Page 10: Wiring Instructions
5. Wiring Instructions The fan now requires to be connected to your household supply in accordance with diagrams 1-3. Please note : Before installation ensure that you have all pole disconnection of the electricity supply and that all wiring is carried out in accordance with I.E.E. Regulations , current good practice, national and local electrical cod es. - Page 11 See Diagram 2 Remote Control operates Fan & Light - Remote control supplied separately not included Connection Switched Live Supply connects Brown on imput side of the receiver. Neutral Supply connects to the Blue Input of the receiver. Brown Output connects to the Brown Supply wire of the fan Blue Output connects to the Blue Supply wire of the fan Orange Output connects to the Orange Supply wire of the fan See Diagram 3...
-
Page 12: Product Disposal Instructions
Product Disposal Instructions This product has been classed as Electrical or Electronic Equipment and should not be disposed of with other household or commercial waste at the end of it’s working life. The Waste of Electrical and Electronic Equipment (WEEE) Directive (2002/96/EC) has been put in place to recycle products using best available precise and minimize the impact upon the environment. - Page 13 The ceiling fan itself, excluding accessories such as the Remote Control Transmitter and Receiver, is covered by a 10 year warranty. During this period, Fantasia Distribution Ltd will, at its discretion, repair or replace defective product. During this 10 years, the owner is responsible for labour costs incurred in removing and re-installing the fan, and for transport costs to Fantasia Distribution Ltd’s repair centre.
- Page 14 28”/71cm Kompact FANTASIA DISTRIBUTION LTD. Unit B. The Flyers Way, Westerham, Kent, TN16 1DE Tel : (01959) 564 440 Fax : (01959) 564 829 E-MAIL: info@fantasiaceilingfans.com...
- Page 16 Please cut out this warranty page and send it in an envelope to the address below. Alternatively please go to our website www.fantasiaceilingfans.com and fill in the warranty section there. FANTASIA DISTRIBUTION LTD. Unit B. The Flyers Way, Westerham, Kent, TN16 1DE Tel : (01959) 564 440 Fax : (01959) 564 829 E-MAIL: info@fantasiaceilingfans.com...
Need help?
Do you have a question about the Kompact and is the answer not in the manual?
Questions and answers