Table of Contents
Advertisement
Quick Links
PRISM M
Thank you for purchasing a Rosewill Case.
Please read the instruction manual before use and retain for future reference.
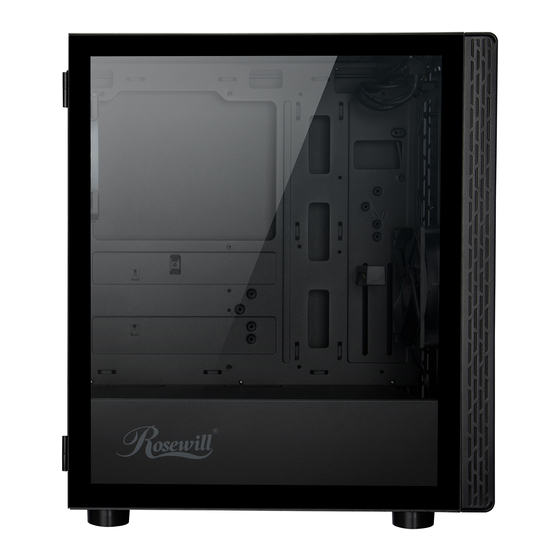
PRODUCT OVERVIEW
Disassembly Chart (components vary by country)
Top Dust Filter
Panel R
120 mm RGB
Double Ring Fan
SSD
Panel L
Cage
HDD
Cage
120 mm Black Fan
Front Panel
Dimensions: 208 x 455 x 390 mm (W x H x D)
390 mm
208 mm
1
Advertisement
Table of Contents

Related Manuals for Rosewill PRISM M


Summary of Contents for Rosewill PRISM M
- Page 1 PRISM M Thank you for purchasing a Rosewill Case. Please read the instruction manual before use and retain for future reference. PRODUCT OVERVIEW Disassembly Chart (components vary by country) Top Dust Filter Panel R 120 mm RGB Double Ring Fan...
-
Page 2: Accessory Kit
Accessory Kit Screw-A Screw-B Screw-C Nut Setter (6-32 x 6 mm) (M3 x 5 mm) (6-32 x 8 mm) Motherboard 3.5" HDD Standoff Installation Add-on Card 2.5" HDD/SSD Standoff Speaker Cable Tie Motherboard Motherboard Cable (6 pre-Installed) Management INSTALLATION GUIDE 1. -
Page 3: Install Power Supply
2. Install Power Supply 2-1. Set the power supply unit (PSU) at the bottom-rear of the case and secure with Screw-A (Figure 2). 3. Install Motherboard 3-1. Secure the motherboard onto the pre-installed standoffs with Screw-B (Figure 3). -
Page 4: Install Add-On Card
4. Install Add-on Card 4-1. Bend to remove the slot covers, then install the add-on card and secure with Screw-A (Figure 4). 5. Install 3.5”/2.5” HDD/SSD 5-1. Remove the thumb screws on the bottom of chassis to take out the HDD cage (Figure 5a). - Page 5 5-2. Install HDD/SSD onto the trays and secure with Screw-B or C (Figure 5b). Insert the trays back into drive cage and secure with thumb screws (Figure 5c). 5-3. Alternatively, you can also install 2.5” SSD on the right side of chassis (Figure 5d). 6.
- Page 6 RGB-2 (seven-color-blinking) 7-1. Liquid Cooling Radiator Installation The PRISM M supports the option of installing a 240 mm radiator in the front (Figure 7a) and a 240 mm radiator on the top (Figure 7b) to more effectively cool high-performance systems.
-
Page 7: Usb 3.0 Connector
TOP I/O CABLE PINOUT USB 3.0 CONNECTOR USB 2.0 CONNECTOR HD Audio CONNECTOR TOP I/O LED Mode Audio In Power Reset USB 3.0 USB 2.0 Audio Out... -
Page 8: Specifications Table
1 x Rear (optional) Physical Specifications Dimensions 8.19 x 17.91 x 15.35 in (W x H x D) Weight 12.13 lbs Technical Support Information techsupport@rosewill.com 1-800-575-9885 Please register your product at www.rosewill.com for complete warranty information and support for your product. PRISM M_B...
Need help?
Do you have a question about the PRISM M and is the answer not in the manual?
Questions and answers