Table of Contents
Advertisement
VSAT Installation and Monitoring
July 2007
Document No. DC-4491-00 Preliminary
Gilat Satellite Networks Ltd.
This document contains information proprietary to Gilat Satellite Networks Ltd. and may not be
reproduced in whole or in part without the express written consent of Gilat Satellite Networks Ltd. The
disclosure by Gilat Satellite Networks Ltd. of information contained herein does not constitute any
license or authorization to use or disclose the information, ideas or concepts presented. The contents of
this document are subject to change without prior notice.
Advertisement
Table of Contents

Summary of Contents for Gilat Satellite Networks SkyEdge II
- Page 1 This document contains information proprietary to Gilat Satellite Networks Ltd. and may not be reproduced in whole or in part without the express written consent of Gilat Satellite Networks Ltd. The disclosure by Gilat Satellite Networks Ltd. of information contained herein does not constitute any license or authorization to use or disclose the information, ideas or concepts presented.
-
Page 3: Table Of Contents
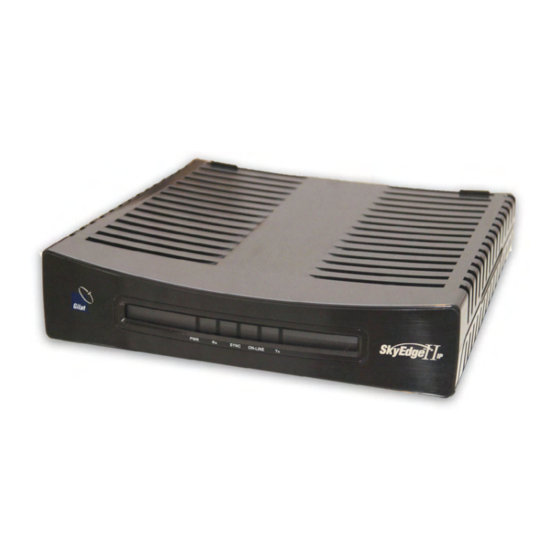
SkyEdge II VSAT Installation and Monitoring Contents 1. Introduction and Overview ....................1 1.1 Scope and Limitations .....................1 1.2 Background and Purpose ..................1 1.3 Inter-Facility Link (IFL) Cables.................2 1.3.1 Coaxial Cables....................2 1.3.2 LAN Cable ....................2 2. Configuring the VSAT ....................3 2.1 Data Required ......................3 2.2 Configuring SkyEdge VSATs via SkyManage Web Page .........3... - Page 4 SkyEdge II VSAT Installation and Monitoring Figures Figure 1: SkyEdge II IP VSAT (front view) ..............1 Figure 2: SkyEdge II IP VSAT (rear view) ............... 1 Figure 3: SkyManage Home Page .................. 4 Figure 4: Info Page Before Configuration................ 5 Figure 5: Telemetry Page ....................
- Page 5 Objectives This manual provides detailed instructions how to configure, install and monitor the operation of the SkyEdge II IP VSAT. How to Use This Manual This manual is to be used by a trained installer in order to configure and install a VSAT.
- Page 6 SkyEdge II VSAT Installation and Monitoring Conventions This manual uses the following conventions to convey instructions and information: Convention Description Boldface font Commands and keywords. Italic font The result of an instruction or command. Screen font Information to be typed into a form or dialog box.
-
Page 7: Introduction And Overview
SkyEdge II VSAT Installation and Monitoring 1. Introduction and Overview 1.1 Scope and Limitations This manual is valid for SkyEdge II VSATs. 1.2 Background and Purpose In order to enable a VSAT to come on line it has to be configured with a minimum number of parameters that are used to enable the VSAT to boot up. -
Page 8: Inter-Facility Link (Ifl) Cables
SkyEdge II VSAT Installation and Monitoring The VSAT can be in either one of two modes, Boot or Operational. The configuration parameters can only be modified while the VSAT is in Boot mode. This ensures that no changes can be made in the basis VSAT configuration parameters to a VSAT that is live in a network. -
Page 9: Configuring The Vsat
SkyEdge II VSAT Installation and Monitoring 2. Configuring the VSAT 2.1 Data Required Prior to configuring a VSAT verify that the following parameters have been supplied by the hub operations staff using the spreadsheet supplied by Gilat. The parameters are found in Table 1. -
Page 10: Figure 3: Skymanage Home Page
SkyEdge II VSAT Installation and Monitoring 1. To open the SkyManage web page type 192.168.1.1 in the address bar and click to open. Result: The SkyManage home page opens (Figure 3). Figure 3: SkyManage Home Page The home page, viewable by all users, contains the following information (for an... -
Page 11: Figure 4: Info Page Before Configuration
SkyEdge II VSAT Installation and Monitoring Figure 4: Info Page Before Configuration The Info page, viewable by all users, contains the following: Identity – VSAT ID (if configured), part number and serial number (factory assigned) Hardware – identifies the hardware version of the main board and any expansion cards present Software –... -
Page 12: Figure 5: Telemetry Page
SkyEdge II VSAT Installation and Monitoring Figure 5: Telemetry Page This page shows the CPU Utilization and Rx Signal EbN0 (for offline VSATs the value is 0). 4. To view a graphical presentation of the telemetry, click on the Graph button next to the telemetry bar graph. -
Page 13: Configuring The Vsat
SkyEdge II VSAT Installation and Monitoring Result: The Rx signal EsNo Graph appears (Figure 7). Figure 7: Rx EsNo Signal Graph 2.2.2 Configuring the VSAT To configure the VSAT from the SkyManage web site: 1. Click Installer. Result: The Password screen opens (Figure 8). -
Page 14: Figure 9: Setup (Compressed View)
SkyEdge II VSAT Installation and Monitoring The password above is the default. Check with your hub operator to verify that the password has or has not been changed Result: The Setup page opens (Figure 9). Figure 9: Setup (compressed view) Figure 9 hides all of the specific parameters in order to view the entire page. -
Page 15: Figure 10: Configuration Parameters
SkyEdge II VSAT Installation and Monitoring Figure 10: Configuration Parameters SE VSAT Install and Monitor May, 2007 Proprietary and Confidential... -
Page 16: Table 1: Configuration Parameters
SkyEdge II VSAT Installation and Monitoring Table 1: Configuration Parameters Parameter Type Parameter Explanation General VSAT ID Assigned in NMS Workgroup Address Software Group Address Streamer PID Outbound ID Boot-Time Options Software Download Enable or Disable Software Download Timeout Needs to be entered when... -
Page 17: Configuring A Vsat Using A File
SkyEdge II VSAT Installation and Monitoring 4. When all of the parameters have been entered, click Submit. Result: The confirmation message appears (Figure 11). Figure 11: Confirm Configuration Parameters 5. Click OK. Result: The Submit Successful message appears (Figure 12). -
Page 18: Saving The Configuration As A File
SkyEdge II VSAT Installation and Monitoring 2.3.1 Saving the Configuration as a File To save a VSAT configuration as a file: 1. After submitting the configuration, click Setup from File. Result: The Setup from file page opens (Figure 13). Figure 13: Setup from file 2. -
Page 19: Uploading A File To A Vsat
SkyEdge II VSAT Installation and Monitoring Result: A Save As dialog box opens. 4. Save the file to the desired location. It is recommended that the file be saved to the Desktop. A sample file is shown in Figure 15. -
Page 20: Reset Vsat
SkyEdge II VSAT Installation and Monitoring 2.4 Reset VSAT To reset a VSAT: 1. On the Installer page, click Reset. Result: The Reset VSAT page opens (Figure 16). Figure 16: Reset VSAT 2. Click Reset VSAT. Result: The Confirm Reset VSAT message appears (Figure 16). -
Page 21: Vsat Installation
SkyEdge II VSAT Installation and Monitoring 3. VSAT Installation 3.1 Grounding ARNING Before installing the unit, be sure the antenna and cable system is grounded so as to provide protection against voltage surges and static charges. Section 810 of the US National Electrical Code, ANSI/NFPA 70, and... -
Page 22: Using The Vsat As A Pointing Device
SkyEdge II VSAT Installation and Monitoring 2. Place the VSAT on a flat surface with the rear panel facing towards you as shown in Figure 2. 3. Connect the coaxial cable labeled RF IN to the RF-IN connector on the VSAT. -
Page 23: Figure 21: Start Alignment
SkyEdge II VSAT Installation and Monitoring Figure 20: Start Alignment Result: The VSAT restarts in Antenna Alignment mode. The device works by reading the outbound signal received by the VSAT. As the antenna position is adjusted, the strength of the signal is indicated simultaneously in... -
Page 24: Figure 23: Rx Signal Optimized
SkyEdge II VSAT Installation and Monitoring Figure 22: Rx Signal Optimized 12. Click Cross Pole Alignment. Result: The Cross Pole Alignment screen appears. Figure 23: Cross Pole Alignment Starting 13. Wait until the CW is assigned and then rotate the feed arm until the Delta value is greater than the Threshold value. -
Page 25: Initial Boot-Up
SkyEdge II VSAT Installation and Monitoring Figure 24: Cross Pole Completed 14. Loosen the azimuth lock bolt and slowly rotate the antenna from side to side until you pass the maximum signal strength, as indicated on the screen and speaker. -
Page 26: Monitoring Via The Skymanage Web Page
SkyEdge II VSAT Installation and Monitoring Table 2: LED Boot Sequence Mode Status Boot Mode Flash On and Off On-Line Flash On and Off SYNC Flash On and Off Flash On and Off Flashes On and Off for 5 seconds... -
Page 27: Figure 29: Outbound Locked In Operational Code
SkyEdge II VSAT Installation and Monitoring Figure 26: Outbound Locked in Operational Code 4. The VSAT is Authorized (Sync up, Satellite link up). Figure 27: VSAT Authenticated with Sync and Satellite Link Up SE VSAT Install and Monitor May, 2007... -
Page 28: Figure 32: Active Vsat
SkyEdge II VSAT Installation and Monitoring 5. The VSAT is shown to be fully active (HTTP acceleration is only active with embedded RPA, which is an optional feature). Figure 28: Active VSAT SE VSAT Install and Monitor May, 2007 Proprietary and Confidential... -
Page 29: Activating Cw
SkyEdge II VSAT Installation and Monitoring 6. The VSAT Info page is updated. Figure 29: VSAT Info page for Active VSAT 3.5 Activating CW 3.5.1 Activating CW from the LCD Keypad AUTION DO NOT TRANSMIT A CW UNLESS AUTHORIZATION TO TRANSMIT IS... -
Page 30: Figure 34: Cw Off
SkyEdge II VSAT Installation and Monitoring Figure 30: CW Off When this screen appears the frequency field is blank. The value in Figure 30 is for demonstration purposes only. 2. Type the CW Frequency and Duration (maximum 3600 seconds/default 1800 seconds) and click On. -
Page 31: Regulatory Requirements
4. Regulatory Requirements 4.1 Electrical Ratings The electrical rating for the SkyEdge II IP VSAT (P/N 561000) with either an external power adapter is 24V, 5A. If an AC power converter is used, it is rated at 100-240VAC, 50/60Hz, 1.5A. -
Page 32: Weee Compliance
SkyEdge II VSAT Installation and Monitoring 4.3 WEEE Compliance Gilat participates in the EU recycling program. Figure 36: WEEE Symbol 4.4 Precautions AC powered units are intended for restricted access location in Finland, Norway and Sweden and must be connected to an earthed mains socket outlet. -
Page 33: Vsat Sicherheitsvorschriften (Germany)
SkyEdge II VSAT Installation and Monitoring For North American power connections, select a power supply cord that is UL Listed and CSA Certified 3 - conductor, [18 AWG], terminated in a molded on plug cap rated 125 V, [15 A], with a minimum length of 1.5m [six feet] but no longer than 4.5m... -
Page 34: Vorkehrungen
SkyEdge II VSAT Installation and Monitoring 4.5.2 Vorkehrungen Die Wechselstromeinheiten sind für Standorte mit eingeschränktem Zugang in Finnland, Norwegen und Schweden vorgesehen und müssen an einen geerdeten Hauptleitungsanschluss angeschlossen werden. Die Gleichlstromeinheiten sind für Standorte mit eingeschränktem Zugang in den USA und Kanada vorgesehen.
Need help?
Do you have a question about the SkyEdge II and is the answer not in the manual?
Questions and answers