
Related Manuals for Eaton SEFELEC 5 Series


Summary of Contents for Eaton SEFELEC 5 Series
- Page 1 User Manual SEFELEC 5X Series 50-C 56-H 56-D 56-S 506-H 506-D 506-S 1000-M PENT6833 version 1.06 - July 2020...
-
Page 2: Table Of Contents
CONTENTS Introduction ................................8 Warranty ................................ 9 Pictograms used ............................10 Warning and Safety Instructions ........................12 Declaration of Conformity ..........................13 Qualification of personnel ..........................13 Exclusion of Liability ............................. 13 After-sales service ............................14 Presentation of the device ........................... 15 Basic version .............................. - Page 3 4.2.2. Safety optimization ..........................31 Precautions of use ............................32 Commissioning ..............................33 Delivery content ............................33 Installation of the different connectors and cords ..................34 Instructions for fitting in the bay ......................... 34 Switching on the power to the device ......................36 Configuration of the device ..........................
- Page 4 Dielectric strength test settings ........................... 78 Adjusting the measurement time ........................ 80 Adjusting the measurement voltage ......................83 Selection of the mode of cut-out Fault detection ..................85 Adjustment of IMAX, IMIN and Delta I detection thresholds ..............86 Selection of the filter mode ......................... 88 Backup of the dielectric strength test settings.....................
- Page 5 Multipoint ground continuity step: ....................133 14.1.2. Text message step: ........................135 14.1.3. Image message step: ........................137 14.1.4. PDF message step: ........................139 14.1.5. Condition step: ..........................141 14.1.6. Repetition step: ..........................143 14.1.7. Pause step: ............................ 144 14.1.8. Keyboard Entry step: ........................
- Page 6 17.1.8. Malware Defences: .......................... 167 17.1.9. Secure Maintenance: ........................167 17.1.10. Business Continuity/ Cybersecurity Disaster Recovery: ..............168 First Time Connection - White list ..................... 168 Connection examples ......................... 169 Single connection between a PC and a device with a fixed IP address ....... 169 17.3.1.
- Page 7 Application notes ............................186 Why dielectric tests ? .......................... 186 Glossary of terms ..........................186 Environmental influences ........................187 19.3.1. TEMPERATURE ..........................187 19.3.2. Pressure ............................187 19.3.3. Humidity ............................187 Insulation resistance measurement ....................188 19.4.1. Precautions to be observed ......................188 19.4.2.
- Page 8 Maintenance ............................197 EULA: END USER LICENSE AGREEMENT ......................199 EU Declaration of Conformity ........................204 User manual SEFELEC 5x Series v1.06...
-
Page 9: Introduction
INTRODUCTION General information This manual presents instruments in the SEFELEC 5x range designed for testing dielectric strength, high electrical resistances and ground continuity, as well as their electrical and me- chanical specifications. It also contains the information necessary for their use in accordance with the applicable rules for safe operation, commissioning and maintenance of the equipment. -
Page 10: Warranty
Lognes. Modifications to the device or any of its accessories not approved by EATON cancel this warran- EATON is not responsible for any indirect damage resulting from the use of the device. -
Page 11: Pictograms Used
PICTOGRAMS USED Warnings with symbols are used in this manual; they must be respected to ensure safe opera- tion of the devices. The warnings and symbols used in this manual are: Indicates imminent danger. Death or very serious injury can be caused if appropriate safety measures are not taken. - Page 12 The following symbols may appear on the devices: Warning (see accompanying documents). Direct current. Warning, Risk of electric shock. Direct and alternating cur- rent. Is covered by a WEEE recycling procedure Alternating current Ground terminal. When the symbol is placed on the device or on one of its accessories it is imperative to refer to this manual find out the nature of the potential dangers and all actions to be taken to avoid them.
-
Page 13: Warning And Safety Instructions
WARNING AND SAFETY INSTRUCTIONS The devices in the SEFELEC 5x range are intended for testing dielectric strength, and high or low resistances. Warning: • The measurement device must only be used in conformity with the provi- sions mentioned above. • Correct use of a measurement device implies transport, installation, han- dling and maintenance according to the instructions in this manual. -
Page 14: Declaration Of Conformity
DECLARATION OF CONFORMITY The SEFELEC 5x range measuring devices marketed by the EATON Corporation comply with the requirements of: European Directives 2014/35/EU covering the safety of electrical equipment intended to be used within cer- tain voltage limits. (Low Voltage Directive) -
Page 15: After-Sales Service
AFTER-SALES SERVICE For all technical questions contact your technical representative or our service department at the following addresses: EATON EATON SEFELEC SAS SEFELEC GmbH 19 rue des Campanules Karl-Bold-Str. 40 F-77185 - LOGNES D-77855 Achern FRANCE GERMANY Phone: +33 (0)1 64 11 83 40... -
Page 16: Presentation Of The Device
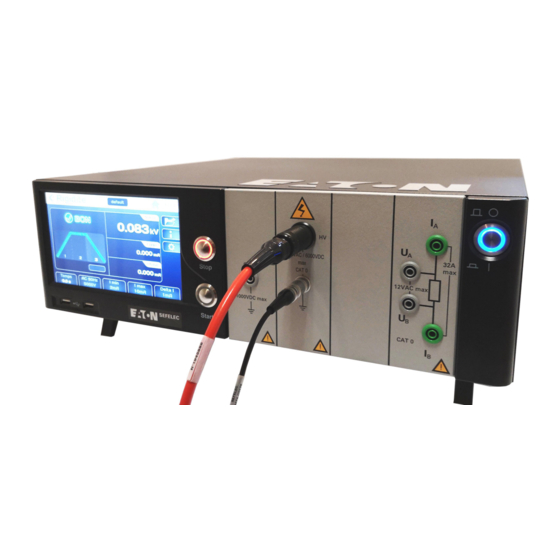
PRESENTATION OF THE DEVICE BASIC VERSION The SEFELEC 5x range is a range of products for performing dielectric tests and ground conti- nuity measurements very simply and in a comprehensively. SEFELEC 56-H and SEFELEC 506-H are used to perform tests of dielectric strength at powers of 50 VA 500 VA respectively. -
Page 17: Options (To Be Ordered According To The Requirement)
The dielectric strength tests are performed at voltages adjustable from 100 VAC 5,000 VAC 100 VDC 6,000 VDC. The rated current is 10 mA for the 50 VA models and 100 mA 500 VA models. Breakdown voltages and currents are stored after circuit break and cut-off of the high voltage. -
Page 18: Accessories (To Be Ordered According To The Requirement)
ACCESSORIES (TO BE ORDERED ACCORDING TO THE REQUIREMENT) • SEFA-KR 19” rack mounting • SEFA-TE65-02 HV/Insul. measurement probe. Length 2 m • SEFA-TE65-05 HV/Insul. measurement probe. Length 5 m • SEFA-TE65-10 HV/Insul. measurement probe. Length 10 m • SEFA-CO175-02 4mm return cord HV/Insul. Length 2 m •... -
Page 19: Specifications
SPECIFICATIONS OVERVOLTAGE CATEGORY Supply to the device by a CAT II mains network POLLUTION DEGREE Pollution 2: occasional conductive pollution by condensation only. SAFETY CLASS Class I: device connected to the protective ground by the power cord, Ground < 3 Ω, power line disturbance <... -
Page 20: Measurement Specifications
MEASUREMENT SPECIFICATIONS Dielectric strength, 50 VA (SEFELEC 56-H/D/S) Output voltage Adjustable from 0.100 to 5.000 kV in AC Sinusoidal alternating with frequency of 50 Hz or 60 Hz Adjustable from 0.100 to 6.000 kV in DC (+) pole in DC to ground Residual DC ripple <... - Page 21 Dielectric strength, 50 VA At current threshold IMAX Amplitude adjustable from 0.001 mA to 10.000 mA in steps of 0.001 mA. The device continuously measures the total current and the real current (AC) circulating through the sample under test and compares the latter according to two possibilities: The high threshold >...
- Page 22 Dielectric strength, 50 VA Measurement of the real alternating current The reading of the real current, linked to the resistance, is obtained through a shunt located di- rectly in the test circuit Resolution 10,000 points Accuracy 0.001 mA to 9.999 mA AC ±(3% + 100 µA) Signalling of a fault By a PASS or FAIL colour message on the LCD display and an audible signal...
- Page 23 Dielectric strength, 500 VA (SEFELEC 506-H/D/S) Output voltage Adjustable from 0.100 to 5.000 kV in AC Sinusoidal alternating with frequency of 50 Hz or 60 Hz Adjustable from 0.100 to 6.000 kV in DC (+) pole in DC to ground Residual DC ripple <...
- Page 24 Dielectric strength, 500 VA At current threshold IMAX Adjustable amplitude of from 0.01 mA to 110 mA in steps of 0.01 mA. The device continuously measures the current flowing in the sample under test and compares it according to two possibilities: The high threshold >...
- Page 25 Dielectric strength, 500 VA Measurement of the ACTUAL permanent current The reading of the real current, linked to the resistance, is obtained through a shunt located di- rectly in the test circuit Resolution 11,000 points Accuracy 0.01 mA to 110.00 mA AC ±(3% + 1 mA) Signalling of a fault By a PASS or FAIL colour message on the LCD display and an audible signal...
- Page 26 Insulation resistance (SEFELEC 1000-M; SEFELEC 56/506-D/S) Measurement specifications Programmable volt per volt from 20 to 1,000 VDC Generation accuracy ±(1% + 1 V) (+) pole of the generator to ground Dynamic stability for mains ΔV = ±10%: Variation of the <...
- Page 27 Insulation resistance Measurement thresholds 100 kΩ to 200 GΩ (or 2 TΩ) Two measurement thresholds adjustable from Measurement results according to the thresholds Low threshold / R.measured / High threshold 10 MΩ / 15.4 MΩ/ 200 GΩ PASS: R.measured >= SB and SH disabled 0 kΩ...
- Page 28 Ground continuity 32 A AC (SEFELEC 32-C; SEFELEC 56/506-S) Measurement current Sinusoidal alternating with frequency of 50 Hz or 60 Hz depending on the mains Adjustable in steps of 0.5 A 5.0 to 32.0 A AC option 5.0 to 50.0 A ac Generation and measurement accuracy ±(1% + 0.1 A) option ±(1% + 0.2 A)
- Page 29 Measurement thresholds in resistance or voltage drop The device offers high and a low measurement thresholds expressed either in continuity resistance or in voltage drop. 0.1 mΩ to 1,000.0 mΩ Resistance measurement thresholds adjustable from Voltage drop measurement thresholds adjustable from 0.01 to 9.99 V Time delay PERMANENT...
-
Page 30: Safety
SAFETY SECURITY WHEN WORKING ON ELECTRICAL DEVICES Danger of electric shock! • All precautions related to the use of equipment connected to the electrical network must be taken when using it. • In particular, it is absolutely necessary to connect the equipment to the WARNING ground by the power cord and via the ground pin provided for this pur- pose on rear face of the unit (see paragraph 20.1 item Z2) -
Page 31: 4.2.1. Safety Loops
The protection of personnel is the responsibility of the management of the site where the measurement device is installed. EATON can only give advice; the respect of the conditions of safety is the responsibility of the user company’s safety manager. -
Page 32: 4.2.2. Safety Optimization
CO160 option) must be put in place. WARNING EATON can provide, on request, a locking system implemented during the test to control a safe- ty cage type CA001, CA002 (image below) or CA003 in order to make the tests in complete safety. -
Page 33: Precautions Of Use
During the use of the devices of the SEFELEC 5x range, the non-respect of the conditions of operation listed above (condition of the environ- ment, mains supply and of use) release EATON from any warranty and any production following degradation of the device. -
Page 34: Commissioning
• 1 CE certificate of conformity (included at the end of this manual) And depending on your order: • The measurement accessories • WINPASS_MX software • 1 audit report with the measurement readings. If any item is missing, contact EATON. See chapter entitled After-sales service. User manual SEFELEC 5x Series v1.06... -
Page 35: Installation Of The Different Connectors And Cords
INSTALLATION OF THE DIFFERENT CONNECTORS AND CORDS Before powering the measurement device, ensure that the following accessories are installed, and their plugs locked: • The C5 safety plug (10 points) must be installed on the socket marked C5 (caution, there is mechanical fool-proofing on the sockets) •... - Page 36 Position the brackets on each side of the device as in the drawing and secure with the 4 screws. See below: 4 - Fitting the bay kit: Fit the 2 runners, adjust them in height according to the equipment to be installed in the bay.
-
Page 37: Switching On The Power To The Device
After switching off the power to the device, wait 2 seconds before turn- ing it back on. IMPORTANT When switching on the power to the device after receipt, it displays a pattern with the EATON logo and then after approximately 10 seconds, the subsequent screen to ask for the language of use: User manual SEFELEC 5x Series v1.06... - Page 38 Choose the language; the device then displays the conditions for the use of the embedded soft- ware and asks you to accept the end user license agreement: Accept the text to be able to use the device. The full text can be found in the appendix chapter 22 of this leaflet.
- Page 39 The top strip indicates: • The reference of the device: SEFELEC 56-S • The software version V1.0.1 • The time 18:36 and the date 18/07/2019 The date and time settings can be changed in the "General settings" menu accessible by press- ing on the area of the screen with the toothed wheel icon.
- Page 40 Pressing the icon in the form of a home in the banner at the top allows you to return to the pow- er-on menu. < icon in the form of allows you to return to the previous menu. Pressing the The entry of the numerical values of the parameters or names of files is done using a virtual keyboard displayed on the screen.
-
Page 41: Configuration Of The Device
CONFIGURATION OF THE DEVICE After switching on the device or the return to the Start menu, the Home screen shows: press the Setup key (gear wheel) The LCD screen displays the following information: User manual SEFELEC 5x Series v1.06... -
Page 42: Language Selection
LANGUAGE SELECTION The messages displayed on the screen can be in English, German, French, etc. To choose a language, make the selection by pressing the field indicating the selected lan- guage. Then scroll through the different languages and select the new language by pressing again on the field. -
Page 43: Display Settings
DISPLAY SETTINGS In the "General settings" menu press the “Settings” area of the "Display" line: To obtain the following screen: Adjust the brightness and colours by moving the different cursors by holding your finger on the touch pad and dragging it from right to left or vice versa. User manual SEFELEC 5x Series v1.06... -
Page 44: Sound Settings
SOUND SETTINGS In the "General settings" menu press the “Settings” area of the "Sound" line: To obtain the following screen: Choose the different sound possibilities for the proposed actions. User manual SEFELEC 5x Series v1.06... - Page 45 To adjust the sound volume place your finger on the graphic bar and drag it to the right while remaining in contact with the screen to increase the volume, and to the left to decrease the vol- ume. < Return to the previous menu with the symbol: User manual SEFELEC 5x Series v1.06...
-
Page 46: Time-Date Settings
TIME-DATE SETTINGS In the "General settings" menu press the “Settings” field indicating the time and date of the "Time – Date" line: To obtain the following screen: Choose the YYYY/MM/DD or DD/MM/YYYY date format, and then set the date using the drop- down windows or press the icon symbolizing a calendar to choose a date directly. - Page 47 Proceed in the same way for setting the time and validate by OK User manual SEFELEC 5x Series v1.06...
-
Page 48: System Settings
SYSTEM SETTINGS In the "General settings" menu press the “Information” area of the "System" line: To obtain the following screen: User manual SEFELEC 5x Series v1.06... - Page 49 Updating the main firmware of the HMI (Human Machine Interface): The update of the main firmware of the HMI can be done from the update file (contact our ser- vice department to obtain the latest version available) and which will be saved on a USB key. Then on the following screen: Press the field showing the version number of the main firmware (e.g.: V0.9.0) to obtain the fol- lowing screen:...
- Page 50 Insert the USB key with the update file. Then press the "Update" key and follow the instructions It is important not to turn off the device during the update NOTE Update of the Firmware of the function boards: The update of the function board firmware can be done from the update file (contact our service department to obtain the latest version available) and which will be saved on a USB key.
- Page 51 Press the area indicating the update of the function board Firmware to get the following screen: Press the "Cancel" key if you do not want to do the update. Insert the USB key with the update file. Then press the "Update" key and follow the instructions It is important not to turn off the device during the update NOTE User manual SEFELEC 5x Series...
-
Page 52: Access Settings
ACCESS SETTINGS In the "General settings" menu press the active area of the "Access" line: To obtain the following screen: Choose the user level and enter the corresponding password to validate the change in user lev- The Administrator level has no limitation on the access to the different menus and functions of the device. - Page 53 The Service level has no limitation in the access to the different menus and functions of the de- vice with an additional access to the calibration of the device. The Service level is only accessi- ble to EATON technicians. Rules concerning the password: When changing the password, enter the old password and then the new one.
-
Page 54: Selection Of The Type Of Interface
SELECTION OF THE TYPE OF INTERFACE Scroll through the "General settings" screen downwards to obtain the following screen: Press the selection area of the "Interface" line to obtain the following screen: Select the type of interface you want and set the communication settings according to the indica- tions provided in the paragraph describing the selected interface. -
Page 55: Restoration Of The Default Settings
RESTORATION OF THE DEFAULT SETTINGS The device proposes to restore the default settings Scroll through the "General settings" screen downwards to obtain the following screen: Press the active area of the "Restore" line to display: If you do not want to restore press the "Cancel" key, to restore press the "Restore" key. After a restoration it is advised to turn the device off and on again and select the language at start-up. -
Page 56: Storage Of Results
STORAGE OF RESULTS To ensure traceability of measurements taken it is possible to store the test settings as well as the measurement results in the internal memory of the device To activate this function, after switching on the device or returning to the Start menu, the Home screen shows: Press the key to access the results storage menu (floppy) User manual SEFELEC 5x Series... - Page 57 The LCD screen displays the following information: Activate the backup of the measurement results by pressing the right side of the "Store results" area; display of ON and display of a floppy greyed out to the left of the Home icon. Disable the backup of the measurement results by pressing on the left of the "Store results"...
- Page 58 For the purpose of making a backup or to copy the settings from one device to another, it is pos- sible to export and import the device settings files to a USB key. The measurement results stored in the device can also be exported to a USB key for archiving or processing. Connect a USB key to one of the USB ports available under the LCD screen.
- Page 59 Do not disconnect the USB key during the import and export operations. NOTE On the USB key there is a "HORUS_BACKUP" directory with the following sub-directories: Go to the desired directory and open the results file in .CSV format with Excel: IDN: EATON,SEFELEC 56-S,1900607,1.1.0.22 Parameters: Tension= 2.00E+01 Temps= Auto Montée=...
-
Page 60: Setting The Measurement Of Insulation Resistance
SETTING THE MEASUREMENT OF INSULATION RESISTANCE After switching on the device or returning to the Start menu, the Home screen shows: press the MΩ key to access the measurement screen: User manual SEFELEC 5x Series v1.06... - Page 61 Description of the measurement screen: Programme name Memory access Settings access Measurement cycle Measurement display Settings shortcuts The measurement display is done on 3 screens (current, voltage and resistance) the order of which can be changed by pressing one of the 3 areas and dragging up or down. Access to the measurement settings can be from the shortcut keys located on the bottom of the measurement screen or from the key with the gear wheel icon which displays the follow-...
-
Page 62: Adjusting The Measurement Time
ADJUSTING THE MEASUREMENT TIME To change the measurement time press the active area of the "Time" line to obtain: The Permanent mode: a rise time applies to the test and then the output voltage is equal to the set point. The test is stopped if the user requests to stop the test by pressing the red button on the front panel. - Page 63 To use the internal timer Select the AUTO mode and adjust the Rise, Hold and Fall times from the settings menu (values between 0.1 and 9999 sec.): To adjust the measurement time press the active area of the line of the corresponding setting: Enter the time in seconds, if the value entered is outside the minimum and maximum limits it will be displayed in red.
-
Page 64: Adjusting The Measurement Voltage
ADJUSTING THE MEASUREMENT VOLTAGE From the settings menu or by the voltage shortcut key at the bottom of the measuring screen press the active area of the voltage line: To obtain the following screen: Enter a voltage between 20 and 1,000 VDC; if the value entered is outside the permitted limits it is shown in red. -
Page 65: Adjustment Of The Comparison Thresholds
ADJUSTMENT OF THE COMPARISON THRESHOLDS The device offers two comparison thresholds Rmin and Rmax. The main threshold in the measurement of the insulation resistance is the Rmin threshold. If the resistance measured is less than the Rmin threshold the result is FAIL, if the resistance meas- ured is greater than Rmin the result is PASS. - Page 66 Then press the active area of the threshold to be changed to obtain the following input menu: Enter the value of the threshold using Tera, Mega, Giga or kilo Ω units. If the value entered is beyond the limits, it is displayed in red. Validate the threshold by pressing the enter key.
-
Page 67: Selection Of The Filter Mode
SELECTION OF THE FILTER MODE The device offers a filter mode to stabilize the measurement on the capacitive components Press the active area of the "Filter" line activate the filtering mode: The device offers a measurement configuration for capacitive circuits: Capacitor: this measurement mode implements analogue treatments and software to provide stable measurements on highly capacitive circuits. -
Page 68: Selection Of The Megohm Per Kilometre Mode
SELECTION OF THE MEGOHM PER KILOMETRE MODE The device proposes to indicate values of resistance of cables expressed in insulation per kilo- metre, as this formulation is the one generally used in manufacturers’ specifications or stand- ards. The cables can be comprised of several independent conductors connected in parallel for the measurement;... -
Page 69: Save Under A File Name The Measurement Settings
SAVE UNDER A FILE NAME THE MEASUREMENT SETTINGS All the settings of the insulation resistance measurement can be saved under a file name allow- ing the setting to be found easily. After you have set all the settings, they are located under the file name specified in the field be- low: To change the name of the file press the field with the name of the file to show a virtual keyboard and enter the new name. - Page 70 To recall a file name press the function key with a folder icon: To obtain the following screen: Find the name of the file by scrolling the list of files to the bottom or to the top. Press the desired file name then press outside the area of the display of the list of files or on the button with the yellow arrow.
- Page 71 From this window it is also possible to create a new file with the (+) key which generates a file that auto-increments from a file named: file1 WARNING: Any change of a file setting is automatically saved in the file NOTE User manual SEFELEC 5x Series v1.06...
-
Page 72: Measurement Of Insulation Resistance
Do not try to modify an accessory; measurement accessories may contain imita- tion and protection elements. It is forbidden to modify the accessories without written agreement from SEFELEC-EATON. If the device is used in conditions other than those specified in the manual of the device, potential risks may occur for the safety of the user. - Page 73 Connect the SEFA-TE65 measurement cord to in the HV socket provided; to lock the cord push the plug until you hear a click. Proceed in the same way with the SEFA-CO175 return cord on the socket connected to the ground. The connectors are fitted with a thumb wheel at the back preventing their extraction.
-
Page 74: Precautions To Be Observed During Measurement
PRECAUTIONS TO BE OBSERVED DURING MEASUREMENT: To perform a measurement of resistance above 100 Gohm, use effective shielding connected to the guard terminal (grey terminal on the front panel). This avoids erroneous measurements due to the presence of leakage currents or the introduction of alternating residues. The proximity of an operator approaching his/her hand to a sample under test can distort the measurement. - Page 75 After having connected the component for measurement applying the precautions described above and selected the measurement settings required, return to the measurement screen: Press the Start button. For safety reasons, it is necessary to press the button for > 1 second for the device to switch into measurement mode. If the button is pressed for too short a time a message will be displayed momentarily on the NOTE LCD screen.
- Page 76 Display Rise Hold Fall End of test Voltage Current Resistance PASS/FAIL At the end of the test the display shows the last value measured before the reduction of the volt- age and if the measurement is between Rmin and Rmax i.e. considered PASS User manual SEFELEC 5x Series v1.06...
- Page 77 If the measurement is < Rmin or >Rmax, it will be regarded as FAIL The coloured function key indicates the setting that caused the FAIL sanction of the measure- ment. Before disconnecting the measured component, press the Stop button to con- firm the stoppage of the high voltage generation and discharge the component: the de- vice then performs a check of the residual voltage up to a value of 30 VAC or DC STOP...
-
Page 78: The Following Error Messages
THE FOLLOWING ERROR MESSAGES: "SAFETY LOOP OPEN": the safety loop is not closed, there is no connection between the points 1-9 or 2-10 of connector C5 on the rear panel of the device. Press OK to acknowledge the message ... -
Page 79: Dielectric Strength Test Settings
DIELECTRIC STRENGTH TEST SETTINGS After switching on the device or returning to the Start menu, the Home screen shows: press the Hipot (Dielectric Strength test) key to access the measurement screen: User manual SEFELEC 5x Series v1.06... - Page 80 Description of the measurement screen: Programme name Memory access Settings access Measurement cycle Measurement display Settings short cuts The measurement display is shown on 3 screens (Voltage, Total current and Real current) the order of which can be changed by pressing one of the 3 fields and dragging up or down Access to the measurement settings can be from the shortcut keys located on the bottom of the meas- urement screen or from the key with the gear wheel icon which displays the following...
-
Page 81: Adjusting The Measurement Time
ADJUSTING THE MEASUREMENT TIME In Auto mode, the value of the Rise, Hold and finally of Fall are decremented every 0.1 second. When the Fall time displayed reaches 0, the output voltage is automatically cut off. Depending on the value of the leakage current during the test in relation to the IMAX and IMIN thresholds, the PASS or FAIL indication is displayed on the LCD screen. - Page 82 The Permanent mode does not use the internal timer of the device and the measurement takes place from when the Start button is pressed to when the Stop button is pressed. The Permanent mode allows the setting of a voltage Increase gradient. To change the measurement time press the active area of the "Time"...
- Page 83 To use the internal timer, select the AUTO mode. Adjust the Rise, Hold and Fall times from the settings menu (values between 0.1 and 9999 sec.): To adjust the measurement time press the active area of the line of the corresponding setting: Enter the time in seconds, if the value entered is outside the minimum and maximum limits it will be displayed in red.
-
Page 84: Adjusting The Measurement Voltage
ADJUSTING THE MEASUREMENT VOLTAGE From the settings menu or by the voltage shortcut key at the bottom of the measuring screen press the active area of the voltage line: To obtain the following screen: Enter a voltage between 100 V and 5,000 VAC or 6,000 VDC in steps of 1 V; if the value entered is outside the permitted limits it is shown in red. - Page 85 From the settings menu or by the voltage short cut key at the bottom of the measuring screen press the active area of the "Frequency" line: Choose the frequency of the voltage: AC 50 Hz AC 60 Hz User manual SEFELEC 5x Series v1.06...
-
Page 86: Selection Of The Mode Of Cut-Out Fault Detection
SELECTION OF THE MODE OF CUT-OUT FAULT DETECTION The device offers the possibility to choose between several modes of cut-out Fault detection In the Delta I detection mode: The ΔI (delta I) sensor automatically performs the subtraction between the current flowing nor- mally in the sample under test (I = U/Z) and the one that occurs suddenly when a fault occurs: (I' = I + I fault). -
Page 87: Adjustment Of Imax, Imin And Delta I Detection Thresholds
ADJUSTMENT OF IMAX, IMIN AND DELTA I DETECTION THRESHOLDS The device comprises two thresholds, IMAX and IMIN, used for the comparison with the value of the measurement of current flowing in the equipment under test and to decide whether the result of the test is PASS or FAIL. - Page 88 Then press the active area of the threshold to be changed to obtain the following input menu: Enter the threshold value using µA or mA units. If the value entered is beyond the limits, it is displayed in red. Validate the threshold by pressing the enter key.
-
Page 89: Selection Of The Filter Mode
SELECTION OF THE FILTER MODE The device offers a filter mode to stabilize the measurement on capacitive components tested with a DC voltage. Press the active area of the “Filter” line to activate the most suitable mode: The device offers a measurement configuration on capacitive circuits: ... -
Page 90: Backup Of The Dielectric Strength Test Settings
BACKUP OF THE DIELECTRIC STRENGTH TEST SETTINGS All the dielectric strength test settings can be saved under a file name allowing the setting to be found easily. After you have set all the settings, they are located under the file name specified in the field be- low: To change the name of the file press the field with the name of the file to show a virtual keyboard and enter the new name. - Page 91 To recall a file name press the function key with a folder icon: To obtain the following screen: Find the name of the file by scrolling the list of files to the bottom or to the top. Press the desired file name then press outside the area of the display of the list of files or on the button with the yellow arrow.
- Page 92 From this window it is also possible to create a new file with the (+) key which generates a file that auto-increments from a file named: file1 WARNING: Any change of a file setting is automatically saved in the file NOTE User manual SEFELEC 5x Series v1.06...
-
Page 93: Performing A Dielectric Strength Test
Do not try to modify an accessory; measurement accessories may contain imita- tion and protection elements. It is forbidden to modify the accessories without written agreement from SEFELEC-EATON. If the device is used in conditions other than those specified in the manual of the device, potential risks may occur for the safety of the user. - Page 94 Connect the SEFA-TE65 measurement power cord to in the HV socket provided; to lock the cord push the plug until you hear a click. Proceed in the same way with the SEFA-CO175 return cord on the socket connected to the earth. The connectors are fitted with a thumb wheel at the back preventing their extraction.
-
Page 95: Precautions To Be Observed During Measurement
PRECAUTIONS TO BE OBSERVED DURING MEASUREMENT: Never disconnect a capacitive sample without switching to the dis- charge mode and waiting for the time required for the capacity of the sample to be discharged into the resistance of 1.5 MΩ of the dis- charge circuit. - Page 96 Press the Start button. For safety reasons, it is necessary to press the button for > 1 second for the device to switch into measurement mode. If the button is pressed for too short a time a message will be displayed momentarily on the NOTE LCD screen.
- Page 97 If the current flowing in the element tested exceeds the cut-out criteria set (in the ΔI or IMAX mode), the device indicates that there a cut-out with cut-out of the high voltage (at the zero- crossing of the sine wave), the display then indicates: The coloured function key indicates the setting that caused the FAIL sanction of the measure- ment.
- Page 98 Before disconnecting the measured component, press the Stop button to confirm the stoppage of the high voltage generation and discharge the component: The device then performs a check of the residual voltage up to a value of 30 VAC or DC. STOP This action returns you to the initial measurement screen either to change the settings or to per- form a new measurement by pressing the Start button.
-
Page 99: The Following Error Messages
THE FOLLOWING ERROR MESSAGES: "SAFETY LOOP OPEN": the safety loop is not closed, there is no connection between the points 1-9 or 2-10 of connection C5 on the rear panel of the device. Press OK to acknowledge the message ... -
Page 100: Multi-Slope Dielectric Strength Tests
MULTI-SLOPE DIELECTRIC STRENGTH TESTS: The multi-slope dielectric strength function enables us to produce a sequence of 7 voltage Rise, Hold or Fall phases. If the device has a multi-slope dielectric strength function, press the key from the following menu: To obtain the following screen: User manual SEFELEC 5x Series v1.06... - Page 101 For each phase (1 to 7) it is possible to define an AC or DC voltage, a Rise, Hold or Fall time as well as the cut-out modes and associated thresholds. Create a new test file by pressing the folder icon to obtain the following screen: Press the (+) icon to create a new file (file name example: file1) and then press the key with the yellow arrow.
- Page 102 The lower part of the screen displays the different phases activated (1/n, 2/n, …) as well as a zone of "Global" settings. Browsing in the different phases and in the Global mode is done either by pressing at the bottom of the screen on the desired phase or by pressing the screen and dragging the finger from right to left or left to right.
-
Page 103: Connection Of The Component To Be Measured
Do not try to modify an accessory; measurement accessories may contain imita- tion and protection elements. It is forbidden to modify the accessories without written agreement from SEFELEC-EATON. If the device is used in conditions other than those specified in the manual of the device, potential risks may occur for the safety of the user. - Page 104 Connect the SEFA-TE65 measurement power cord to in the HV socket provided; to lock the cord push the plug until you hear a click. Proceed in the same way with the SEFA-CO175 return cord on the socket connected to the earth. The connectors are fitted with a thumb wheel at the back preventing their extraction.
-
Page 105: Precautions To Be Observed During Measurement
PRECAUTIONS TO BE OBSERVED DURING MEASUREMENT: Never disconnect a capacitive sample without switching to the dis- charge mode and waiting for the time required for the capacity of the sample to be discharged into the resistance of 1.5 MΩ of the dis- charge circuit. - Page 106 Press the Start push button. For safety reasons, it is necessary to press the button for > 1 second for the device to switch into measurement mode. If the button is pressed for too short a time a message will be displayed momentarily NOTE on the LCD screen.
- Page 107 If the current flowing in the element tested exceeds the cut-out criteria set (in the ΔI or IMAX mode), the device indicates that there a cut-out with cut-out of the high voltage (at the zero- crossing of the sine wave), the display then indicates: The coloured function key indicates the setting that caused the FAIL sanction of the measure- ment.
-
Page 108: The Following Error Messages
THE FOLLOWING ERROR MESSAGES: "SAFETY LOOP OPEN": the safety loop is not closed, there is no connection between the points 1-9 or 2-10 of connection C5 on the rear panel of the device. Press OK to acknowledge the message ... -
Page 109: Setting The Measurement Of Ground Continuity
SETTING THE MEASUREMENT OF GROUND CONTINUITY After switching on the device or returning to the Start menu, the Home screen shows: Press the Ground Bond key to access the following measurement screen: User manual SEFELEC 5x Series v1.06... - Page 110 Description of the measurement screen: Programme name Memory access Settings access Measurement cycle Measurement display Settings short cuts The measurement display is done on 3 screens (current, voltage and resistance) the order of which can be changed by pressing one of the 3 areas and dragging up or down. Access to the measurement settings can be from the shortcut keys located on the bottom of the measurement screen or from the key with the gear wheel icon which displays the fol-...
-
Page 111: Adjusting The Measurement Time
ADJUSTING THE MEASUREMENT TIME To change the measurement time press the active area of the "Time" line to obtain: The Permanent mode: a rise time applies to the test and then the output current is equal to the set point. The test is stopped if the user requests to stop the test by pressing the red button on the front panel. - Page 112 To use the internal timer Select the AUTO mode and adjust the Rise, Hold and Fall times from the settings menu (values between 0.1 and 9999 sec.): To adjust the measurement time press the active area of the line of the corresponding setting: Enter the time in seconds, if the value entered is outside the minimum and maximum limits it will be displayed in red.
-
Page 113: Adjusting The Measurement Current
ADJUSTING THE MEASUREMENT CURRENT From the settings menu or by the current short cut key at the bottom of the measuring screen press the active area of the Current line: To obtain the following screen: Enter a current between 5 and 32 A AC (50 A AC on option) if the value entered is outside the permitted limits it is shown in red. -
Page 114: Adjustment Of The Comparison Thresholds In Resistance Or Voltage Drop
ADJUSTMENT OF THE COMPARISON THRESHOLDS IN RESISTANCE OR VOLTAGE DROP The device includes two comparison thresholds to verify if the measured item is PASS or FAIL. These thresholds can be a resistance or a voltage (according to the recommendations of the EN60204-1 standard) The High Threshold defines the maximum limit of validity of the measurement. -
Page 115: Save Under A File Name Citing The Measurement Settings
Then press the active area of the threshold to be changed to obtain the following input menu: Enter the threshold value using mΩ or V units. If the value entered is beyond the limits, it is displayed in red. Validate the threshold by pressing the enter key. Proceed in the same way to adjust the other threshold. - Page 116 To change the name of the file press the field with the name of the file to show a virtual keyboard and enter the new name. Spaces are not allowed in the file name, use the dash (-) or the underscore (_) as a separator. Special characters such as @, €, £, $, &, µ, (), {}, etc.
- Page 117 To recall a file name press the function key with a folder icon: To obtain the following screen: Find the name of the file by scrolling the list of files to the bottom or to the top. Press the desired file name and then press outside the area of the display of the list of files or on the button with the yellow arrow.
- Page 118 From this window it is also possible to create a new file with the (+) key which generates a file that auto-increments from a file named: file1 WARNING: Any change of a file setting is automatically saved in the file NOTE User manual SEFELEC 5x Series v1.06...
-
Page 119: Ground Continuity Resistance Measurement
Do not try to modify an accessory; measurement accessories may contain imita- tion and protection elements. It is forbidden to modify the accessories without written agreement from SEFELEC-EATON. If the device is used in conditions other than those specified in the manual of the device, potential risks may occur for the safety of the user. -
Page 120: Precautions To Be Observed During Measurement
Connect the SEFA-CO184 measurement power cord to piggy back terminals of diameter 4mm IA and UA respecting the colour code. Proceed in the same way with the SEFA-CO183 measurement cord and terminals IB and UB SEFA-CO184 SEFA-CO183 WARNING: The cable sections are calculated according to the currents flowing in these cables. - Page 121 During measurement, it is recommended not to move or break the electrical contact with the parts tested so as, on one hand, not to distort the test conditions (e.g.: duration of application) and, on the other hand, not to affect the contact area by arcing due to the strong current. The passage of a strong current in an element with low resistance can lead to a significant temperature rise.
- Page 122 Press the Start push button. For safety reasons, it is necessary to press the button for > 1 second for the device to switch into measurement mode. If the button is pressed for too short a time a message will be displayed momentarily NOTE on the LCD screen.
- Page 123 At the end of the test the display shows the last value measured before the reduction of the volt- age and if the measurement is between Rmin and Rmax i.e. considered PASS. If the measurement is < Rmin or > Rmax, it will be regarded as FAIL The coloured function key indicates the setting that caused the FAIL sanction of the measure- ment.
-
Page 124: Multi-Point Ground Continuity
Elimination of residual resistance: It is possible to subtract a value of residual resistance from the measured resistance. Make a first measurement of the residual resistance, when the value is stabilized press the Zero key: The zero function key then switches to a clear background and ON The resistance value displayed should then be near to 0.0 mOhm. -
Page 125: The Following Error Messages
THE FOLLOWING ERROR MESSAGES: "SAFETY LOOP OPEN": the safety loop is not closed, there is no connection between the points 1-9 or 2-10 of connection C5 on the rear panel of the device. Press OK to acknowledge the message ... -
Page 126: Sequence Mode
SEQUENCE MODE The sequence mode is a very complete mode of operation which allows us to create measurement programmes involving files with different settings, different measurement functions, messages giving information or instructions for the operators as well as oppor- tunities for viewing photos or drawings. A set of instructions allows a flow of each se- quence according to the results of measurement, conditional loops as well as jumps at cer- tain stages of the sequence. -
Page 127: List Of Functions Available In The Sequence Mode
LIST OF FUNCTIONS AVAILABLE IN THE SEQUENCE MODE From the sequence mode screen press the function key: to show the drop-down list of available functions. A Sequence is composed of a sequence of steps, each step can be any of the following func- tions: Megohmmeter Hipot... - Page 128 General rules of the sequence mode: Each step consists of a line comprising: • a check box that allows the step to be selected so that it can be deleted (bin icon), put in standby or reactivated (no entry icon). It is possible to make a multiple selection of sev- eral lines to delete them or put them in standby.
- Page 129 It is possible to inhibit a step of a sequence without deleting it completely. This allows easier fine tuning of the sequences. Select the step line or lines to be inhibited by checking the selection check box: Then press the no entry icon: Choose to pass these steps or to enable them: User manual SEFELEC 5x Series v1.06...
- Page 130 To delete a step of a sequence, select the line or lines to be deleted by checking the selection check box: Then press the bin icon: Confirm (Delete) or not (Cancel) the deletion of these steps: User manual SEFELEC 5x Series v1.06...
- Page 131 User manual SEFELEC 5x Series v1.06...
- Page 132 To recall an existing sequence file, press the icon: to view the list of available files: The keys: allow us to add or delete files. To load a sequence file, select it in the drop-down list and press the key: User manual SEFELEC 5x Series v1.06...
-
Page 133: Megohmmeter Step And Other Measurement Functions
14.1.1. MEGOHMMETER STEP AND OTHER MEASUREMENT FUNCTIONS: The Megohmmeter step allows us to perform a measurement of the insulation resistance with a chosen setting file. To view the drop-down list of the steps press the icon: Choose the Megohmmeter function from the list of steps: It is displayed as follows: See the general rules of the sequence mode in paragraph 11-1. -
Page 134: Multipoint Ground Continuity Step
14.1.2. MULTIPOINT GROUND CONTINUITY STEP: The multipoint ground continuity function allows us to define simply a step in the sequence mode in which several points need to be tested successively for continuity. To view the drop-down list of the steps press the icon: Choose the multipoint continuity function from the list of steps: User manual SEFELEC 5x Series v1.06... - Page 135 It is displayed as follows: Choose the name of the continuity programme with the test parameters required by pressing the yellow text. Define the number of continuity points to be tested from 1 to 10,000. During the execution of this step a message will ask the operator to validate passage to the next point.
-
Page 136: Text Message Step
14.1.3. TEXT MESSAGE STEP: The Text Message step allows you to insert a text message to inform or guide the operator. To view the drop-down list of steps press the icon: Choose the Text Message function from the list of steps: The step is displayed as follows: See the general rules of the sequence mode in paragraph 11-1. - Page 137 Press Edit the Title to access an input keyboard to give a title to the message. Proceed in the same way for the other message text. It is necessary to enter a text, if not, a se- quence error message is displayed. User manual SEFELEC 5x Series v1.06...
-
Page 138: Image Message Step
14.1.4. IMAGE MESSAGE STEP: The Image Message step allows us to insert an image to inform or guide the operator. To view the drop-down list of the steps press the icon: Choose the Image Message function from the list of steps: The step is displayed as follows: See the general rules of the sequence mode in paragraph 11-1. - Page 139 If there are no images in the unit or to import new ones: • Copy the image files in the format JPEG or PNG from a PC on a USB key. We recom- mend limiting the size of the images to < 1 Mo •...
-
Page 140: Pdf Message Step
14.1.5. PDF MESSAGE STEP: The PDF message step allows you to insert a PDF format file to inform or guide the operator. To view the drop-down list of the steps press the icon: Choose the PDF Message function from the list of steps: The step is displayed as follows: See the general rules of the sequence mode in paragraph 11-1. - Page 141 If there are no PDF file or to import new ones: • Copy the files in the PDF format from a PC onto a USB key. • Eject the USB key from the PC • Put the USB key containing the files in one of the USB connectors on the front panel •...
-
Page 142: Condition Step
14.1.6. CONDITION STEP: The Condition step allows us to insert a condition in the sequence of steps of a sequence. To view the drop-down list of the steps press the icon: Choose the Condition function from the list of steps: The step is displayed as follows: See the general rules of the sequence mode in paragraph 11-1. - Page 143 Press the area in yellow to set the condition: The Condition function requires the following information: • The number of the step to which the condition applies o Enter a step number corresponding to a measurement function. If a step number does not correspond to a measuring function, the result of the step will always be PASS and will enable a non-conditional connection to be made.
-
Page 144: Repetition Step
14.1.7. REPETITION STEP: The Repetition step allows us to insert an iterative loop in the sequence of steps of a sequence. To view the drop-down list of the steps press the icon: Choose the Repetition function from the list of steps: The step is displayed as follows: See the general rules of the sequence mode in paragraph 11-1. -
Page 145: Pause Step
14.1.8. PAUSE STEP: The Pause step allows us to insert a timed pause in the sequence of steps of a sequence. To view the drop-down list of the steps press the icon: Choose the Pause function in the list of steps: The step is displayed as follows: See the general rules of the sequence mode in paragraph 11-1. -
Page 146: Keyboard Entry Step
14.1.9. KEYBOARD ENTRY STEP: The Keyboard entry step allows us to insert a data input in the conduct of the different steps of a sequence, for example, the name of an operator or a batch number of parts or any other in- formation. -
Page 147: Execution Of A Sequence
EXECUTION OF A SEQUENCE Either a "default" sequence name calling a Megohmmeter function with a set of settings called "default" settings followed by a text message and a call to a Megohmmeter function with a set of settings called "default" settings and a looping of 10 times. This corresponds to the following sequence: When the Start button on the front of the device is illuminated in green, it is possible to start the sequence... - Page 148 The first step of the sequence will run while displaying a measurement screen in the Megohm- meter mode: The yellow progress bar at the bottom of the screen indicates the relative position of the step in the sequence. At the end of the measurement, the next step displays a text message Then the sequence passes to the second measurement in the Megohmmeter mode: User manual SEFELEC 5x Series v1.06...
- Page 149 At the end of the repetition of n times, the sequence will be terminated with a synthesis of the measurement results: In this example, the result of the sequence is FAIL because of the measurement step 3/4 and 4/4 in the Hipot mode with the "default" settings file. It is possible to review the screens of the different stages with the browse keys: User manual SEFELEC 5x Series v1.06...
- Page 150 Press the arrow key to the left to view the screen of the last step: With the arrow keys to the right and to the left it is possible to display all the steps in the step sequence. Case of a PASS sequence result: User manual SEFELEC 5x Series v1.06...
- Page 151 To finish the sequence completely, press the Stop button illuminated in red Before disconnecting the measured component, press the Stop button to confirm the stoppage of the high voltage generation and discharge the component: STOP This action returns us to the initial Sequence screen either to change the settings or to perform a new sequence of measurement by pressing the Start button.
-
Page 152: Plc Interface (Programmable Logic Controller)
PLC INTERFACE (PROGRAMMABLE LOGIC CONTROLLER) Reminder: The PLC (Programmable Logic Controller) function must be selected in the configuration menu (Interface: PLC). Note: The role of the interface option is to allow control of the measurement instrument by a system such as an industrial PLC. The implementation of the safety loop is essential. -
Page 153: Electrical Characteristics Of The Signals
ELECTRICAL CHARACTERISTICS OF THE SIGNALS INPUTS Number: 11 Type: Optoelectronic Input resistance 2.2 kΩ U minimum: 11 VDC U maximum: 43 VDC OUTPUTS Number: 9 Type: Photo-electric relay Maximum voltage: 48 VDC Maximum current / output: 100 mADC Resistance in the closed state < 1.2Ω CONVENTIONS ON THE DIFFERENT LOGICAL STATES N INPUT The high logic state is defined by the presence of a DC voltage between Umin and Umax. -
Page 154: Connections
CONNECTIONS The input-output signals are accessible on the rear face of the device on terminals C6, C7 and Every terminal has a mechanical coding Note: Connector C6 Connector C7 Connector C8 IN_OUT_0-10V_0 Type: IN_OUT_0-10V_1 MESDCH GND10V IN_0-10V_3 +24VDC COMOUT COMIN CTRLOUT CTRLIN PLCFAIL... -
Page 155: Definition Of Input-Output Signals
DEFINITION OF INPUT-OUTPUT SIGNALS COMIN (C6-5) Electrical common line for the input signals. COMOUT (C7-4) Electrical common line for the output signals. CTRLIN (input C6-6) Request to take over control of the measuring instrument by the PLC. MES_DCH (input C7-2) Switching to measurement or discharge. - Page 156 To make the correspondence between the memory numbers and the Sequence file names, go to the sequence menu (see Chapter 11 - Sequence mode) and press the PLC key (the PLC in- terface must be selected in the General settings menu): To display the following correspondence table: Display the memory number by swiping the screen toward the top or pressing the vertical scroll bar on the left of the screen.
- Page 157 CTRLOUT (Output C7-5) Validation contact for the taking of control of the device by the PLC. EOT (Output C7-7) End of Test contact PLCPASS (Output C7-8) Test result contact: PASS PLCFAIL (Output C7-6) Test result contact: FAIL ERROR (Output C7-9) Indicates whether an error occurred during the test;...
-
Page 158: Measurement-Discharge Cycle
MEASUREMENT-DISCHARGE CYCLE The PLC (Programmable Logic Controller) function must be select- ed in the configuration menu (Interface: PLC). Note: To make a measurement (see diagram no. 2) Activate the CTRLIN signal (High Logic state). The PLC must specify the measurement function on the standard input. - Page 159 Diagram No. 2: Launch of an insulation test Memory 5 - Test result NG. User manual SEFELEC 5x Series v1.06...
- Page 160 Diagram No. 4: Wiring of the PLC option with an external power supply. User manual SEFELEC 5x Series v1.06...
- Page 161 PLC SYSTEM DEVICE Diagram No. 5: Wiring of the PLC option with the internal power supply to the measuring device. User manual SEFELEC 5x Series v1.06...
-
Page 162: Ieee488-2 (Gpib) Interface
IEEE488-2 (GPIB) INTERFACE The IEEE488-2 function must be selected in the configuration menu, interface line: IEEE488 Enter the value of the address of the device be- tween 0 and 30. Note: SEFELEC test and measurement instruments can be equipped with an IEEE-488 interface. It enables the integration of all the instruments of the range in an automatic test or measure- ment system whether it is intended for production control or entry control. -
Page 163: Syntax Rules
SYNTAX RULES A command destined for the device should preferably end by the character: (hexadec- imal 0A, decimal 10). The codes can be sent in upper case or lower case. The maximum number of commands in the same block must not exceed 15 instructions. Take care not to associate normalized orders or queries with other types of commands. -
Page 164: Ethernet Interface
ETHERNET INTERFACE IMPORTANT: The ETHERNET function must be selected in the config- uration menu, on the Interface line: ETHERNET. Note: SEFELEC 5x range test and measurement instruments can be fitted with an Ethernet inter- face. It enables the integration of all the instruments of the range in an automatic test or measurement system whether it is intended for production control or entry control. -
Page 165: Cyber Security Recommendations
EATON is committed to minimizing the cybersecurity risk in its products and deploying cyberse- curity best practices in its products and solutions, making them more secure, reliable and com- petitive for customers. -
Page 166: Account Management
Following are some best practices that EATON recommends to physically secure your device: Secure the facility and equipment rooms or closets with access control mechanisms such as locks, entry card readers, guards, man traps, CCTV, etc. as appropriate. - Restrict physical access to cabinets and/or enclosures containing SEFELEC 5x and the asso- ciated system. -
Page 167: Network Security
Please ensure that encryption options are enabled. You can secure the product’s commu- nication capabilities by taking the following steps: EATON recommends opening only those ports that are required for operations and protect the network communication using network protection systems like firewalls and intrusion detection systems / intrusion prevention systems. -
Page 168: Logging And Events Management
17.1.7. LOGGING AND EVENTS MANAGEMENT - EATON recommends logging all falling within system and application events, including all ad- ministrative and maintenance activities. Logs should be protected from tampering and other risks to their integrity (for example, by restricting permissions to access and modify logs, transmitting logs to a security information and event management system, etc.). -
Page 169: Business Continuity/ Cybersecurity Disaster Recovery
BUSINESS CONTINUITY/ CYBERSECURITY DISASTER RECOVERY: Plan for Business Continuity / Cybersecurity Disaster Recovery EATON recommends incorporating SEFELEC 5x into the organization’s business continuity and disaster recovery plans. Organizations should establish a Business Continuity Plan and a Disas- ter Recovery Plan and should periodically review and, where possible, exercise these plans. As... -
Page 170: Connection Examples
It is possible to clear the list of permitted addresses (White list). From the Ethernet Interface menu, on the White list line, press Delete and confirm or not to the deletion of the all the author- ised IP addresses. CONNECTION EXAMPLES 17.3.1. -
Page 171: Connection Between A Pc And A Device Through A Network
17.3.2. CONNECTION BETWEEN A PC AND A DEVICE THROUGH A NET- WORK In this configuration we must use a straight (non-crossover) Ethernet cable. See your network administrator for the choice of parameters of the device (IP address, net- work mask, etc.) NOTE Most of the current switches are of the "Auto Sense”... -
Page 172: Procedure To Be Followed
17.4.1. PROCEDURE TO BE FOLLOWED Go to the Control Panel/ Network Connections/ Properties Select Internet Protocol (TCP/IP) in the fields "This Internet connection uses the follow- ing items:" and then click on Properties Select: Use the following IP address: Enter the IP address of the network card (PC) (e.g.: 192.168.0.1) Enter your subnet mask (e.g.: 255.255.255.0) User manual SEFELEC 5x Series v1.06... -
Page 173: Setting Of The Ethernet Connection On The Device
On the last two open windows click OK. SETTING OF THE ETHERNET CONNECTION ON THE DEVICE User manual SEFELEC 5x Series v1.06... -
Page 174: Dhcp (Dynamic Host Configuration Protocol)
17.5.1. DHCP (DYNAMIC HOST CONFIGURATION PROTOCOL) Reminder: DHCP is an English term designating a network protocol whose role is to ensure the automatic configuration of TCP/IP settings of a station, notably by assign- ing an IP address and a network mask automatically. Select to activate this mode. -
Page 175: List Of Ethernet Commands
In the case of incorrect syntax the dialogue error 1 message is displayed. In the case of a code out of context the dialogue error 2 message is displayed (a code specific to a func- tion when we are not in this function, or a digital value outside the limits). 17.5.6. -
Page 176: Malfunction
17.5.9. MALFUNCTION If the Ethernet connection does not work as described in this manual, check the following points: Absence of a reaction by the device when commands are sent: Devices of the SEFELEC 5x range have several types of possible interfaces, check in the configuration menu that the Ethernet mode has been selected on the interface line. -
Page 177: Rs232C Interface
RS232C INTERFACE IMPORTANT: The RS232C function must be selected in the configura- tion menu, interface line: RS232 Note: SEFELEC 5x range test and measurement instruments are fitted with a RS232C interface working in the speak and listen mode. It enables the integration of all the instruments of the range in an automatic test or measurement system whether it is intended for production con- trol or entry control. - Page 178 The transmission settings are not modifiable and are: Parity: Without Format: 8 bits Stop bit: To change the speed of transmission, go into the Config menu, on the interface line and se- lect RS232. In the Bit/s area choose the flow by scrolling through the values between 1.2 kbauds and 115.2 kbauds.
-
Page 179: List Of Rs232C Commands
LIST OF RS232C COMMANDS The syntax of the commands sent on the RS232C connection has been made consistent with the IEEE488-2 standard (1992 revision). Reminders of the digital formats according to the IEEE488-2 standard. NR1 format: +/-<digit>...<digit> NR2 format: +/-<digit>...<digit>.<digit>...<digit> NR3 format: +/-<digit>...<digit>.<digit>...<digit>E+/-<digit>..<digit>... -
Page 180: Standardized Queries
*CLS Positions all standardized registers in the state in which the user finds them at power *RST Performs a reset of the device. WARNING: The unit returns to Local mode, regain control of the device with the REM command before any other command. 18.1.3. - Page 181 Allows identification of the device. The message returned by the device is of the follow- ing form: <field1>, <field2>, <field3>, <field4> with Field 1: The name of the manufacturer (e.g.: EATON) Field 2: Type of the device (e.g.: SEFELEC56S.) Field 3: Serial number Field 4: Software version (e.g.: 1.60).
-
Page 182: Commands Dependent On The Device
18.1.4. COMMANDS DEPENDENT ON THE DEVICE MEG (MEGohmmeter) : Selects the megohmmeter. Must be sent from the initialization display. HIP (HIPot) : Selects the Hipot function. Must be sent from the initialization display. GND (GrouND) : Selects ground continuity function. Must be sent from the initialization display. SEQ (SEQuence) : Selects the sequence function. - Page 183 OHM (OHMmeter) : Sets the main thresholds unit (Ohm) and the ground continuity display function. Caution : The action on this command will erase all previous recorded thresholds (Reset to zero). VOLT (VOLTmeter) : Sets the main thresholds unit (Volt) and the ground continuity display function. Caution : The action on this command will erase all previous recorded thresholds (Reset to zero).
-
Page 184: Request Depending On The Device
FILT (FILTer) NOR/CAP Enables the normal or the capacitor measurement modes. For instance : CONF:FILT CAP DET (DETection) OFF / I / I+DELTA / DELTA : Hipot function only sets the mode of the breakdown. IDE (IDElta) <NR3> Hipot function : Delta I breakdown detection value adjustment MKM (MEGOHMKM) ON OFF Allows to activate or disactivate the Megohm.km mode MKMLEN (MEGOHMKMLENGTH) <NR1>... -
Page 185: Rs232 / Ieee488-2 Commands Summary
18.1.6. RS232 / IEEE488-2 COMMANDS SUMMARY Code Menu Init SETUP mΩ MΩ *CLS *ESE *ESE? *ESR? *IDN? *LRN? *RST *SRE *SRE? *STB? *TST? ACV50 ACV60 CONF FILT FTIM HLIM CBHLIM HTIM LLIM MEAS MEAS? MKMLEN MKMCOUNT QUIT RTIM STOP VOLT User manual SEFELEC 5x Series v1.06... -
Page 186: Operation Fault Of The Rs232C Series Connection
18.1.7. OPERATION FAULT OF THE RS232C SERIES CONNECTION If the RS232C connection does not work as described in this manual, check the following points: Absence of a reaction by the device when commands are sent: The connection cord between the device in the SEFELEC 5x range and the computer must be properly connected to both ends and be of the non-crossover type. -
Page 187: Application Notes
APPLICATION NOTES WHY DIELECTRIC TESTS ? The dielectric tests are performed in order: to detect manufacturing fault on electrical equipment to verify the quality of the insulating material of an electrical equipment to verify that an electrical installation has been correctly done to control the insulation resistance of an equipment or an installation to trace its changes during the years. -
Page 188: Environmental Influences
ENVIRONMENTAL INFLUENCES Temperature, pressure and humidity conditions have an influence on the dielectric tests results. 19.3.1. TEMPERATURE The temperature having an influence on the gas density, this one is altering the performances of the liquid or gaseous insulating material. The oils, often used as insulation are never pure, the dissolved quantity of gas increases with the temperature and is decreasing the insulation quality of the oil. -
Page 189: Insulation Resistance Measurement
INSULATION RESISTANCE MEASUREMENT The insulation resistance measurement is intended to verify that the various components and sub-assemblies of electrical equipment have an insulation resistance such as the leakage cur- rents do not reached inadmissible values. The principle is to apply a DC voltage, stable and specified (selected among the standard val- ues) between defined points and after a prescribed time, to measure the current flowing in the tested material. -
Page 190: Measurement On Cables
that case the unit indicates its maximum value and takes a long time to come back to the real measured value. C) The insulation resistance value of a capacitor being a function following a time expo- nential law, it is important to make sense to the measured value, to indicate the duration of the measurement. -
Page 191: Measurement Voltage Selection
100 Mohm.km x 10 = 1,000 Mohm.km C) The insulation resistance value of a cable being a function following a time exponential law, it is important to make sense to the measured value, to indicate the duration of the measure- ment. -
Page 192: Selection Of The Test Voltage
19.5.1. Selection of the test voltage The dielectric strength tests intending to verify that materials or equipments comply with stand- ard requirements, it is important to refer to these standards to select the voltage. In case of no indication regarding the test voltage, a common rule is to apply the following formu- Utest = 2 x Unominal + 1,000 volts Most of the standards specify the type of the test voltage: AC (50-60 Hz) or DC. -
Page 193: 19.5.1.2. Dielectric Strength Tests With Dc Voltage
19.5.1.2. DIELECTRIC STRENGTH TESTS WITH DC VOLTAGE BENEFITS: * The power of the HV source can be lower than the one necessary in AC voltage (less weight and more safety for the operator). The current flows through the specimen only dur- ing the charging phase. -
Page 194: Ground Continuity Measurement
therefore it is possible to destroy or burn the specimen under test. The power of the HV source being limited, continued use of the OFF detection mode can trigger the built-in thermal safety switch. Under those circumstances (display of the message: INTERLOCK DISABLE) wait be- tween 3 and 5 minutes before proceeding to the tests. -
Page 195: Test Time
19.6.3. Test time Unlike a simple resistance measurement, the time that the current is being flowing for the ground continuity measurement is important because of the ‘Safety’ function of the tested connection. Beyond the ohm value evaluation, it is mandatory to test the quality of the connection to the ground potential (diameter of the wire, solders quality, screwing quality, ...). -
Page 196: Installation Of The Sockets In The Rear Panel
INSTALLATION OF THE SOCKETS IN THE REAR PANEL REAR PANEL DESCRIPTION The rear face carries the following elements: Mains supply sockets with fuses incorporated Ground connection Exit area of the measurement cables in the case of the rear face outlet option. ... -
Page 197: C5 Safety Connector
20.1.1. C5 SAFETY CONNECTOR Safety loop contact: to be linked to 9 Safety loop contact: to be linked to 10 Green light Red light 25V common line, red-green light PASS contact (= +25 V) FAIL contact (= +25 V) Safety loop contact: to be linked to 1 Safety loop contact: to be linked to 2 Connection example of the red/green lights, of the contacts of the safety loop and con- tacts PASS/FAIL:... -
Page 198: Care, Maintenance And Calibration
CARE, MAINTENANCE AND CALIBRATION PRELIMINARIES Our warranty (see the beginning of this manual) certifies the quality of the equipment of our pro- duction. If a malfunction is suspected or for any technical information concerning the use of our devices, call our technical department for France on 33.1.64.11.83.40. For foreign countries Contact your local representative. - Page 199 We recommend annual calibration of our devices. This calibration may be advanced or de- layed depending on the rate of use of the measurement device (ask the EATON service de- partment for advice). The latter must be carried out by qualified personnel with the detailed procedure and duly verified calibration means.
- Page 200 EATON, that may contain bug fixes or alternate program functions for the Software, and (b) a subsequent release of the Software, if and when developed by EATON. An Update does not include any release, new version, option, or future product, which EATON licenses separately.
- Page 201 EATON. Licensee may transfer the Software directly to a third party only in connection with the sale of the EATON product in which it is installed or the sale of other products in which it may be permitted to be installed as described by EATON in the Documentation.
- Page 202 APPLICABLE LAW, THE INSTALLATION AND USE OF THE SOFTWARE IS AT LICENSEE’S SOLE RISK. 5.0 General Provisions. 5.1 Update Policy. EATON may from time to time, but has no obligation to, create Updates of the Software or components thereof. 5.2 Limitation on Liability. NOTWITHSTANDING ANY PROVISION OF THIS AGREEMENT TO THE...
- Page 203 C.F.R. § 12.212, and is provided to the U.S. Government only as a commercial end item. Consistent with 48 C.F.R. § 12.212 and 48 C.F.R. §§ 227.7202-1 through 227.7202-4, all U.S. Government End Users acquire the Software with only those rights set forth herein. Contractor / manufacturer is EATON Corpora- tion, 1000 Eaton Boulevard, Cleveland, Ohio 44122.
- Page 204 EATON, the disclosure of which would cause substantial harm to EATON that could not be remedied by the payment of damages alone and such confidential aspects of the Software shall not be disclosed to third parties without the prior written consent of EATON. According- ly, EATON will be entitled to preliminary and permanent injunctive and other equitable relief for any breach of this Section 5.13.
- Page 205 EU DECLARATION OF CONFORMITY User manual SEFELEC 5x Series v1.06...
- Page 206 User manual SEFELEC 5x Series v1.06...
- Page 207 User manual SEFELEC 5x Series v1.06...
- Page 208 User manual SEFELEC 5x Series v1.06...
- Page 209 Only order confirmations and Electrical Sector EMEA Route de la Longeraie technical documentation by Eaton is binding. Photos and pictures also do not 71110 Morges, Switzerland warrant a specific layout or functionality. Their use in whatever form is subject Eaton.eu...
Need help?
Do you have a question about the SEFELEC 5 Series and is the answer not in the manual?
Questions and answers