Table of Contents
Advertisement
Quick Links
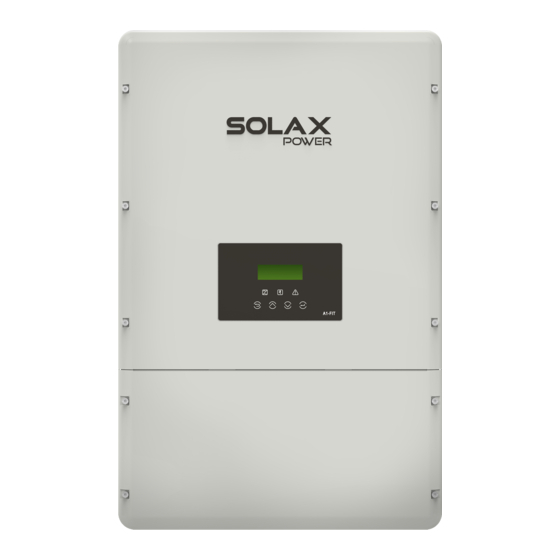
A1 Series User Manual
6.0kw - 8.6kw
UL
Copyright Declaration
Solax Power Network Technology(Zhe jiang) Co,. Ltd.
The copyright of this manual belongs to SolaX Power Network Technology(Zhe jiang) Co,. Ltd. .
Any corporation or individual should not plagiarize, partitially or fully copy (including
software,etc.), and no reproduction or distribution of it in any form or by any means. All rights
reserved. SolaX Power Network Technology (Zhe jiang) Co.,Ltd. reserves the right of final
interpretation.
614.00384.00
Advertisement
Table of Contents

Related Manuals for Solax A1 Series


Summary of Contents for Solax A1 Series
- Page 1 Copyright Declaration Solax Power Network Technology(Zhe jiang) Co,. Ltd. The copyright of this manual belongs to SolaX Power Network Technology(Zhe jiang) Co,. Ltd. . Any corporation or individual should not plagiarize, partitially or fully copy (including software,etc.), and no reproduction or distribution of it in any form or by any means. All rights reserved.
-
Page 2: Table Of Contents
Contents Contents 1 Note on this Manual 1.1 Scope of Validity 1.2 Target Group 1.3 Symbols Used 2 Safety 2.1 Important Safety Instructions 2.2 Explanation of Symbols 3 Introduction 3.1 Basic Features 3.2 External Terminals of Inverter 3.3 Internal Terminals in Wiring Box 3.4 Identification of A1-Series 4 Technical Data 4.1 DC Input... -
Page 3: Target Group
7.2 LAN Connection 1.1 Scope of Validity 7.3 Meter Connection (optional) This manual is an integral part of A1 Series invereter. It describes the assembly, 7.4 Rapid Shutdown Connection(optional) installation, commissioning, maintenance and failure of the product. Please read it 7.5 Monitoring Connection (optional) -
Page 4: Symbols Used
This document does not replace and is not intended to replace any local, state, provincial, including without limitation applicable in the WARNING! jurisdiction of installation. SolaX assumes no responsibility for the “Warning” indicates a hazardous situation which, if not avoided, could result compliance or non-compliance with such laws or codes in in death or serious injury. -
Page 5: Explanation Of Symbols
Safety Safety Lightning and Surge Protection A1 Series inverter are designed and certified to meet stringent UL1741/IEEE WARNING ! 1547 and ANSI/IEEE 62.41/62.42 lighting and surge requirements. Store away from damp and corrosive materials! However, every PV installation is unique, thus additional external UL/NEC AC. -
Page 6: Introduction
Safety Introduction 3 Introduction Symbols on the Type Label 3.1 Basic Features Symbol Explanation A1 Seires is a high-quality inverter which can convert solar energy to AC energy. CSA certified. The inverter can be used to optimize self consumption or feedin to public grid. Work mode depends on PV energy and user’s preference. -
Page 7: External Terminals Of Inverter
Introduction Introduction 3.2 External Terminals of Inverter Object Description PV connection area Grid output connection Communication port DC Disconnection swatch Waterproof valve Pocket WiFi/LAN/4G (optional) USB port for upgrading Smart plug(optional) Reserved Wiring box Inverter power box Please note the inverter power box (section O) is sealed at the factory and there are no user-serviceable parts inside. -
Page 8: Internal Terminals In Wiring Box
Object Description PV Fuses 1. Every A1 series product of our company on the market should correspond to a unique serial number under the unified management of the company. A1 PV terminals series of machine serial number is divided into five parts: type (2 bits)+ power... -
Page 9: Technical Data
Technical Data Technical Data 4.3 Efficiency, Safety and Protection 4 Technical Data 4.1 DC Input Model A1-6.0-US A1-7.0-US A1-7.6-US A1-8.6-US Max. PV-AC 98.50% 98.50% 98.50% 98.50% Model A1-6.0-US A1-7.0-US A1-7.6-US A1-8.6-US CEC efficiency 97.00% 97.00% 97.00% 97.00% Safety & Protection Max. -
Page 10: Hmi
Technical Data Installation 4.5 HMI 5 Installation Model A1-6.0-US A1-7.0-US A1-7.6-US A1-8.6-US 5.1 Check for Physical Damage Display Make sure the inverter is intact during transportation. If there is any visible damage, such as cracks, please contact your dealer immediately. Touch button Communication interface RS485/LAN/WIFI(optional)/4G(optional)/RF(optional) -
Page 11: Mounting
5.3 Mounting Ø Dimensions for Mounting Mounting Environment A1 Series inverter is designed for outdoor installation (Type 4X). Make sure the installation site meets the following conditions: Not in direct sunlight. Not in areas where highly flammable materials are stored. - Page 12 Installation Installation Ø Installation Tools Ø Mounting Steps crimping pliers for binding post and RJ 45, screwdriver, manual wrench Step 1: Screw the wall bracket on the wall driller. 1.1 Place the two brackets on the wall and mark down the positions of the 12 holes.
-
Page 13: Electrical Connection
Electrical Connection Electrical Connection 6. Electrical Connection 6.1 Overview of all Electrical Wirings Method WARNING! All electrial wiring will be done in the wiring box, and all elelctrical wiring All electrical installations must be carried out in accordance with method is similar. Therefore this section will introduce all electrical wiring the local electrical standards and the National Electrical Code steps and requirements. - Page 14 Ø Connecting Electrical Wirings to Terminals A1 series inverter has 3 1-ED holes and 2 1/2-ED holes for wiring connection. Step1: Choose the appropriate wire according to specific connection. And the 3 1-ED holes are used for electrical wiring connection.
-
Page 15: Pv Connection
Electrical Connection Electrical Connection 6.2 PV Connection WARNING! Electric Shock Hazard. The DC conductors of this photovoltaic CAUTION! system are ungrounded and may be energized. Never reverse the polarity of the array string cables since inverter would be damage. Always ensure correct polarity. WARNING! Electric Shock Hazard. - Page 16 PV String Connection PV Fuse Information A1 Series inverter can be connected with PV modules in series with 2 MPPTs A1 Series inverter are shipped with several 15A 600Vdc Littelfuse KLKD 15 string for 6.0KW, 3 MPPTs for 7.0KW and 7.6KW , 4 MPPTS for 8.6KW.
-
Page 17: Grid Connection
A1 Series inverters are grid-tied to the public utility. The connection procedure will vary depending on the grid configuration. The following table provides an overview of the compatible grid configurations, which voltage limit, frequency limit and conductors have to be connected to the inverter to comply with the grid configuration. - Page 18 And the AC circuit breaker selection and installation 208V must follow the National Electrical Code(NEC), ANSI/NFPA 70 or local electrical 240V codes. 208V A1 Series Inverter 208V Delta AC Grid 240V/120V Stinger AC Grid Grid Port Ø Grid Terminal Connection...
-
Page 19: Ground Connection
Electrical Connection Communication Cables Connection 6.4 Ground Connection 7 Communication Cables Connection User can additionally earth the inverter to the enclosure of a second earthing or equipotential bonding if it is required by local safety. This prevents electric 7.1 Overview of all Communication Cables Method shock if the original protective conductor fails. - Page 20 Communication Cables Connection Communication Cables Connection Ø Removing the Communication Broad Ø Connecting Wirings to Terminal Block Step1: Make sure the DC switch is in “OFF” position before removing the Wire size permitted Required torque Terminals Type communication broad. Meter terminal 3-pin terminal block 20AWG 2.3 Ibf.in...
- Page 21 Communication Cables Connection Communication Cables Connection Ø Connecting Wirings to RJ45 Terminal Step4 Step5 Wire size permitted Required torque Terminals Type RJ45, 8-conductor LAN terminal RJ45 Plug-in CAT5 non-crossover Step1: Prepare a communication cable with RJ45 interface and cross it through the conduit.
-
Page 22: Lan Connection
PC and inverter via the local network. NOTE! Ø LAN Connection Diagram The meter communication only works when meter is compatible with the inverter. Ø Meter Connection Diagram A1 Series Inverter A1 Series Inverter Grid Port Home Electric Utility Load meter Ø... -
Page 23: Rapid Shutdown Connection(Optional)
7.5 Monitoring Connection(optional) Inverter provides a Monitoring port which can collect data from inverter and A1 Series inverter reserve a 3pin communication interface to support or control transmit it to monitoring-website via an external monitoring data collector. SolaX the Rapid shutdown(RPSD) function. This communication function is still being could provide three type monitoring data collector, and they are Pocket wifi, developed. -
Page 24: Emergency Stop Swith Connection
Make sure all ground Bus-bar are connected well. Make sure the PV arrays are connected well. Make sure the loads are connected well. A1 Series Inverter emergency stop switch Wiring Box of A1 Series Inverter EPO port METER GRID Ground Bus-bar Ø... -
Page 25: Start The Inverter
Operation Method Firmware Upgrading 8.2 Start the Inverter 9. Firmware Upgrading User can upgrade inverter’s firmware via an U-disk. Step1. Turn on the DC and AC switch at the bottom of the inverter. Step2. Select the wanted voltage through the screen, such as the 208V or 240V. Step3. -
Page 26: Upgrading Steps
Firmware Upgrading Firmware Upgrading 9.3 Upgrading Steps Step3 Step1. Please contact our service support to get the update les, and extract it into your U-disk as follow: “update\ARM\618.00050.00_A1_Manager_VX.XX_XX-XX.usb”; “update\DSP\618.00084.00_A1_Master_VX.XX_XXXXXXXX”; Update Update(ARM) (Vx.xx is version number, xxxxxxxx is le complation date) >ARM Updating---------25% Warning! -
Page 27: Setting
Setting Setting 10. Setting 10.2 Menu Structure please refer to the inverter for the most updated structure All advance setting can only be set by the 10.1 Control Panel technician or the installer with the installer password. L/HVRT Grid L/HFRT Solar Power Factor Load... -
Page 28: Lcd Operation
Setting Setting Ø Status 10.3 LCD Operation Ø LCD Main Interface The main inter face is the default inter face. When the system starts Grid successfully or does not run for a period of time, the inverter will jump to the interface automatically. - Page 29 Setting Setting Ø History a-2) Solar This status shows the realtime Pvcondition of the system,such as input voltage,current and power situation of each PV input. Inverter Yield Solar Load Consume 0.0A 0.0V Meter Yield 0.0A 0.0V 0.0A Error Log 0.0V 0.0A b) History The history function contains seven items of the information: Inverter yield, Load...
- Page 30 Setting Setting b-2) Load Consume Ø Setting The Load consume contains the energy consumed by back-up loads by today and total. Load consume >Today: 00.0 Total: L/HVRT 00.0KWh L/HFRT b-3) Meter Yield Power Factor The Meter Yield contains four items: FeedInToday, FeedInTotal, ConsumeToday and Consume Total.
- Page 31 Setting Setting c ) Setting Ethernet This function is used to set the inverter time, connection, grid and so on . Enduser can set Date Time, Language , Ethernet, ARC-Detection and Work mode 192.168.001.001 directly. Mac Address But for advance setting, it requires installer password to operate most of the 38-33-5D-F6-B0-D1 professional settings.
- Page 32 60.5 0.16 A1 Series inverter comply with the established standards of UL 1741 and IEEE 1547. These standards provide regulation for acceptable output voltage ranges, output frequency, total harmonic distortion, and anti islanding performance when Manufacturer’s Stated Accuracy according to the requirement of UL 1741 the inverter is exporting power to the utility.
- Page 33 Setting Setting Value Magnitude (Hertz) Time (sec) Utility interconnection Frequency SA 12 SPF – Speci ed Power Factor A1-6.0-US A1-7.0-US A1-7.6-USA1-8.6-US trip limits and trip times Procedure for speci ed power factor test Default: -0.95 (underexcited) Overfrequency - HF2 60.1 Apparent Power Rating ( VA) –...
- Page 34 Setting Setting Value SA 15 Volt-Watt (VW) – Optional A1-6.0-US A1-7.0-US A1-7.6-USA1-8.6-US Value Output Power Rating ( W ) – Prated 6000 7000 7600 8600 SA 13 Volt/VAr Mode (Q( V )) A1-6.0-US A1-7.0-US A1-7.6-USA1-8.6-US 100%~120%Vnom AC voltage range with function enabled (V) – [Vmin, Vmax] Procedure for Volt-VAr “Q( V )”test 240V/208V Nominal AC voltage ( V ) –...
- Page 35 Setting Setting c-4-1-2 ) Reconnect Time Frequency Default Setting The user can set the Reconnect Time here. 5 minutes is default, and the setting Value value range is 1 minute to 5 minutes. Trip Time 0.16 High Frequency 2 (Hf2) Ride-through Time Ride-through Mode Reconnect Time...
- Page 36 Setting Setting c-4-2 )Parallel Setting c-4-1-6 ) GlblMPPTFunc GlblMPPTFunc means global Max. power point shadow track function. The function is still being developed. When a part of PV panel is covered by a shadow, it might procduct two or more Please contact with sales for future reference.
- Page 37 ARC fault can not be deleted automatically in any condition in accordance with the Reset Load1 Standard UL1699B. User need to contact SolaX or maintenance staff to fix once >No< there has ARC fault. After fixing the ARC fault, operator should choose “Reset Arc” to delete the fault manually and the inverter will restart automatically.
-
Page 38: Troubleshooting
This section contains information and procedures for solving possible problems “OFF” means the inverter stop delivering all power, but the LCD remains on. with A1 Series inverters, and provides you with troubleshooting tips to identify and solve most problems that could occur with the A1 Series inverters. - Page 39 Troubleshooting Troubleshooting Grid Frequency Out of Range Other Devide Fault • System will reconnect if the utility is back to normal. GridOverFreqFault Other_DeviceFault • Disconnect PV+ , PV- and grid, reconnect them. • Or seek help from us. • Or seek help from us, if can not go back to normal state Grid Voltage Out of Range Temperature Below the Limitation •...
-
Page 40: Routine Maintenance
Contact SolaX Customer Service for further assistance. Please be prepared to Ø Safety checks describe details of your system installation and provide model and serial number of the unit. -
Page 41: Remove The Inverter
Decommissioning Decommissioning 12 Decommissioning 12.1 Remove the Inverter Disconnect the inverter from DC Input and AC output. Wait for 5 minutes for de-energizing. Disconnect communication and optional connection wirings. Remove the inverter from the bracket. Remove the bracket if necessary. 12.2 Packaging Please pack the inverter with the original packaging.
Need help?
Do you have a question about the A1 Series and is the answer not in the manual?
Questions and answers