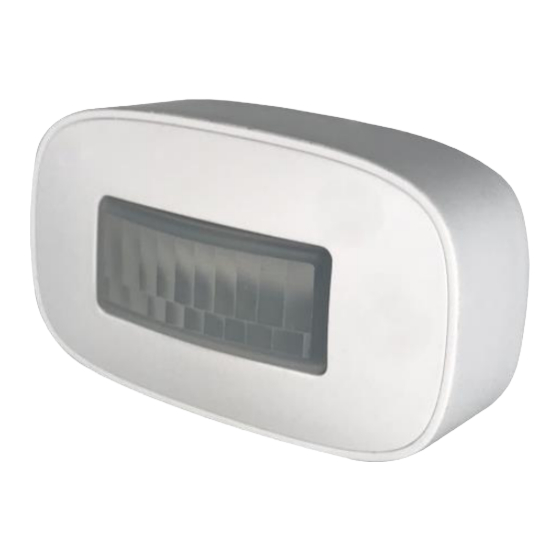
Summary of Contents for ARC MIMST-1703
-
Page 1: Table Of Contents
Issue Date: 23/03/2020 INDOOR MOTION SENSOR MIMST-1703 CONTENTS 1. Overview and features Page 2. 2. Diagrams Page 3. 3. Battery Page 4. 4. Mounting on surface Page 7. 5. Pairing / Un-pairing device Page 9. 6. Delay Off timer setup Page 10. -
Page 2: Overview And Features
Issue Date: 23/03/2020 1. Overview and features Indoor motion sensor can detect occupancy and movement and triggers your connected receiver devices. Place the motion sensor freestanding on a table or shelf or affix the magnetic mounting base on the ceiling or on wall corner. Perfect for your basement, garage or hallway. -
Page 3: Diagrams
Issue Date: 23/03/2020 2. Diagrams Notes for the diagrams: Lux setting Learn button Delay off timer LED Indicator DIAGRAMS... -
Page 4: Battery
Issue Date: 23/03/2020 3. Battery Red LED will flash once every 4 seconds to indicate the battery is low. 1. Using a cross head screwdriver, turn counterclockwise to loosen the battery compartment. 2. Pull out battery insulation strip. (First time use only) Insulation strip BATTERY... - Page 5 Issue Date: 23/03/2020 3. Or replace new battery with a slot screwdriver and push down the metal spring then remove battery. 4. Replace with a new 3V CR2450 battery. Gently tilt battery at an angle towards the metal spring and with some force push down the battery making sure the positive symbol is facing upwards.
- Page 6 Issue Date: 23/03/2020 Initial start (when battery is inserted) please leave the motion sensor steady for at least 15 seconds to allow the sensor to warm up and stable enough to detect any movement. LITHIUM BATTERY CAUTION: Risk of Explosion if battery is replaced by an incorrect type. Dispose of used batteries according to the environment protection rules.
-
Page 7: Mounting On Surface
Issue Date: 23/03/2020 4. Mounting On Surface 1. Using a cross head screwdriver to mount the magnetic base on flat surface. 2. Gently attach the motion senor to the magnetic base making sure the detection lens is not up side down. Square box must be at the bottom. - Page 8 Issue Date: 23/03/2020 4. Detection range and angle. 5. Recommendation for best performance is at 6M / 90̊ @ 1.5M mounting height. 6. Motion Sensor can also be freestanding on a table or shelf but making sure the detection lens is not upside down. MOUNTING ON SURFACE...
-
Page 9: Pairing / Un-Pairing Device
Issue Date: 23/03/2020 5. Pairing / Un-pairing Device AIRING AIRING Refer to the relevant receiver operation manual that you wish to control for detailed pairing / un-pairing procedure. With the receiver that you intent to use, enter into “Learning Mode” To Pair: Press Learn Button once. -
Page 10: Delay Off Timer Setup
Issue Date: 23/03/2020 6. Delay Off Timer Setup Motion sensor has built in delay off timer (5S / 1M / 5M / 10M) that automatically trigger the connected receiver to turn OFF in order to conserves battery power. Factory pre-setting will be at ‘5’ seconds position. •... -
Page 11: Lux Setup
Issue Date: 23/03/2020 7. Lux Setup Motion sensor can adjust Lux level depending on the areas used. Factory pre-setting will be at ‘H’ Lux level. ⚫ To adjust lux level, simply adjust rotary switch from H-M or M-L and leaving the motion sensor in a stable environment. -
Page 12: Operation
Issue Date: 23/03/2020 8. Operation Manual ON: Press Learn Button once. Manual OFF: Press Learn Button twice. OPERATION... -
Page 13: Specifications
Issue Date: 23/03/2020 9. Specifications Battery: 3V CR2450 Lithium Cell Battery Radio Frequency: 433.92MHz 1W Power consumption: ºC Environment Temperature: 0-40 Range: Up to 50 m indoors (Depends on building materials) In accordance with: Low Voltage Directive 2014/35/EU RED Directive 2014/53/EU CE Certification: The CE marked affixed to this product confirms Its complaisance with the European Directives...


Need help?
Do you have a question about the MIMST-1703 and is the answer not in the manual?
Questions and answers