Table of Contents
Advertisement
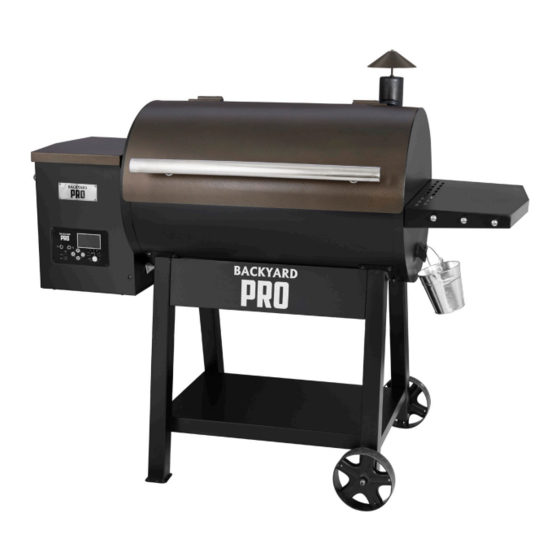
WOOD-FIRE PELLET
GRILL AND SMOKER
INSTRUCTION MANUAL
#554PL2026, #554PL2032
02/2020
FOR YOUR SAFETY!
Use outdoors only! Do not use grill in a building, garage or any other
enclosed areas. Read the entire manual before installation and use of the pellet fuel-burning
appliance. Failure to follow these instruction could result in property damage, bodily injury or
WARNING
even death. Do not use the grill unless it is completely assembled and all the parts are securely
fastened. This grill will become very hot, do not move it during operation. Keep children and
pets away while grill is in use.
1
Advertisement
Table of Contents

Summary of Contents for Backyard Pro 554PL2026
- Page 1 WOOD-FIRE PELLET GRILL AND SMOKER INSTRUCTION MANUAL #554PL2026, #554PL2032 02/2020 FOR YOUR SAFETY! Use outdoors only! Do not use grill in a building, garage or any other enclosed areas. Read the entire manual before installation and use of the pellet fuel-burning appliance.
-
Page 2: Table Of Contents
Table of Contents For Your Safety ������������������������������������������������������������������������������������������������������� 3-5 Exploded View ����������������������������������������������������������������������������������������������������������� 6 Parts & Hardware List ��������������������������������������������������������������������������������������������� 7-8 Preparation ���������������������������������������������������������������������������������������������������������������� 8 Assembly Instructions������������������������������������������������������������������������������������������� 9-12 Power & Preparation ����������������������������������������������������������������������������������������������� 13 Operation ������������������������������������������������������������������������������������������������������������ 14-21 How It Works ���������������������������������������������������������������������������������������������������� 13 Getting Started �������������������������������������������������������������������������������������������������� 14 Control Panel and LCD Screen ���������������������������������������������������������������������������... -
Page 3: For Your Safety
FOR YOUR SAFETY NOTE: MAJOR CAUSES OF FIRES ARE MAINTENANCE AND FAILURE TO MAINTAIN REQUIRED CLEARANCES TO COMBUSTIBLE MATERIALS. IT IS OF UTMOST IMPORTANCE THAT THIS PRODUCT BE USED ONLY IN ACCORDANCE WITH THESE INSTRUCTIONS. READ ALL SAFETY WARNINGS AND INSTRUCTIONS CAREFULLY BEFORE ASSEMBLING AND OPERATING YOUR GRILL 1. - Page 4 Check with your local dealer on the quality of pellets in your area, and for information on what can be expected from various brands. NOTE: As there is no control over the quality of pellets used with the appliance, Backyard Pro assumes no liability caused by the quality of fuel.
- Page 5 use. 2. Keep grill area clear and free from flammable materials. 3. Use caution when moving grill to reduce risk of injury. FOR YOUR SAFETY 4. Use grill only in a well-ventilated space. NEVER use in enclosed space such as carport, garage, porch, covered patio, or under an overhead structure of any kind.
-
Page 6: Exploded View
EXPLOSION VIEW EXPLODED VIEW... - Page 7 PARTS AND HARDWARE PARTS AND HARDWARES PARTS AND HARDWARES PARTS AND HARDWARES PARTS AND HARDWARES PL2032 & PL2026 PARTS LIST PARTS AND HARDWARES PARTS AND HARDWARES PARTS AND HARDWARES PARTS AND HARDWARES PARTS AND HARDWARES PARTS AND HARDWARES Right front leg Side table Right Front Leg Side Table...
-
Page 8: Preparation
PARTS AND HARDWARE PL2026 HARDWARE PL2032 HARDWARE PREPARATION PREPARATION Before beginning assembly make sure all parts are present. Compare parts with included contents list and diagram above. If any parts are missing or damaged, do not attempt to assemble the grill. Contact customer Before beginning assembly make sure all parts are present. -
Page 9: Assembly Instructions
ASSEMBLY INSTRUCTIONS STEP 1 STEP 2 Attach the washers (3) and metal wheel (4) to Assemble the right front leg (1), right back leg (2), the right front leg (1) and right back leg (2) with and left back leg (6) and left front leg (7) to the 2 nuts (C) and 2 metal washers (D) Barrel &... - Page 10 ASSEMBLY INSTRUCTIONS STEP 5 STEP 6 Screw 3 tool hangers (11) to side table (12). Insert the handle (14) to the Barrel & Half screw 2 bolts (A) to the main body as shown. Hopper Assembly (10) with 2 bolts (A) and Align and hang the side table (12) onto the halfway 2 washers (E)(B).
- Page 11 PL2026 ASSEMBLY INSTRUCTIONS, STEPS 8-10 STEP 8 STEP 9 Assemble the stack (17) and gasket (16) to Attach the grease bucket (9). the main body with 3 bolts (F) and 3 washers (G). STEP 10 TO USE: 1. Place heat diffuser shield (18) over the fire cup 1.
- Page 12 PL2032 ASSEMBLY INSTRUCTIONS, STEPS 8-10 STEP 8 STEP 9 Assemble the stack (17) and gasket (16) to Attach the grease bucket (9). the main body with 4 bolts (A) and 4 washers (E). STEP 10 TO USE: 1. Place heat diffuser shield (18) over the fire cup 1.
- Page 13 POWER & PREPERATION HOOKING UP TO POWER NOTE: Before plugging your pellet grill into any electrical outlet, ensure the Temperature Dial is in the "STAND BY" position and Power Switch to the "OFF" position. AT HOME This appliance requires 110-120V, 60Hz, 5 amp service. It must be a 3 prong grounded plug. The control uses a 5 amp 120 Volt Fast-Blow fuse to protect the board from the igniter.
-
Page 14: Operation
OPERATION OPERATION Control Panel Functions Control Panel Functions 1. Power Switch must be in the OFF position and 1. Power Switch must be in the OFF position the TEMP Control must be in the "STAND BY" and the TEMP Control must be in the “STAND BY”... -
Page 15: How It Works
In accordance with the procedures and specifications listed in UL SUBJECT 2728-2009 "PELLET FUEL COOKING APPLIANCES"AND CANADIAN ULC/ORD C2728 and CSA C22.2 #3 "FOR ELECTRICAL FEATURES OF FUEL BURNING EQUIPMENT", The Backyard Pro pellet cooking appliance has been independently tested and listed by INTERTEK (an accredited testing laboratory) to ETL,UL,ULC... -
Page 16: Getting Started
OPERATION GETTING STARTED Following is a list of the important tips that will contribute to the cooking perfection that you can expect when using your grill: ENVIRONMENT As with all barbecues, the outside weather conditions will play a big part in the performance of your grill and the cooking times needed to perfect your culinary delights. -
Page 17: Control Panel And Lcd Screen
OPERATION OPERATION Control Panel and LCD Screen Control Panel and LCD Screen Set TEMP Readout/Timer Readout Meat Probe TEMP Readout “P” Setting Readout Meat TEMP Probe LCD Screen Actual TEMP Readout Power Switch TEMP Control “P” / “M” Setting High Temperature Mode LCD Screen •... - Page 18 OPERATION OPERATION MEAT TEMP PROBE POWER SWITCH STAND BY “P” / “M” Setting SMOKE TEMP CONTROL "P" SETTING “P” SETTING The main benefit to the "P" Button is that it allows you to fine tune your Pellet Grill to compensate for ambient The main benefit to the “P”...
- Page 19 OPERATION OPERATION MEAT TEMP PROBE POWER SWITCH STAND BY “P” / “M” Setting SMOKE TEMP CONTROL "M" Meat Probe Setting “P” SETTING Insert Meat Probe to P1 or P2, and set temperature dial to your desired one. Then push "M"and hold for 3 The main benefit to the “P”...
-
Page 20: Manual Lighting Procedure
OPERATION MANUAL LIGHTING PROCEDURE IF FOR ANY REASON YOUR ELECTRIC IGNITER FAILS, YOU CAN START YOUR GRILL USING THIS MANUAL METHOD. NOTE: Always clean or check your burn pot before each use. This will ensure proper ignition, heat output and a successful grilling experience. Manual Start Up 1. -
Page 21: Shutting Off Your Grill
OPERATION SHUTTING OFF YOUR GRILL Your Pellet Grill will give you years of service with proper cleaning. An important step is allowing the grill and cooking grids to "Self Clean" by running the grill on HIGH temperature for 5 to 10 minutes after each use. When finished using your grill, turn the Temperature Dial to HIGH. - Page 22 TROUBLE SHOOTING Proper cleaning, maintenance and the use of clean, dry, quality fuel will prevent common grill operational problems. However, if your Wood Pellet Grill is simply operating poorly, or not at all, the following trouble shooting tips may be helpful. DO NOT RETURN the appliance without calling Customer Service for assistance.
- Page 23 TROUBLE SHOOTING PROBLEM POSSIBLE CAUSE PREVENTION/SOLUTION Ensure unit is plugged in. Verify there is power at the electrical outlet. Power Check and reset the Ground Fault Interrupter, if necessary. If igniter not working, check 5 amp fuse found on the back of the control.
- Page 24 TROUBLE SHOOTING PROBLEM POSSIBLE CAUSE PREVENTION/SOLUTION Check the burn pot for ash build-up or obstructions. Check the fan for proper operation; that it is working, that the air intake is not blocked and that there is no blockage in Insufficient air flow the auger tube�...
-
Page 25: Troubleshooting Guide
TROUBLE SHOOTING Trouble Shooting Guide DIGITAL CONTROL WIRING DIAGRAM Digital Control Wiring Diagram The Digital Temperature Control system is an The Digital Temperature Control intricate and valuable piece of technology. system is an intricate and valuable For protection from power surges and piece of technology. -
Page 26: Grilling Recipes
GRILLING RECIPES COOK TIME GUIDELINES The following cooking guidelines are just that "Guidelines", and are in no way the only way to cook. TIP! For best results always allow for "Resting Time". This allows the natural juices to migrate back into the meat fiber, giving a much juicer, flavorful cut. - Page 27 1 Year Parts and Labor Warranty Backyard Pro warrants to the original purchaser of new Backyard Pro grills (and all parts thereof), that such equipment will be free from defects in material and workmanship for a period of 1 year from the date of delivery.
Need help?
Do you have a question about the 554PL2026 and is the answer not in the manual?
Questions and answers