
Subscribe to Our Youtube Channel
Related Manuals for Merax L510C


Summary of Contents for Merax L510C
- Page 1 USER’S MANUAL Note: Following the principles of sustainable development, we may modify machines when necessary and will not notify again. It all depends on the actual product.
-
Page 2: Table Of Contents
…….……………………………………13 5.Routine Maintenance PLEASE DO NOT RETURN PRODUCT TO THE STORE. If you have any problem or concerns, please feel free to contact our customer service department. We will reply you as soon as possible. E-Mail: csr@merax.com Tel: 626-912-8886 Ext.100... -
Page 3: Product Brief
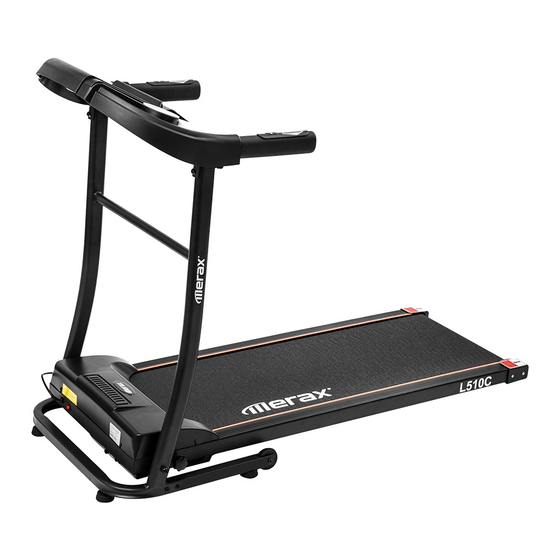
1.Product Brief Product name: Merax L510C Folding Electric Treadmill Motorized Running Machine Main parameters and parts list Main technical parameters Parameters Names Description Input power voltage 110V Motor power 1.5 HP Speed 0.5-7.5 mph Running surface 400*1100 mm Max user weight... -
Page 4: Security Precautions And Warnings
If you do not feel well while using this machine, please stop and consult a doctor. The included silicone lubrication must be kept away from children after use. If the power cord is damaged, please contact our qualified maintenance personnel for service rather than disassemble it at csr@merax.com. Forbidden ... - Page 5 Don't jump up and down while the treadmill is in motion. ---- Injuries may result from falling. Don't keep machine in or near moist/damp space such as the bathroom. Don’t place machine in direct sunlight, or high temperature places such as near a stove or a heating appliance.
- Page 6 When not in use, pull out the power plug from the socket. ----Surrounding dust and moisture can age the insulation, and result in a possible leakage fire. This appliance is not intended for use by persons (including children) with reduced physical, sensory or mental capabilities, or lack of experience and knowledge concerning treadmills, unless they are being supervised or have been given instructions concerning use of the appliance by a person responsible for their safety.
-
Page 7: Installation Instructions
3.Installation Instructions When installing, simple arrange all of the screws in their proper position first, then tighten the screws the treadmill frame has been positioned when the installation of frame is done. Name Complete Machine 6mm inner hexagon wrench 5mm inner hexagon wrench Combination wrench Safety key Silicon oil... - Page 8 1. Place the machine flat on the ground. Remove the knob by twisting it in the direction of the picture below. Raise the supportive columns and console upward in the direction shown by the arrows in the picture below. 2. Use a #5 hexagon wrench and screw provided screws (M6*12) to secure the treadmill base (use two M6*12 screws for each side).
- Page 9 4.Refer to the knob in step 1. Use this knob to lock the m n base and columns in place by rotating clockwise, please refer to the picture below. If your treadmill is on an uneven surface, this may cause difficulties when rotating the knob. Please lift the column slightly forward so the running surface is perfectly flat in mid-air and tighten the knob as shown in the picture below.
-
Page 10: Using Instructions
Folding instructions When the treadmill is not in use, you can lift the running deck and then twist the knob to lock it in an upright position, as shown in the picture below. 4. Using Instructions Using your treadmill 1. Insert the power plug into a proper outlet and turn on the red switch located at the base of the treadmill(1). - Page 11 Console instructions Button instructions For the treadmill to start moving it typically takes a 3 second countdown. Programs and modes There are 3 modes and 12 automatic programs. Safety key function When the safety key is disconnected “E7” will appear on the screen, the treadmill will gradually stop and you will hear a beeping sound.
- Page 12 5. Speed buttons Use these buttons to adjust the speed of the treadmill in 0.1mile increments. Press the ‘+’ key to increase the speed by 0.1mile and ‘-‘ to decrease the speed by 0.1mile. You can also adjust the speed using the Speed Quick Keys on the handle grips. Display Functions 1.
- Page 13 Error Code Translations Fault code Failure Description fault handling Disrupted Possible Causes: The electronic connection between the console Electronic and lower controller is blocked, check each wire that connects Connection: When the console with the lower controller, make sure that each wire turned base is fully plugged in.
-
Page 14: Routine Maintenance
5. Routine maintenance Warning: Before cleaning or doing product maintenance, please ensure the treadmill power plug is pulled out of the electric socket. Cleaning: Thoroughly cleaning your treadmill will extend its usage life. Remove dust periodically in order to keep the parts clean. Be sure to clean both sides of running belt, this will reduce the accumulation of dust and dirt. - Page 15 Picture A Picture B Applying the treadmill silicone oil Step 1: Lift the running belt slightly Step 2: Open the silicone oil bottle, squeeze the silicone oil on the sides of the running board, as show in the following picture:...
Need help?
Do you have a question about the L510C and is the answer not in the manual?
Questions and answers
How to fold treadmill with lock number but have silver locking device
To fold the Merax treadmill model L510C with the silver locking device:
1. Locate the knob (silver locking device) mentioned in Step 1.
2. Rotate the knob clockwise to lock the main base and columns in place.
3. If the treadmill is on an uneven surface and the knob is difficult to rotate, slightly lift the column forward so the running surface is flat in mid-air.
4. Tighten the knob as shown in the picture in the manual.
5. Do not twist the knob too tightly to ensure the machine can fold easily.
This answer is automatically generated