Table of Contents
Advertisement
Advertisement
Table of Contents

Subscribe to Our Youtube Channel
Related Manuals for Wen 3705


Summary of Contents for Wen 3705
-
Page 3: Table Of Contents
Table of Contents SECTION PAGE Specifications………………………………………………………………… Rules for safe operation……………………………………………………… General instructions for all power tools……………………………………… Extension cords………………………………………………………………. Grounding instructions……………………………………………………….. Unpacking……………………………………………………………………. Assembly……………………………………………………………………... To mount table saw on a work bench………………………………… To assemble the leg stand……………………………………………. To mount the leg stand on table saw base……………………………. To install the handwheel………………………………………………... -
Page 4: Specifications
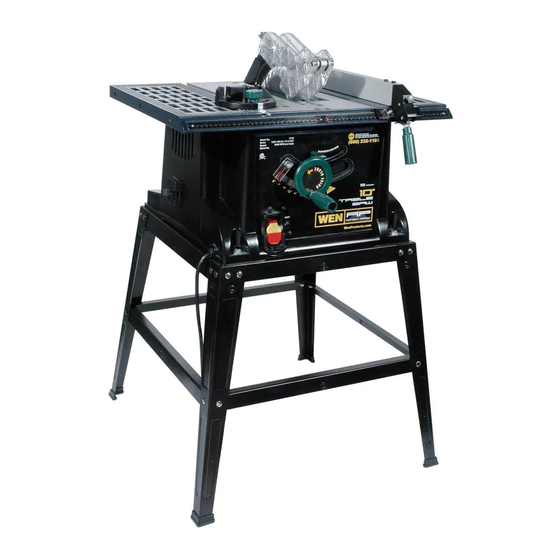
Specifications 10” Table Saw with Stand Item#: 3705 Motor: 120V, 60Hz, 15A Motor speed: 4800rpm (no load) Blade: 10” carbide tipped Arbor size: 5/8” dia. Depth of cut at 90º: 3” Depth of cut at 45º: 2-3/8” Bevel angle range: Left, 90º-45º... -
Page 5: Rules For Safe Operation
Servicing requires extreme care and knowledge and should be performed only by a qualified service technician. For service, we suggest you return the tool to WEN PRODUCTS a division of Great Lakes Technologies, LLC. for repair . When servicing, use only identical WEN®... -
Page 6: General Instructions For All Power Tools
General instructions for all power tools READ ALL INSTRUCTIONS!!! • Know your power tool. Read the operator’s manual carefully. Learn the application and limitations as well as specific potential hazards related to this tool. • Keep guards in place and in working order. Never operate the tool with any guard or cover removed. - Page 7 General instructions for all power tools (continued) • Use recommended accessories. Consult the operator’s manual for recommended accessories. The use of improper accessories may cause risk of injury. • Never stand on tool. Serious injury could occur if the tool is tipped or if the blade is unintentionally contacted.
- Page 8 • Replacement parts. All repairs, whether electrical or mechanical, should be made by a qualified service technician at an authorized service center. WARNING - when servicing use only identical WEN® replacement parts. Use of any other part may create a hazard or cause product damage.
- Page 9 General instructions for all power tools (continued) • Stay alert and exercise control. Watch what you are doing and use common sense. DO NOT operate tool when you are tired. DO NOT RUSH! • Make sure work area has ample lighting to see the work and that no obstructions will interfere with safe operation before performing any work by using your saw.
- Page 10 Specific safety rules for table saw For Your Own Safety Read Instruction Manual before Operating Saw 1. Wear eye protection. 2. Use saw-blade guard and spreader for every operation for which it can be used, including all through sawing. 3. Keep hands out of the line of saw blade. 4.
- Page 11 Specific safety rules for table saw (continued) • Do not use fence as a guide when crosscutting. • Do not ripcut a twisted or warped work piece, or work piece without straight edge to guide along fence. • Maintain control of the work piece. Do not allow the work piece to rest against the moving blade without holding onto it.
-
Page 12: Extension Cords
Extension cords In the event of a malfunction or breakdown, grounding provides a path of least resistance for electric current and reduces the risk of electrical shock. Tools equipped with an electrical cord having an equipment-grounding conductor must be plugged into a matching outlet that is properly installed and grounded in accordance with all local codes and ordinances. -
Page 13: Grounding Instructions
Grounding instructions IN THE EVENT OF A MALFUNCTION OR BREAKDOWN, grounding provides the path of least resistance for electric current and reduces the risk of electric shock. This tool is equipped with an electric cord that has an equipment grounding conductor and a grounding plug. The plug MUST be plugged into a matching outlet that is properly installed and grounded in accordance with ALL local codes and ordinances. -
Page 14: Unpacking
Unpacking WARNING - to prevent accidental starting that could cause possible serious personal injury; assemble all parts to your saw before connecting it to power supply. Saw should never be connected to power supply when you are assembling parts, making adjustments, installing or removing blades, or when not in use. -
Page 15: Assembly
Assembly WARNING! Prior to performing any assembly procedures, make sure the 10” table saw is disconnected from its electrical power source. To mount table saw on a workbench: 1. NOTE: If the Table Saw is mounted onto a workbench instead of the Leg Assembly, the workbench surface must have an opening for sawdust to fall through. -
Page 16: To Mount The Leg Stand On Table Saw Base
Assembly (continued) 6. Move the Leg Assembly to the desired floor surface working location. Then, firmly tighten all hardware, using an appropriate size wrench (not provided). To mount the leg stand on table saw base: 1. With assistance, place the Table Saw upside down on a flat, level, smooth surface (i.e., cardboard) on the floor. -
Page 17: Operating Instructions
Operating instructions Read the general instructions and safety rules section at the beginning of this manual before set up or use of this product. Table saw adjustments To prevent serious injury from accidental operation: Turn the Power Switch of the tool to its “OFF” position, remove Safety key, and unplug the tool from its electrical outlet before performing any inspection, maintenance, or cleaning procedures. -
Page 18: 45º And 90º Positive Stop Adjustment
Operating instructions (continued) When the Blade is tilted to the right as far as it will go, the Blade should be at a 90ºangle to the Saw Table and the Bevel Indicator on the Ruler should point to 0º. Please note: When the Blade is at 90º to the Table Saw, the Blade should be square with the Saw Table. -
Page 19: Adjusting Table Insert
Operating instructions (continued) WARNING! The Fence must be properly aligned to the gauge slot to prevent kickback during ripping. To check for proper alignment, position the Fence next to the gauge slot and clamp Fence to the Table by pushing down on Fence Handle. Once locked, the edge of the Fence should be parallel to the gauge slot. -
Page 20: Installing/Replacing Saw Blade
Operating instructions (continued) Using a square or ruler (not included), place the square against the Miter Gauge slot and adjust the flat edge of the square until it touches the marked tooth. Rotate the Blade and check the same marked tooth at the rear of the Table Saw. If the front and rear measurements are not identical, have a qualified service technician repair the Table Saw. -
Page 21: Workpiece And Work Area Set Up
Operating instructions (continued) Workpiece and work area set up Designate a work area that is clean and well-lit. The work area must not allow access by children or pets to prevent injury and distraction. Route the power cord along a safe route to reach the work area without creating a tripping hazard or exposing the power cord to possible damage. -
Page 22: Avoiding Kickback
Operating instructions (continued) Avoiding kickback The Table Saw can be used for straight-line cutting, such as cross cutting, ripping, mitering, beveling and compound cutting. However, kickback can occur when the Blade stalls, a cut is made at an incorrect depth, or you saw into a knot or nail. To avoid kickback, do the following: 1. -
Page 23: Making A Rip-Cut
Operating instructions (continued) Place a support (not included) that is the same height as the Table Saw behind the Saw. Turn the Switch to “ON”. Let the Blade build up to full speed before moving the workpiece into the Blade from the front of the Saw. -
Page 24: Making A Bevel Rip-Cut
Operating instructions (continued) Making a bevel rip-cut WARNING! The Fence must be on the right side of the Blade to avoid trapping the wood and causing kick-back. Placing the Fence to the left of the Blade will result in kickback and lead to potential injury and property damage. -
Page 25: Maintenance And Servicing
Maintenance and servicing Procedures not specifically explained in this manual must be performed only by a qualified technician. WARNING! To prevent serious injury from accidental operation: Turn the Power Switch of the tool to its “OFF” position and unplug the tool from its electrical outlet before performing any inspection, maintenance, or cleaning procedures. -
Page 26: Exploded View And Parts List
Exploded view and parts list... - Page 27 Exploded view and parts list (continued) Part# Stock# Description Part# Stock# Description 3705-001 Rubber feet 3705-047 Big washer 3705-002 Bolt M6×25 3705-048 3705-003 Spring washer 3705-049 Nut M10 3705-004 Mat washer 3705-050 Flat washer 3705-005 Base 3705-051 Pointer 3705-007 Bolt ST4.2×14...
- Page 28 Exploded view and parts list (continued) Part# Stock# Description Part# Stock# Description 3705-092 Front cover 3705-119 Splitter bracket 3705-093 Bolt M5×20 3705-120 Bolt M6×12 3705-094 Arbor shaft 3705-121 Wing nut M6 3705-096 Blade 3705-122 Twist spring 3705-097 Outer flange 3705-123...
-
Page 29: Warranty Statement
Warranty statement WEN Products is committed to build tools that are dependable for years. Our warranties are consistent with this commitment and our dedication to quality LIMITED WARRANTY OF WEN CONSUMER POWER TOOLS PRODUCTS FOR HOME USE GREAT LA KES TECHNOLOGIES, LL C ("Seller") warrants to the original purchaser only, that all WEN consumer power tools will be free from defects in material or workmanship for a period of one year from date of purchase.
Need help?
Do you have a question about the 3705 and is the answer not in the manual?
Questions and answers