Table of Contents
Advertisement
Your new tool has been engineered and manufactured to WEN's highest standards for dependability,
ease of operation, and operator safety. When properly cared for, this product will supply you years
of rugged, trouble-free performance. Pay close attention to the rules for safe operation, warnings,
and cautions. If you use your tool properly and for intended purpose, you will enjoy years of safe,
reliable service.
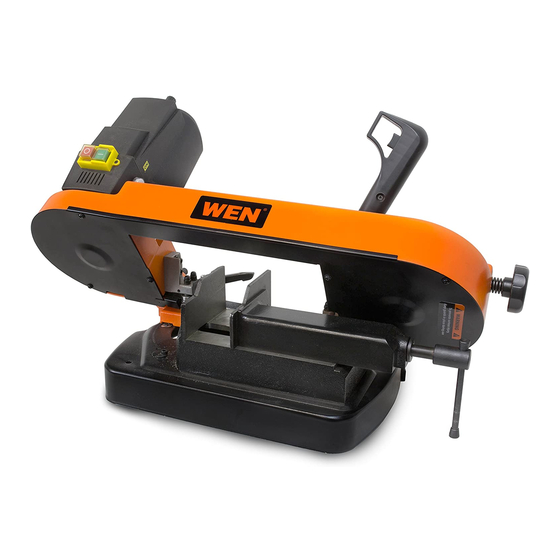
5-INCH PORTABLE
METAL BAND SAW
IMPORTANT:
NEED HELP? CONTACT US!
Have product questions? Need technical support?
Please feel free to contact us at:
800-232-1195
techsupport@wenproducts.com
WENPRODUCTS.COM
bit.ly/wenvideo
(M-F 8AM-5PM CST)
Advertisement
Table of Contents

Summary of Contents for Wen 3975
- Page 1 IMPORTANT: Your new tool has been engineered and manufactured to WEN’s highest standards for dependability, ease of operation, and operator safety. When properly cared for, this product will supply you years of rugged, trouble-free performance. Pay close attention to the rules for safe operation, warnings, and cautions.
-
Page 2: Table Of Contents
Operation Maintenance Troubleshooting Exploded View & Parts List Warranty TECHNICAL DATA Model Number: 3975, 3975T Motor: 120 V, 60 Hz, 4.5A, 400W (S6 40%) Saw Blade: 56-1/2 x 1/2 in. Cutting Capacity for Square Material: 5 x 4-7/8 in. (90°) 3-1/8 x 3-15/16 in. -
Page 3: General Safety Rules
GENERAL SAFETY RULES Safety is a combination of common sense, staying alert and knowing how your item works. SAVE THESE SAFE- TY INSTRUCTIONS. WARNING: To avoid mistakes and serious injury, do not plug in your tool until the following steps have been read and understood. 1. -
Page 4: Specific Safety Rules For Band Saw
GENERAL SAFETY RULES 15. DO NOT OVERREACH. Keep proper footing and balance at all times. Wear oil-resistant rubber-soled foot- wear. Keep the floor clear of oil, scrap, and other debris. 16. MAINTAIN TOOLS PROPERLY. ALWAYS keep tools clean and in good working order. Follow instruc- tions for lubricating and changing accessories. -
Page 5: Electrical Information
ELECTRICAL INFORMATION GROUNDING INSTRUCTIONS IN THE EVENT OF A MALFUNCTION OR BREAKDOWN, grounding provides the path of least resistance for an electric current and reduces the risk of electric shock. This tool is equipped with an electric cord that has an equipment grounding conductor and a grounding plug. -
Page 6: Know Your Band Saw
KNOW YOUR BAND SAW Refer to the parts and controls in the dia- gram below. They will be referred to later in the manual for assembly, adjustment, and operation instructions. Blade Tension Adjustment Knob Run Switch Vise Handle Rubber Feet Work Stop Miter Locking Handle Locking Pin... -
Page 7: Adjustments
ASSEMBLY ASSEMBLY 1. Attach the four feet (Fig. B - 1) along each respective corner of the base. 2. Place the machine on a work bench, and secure it in place by us- ing the three holes provided in the base (Fig. A). 3. -
Page 8: Cutting Speed
1. Using a hex wrench, loosen the 2 socket head cap screws (parts 3975-109 and 3975-110). 2. Adjust the position of the stationary blade guide assembly so that its side lays flush with the body of the saw. -
Page 9: Operation
OPERATION Fig. G Fig. H Fig. I 1. Pull out the pin (Fig. G - 1) from the hole in the saw’s body and tilt the saw to its upper position. Set the blade stop to the desired position (Fig. H - 2). -
Page 10: Maintenance
Replace the band saw blade when it becomes dull. A sharp blade gives the best cuts and helps extend the life of your machine. Replacement blades (model no. 3975-056 and BB5650) can be purchased from wenproducts.com. -
Page 11: Troubleshooting
4. Keep the machine’s hand grip clean in order to prevent accidental slippage during use. 5. If you do not intend to use the machine for longer than a week, clean it and store it in a cool, dry place out of the reach of children. -
Page 12: Exploded View & Parts List
EXPLODED VIEW AND PARTS LIST... - Page 13 123 3975-123 Vise jaw 28 3975-028 Ball bearing 76 3975-076 Flat washer 124 3975-124 Sliding case 29 3975-029 Retaining ring 77 3975-077 Rear blade guide block 125 3975-125 Retaining ring 30 3975-030 43T Gear 78 3975-078 Ball bearing 126 3975-126 Screw...
- Page 14 500 hours of use; whichever comes first. Ninety days for all WEN products if the tool is used for professional or commercial use.


Need help?
Do you have a question about the 3975 and is the answer not in the manual?
Questions and answers