Advertisement
Quick Links
Intertek
4000311
Your new tool has been engineered and manufactured to WEN's highest standards for dependability,
ease of operation, and operator safety. When properly cared for, this product will supply you years
of rugged, trouble-free performance. Pay close attention to the rules for safe operation, warnings,
and cautions. If you use your tool properly and for intended purpose, you will enjoy years of safe,
reliable service.
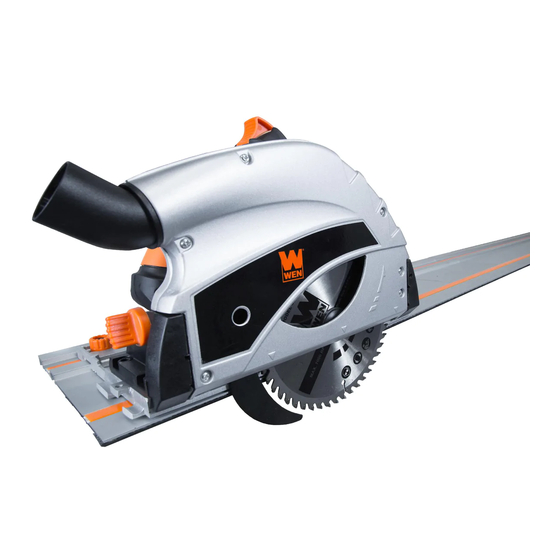
6-1/4 IN. TRACK SAW
IMPORTANT:
NEED HELP? CONTACT US!
Have product questions? Need technical support?
Please feel free to contact us at:
800-232-1195
techsupport@wenproducts.com
WENPRODUCTS.COM
Model # 36055
bit.ly/wenvideo
(M-F 8AM-5PM CST)
Advertisement

Subscribe to Our Youtube Channel
Related Manuals for Wen 36055


Summary of Contents for Wen 36055
- Page 1 IMPORTANT: Your new tool has been engineered and manufactured to WEN’s highest standards for dependability, ease of operation, and operator safety. When properly cared for, this product will supply you years of rugged, trouble-free performance. Pay close attention to the rules for safe operation, warnings, and cautions.
- Page 2 Specific Safety Rules For Track Saw Electrical Information Know Your Track Saw Assembly and Adjustments Operation Maintenance Exploded View and Parts List Warranty TECHNICAL DATA 36055 Model Number: Motor: 120 V, 60 Hz, 9A 5500 RPM Speed (no load): 20 mm Arbor Size: 160 mm...
-
Page 3: General Safety Rules
GENERAL SAFETY RULES Safety is a combination of common sense, staying alert and knowing how your item works. SAVE THESE SAFE- TY INSTRUCTIONS. WARNING: To avoid mistakes and serious injury, do not plug in your tool until the following steps have been read and understood. - Page 4 GENERAL SAFETY RULES 15. DO NOT OVERREACH. Keep proper footing and balance at all times. Wear oil-resistant rubber-soled foot- wear. Keep the floor clear of oil, scrap, and other debris. 16. MAINTAIN TOOLS PROPERLY. ALWAYS keep tools clean and in good working order. Follow instruc- tions for lubricating and changing accessories.
- Page 5 SPECIFIC RULES FOR TRACK SAWS 7. Never hold a workpiece in your hands or across your legs during sawing operations. It is important to support the work properly to minimize body exposure, blade binding, or loss of control. 8. When ripping, always use a rip fence or straight edge guide. This improves the accuracy of the cut and reduces the chance for blade binding.
-
Page 6: Save These Instructions
SPECIFIC RULES FOR TRACK SAWS 14. Make sure the blade you are using is the correct type for the material being cut. Do not cut logs or shrubbery with this saw. Only cut flat workpieces. 15. Always make sure that the cutting path, including underneath the workpiece, is free of obstructions before cut- ting, particularly during plunge cuts. -
Page 7: Electrical Information
ELECTRICAL INFORMATION GROUNDING INSTRUCTIONS IN THE EVENT OF A MALFUNCTION OR BREAKDOWN, grounding provides the path of least resistance for an electric current and reduces the risk of electric shock. This tool is equipped with an electric cord that has an equipment grounding conductor and a grounding plug. - Page 8 KNOW YOUR TRACK SAW COMPONENTS 1. Bevel Locks (two) & Gauge 2. Depth Adjustment Lock & Gauge 3. Front Handle 4. Safety (Plunge Release) 5. Trigger Switch 6. Main Handle 7. Dust Port 8. Track 9. Position Lock Knobs 10. Track Stabilizer Lock 11.
-
Page 9: Assembly And Adjustments
ASSEMBLY AND ADJUSTMENTS WARNING: Always be sure that the tool is switched off and unplugged before adjusting, adding accesso- ries, or checking a function on the tool. WARNING: 6-1/4 in. is the maximum blade capacity of your saw. Never use a blade that is too thick to allow the outer flange washer to fit properly on the spindle. - Page 10 ASSEMBLY AND ADJUSTMENTS SETTING UP THE TRACK 1. Using the track adapters, link together enough track to account for the entire workpiece. To do so, insert the track adapters into the inner grooves of each rail. Once the tracks have been connected together, flip the track over and check that the adapter is split evenly between the two tracks.
-
Page 11: Riving Knife Adjustment
ASSEMBLY AND ADJUSTMENTS RIVING KNIFE ADJUSTMENT The riving knife helps prevent kickback by keeping the two sides of your cut from closing on the blade. Before operation, make sure the riving knife is properly aligned with the blade. This requires checking the distance be- tween the blade and the riving knife, making sure it is no greater that 1/8 of an inch. - Page 12 OPERATION WARNING: Before plugging in the tool, always check to see that the tool is turned off. Accidently start- ing the saw could result in injury. TO START THE SAW After checking the correct alignment of the riving knife and blade, plug in the tool. In order to start the saw, pull the trigger switch.
-
Page 13: Bevel Cutting
OPERATION CROSS-CUTTING AND RIP CUTTING Cutting directly across the grain of a piece of wood is called crosscutting and is likely the most common type of cut done with a track saw. Cutting wood lengthwise, or with the grain, is referred to as rip cutting (or also, sim- ply just “ripping”). -
Page 14: Changing The Blade
OPERATION PLUNGE CUTS A plunge cut is a cut that must be made inside the area of the work- piece rather than starting from an outside edge and working inward. Adjust the cutting depth and the riving knife accordingly. 1. Adjust the bevel setting to zero. 2. - Page 15 MAINTENANCE CLEANING Avoid using solvents when cleaning plastic parts. Most plastics are susceptible to damage from various types of commercial solvents and may be damaged by their use. Use clean cloths to remove dirt, dust, oil, grease, etc. WARNING: Do not at any time let brake fluids, gasoline, petroleum-based products, penetrating oils, etc., come in contact with plastic parts.
- Page 16 EXPLODED VIEW AND PARTS LIST...
- Page 17 36053C Clamp (sold separately) 36055-035 Gear Box 36055-038 Screw TRACK EXPLODED VIEW (36027) Part No. Description 36055-039 Gear Box Cover 36055-040 Flathead Countersunk Screws 36027-001 Bottom Rubber Strip 41-42 36055-041 Shaft 36027-002 Bottom Foam Strip 36055-043 Bearing Cover 36027-003 Guiding Rail...
-
Page 18: Limited Two Years Warranty
LIMITED TWO YEARS WARRANTY WEN Products is committed to building tools that are dependable for years. Our warranties are consistent with this commitment and our dedication to quality. LIMITED WARRANTY OF WEN CONSUMER POWER TOOLS PRODUCTS FOR HOME USE GREAT LAKES TECHNOLOGIES, LLC (“Seller”) warrants to the original purchaser only, that all WEN con- sumer power tools will be free from defects in material or workmanship for a period of two (2) years from date of purchase.
Need help?
Do you have a question about the 36055 and is the answer not in the manual?
Questions and answers