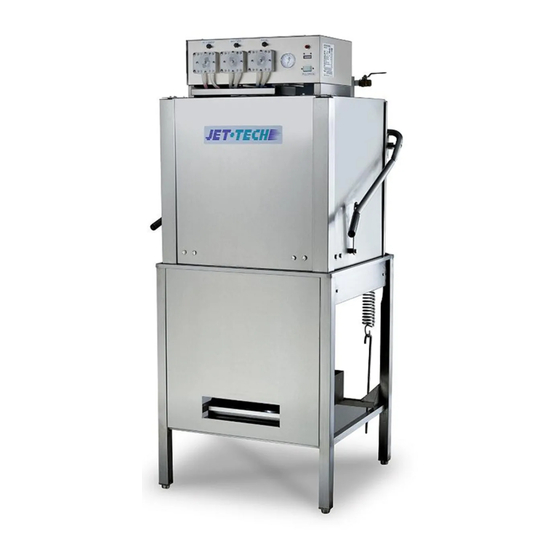
Summary of Contents for Jet-tech X-35C
- Page 1 DISHWASHER MANUAL INSTALLATION, OPERATION, AND MAINTENANCE MODEL X-35C X-35C For operator. Do not discard. DECEMBER 2005...
- Page 3 The Jet-Tech dishwasher is a tool which you can use to make your job easier and which will help you deliver clean dishes.
-
Page 4: Table Of Contents
Contents INTRO PAGE PAGE 3 CONNECTING YOUR NEW X-35C PAGE 5-6 TIMER ADJUSTMENT PAGE 7-8 STARTING INSTRUCTIONS PAGE 9 OPERATING INSTRUCTIONS PAGE 10-11 CLEANING PAGE 12-13 TROUBLESHOOTING PAGE 14-15 CONTACT INFORMATION PAGE 15 PARTS LIST PAGE 16-17... -
Page 5: Connecting Your New X-35C
CONNECTING YOUR NEW X-35C This dishwasher must be installed on a level, rigid, nonflammable surface. To ensure that the machine is level, install the feet (shipped in the wash tank of the machine) and adjust them accordingly. Be sure to provide adequate space for the water, drain and electrical connections. - Page 6 Disconnecting of hard plumbing or removal of counter tops or cabinets, etc., for servicing is not covered by warranty. CHEMICAL INSTALLATION All the chemical pumps, located on the control box at the top, are activated by a timer. Priming switch above will help draw the product in each corresponding lines.
-
Page 7: Timer Adjustment
ADJUSTING THE TIMER The timer is the brain of the dishwasher. It controls all the major components, allowing them to perform their necessary function at given times during the length of the wash cycle. The timer is located at the top, in the control box, on the right. - Page 8 Factory setting. DRAIN 180-200 FILL 190-250 10-20 SANI 220-222 RINSE 220-222 REFERENCE TABLE WHEELS Degrees = Seconds PLASTIC ARROW DIAL...
-
Page 9: Starting Instructions
After the machine stops, the cycle light will switch off, raise the doors, remove the tray, and allow dishes to dry before stacking. The Jet-Tech Dish machine will complete the wash and rinse cycle and automatically feed the proper amount of chemicals, and turn itself off. -
Page 10: Operating Instructions
OPERATING INSTRUCTIONS Dishes are expensive. An average plate can cost over $5.00. Be very careful when preparing and handling dishes. Scrapping. Scrapping operations are necessary to remove, mechanically or by hand, the remaining food from dishes prior to the dishwashing operation. The purpose of scrapping is to keep excessive garbage from going into the dishwashing machine. - Page 11 rack all the sized plates. If you sort and rack properly, it will be easier and save you time. Note in the illustration that the plates are racked with overlapping and that the sprays from the top spray arm will strike the food contact surfaces of the dishes (the face of the dishes).
-
Page 12: Cleaning
12 inches; their combined weight can destroy the porcelain surface on the bottom plates. Cleaning the Jet-Tech Dishwasher. Certain times of the day should be reserved to clean the dishwashing machine. Follow the cleaning and inspection procedures listed below. - Page 13 flushed out by removing the end plugs. Remember to replace the end plugs after cleaning the arm. After the arm has been thoroughly cleaned, re-install and check that arm is fully inserted in the bearing support. Hand tighten thumb screws. Too-tight screws can break off in spray base.
-
Page 14: Troubleshooting
1. Before you call the Jet-Tech service people, clear your temperature gauge on the machine. Check to be sure that you have at least 120 degrees F water. The Jet-Tech dishwasher must have hot water delivered from the primary heater at 120 140 degrees F. -
Page 15: Contact Information
1. You can turn off the machine in an emergency by turning off the master switch located at the back of the control box. Machine Won't Fill 1. Check valve at the top, make sure handle is turned on. If it is, call us the Jet-Tech service people. Spray Arms Won't Spin 1. -
Page 16: Parts List
Part# Description PRICE 07-2703 door guide 07-9004 thermometer w/capillary 19-5043 1/2" vacuum breaker 44-0110 peristaltic pump cover 44-0141 clear squeeze tube (10" ea.req'd) 44-0150 pump shaft seal 44-0220 FEET red detergent line 44-0230 FEET blue rinse line 44-0240 FEET #3 clear vinyl line 44-0256 thumbscrew 44-0258 thumbscrew adaptor 44-0264 spray arm bearing... - Page 17 44-1670 rubber boot 44-1720 fill/drain label 44-1820 ball valve 1/2" FIP 44-1830 1/2" brass 90º elbow 44-1880 teflon tape 44-1891 3/8" romex connector 44-1900 4" cable ties 44-2020 TR-1 open rack (12.41 cdn) 44-2030 TR-3 plate rack (12.41 cdn) 44-4020 Panduit DNF14-187-M terminal 44-6010 bolts- pump cover to mounting 44-6010 bolts- mounting to motor 44-6030 screw- s/s pump cover...
- Page 18 Rm0508...


Need help?
Do you have a question about the X-35C and is the answer not in the manual?
Questions and answers