Table of Contents
Advertisement
Quick Links
Advertisement
Table of Contents

Related Manuals for BK Precision 4060B Series


Summary of Contents for BK Precision 4060B Series
- Page 2 Safety Summary The following safety precautions apply to both operating and maintenance personnel and must be followed during all phases of operation, service, and repair of this instrument. Before applying power to this instrument: • Read and understand the safety and operational information in this manual. •...
- Page 3 Electrical Power This instrument is intended to be powered from a CATEGORY II mains power environment. The mains power should be 115 V RMS or 230 V RMS. Use only the power cord supplied with the instrument and ensure it is appropriate for your country of use.
- Page 4 Do not operate instrument if damaged If the instrument is damaged, appears to be damaged, or if any liquid, chemical, or other material gets on or inside the instrument, remove the instrument’s power cord, remove the instrument from service, label it as not to be operated, and return the instrument to B&K Precision for repair.
- Page 5 Do not substitute parts that are not approved by B&K Precision or modify this instrument. Return the instrument to B&K Precision for service and repair to ensure that safety and performance features are maintained. For continued safe use of the instrument •...
-
Page 6: Table Of Contents
Contents Quick Start Front Panel Rear Panel Touch Screen Display Waveform Selection and Setup Create a simple sine wave 1.5.1 Frequency and Phase 1.5.2 Amplitude, and Offset To Turn On/Off Output 1.6.1 Function Keys Sine Waveform Frequency/Period Amplitude Offset Phase Harmonics 2.5.1 Harmonic Type... - Page 7 Modulation Function 9.1.1 To Select Modulation Source 9.1.2 Internal Source 9.1.3 External Source 9.1.4 Modulation Depth 9.1.5 Modulation Frequency 9.1.5.1 DSB-AM 9.1.5.2 9.1.5.3 Frequency Deviation 9.1.5.4 9.1.5.5 Phase Deviation 9.1.5.6 9.1.6 Key Frequency 9.1.7 Hop Frequency 9.1.7.1 9.1.7.2 9.1.7.3 9.1.8 Pulse Width/Duty Deviation 10 Sweep Function 10.1...
- Page 8 12.2.5 To Recall State File or Data File 12.2.6 To Delete File 12.2.7 To Copy and Paste File 13 Utility Function 13.1 System Settings 13.2 Number Format 13.3 Language Setup 13.4 Power On 13.5 Set to Default 13.6 Beep 13.7 Screen Saver 13.8 System Info...
- Page 9 19 Specifications 20 Appendix: Waveforms 20.1 Common Waveforms 20.1 Math Waveforms 20.2 Engine Waveforms 20.3 Window Waveforms 20.4 Trigonometric Waveforms 20.5 Square Waveforms 20.6 Medical Waveforms 20.7 Modulated Waveforms 20.8 Filter Waveforms 20.9 Demo Waveforms 21 Daily Maintenance 21.1 Cleaning 22 LIMITED THREE-YEAR WARRANTY 23 Service Information...
-
Page 10: Quick Start
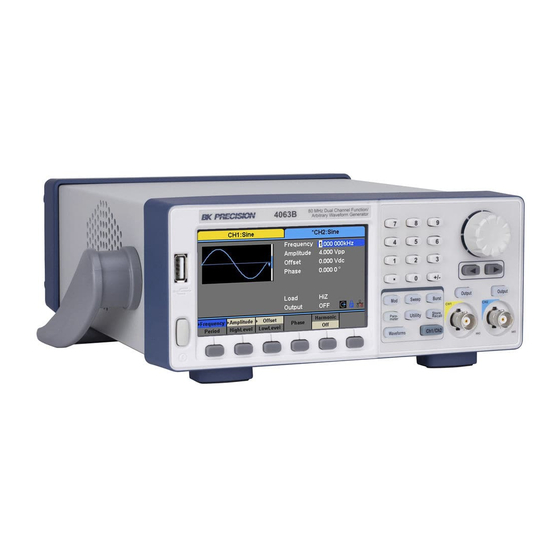
Quick Start 1.1 Front Panel 4060B Series front panel includes a touch screen, menu softkeys, numeric keyboard, knob, function keys, arrow keys, and channel control area as shown in Figure 1.1. Item Description Power Switch USB Port (load waveforms, store settings, etc...) -
Page 11: Create A Simple Sine Wave
Quick Start Item Description Power Input Ethernet Counter Input Auxillary Input/Output Clock Input/Output (10 MHz) Ground Connection Figure 1.2 Rear Panel of 4060B Series Item Description Channel Tab Waveform 0 V reference Parameters Output Settings Status indicators (clock, lock and network) Settings menu Figure 1.3 Touch Screen Display... -
Page 12: Frequency And Phase
Quick Start Page 1 Page 2 Figure 1.4 Waveform Menu 1.5.1 Frequency and Phase To set the frequency, press the first soft-key, the frequence value to the right of the waveform, or the word “frequency” above the first soft-key. The field, when ready for editing, is highlighted in blue as shown in Figure 1.5. -
Page 13: To Turn On/Off Output
Quick Start 1.6 To Turn On/Off Output The two keys on the right side of the operation panel above each channel output are used to enable and disable the output. When enabled, the key will light up. When enabled and lit, pressing the button again disables the respective channel. -
Page 14: Sine Waveform
2.1 Frequency/Period Frequency is one of the most important parameters of basic waveforms. For different instrument models and waveforms, the available ranges of frequency are different. For detailed information, please refer to “4060B Series Datasheet”. The default frequency is 1 kHz. -
Page 15: Offset
The offset setting range is limited by the “Load” and “Amplitude/HighLevel” settings. For detailed information, please refer to “4060B Series Datasheet”. The default value is 0Vdc. 1. Press Waveforms → Sine → Offset, to set the offset. The offset shown on the screen when the instrument is powered on is the default value or the set value of last power down. -
Page 16: Phase
2.5 Harmonics The 4060B Series can be used as a harmonic generator to output harmonics with specified order, amplitude and phase. According to the Fourier transform, a periodic time domain waveform is the superposition of a series of sine waveforms... -
Page 17: Harmonic Type
Harmonic Interface 2.5.1 Harmonic Type The 4060B Series can output odd harmonics, ever harmonics and user-defined orders of harmonics. After entering the harmonic setting menu, press Type to select the desired harmonic type. 1. Press Even, the instrument will output fundamental waveform and even harmonics. -
Page 18: Harmonic Order
Sine Waveform 2.5.2 Harmonic Order After entering the harmonic setting menu, press Order, the use the numeric keyboard or knob to input the desired value. • The range is limited by the maximum output frequency of the instrument and current fundamental waveform frequency. •... -
Page 19: Square Wave
The duty cycle setting range is limited by the “Frequency/Period” setting. For detailed information, please refer to “4060B Series Datasheet”. The default value is 50%. 1. Press Waveforms → Square → DutyCycle, to set the duty cycle. The duty cycle shown on the screen when the instrument is powered on is the default value or the set value of last power down. -
Page 20: Phase
Square Wave 3.2 Phase Figure 3.2 Set Duty Cycle Figure 3.3 Set Duty Cycle Figure 3.4 Set Offset... - Page 21 Square Wave Figure 3.5 Set Hi Level Figure 3.6 Set Low Level Figure 3.7 Set Phase...
- Page 22 Square Wave Figure 3.8 Phase at 180 degrees...
-
Page 23: Ramp Wave
Ramp Wave Press Waveforms key to select the waveform function, and press the Ramp softkey. The ramp waveform parameters are set by using the ramp operation menu. The parameters for ramp waveforms include frequency/period, amplitude/high level, offset/low level, phase and symmetry. As shown in 4.1, in the soft key menu, select Symmetry. -
Page 24: Symmetry
Ramp Wave Figure 4.3 Set Amplitude Figure 4.4 Set Offset 4.2 Symmetry The percentage that the rising period takes up the whole Period. Input Range: 0~100% Default Value: 50% 1. Press Waveforms → Ramp → Symmetry, to set the symmetry. The symmetry shown on the screen when the instrument is powered on is the default value or the set value of last power down. - Page 25 Ramp Wave Figure 4.5 Set High Level Figure 4.6 Set Low Level Figure 4.7 Set Phase...
- Page 26 Ramp Wave Figure 4.8 Set Symmetry 15% Figure 4.9 Set Symmetry 90%...
-
Page 27: Pulse Wave
Pulse width is defined as the time from the 50% threshold of a rising edge amplitude to the 50% threshold of the next falling edge amplitude (as shown in the figure below). The pulse width setting range is limited by the “Minimum Pulse Width” and “Pulse Period” setting. For detailed information, please refer to “4060B Series Datasheet”. The default value is 200s. -
Page 28: Rising And Falling Edges
Pulse Wave Figure 5.2 Set Frequency Figure 5.3 Set Amplitude 2. Input the desired Pulse Width. Use the numeric keyboard to input the parameter value directly, and press the corresponding key to select the parameter unit. Or use the arrow keys to select the digit to edit, and then use the knob to change its value. The generator will change the waveform immediately. -
Page 29: Delay
Pulse Wave 5.4 Delay Figure 5.4 Set Offset Figure 5.5 Set High Level Figure 5.6 Set Low Level... - Page 30 Pulse Wave Figure 5.7 Set Pulse Width Figure 5.8 Set Duty Cycle Figure 5.9 Setting the Risng Edge...
- Page 31 Pulse Wave Figure 5.10 Pulse Delay...
-
Page 32: Noise Wave
Noise Wave Press Waveforms key to select the waveform function, and press the Noise softkey. The noise parameters are set by using the noise operation menu. The parameters for noise include stdev, mean and bandwidth. As shown in 6.1, in the soft key menu, select Figure Stdev, The stdev parameter area is highlighted in the parameter display window, and users can set the stdev value here. -
Page 33: Mean
Noise Wave 2. Input the desired stdev. Use the numeric keyboard to input the parameter value directly, and press the corresponding key to select the parameter unit. Or use the arrow keys to select the digit to edit, and then use the knob to change its value. 6.2 Mean Figure 6.3 Setting the Mean... - Page 34 Noise Wave Setting the Bandwidth Figure 6.5 1. Press Waveforms → Noise → BandSet and choose “On” to set the bandwidth. The bandwidth shown on the screen when the instrument is powered on is the default value or the set value of last power on.
-
Page 35: Dc Wave
DC Wave Press Waveforms → Page 1/2 → DC, to enter the following interface. Please note that there is a ‘DC offset’ parameter at the middle of the screen. Figure 7.1 DC Setting Interface... -
Page 36: Arbitrary Wave
Arbitrary Wave The Arb signal consists of two types: the system’s built-in waveforms and the user-defined waveforms. Built-in waveforms are stored in the internal non-volatile memory. Users may also edit the arbitrary waveform with 8 to 8M data points, namely 8pts to 8Mpts. 8.1 DDS Choose Waveforms →Page 1/2 →Arb →Arb Mode and select the “DDS”... -
Page 37: Sampling Rate
Arbitrary Wave Figure 8.2 TrueArb 8.2.1 Sampling Rate 1. Press Waveforms →Page 1/2 →Arb →TureArb →Srate, to set the sampling rate parameter. The sampling rate shown on the screen when the instrument is powered on is the default value or the set value of last power on. -
Page 38: Selecting A Built-In Waveform
Arbitrary Wave 8.4 Selecting a Built-in Waveform Choose Waveforms →Page 1/2 →Arb →Arb Type →Built-In to enter the following interface, as shown in Figure 8.4. Chapter 20 for the set of available built-in waveforms. Figure 8.4 Built-in Arbitrary Waveforms Press Common, Math, Engine, Window, Trigo or other menus to switch to the desired category (the selected category in the menu bar is highlighted), then rotate the knob or click the touch screen to choose the desired waveform (the selected waveform is highlighted). - Page 39 Arbitrary Wave Figure 8.6 Stored Waveform Display Interface...
-
Page 40: Modulation Function
Modulation Function Use the Mod key to generate modulated waveforms. The 4060B Series can generate AM, FM, ASK, FSK, PSK, PM, PWM and DSB-AM modulated waveforms. Modulating parameters vary with the types of the modulation. In AM, users can set the source (internal/external), depth, modulating frequency, modulating waveform and carrier. In DSB- AM, users can set the source (internal/external), modulating frequency, modulating waveform and carrier. -
Page 41: To Select Modulation Source
+6V and the minimum when the modulating signal is -6V. The 4060B Series can use one channel as a modulating source for the other channel. The following example takes the output signal of CH2 as the modulating waveform. -
Page 42: Dsb-Am
Modulation Function • The modulation frequency ranges from 1mHz to 1MHz. • When external modulation source is selected, this menu is hidden. 9.1.5.1 DSB-AM DSB-AM is an abbreviation for Double-Sideband Suppressed Carrier – Amplitude Modulation. Press Mod → Type → DSB-AM. The parameters of DSB-AM modulation are shown in Fig- 9.2. -
Page 43: Frequency Deviation
Modulation Function Function Explanation Type Frequency modulation Source Internal The source is internal External The source is external. Use the [Aux In/Out] connector at the rear panel. Freq Dev Set the frequency deviation Shape Sine Choose the modulating waveform. Square Triangle UpRamp DnRamp... -
Page 44: Phase Deviation
Modulation Function Function Explanation Type Phase modulation Source Internal The source is internal External The source is external. Use the [Aux In/Out] connector at the rear panel. Phase Dev Phase deviation ranges from 0° ~ 360°. Shape Sine Choose the modulating waveform. Square Triangle UpRamp... -
Page 45: Hop Frequency
Modulation Function Function Explanation Type Frequency shift keying modulation. Source Internal The source is internal. External The source is external. Use the [Aux In/Out] connector at the rear panel. Key Freq Set the frequency at which the output frequency shifts between the carrier frequency and the hop frequency (internal modulation only): 1mHz~1MHz. -
Page 46: Psk
Modulation Function Function Explanation Type Amplitude shift keying modulation. Source Internal The source is internal. External The source is external. Use the [Aux In/Out] connector at the rear panel. Key Freq Set the frequency at which the output amplitude shifts between the carrier amplitude and zero (internal modulation only): 1mHz~1MHz. - Page 47 Modulation Function Function Explanation Type Phase shift keying modulation. Source Internal The source is internal. External The source is external. Use the [Aux In/Out] connector at the rear panel. Key Freq Set the frequency at which the output phase shifts between the carrier phase and 180° (internal modulation only): 1mHz~1MHz.
- Page 48 Modulation Function Function Description Type Pulse width modulation. The carrier is pulse. Source Internal The source is internal. External The source is external. Use the [Aux In/Out] connector at the rear panel. Width Dev Set the width deviation. Duty Dev Set the duty deviation.
-
Page 49: Sweep Function
Sweep Function In the sweep mode, the generator steps from the start frequency to the stop frequency in the sweep time specified by the user. The waveforms that support sweep include sine, square, ramp and arbitrary. Press Sweep key to enter the following menu. Set the waveform parameters by using the operation menu. Function Explanation Sweep time... -
Page 50: Center Frequency And Frequency Span
Frequency Span = Stop Frequency – Start Frequency 4 Sweep Type 4060B Series provides “Linear” and “Log” sweep profiles and the default is “Linear”. 5 Linear Sweep In linear sweep, the output frequency of the instrument varies linearly in the way of “a number of Hertz per second”. -
Page 51: Internal Trigger
Sweep Function Figure 10.3 Linear Sweep Interface Figure 10.4 Log Sweep Interface 8 Internal Trigger Choose Source → Internal, the generator outputs continuous sweep waveform when internal trigger is selected. The default is “Internal”. Choose Trig Out → On, the [Aux In/Out] connector at the rear panel will output the trigger signal. 9 External Trigger Choose Source →... -
Page 52: Burst Function
(N-Cycle mode), or when an external gated signals (Gated mode) is applied. Any waveform (except DC) may be used as the carrier, but noise can only be used in Gated mode. 11.1 Burst Type 4060B Series provides three burst types including N-Cycle, Infinite and Gated. The default is N-Cycle. Burst Type Trigger Source... -
Page 53: Infinite
Burst Function Function Explanation Delay Set the delay time before the burst starts. Trig Out Off Disable trigger out. Enable trigger out. Page 2/2 Return to the previous page. Figure 11.2 N-Cycle Burst Interface (Page 2/2) 11.1.2 Infinite In infinite mode, the cycle number of the waveform is set as an infinite value. The generator outputs a continuous waveform after receiving the trigger signal. -
Page 54: Start Phase
Burst Function Press Burst → Gated, to enter the interface in Figure 11.4. Function Explanation Gated Use the gated mode. Polarity Positive Set the polarity for the gated signal. Negative Start Phase Set the start phase of the burst. Burst Period Set the burst Period. -
Page 55: Burst Trigger Source
Burst Function 11.1.8 Burst Trigger Source The burst trigger source can be internal, external or manual. The generator will generate a burst output when a trigger signal is received and then wait for the next trigger source. 11.1.9 Internal Trigger Choose Source →... -
Page 56: Storage System
Enter the next page. Store/Recall Interface (Page 1/2) Figure 12.1 The 4060B Series provides an internal non-volatile memory (C Disk) and a USB Host interface for external memory. 1. Local (C:) Users can store instrument states and arbitrary waveform files to C Disk. -
Page 57: Browse
Storage System Function Description Copy Copy the selected file. Paste Paste the selected file. Cancel Exit the Store/Recall interface. Page 2/2 Return to the previous page. Figure 12.2 Store/Recall Interface (Page 2/2) Figure 12.3 Storage System 12.1.2 Browse • Use the knob to shift between the directories or click the corresponding location on the screen to choose Local (C:) or USB Device (0:). -
Page 58: State File
12.1.5 Data File The 4060B Series can recall the data files in “*.csv” or “*.dat” format from the external memory and transfer them into “*.bin” format then store them in the internal memory. When it is done, the generator will enter the arbitrary waveform interface automatically. -
Page 59: Select The Character
12.2.7 To Copy and Paste File 4060B Series supports the internal and external storage to copy files from each other. For example, copy an arbitrary wave file in the U-disk to the instrument, the procedure is as follows: 1. -
Page 60: Utility Function
Utility Function With the Utility function, the user can set the parameters of the generator such as Sync, Interface, System Setting, Self Test and Frequency Counter, etc. Press Utility to enter the utility menu, as shown in Figure 13.1. Figure 13.1 Utility Menu... -
Page 61: System Settings
Utility Function System Set the system configuration. Test/Cal Test and calibrate the instrument. Frequency counter setting. Counter Output Setup Set the output parameters of CH1 and CH2. Set the track, channel coupling or channel copy function. CH Copy Coupling Interface Set the parameters of remote interfaces. -
Page 62: Number Format
13.4 Power On Choose the 4060B Series’s setting to load when the generator is powered on. Two choices are available: the default setting and the last settings set when the unit was last powered down. Once selected, the setting will be applied when... -
Page 63: Set To Default
Utility Function Figure 13.4 Chinese Interface the instrument is powered on. This setting is stored in non-volatile memory and will not be influenced by the Set To Default operation. Last includes all system parameters and states, except channel output state. denotes the factory defaults except certain parameters (such as Language). -
Page 64: Built-In Help
13.10 Built-in Help The 4060B Series provides a built-in help system, by which users can view the help information at any time when operating the instrument. Press Utility → System → Page 1/2 → Help to enter the following interface. -
Page 65: Test/Cal
Utility Function Figure 13.5 System Information Interface Figure 13.6 Help Menu Down Cursor downward to select. Read the currently selected help information. Select Cancel Exit the built-in help system. 13.11 Test/Cal Choose Utility → Test/Cal, to enter the following interface. SelfTest Perform a system self-test. -
Page 66: Screen Test
Utility Function Figure 13.7 Test/Cal function Menu Self Test Interface Figure 13.8 KeyTest Run keyboard test program. LEDTest Run key indicator lights test program. BoardTest Run hardware circuit self-test program. Cancel Return to the Test/Cal menu. 13.11.2 Screen Test Select “ScrTest” to enter the screen test interface. The prompt message ‘Please press ‘7’ key to continue, press ‘8’ key to exit.’... -
Page 67: Led Test
Utility Function 13.11.4 LED Test Select LEDTest to enter the LED test interface, the on-screen white rectangle shapes represent the front panel keys. The prompt message ‘Please press ‘7’ Key to continue, press ‘8’ Key to exit.’ is displayed. Press the ‘7’ key continuously for testing and when a key is lighted, the corresponding area on the screen will display in blue color. -
Page 68: Frequency Counter
Utility Function 13.12 Frequency Counter The 4060B Series provides a frequency counter which could measure frequencies between 100mHz to 200MHz. The dual channels can still output normally when the counter is enabled. Press Utility → Counter, to enter the following interface. -
Page 69: Counter Setup
Done Save the current settings and return to the previous menu. 13.13 Parameters to be measured The frequency counter on the 4060B Series can measure parameters including frequency, period, duty, positive pulse width and negative pulse width. 13.14 Reference Frequency System will calculate the deviation between the measured frequency and the reference frequency automatically. -
Page 70: High Frequency Rejection
Utility Function 13.17 High Frequency Rejection High Frequency Rejection can be used to filter out the high-frequency components of a measured signal and improve the measurement accuracy in low-frequency signal measurement. Press HFR to enable or disable this function. The default is “Off”. -
Page 71: Eqphase
13.22 Waveforms Combination Mode The CH1 output port of the 4060B Series outputs the waveform of CH1 in the general mode, while the waveform of CH1+CH2 can be output in the combined mode. Similarly, the CH2 output port of 4060B Series outputs the waveform of CH2 in the general mode while the waveform of CH1+CH2 can be output in the combined mode. -
Page 72: Frequency Coupling
Utility Function Figure 13.14 Waveforms Combining Interface 13.23.2 Frequency Coupling 1. To Enable Frequency Coupling Function: Press FreqCoup to turn frequency coupling “On” or “Off”. The default is “Off”. 2. To Select Frequency Coupling Mode: Press FreqMode to choose “Deviation” or “Ratio”, and then use the numeric keyboard or knob and arrow keys to input the desired value. -
Page 73: Amplitude Coupling
Utility Function Figure 13.15 Channel Copy Interface the frequency deviation between CH1 and CH2. �� ������ Deviation − �� ������ = �� ������������. ����2 ����1 The frequency ratio of CH1 and CH2. Ratio �� ������ = �� ����������������. ����2 �� ������ ����1 13.23.3 Amplitude Coupling 1. -
Page 74: Channel Tracking
Utility Function 13.24 Channel Tracking When the track function is enabled, by changing the parameters or states of CH1, the corresponding parameters or states of CH2 will be adjusted to the same values or states automatically. At this point, the dual channels can output the same signal. -
Page 75: Output Synchronization
Output Synchronization The generator provides Sync output through the [Aux In/Out] connector on the rear panel. When the synchronization is on, the port can output a CMOS signal with the same frequency as basic waveforms (except Noise and DC), arbitrary waveforms, and modulated waveforms (except external modulation). -
Page 76: Clock Source
Clock Source The 4060B Series provides an internal 10MHz clock source. It also can accept external clock source form the [10 MHz In/Out] connector at the rear panel. It can also output the clock source from the [10 MHz In/Out] connector for other devices. -
Page 77: Channel Phase Mode
Channel Phase Mode Press Utility → Page 1/2 → Mode to enter the mode setup Interface, as shown in Figure 16.1. Figure 16.1 Mode Setup Interface Phase-locked Mode When changing the frequency, the DDSs of both channels reset, and the phase deviation between CH1 and CH2 is maintained. -
Page 78: Overvoltage Protection
Overvoltage Protection Choose Utility → Page 1/2 → OverVoltage Protection to turn on or off the function. If the state is set to ON, overvoltage protection of CH1 and CH2 will take effect once any of the following conditions is met. -
Page 79: Remote Interface
The 4060B Series can communicate with a PC through the USBTMC protocol. You are suggested to do as the following steps. 1. Connect the device: Connect the USB Device interface at the rear panel of 4060B Series with the PC via a USB cable. -
Page 80: Remote Control Via Gpib
18.4 Remote Control via LAN The 4060B Series can communicate with a PC through the LAN interface. Users can view and modify the LAN parameters. Choose Utility → Page 1/2 → Interface → LAN State to turn on LAN. Then choose LAN Setup to enter the interface configuration values. -
Page 81: Specifications
Specifications Note: All specifications apply to the unit after: 1. A temperature stabilization time of 15 minutes over an ambient temperature range of 23 C ± 5 ∘ ∘ 2. Short correction operation performed before making measurement. Specifications are subject to change without notice. - Page 82 Dual Channel Function/Arbitrary Waveform Generators 4060B Series Specifications Note: All specifications apply to the unit after a temperature stabilization time of 30 minutes over an ambient temperature range of 23 °C ± 5 °C. Model 4062B 4063B 4064B Waveform Characteristics (continued)
- Page 83 Dual Channel Function/Arbitrary Waveform Generators 4060B Series Specifications (continued) Model 4062B, 4063B, 4064B Frequency Counter DSB-AM Modulation Characteristics Measurement Frequency, period, positive/negative pulse width, duty cycle Carrier Sine, square, ramp, arbitrary 100 mHz to 200 MHz (DC coupling) Source Internal, external...
-
Page 84: Appendix: Waveforms
Appendix: Waveforms 1 Common Waveforms StairUp Stair waveform, rising StairDn Stair waveform, falling StairUD Stair waveform, rising and falling Trapezia Trapezoidal waveform Positive pulse Ppulse Npulse Negative pulse UpRamp waveform UpRamp DnRamp DnRamp waveform Sine-Tra waveform SineTra SineVer Sine-Ver waveform 20.1 Math Waveforms ExpFall Exponential Decay function... -
Page 85: Engine Waveforms
Appendix: Waveforms Legend 5-times Legend polynomial Versiera Versiera Sinc function Sinc Gaussian Gaussian function Dlorentz Dlorentz function Haversine function Haversine Lorentz Lorentz function Gauspuls signal Gauspuls Gmonopuls Gmonopuls signal Tripuls Tripuls signal Weibull distribution Weibull LogNormal LogNormal Gaussian distribution Laplace Laplace distribution Maxwell distribution Maxwell... -
Page 86: Window Waveforms
Appendix: Waveforms SCR firing profile TV signal Voice signal Voice Surge Surge signal Radar Analog radar signal Ripple wave of battery Ripple Gamma Gamma signal Step-response signal StepResp BandLimited Bandwidth-limited signal CPulse C-Pulse CW pulse CWPulse GateVibr Gate self-oscillation signal LFMPulse Linear FM pulse Mechanical construction noise... -
Page 87: Trigonometric Waveforms
Appendix: Waveforms 20.4 Trigonometric Waveforms Tangent Cotangent Secant Cosecant Arc sine Asin Arc cosine Acos Atan Arc tangent ACot Arc cotangent CosH Hyperbolic cosine Integral cosine CosInt Coth Hyperbolic cotangent Csch Hyperbolic cosecant SecH Hyperbolic secant Hyperbolic sine SinH Integral sine SinInt TanH Hyperbolic tangent... -
Page 88: Modulated Waveforms
Appendix: Waveforms Electroencephalogram Electromyogram Pulseilogram Pulseilogram ResSpeed Speed curve of the respiration ECG1 Electrocardiogram 1 ECG2 Electrocardiogram 2 ECG3 Electrocardiogram 3 Electrocardiogram 4 ECG4 Electrocardiogram 5 ECG5 ECG6 Electrocardiogram 6 ECG7 Electrocardiogram 7 ECG8 Electrocardiogram 8 ECG9 Electrocardiogram 9 Electrocardiogram 10 ECG10 Electrocardiogram 11 ECG11... -
Page 89: Demo Waveforms
Appendix: Waveforms Chebyshev2 Chebyshev2 filter 20.9 Demo Waveforms demo1_375pts TureArb waveform 1 375 pts TureArb waveform 1 16384 pts demo1_16kpts demo2_3kpts TureArb waveform 2 3000 pts demo2_16kpts TureArb waveform 2 16384 pts... -
Page 90: Daily Maintenance
Daily Maintenance Do not store or leave the instrument in where the display screen will be exposed to direct sunlight for a long period of time. CAUTION: To avoid damage to the instrument, do not expose it to spray, liquid, or solvent. 21.1 Cleaning If the instrument requires cleaning, disconnect it from all power sources and clean it with a mild detergent and water. -
Page 91: Limited Three-Year Warranty
LIMITED THREE-YEAR WARRANTY B&K Precision Corp. warrants to the original purchaser that its products and the component parts thereof, will be free from defects in workmanship and materials for a period of three years from date of purchase. B&K Precision Corp. will, without charge, repair or replace, at its option, defective product or component parts. Returned product must be accompanied by proof of the purchase date in the form of a sales receipt. -
Page 92: Service Information
Service Information Warranty Service Please go to the support and service section on our website at bkprecision.com to obtain an RMA #. Return the product in the original packaging with proof of purchase to the address below. Clearly state on the RMA the performance problem and return any leads, probes, connectors and accessories that you are using with the device.
Need help?
Do you have a question about the 4060B Series and is the answer not in the manual?
Questions and answers