Table of Contents
Advertisement
Advertisement
Table of Contents

Related Manuals for Gnet G-On


Summary of Contents for Gnet G-On
- Page 1 USER MANUAL 2CH FHD HDR DASH CAM...
- Page 2 CONTENTS BEFORE USE CAUTION FOR SAFE USE CAUTION FOR MICRO SD MEMORY CARD PRODUCT FEATURES PACKAGE COMPONENT NAME OF EACH PART SPECIFICATION INSTALLATION FUNCTION HOW TO USE MEMORY CARD VIDEO FOLDER G-SYNCLOUD HOW TO USE G-SYNCLOUD HOW TO USE G-SYNCLOUD [IOS] HOW TO USE G-SYNCLOUD [ANDROID] GSYNCLOUD APP GUIDE HOW TO USE G-SYNCLOUD [PC]...
- Page 3 CAUTION FOR SAFE USE BEFORE USE 01 All copyrights reserved to GNET SYSTEM. G-NET is the trademark of G-NET SYSTEM Co.,Ltd. G-NET SYSTEM Co., Ltd. has rights to G-NET (Name, Design, Brand image) Do not shock and insert foreign material.
- Page 4 The memory card is a consumable item, so it should be replaced periodically. Please purchase genuine Gnet memory card for preventing incompatibility problem, only genuine SD card which is designated and supplied by GNET SYSTEM is under warranty. Other brands SD card is not covered by warranty.
- Page 5 OBD2 Support External GPS Super Night Vision Codec (Optional) JDR file system : Block physical access to the Connect wit Gnet Appliaction Memory Format Free microSD card slot by lock by Wi-Fi dongle(Optional) Automatic Low Voltage G-syncloud service (3G/4G) ADAS Cut-off Power Off-12.0(24.0)V...
- Page 6 PACKAGE COMPONENT BEFORE USE 01 Basic Components Main Camera & Rear Camera Direct power cable User Manual (Including bracket) Rear Camera Screw, Wrench Micro SD connection cable Memory card Optional Product External GPS Cigarette lighter Wi-Fi dongle OBD power cable power cable External GPS, Cigar jack cable, Wi-Fi dongle are sold separately with extra cost.
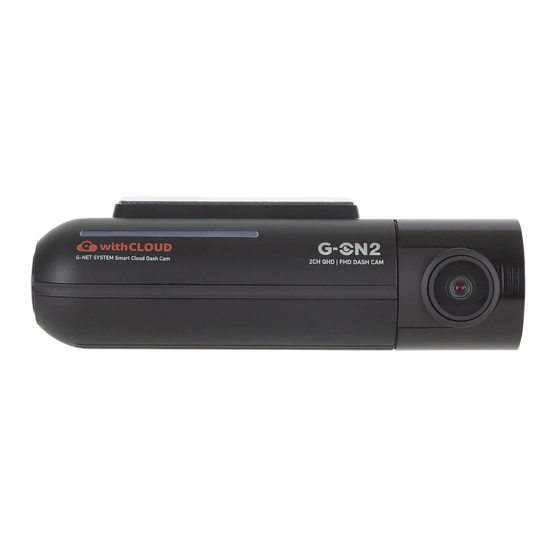
- Page 7 NAME OF EACH PART BEFORE USE 01 Front Camera Front Camera Lens Wi-Fi registration button OBD2 Connector Power Button Rear Camera Slot Security LED Wi-Fi USB dongle Slot Micro SD card cover Front camera bracket GPS LED Power connector (DC-IN) REC LED Extermal GPS Connector Rear Camera...
- Page 8 Front / Rear Full HD 1080P(1920x1080) Front : Max. 60fps / Rear : Max. 30fps Connect to G-Syncloud FMS server via wireless telecommunication 3G/4G/LTE/5G (Optional) (3G/4G/LTE/5G) Connect to GNET Smart phone application via Wi-fi dongle Wi-Fi (Optional) G-Sensor Event recording by External Shock Speaker...
- Page 9 INSTALLATION BEFORE USE 01 How to Install Dashcam Assemble the Front cam with a bracket. Until the hook is located on right place with coming sound according to the order ( , ). Insert the memory card into memory card slot, and then detach the cover from the adhesive double side tape on the bracket.
- Page 10 INSTALLATION BEFORE USE 01 Install the front camera at the windshield by adjusting the angle. ear] [Front] [Rear]...
- Page 11 INSTALLATION BEFORE USE 01 Connect direct power cable to Fuse box in car. Install the rear camera to the rear windshields of the car * Front camera (Curved cable) * Rear camera (Flat plug)
- Page 12 For instance, Power cable is toward driver seat and rear cam connection cable is toward passenger seat. If you want to the G-SYNCLOUD, GNET APP. and ADAS service, pls connect the Wi-Fi dongle and external GPS into the front camera.
- Page 13 INSTALLATION BEFORE USE 01 How to Install Fuse cable Please refer to the car manual because the fuse box is differ depending on car model. It is recommended that install the power from the automobile shop. We are not responsible for any damage caused by self-installation. Find the Fuse box using electric tester from fuse box of the vehicle.
- Page 14 INSTALLATION BEFORE USE 01 Connect [GND] line to vehicle (Do not connect the volt which is connected to dash board. Current is not flowing) Connect the power cable to confirm the operation of product. And organize cables to finish installation work...
- Page 15 INSTALLATION BEFORE USE 01 Insert the Micro SD memory card Push the Micro SD Memory card into the memory card slot until you hear 'clack' sound. When using memory card for the first time or when the memory card is reused after format, the system will be in stand-by mode for 3~5 minutes to create system files and checking the memory card.
- Page 16 HOW TO USE FUNCTION 02 Product operation All LED will be turned on when the engine is on or power is on. "Start recording" starts along with voice guidance and REC LED POWER ON is turned on. External GPS LED will be turned off if it is not connected by external GPS All LED will be turned off when press the power button or POWER OFF...
- Page 17 HOW TO USE FUNCTION 02 ADAS Function -Android Set the ADAS function at the GNET application. ADAS ON/OFF : Turn on/off the ADAS as touching ADAS ON/OFF button. LDWS(Lane Departure Warning System) : When the car leaves the lane, detection alarm will be ringing However, the LDWS will only work if it is above the set speed.
- Page 18 HOW TO USE FUNCTION 02 ADAS Lane correction -Android To improve the ADAS recognition rate, it is recommended to adjust the dash camera position by matching the end of the vehicle bonnet line on condition that "the lane correction button" is turned on in the real time screen.
- Page 19 HOW TO USE FUNCTION 02 Recording Mode - When the power is connected, the normal recording will start. Normal Recording - Security LED flickers left and right every 2 seconds. - If there is impact or shock, the record LED will flicker and record in event recording mode Impact Recording...
- Page 20 HOW TO USE FUNCTION 02 Voice Guidance CONTENTS VOICE GUIDANCE Normal recording Start recording System Off Shut down the system Overwriting Recording does not have enough available. Please check overwriting setting. GPS connection GPS connected. Abnormal recording Video is not being entered. Enable registration Stand-by mode for the registration.
- Page 21 HOW TO USE FUNCTION 02 CONTENTS VOICE GUIDANCE Change the Smartphone setting Setting changed and reboot Change parking mode to normal recording Driving mode to start recording. Safe driving Format the Micro SD memory card On- formatting the memory card. Please wait No Mirco SD memory card No Memory card Micro SD memory card damage...
- Page 22 MEMORY CARD VIDEO FOLDER FUNCTION 02 Removing memory card after the device turn off Insert the removed memory card into the memory reader and connect it to the USB port of PC Select removable disk in explorer folder. - Folders in the removable disk are displayed as shown in the following page -“Event”...
- Page 23 FUNCTION 02 Recording time (Default: Front 60fps /Rear 30fps) : 8GB(1hrs), 16GB(2hrs), 32GB(4hrs), 64GB(8hrs), 128GB(16hrs), 256GB(32hrs), 512(64hrs), 1TB Log.txt : It records device's statement as log file Config (Manage system) Version.ini : Saving version information of device Recording files are located . File list numbers are Date (Normal recording) different depend on Micro SD memory card’s capacity Event (Event recording)
- Page 24 HOW TO USE G-SYNCLOUD G-SYNCLOUD 03 Benefit of G-Syncloud Unlimited storage capacity beyond the limitation of dash camera storage Effective Fleet Managment System Main feature : Live view streaming, Live GPS tracking, Geo-fences, Driving reports. Precautions when using the G-Syncloud After join the G-syncloud member, you must enroll the vehicle information at G-syncloud server.
- Page 25 HOW TO USE G-SYNCLOUD [APP] G-SYNCLOUD 03 1. How to install applicatiions (Gnet App/GsynCloud App) Download GNET APP (APP name: GNET) Download GSYNCLOUD APP (APP name: GSYNCLOUD)
- Page 26 HOW TO USE G-SYNCLOUD G-SYNCLOUD 03 [APP_iOS] 2. How to connect the application and dashcam [iOS] Press Wi-Fi button of the dash cam. You can hear a voice message "Registration standby mode". The registration standby mode keeps for 2 minutes. When the time elapsed, the voice guidance "Registration standby mode is canceled"...
- Page 27 HOW TO USE G-SYNCLOUD G-SYNCLOUD 03 [APP_iOS] Press the registration Touch the APP(GNET app) button of a dashcam on on mobile phone. mobile phone.
- Page 28 HOW TO USE G-SYNCLOUD G-SYNCLOUD 03 G-SYNCLOUD 03 [APP_iOS] Turn on Wi-Fi in the Settings menu on your smartphone. In the Wi-Fi list, select a name that starts with GNET_BB_. Password [qwertyuiop] Enter in the password field and click “Connecting” button.
- Page 29 HOW TO USE G-SYNCLOUD G-SYNCLOUD 03 [APP_iOS] The connection to the dash cam is complete and Gnet app is available. If the connection fails Please go to "Customer Support" section at the bottom of the mobile app screen for help with...
- Page 30 HOW TO USE G-SYNCLOUD G-SYNCLOUD 03 [APP_iOS] How to set the CLOUD in GNET APP Press the settings button. Touch the GSynCloud in setting screen of GNET APP.
- Page 31 HOW TO USE G-SYNCLOUD G-SYNCLOUD 03 G-SYNCLOUD 03 [APP_iOS] Touch the GSynCloud button You can check the activated to activate it. state as below button shape...
- Page 32 HOW TO USE G-SYNCLOUD G-SYNCLOUD 03 [APP_iOS] Press SSID setting button. Enter your SSID and password on the SSID setup screen. * It is the step to enter the SSID and Password of the network device (ex: portable hot-spot device / Wi-Fi router)
- Page 33 G-SYNCLOUD 03 [APP_iOS] Click (Back arrow) on the Click (Back arrow) on the top top left of SSID setting left of the setting screen to exit screen to exit the screen. the screen. If you use an iOS smart phone(ex.: apple iPhone), the above text does not appear and the dashcam is automatically rebooted.
- Page 34 DASHCAM turns off automatically and is rebooted with the voice message of “The configuration has been changed.” Quit GNET APP on Smartphone (Close out (dispear) the screen where App is executed on Smartphone) DASHCAM turns on automatically. (Voice message of “Dashcam ON”...
- Page 35 HOW TO USE G-SYNCLOUD G-SYNCLOUD 03 [APP_iOS] How to register cloud in Gsyncloud App Touch the APP(GSynCloud app) In the sign up step, on mobile phone. Enter the E-MAIL address, password, last name, first name, phone number...
- Page 36 HOW TO USE G-SYNCLOUD G-SYNCLOUD 03 [APP_iOS] If you do not have an ID, please Enter your information on the click the Register button, and registration screen to login then please register. G-SYNCLOUD. Enter your E-MAIL address, password, last name, first name, phone number and check “ACCEPT GSYNCLOUD TERMS OF SERVICE”...
- Page 37 G-SYNCLOUD 03 [APP_iOS] If you press the login button, Register the vehicle number the vehicle registration and serial number notification popup will appear. And then, press the OK button.
- Page 38 G-SYNCLOUD 03 [APP_iOS] registration of the dashcam’s serial number Serial registration step - you can select one out of the following two options...
- Page 39 HOW TO USE G-SYNCLOUD G-SYNCLOUD 03 [APP_iOS] Notice: When you want to test G-SYNCLOUD by using HOT SPOT of ISO/Android smartphone, In case of Android smartphone like Samsung Galaxy, if HOT SPOT is turned ON, CLOUD connection continues even if dashcam and Android smartphone are more than 5 meters apart.
- Page 40 G-SYNCLOUD 03 [APP_iOS] Find Password At the bottom of the login Please enter your email screen, Please press the Find address and press the Find Password button. Password button.
- Page 41 HOW TO USE G-SYNCLOUD G-SYNCLOUD 03 [APP_Android] 2. How to connect the Applications in smart phone and dashcam [Android] Press Wi-Fi button of the dash cam. You can hear a voice message "Registration standby mode". The registration standby mode keeps for 2 minutes. When the time elapsed, the voice guidance "Registration standby mode is canceled"...
- Page 42 HOW TO USE G-SYNCLOUD G-SYNCLOUD 03 [APP_Android Press the registration Touch the APP(GNET app) button of a dashcam on on mobile phone mobile phone.
- Page 43 HOW TO USE G-SYNCLOUD G-SYNCLOUD 03 [APP_Android The word “On searching Press the left or right dash cam” is displayed in arrow to select the desired smart phone screen Dashcam.
- Page 44 HOW TO USE G-SYNCLOUD G-SYNCLOUD 03 [APP_Android The registration of the dash cam is completed. Enter the information and touch 'Save' button The information input is for the purpose of classification when using many dashcams If the connection fails Please go to "Customer Support"...
- Page 45 HOW TO USE G-SYNCLOUD G-SYNCLOUD 03 [APP_Android How to set the CLOUD in GNET APP Press the settings button. Touch the GSynCloud in setting screen of GNET APP.
- Page 46 HOW TO USE G-SYNCLOUD G-SYNCLOUD 03 [APP_Android Touch the GSynCloud button You can check the activated to activate it. state as below button shape...
- Page 47 HOW TO USE G-SYNCLOUD G-SYNCLOUD 03 [APP_Android Press SSID setting button. Enter your SSID and password on the SSID setup screen. * It is the step to enter the SSID and Password of the network device (ex: portable hot-spot device / Wi-Fi router)
- Page 48 HOW TO USE G-SYNCLOUD G-SYNCLOUD 03 [APP_Android Click (Back arrow) on the Click (Back arrow) on the top top left of SSID setting left of the setting screen to exit screen to exit the screen. the screen. If you use an iOS smart phone(ex.: apple iPhone), the above text does not appear and the dashcam is automatically rebooted.
- Page 49 DASHCAM turns off automatically and is rebooted with the voice message of “The configuration has been changed.” Quit GNET APP on Smartphone (Close out (dispear) the screen where App is executed on Smartphone) DASHCAM turns on automatically. (Voice message of “Dashcam ON”...
- Page 50 HOW TO USE G-SYNCLOUD G-SYNCLOUD 03 [APP_Android How to register cloud in Gsyncloud App Touch the APP(GSynCloud app) In the sign up step, on mobile phone. Enter the E-MAIL address, password, last name, first name, phone number...
- Page 51 HOW TO USE G-SYNCLOUD G-SYNCLOUD 03 [APP_Android If you do not have an ID, please Enter your information on the click the Register button, and registration screen to login then please register. G-SYNCLOUD. Enter your E-MAIL address, password, last name, first name, phone number and check “ACCEPT GSYNCLOUD TERMS OF SERVICE”...
- Page 52 HOW TO USE G-SYNCLOUD G-SYNCLOUD 03 [APP_Android If you press the login button, Register the vehicle number the vehicle registration and serial number notification popup will appear. And then, press the OK button.
- Page 53 HOW TO USE G-SYNCLOUD G-SYNCLOUD 03 [APP_Android registration of the dashcam’s serial number Serial registration step - you can select one out of the following two options...
- Page 54 HOW TO USE G-SYNCLOUD G-SYNCLOUD 03 [APP_Android Notice: When you want to test G-SYNCLOUD by using HOT SPOT of ISO/Android smartphone, In case of Android smartphone like Samsung Galaxy, if HOT SPOT is turned ON, CLOUD connection continues even if dashcam and Android smartphone are more than 5 meters apart.
- Page 55 HOW TO USE G-SYNCLOUD G-SYNCLOUD 03 [APP_Android Find Password At the bottom of the login Please enter your email screen, Please press the Find address and press the Find Password button. Password button.
- Page 56 HOW TO USE G-SYNCLOUD [APP] G-SYNCLOUD 03 3.Gsyncloud App guide Menu Icon Vehicle registration icon Dashcam list icon Vehicle’s driving information Icon Live video icon Driving information Icon...
- Page 57 HOW TO USE G-SYNCLOUD [APP] G-SYNCLOUD 03 * Vehicle’s driving information Icon Normal Emergency Impact Over speed Sudden stop Sudden start Parking start Parking off Parking motion detection Drive Question mark...
- Page 58 G-SYNCLOUD 03 [Select a dashcam] Click the icon on the Select a dashcam to use main screen from the list...
- Page 59 G-SYNCLOUD 03 [View the driving information list] Click the driving information You can check the driving button on the main screen information in the list by selecting the driving date.
- Page 60 HOW TO USE G-SYNCLOUD [APP] G-SYNCLOUD 03 [Viewing the driving Information & Saving the dashcam photos and videos] Select the driving Check the driving information to check information on the map. from the list. Touch a photo to see more information.
- Page 61 HOW TO USE G-SYNCLOUD [APP] G-SYNCLOUD 03 You can check the front When you save the picture, and rear camera scenes. a Save path popup window Tap the icon to save of the picture appears. the photo. And press “OK”...
- Page 62 HOW TO USE G-SYNCLOUD [PC] G-SYNCLOUD 03 Enroll the Vehicle information-PC When you use the G-Syncloud at first time, it is mandatory to 1) join the G-syncloud member and 2) enroll your vehicle information. Please access the http://www.gsyncloud.com and click the “Sign up” button. Put your information and click the “Sign up”...
- Page 63 HOW TO USE G-SYNCLOUD [PC] G-SYNCLOUD 03 When you log in the G-Syncloud server at first time, click setting icon from the top menu. Click the green + button and enroll the vehicle information After you put the detail information and insert the serial number of your dash camera.
- Page 64 PC VIEWER INSTALLATION PC-VIEWER 04 Install PC Player-MAC OS "PC Player-MAC OS" installation program on the Gnet homepage [Customer Center - Download ] Download and use it.
- Page 65 PC VIEWER INSTALLATION PC-VIEWER 04 Reverse and forward play Stop Repeat all video Previous, Next Event...
- Page 66 PC VIEWER INSTALLATION PC-VIEWER 04 Install PC Player-Window The PC specification should be over "CPU i5 3.0 GHz, Memory 4GB" to play the Full HD If the PC specification is lower than standard, it is possible to happen "No-play back" or disconnect PC viewer program is not installed in case of first use or when format the memory card.
- Page 67 PC VIEWER INSTALLATION PC-VIEWER 04 Install the [Viewer.exe] file in the Micro SD memory card as picture shown Click the [YES] button on the user control menu Click the [Next] button and click the [Installation] button...
- Page 68 PC Viewer program will be executed directly Click the [Execute a viewer] button to start viewer program When the installation is completed, the PC Viewer program runs automatically and Gnet icon will be created on the computer. [Open the file] - When click the file button, the browse folder will appear like picture.
- Page 69 PC VIEWER MENU PC-VIEWER 04 Save Folder Open Print Setting Playlists and Information Display G-sensor (acceleration) graph GPS reception window Speedometer Play a recorded video Video control popup Reverse and forward play Thumbnail Pause Draw a lane Repeat event video View a video Previous, Next Event Split View...
- Page 70 PC VIEWER MENU PC-VIEWER 04 How to Check the G-sensor data When you play the video, three-dimensional coordinate system information (G-sensor data) on the X-axis(progress direction), Y-axis (left-right), and Z-axis (height) of the image currently being played at the G-sensor data location is output.
- Page 71 Precaution before connect the Smart phone We provides Android and iOS platform. Please search “GNET” on Google play or App store. Or use the QR code Real time video and playback can be delayed depending on Smart phone specification Do not handle the device while driving, it causes serious accident.
- Page 72 SMART PHONE CONNECTION APPLICATION 05 How to connect your smartphone - iOS After installing Gnet app, run it on the smartphone screen Press Wi-Fi button of the dash cam. You can hear a voice message "Registration standby mode". The registration standby mode keeps for 2 minutes.
- Page 73 SMART PHONE CONNECTION APPLICATION 05 If the connection fails Please go to "Customer Support" section at the bottom of the mobile app screen for help with connection.
- Page 74 SMART PHONE CONNECTION APPLICATION 05 How to connect – Android After installing Gnet app, run it on the smartphone screen Press Wi-Fi button of the dash cam. You can hear a voice message "Registration standby mode". The registration standby mode keeps for 2 minutes.
- Page 75 SMART PHONE CONNECTION APPLICATION 05 The registration of the If the connection fails dash cam is completed. Please go to "Customer Enter the information Support" section at the and touch 'Save' button bottom of the mobile app screen for help with The information connection.
- Page 76 SMART PHONE CONNECTION APPLICATION 05 APP Main Screen Description This function allows you to connect other dash cams or delete the registered devices. Supported only on Android mobile Real-Time Video You can watch a real-time video. Settings You can easily change settings via your smartphone.
- Page 77 QUESTION AND ANSWER Q&A Hearing “Ding-Dong” sound come from dash cam while driving. A impact detection sensor inside dash cam detects impact or when dash cam detect curve while driving, there is buzzer sound like Ding-dong with frequent LED blinking. It means that dash cam is correctly working. If the sound from device bothers you, you can configure sound and buzzer to turn on/off via dedicated viewer.
- Page 78 QUESTION AND ANSWER Q&A Parking mode work in curve or slope on the road. To switch into parking mode, dash cam need to have those information such as migratory routs, horizontal angle of car. But, if your car is parked on slope, dash cam may not be recognized that car is not stopped.
- Page 79 QUESTION AND ANSWER Q&A If dash cam is connected with constant power cable, is the car battery discharged at all? Our dash cam has a function that it is automatically power off when dash cam detects below voltage value from car’s engine. We can say that our dash cam is fully working against discharge of car battery.
- Page 80 QUESTION AND ANSWER Q&A Is dash cam used with AC adapter? Our products are only for car and it is not available to use with AC adapter. Dash cam is suddenly power off while driving. Users who are using dash cam with constant power cable often trouble with this kind of issue.
- Page 81 QUESTION AND ANSWER Q&A Dash cam is turn on at all. [Using Cigar jack Cigarette cable] a. Please make sure if cigar jack cable is correctly working or not. b. Confirm that power socket of cigar cable is correctly connected. c.
- Page 82 QUESTION AND ANSWER Q&A Why user should use genuine memory card. Every memory card from each manufacture has different NAND flash and internal controller. Our genuine memory card has been tested for long time in multiple test environments. Also, genuine memory card shows the best compatibility with our products.
- Page 83 QUESTION AND ANSWER Q&A How to use products stably. 1. Swipe dash cam lens regularly. Fingerprint and dust on lens are one of issue to make Blurred video quality. 2. Please check if you dash cam is properly working or not. It may not correctly work from errors such as memory card faulty and poor contact of cigar jack.
- Page 84 QUESTION AND ANSWER Q&A How long is the warranty period? The warranty period for GNET Dash camera is one year from the date of purchase. ※ The warranty period for accessories and Micro SD card : 3 months WARRANTY CARD...
- Page 85 It is different system depends on the manufacture. A. Samsung : My file → Device Internal storage → DCIM → GNET B. LG : File management → All files (or Internal storage → DCIM → GNET) C. I-phone : Camera roll(in the picture app)
- Page 86 Micro SD Card when it is first booted (when a formatted SD card is loaded). (1) When first use, insert the GNET Micro SD card to front camera (2) And connect the power cable (3) Takes 3~5 min to initialize and crease the file system when first use.
- Page 87 QUESTION AND ANSWER Q&A What is the G-Sensor? G sensor (Gravity Sensor), is a sensor that recognizes movement or tilting of an object due to gravitational action of the Earth. X axis: Shock and acceleration (+) and deceleration (-) in front and rear are displayed in red. Y axis: Shock from left (+) and right (-) side and left and right movement (left turn, right turn) are displayed in green.
- Page 88 QUESTION AND ANSWER Q&A What kind of recording mode GNET Dash cam have? We have 4 types of recording mode. - It starts recording when power is connected Normal Recording - Security LED flickers once every 2 seconds - If there is impact or shock, the REC LED will flicker and...
- Page 89 QUESTION AND ANSWER Q&A What is the LBP? It is equipped with the voltage management function which is installed to protect the battery of the customer who uses the LBP and the dash camera. LBP is the implication of Low Battery Power. The dash camera is a function that protects the battery of the customer by cutting off the power by oneself.
- Page 90 QUESTION AND ANSWER Q&A What is the Parking mode ? Parking mode means that if you do not drive the car and the parking condition to record and store for a long time. In the case of a product which uses a 3-wire constant power cable, if the ACC power is cut off after parking the car, it will enter the parking mode right away.
- Page 91 QUESTION AND ANSWER Q&A How can I change the time of device without LCD screen ? In PC VIEWER, you can enter the Setting > System > Time Setting as below...
- Page 92 QUESTION AND ANSWER Q&A My smartphone can not be connected with dashboard camera. Depending on the smartphone settings, some smartphones may be disconnected due to weak Internet signals. This is not a problem with the product or smartphone application, please refer to the solution below. How to check Wi-Fi connection 1.
- Page 93 QUESTION AND ANSWER Q&A How to use direct power cable ( 3 Wired Type ) * Black cable : Ground * Red cable : ACC (Power source on when key ignition is in accessories or ON position.) * Yellow cable : VCC (Continued power source.) 1.
- Page 94 QUESTION AND ANSWER Q&A 2. If you don't want to use continued recording of dash cam. when turn off ignition Black cable(Ground): It should connect to ground in car Twist Yellow cable(VCC) with Red cable(ACC) as below a picture. Twisted cable should connect to power supply of fuse which is operated. when turn on ignition (ex : cigar light fuse etc)
- Page 95 → only the power LED is turned on and DASHCAM is not working normally, send the problem DASHCAM to GNET. Video input error After checking whether the front camera or the rear camera is due to a bad image sensor, send the DASHCAM in question to GNET.
- Page 96 SD card.If the same symptom appears afterwards, contact the usage time and receive a replacement product within 3 months. If there is no live video, contact GNET. SD card recognition failure Check whether the PC is recognized or not, check the operation after reinserting the SD card, contact us for usage time, and receive a replacement product within 3 months.
- Page 97 At this time, the voice prompt 'Registered standby mode' appears (For models without LCD screen, press WI-FI button) 4. Run GNET app of dashcam registration window and click ” Yes” button 5. Select and connect the model image you are using Contact G-SYNCLOUD FULL GUIDE DOWNLOAD (www.gnetsystem.com/en)
- Page 98 1. Normal operation 1) Check the type of power cable 1ch models : GN700, G-BLACK 2ch models : G-ON, N2, X2, L2, GDR, IRONMAN, MATMAN, GK, G-STYX, N2I, N2T, X2I, X2T 3ch models : G-STYX, X3I, GT700 3CH 4ch models : CP440, GT700 4CH...
- Page 99 TROUBLE SHOOTING Vehicle battery discharge 1. Always-on connection check 2. Confirm whether it is a 2-wire or 3-wire model (2-wire model does not apply to items 2 and 3 below) 3. Cause of discharge ① In winter, when the weather is cold and the battery performance of the car is weakened, the car may be discharged when the driving time is short.
- Page 100 TROUBLE SHOOTING TROUBLE SHOOTING Recovery Inquiry 1. Saved time Deleted videos cannot be restored because they are overwritten sequentially. 2. If the user checks the SD card on the computer and accidentally deletes the jdf file in the data / event folder (or if for some reason) ①...
- Page 101 WARRANTY CARD...
- Page 102 www.gnetsystem.com/en 6F Lotte IT Castle II Gasan Digital 2ro 98, Geumcheon-gu, Seoul, Korea info@gnetsystem.com...
Need help?
Do you have a question about the G-On and is the answer not in the manual?
Questions and answers