Advertisement
Advertisement

Related Manuals for Gnet G-ON4


Summary of Contents for Gnet G-ON4
- Page 1 2CH 4K UHD | FHD HDR DASH CAM USER MANUAL...
-
Page 2: Table Of Contents
CONTENTS 01. BEFORE USE IMPORTANT SAFTY ······················································ INSTRUCTIONS WARNING CAUTION FOR MEMORY CARD ································ PRODUCT FEATURES ···················································· PACKAGE COMPONENTS ·········································· NAME OF EACH PART ···················································· SPECIFICATION ······························································· INSTALLATION ······························································· 02. FUNCTION HOW TO USE ···································································· MEMORY CARD VIDEO FOLDER ······························ 03. -
Page 3: Before Use
GNET SYSTEM CO.,LTD. GNET SYSTEM CO.,LTD reserves the right to change or improve its products and to make changes in the content of this manual without obligation to notify any person or organization of such changes or improvements. - Page 4 It is possible to format the memory card in the GNET application for Mac and PC. Please visit the GNET SYSTEM’s website at:...
- Page 5 PRODUCT FEATURES 01. BEFORE USE SONY STARVIS CLOUD SYSTEM IMAGE SENSOR UHD/FHD G-NET H.265 CODEC Wi-Fi APP TIME LAPSE REAL HDR SD LOCKS FOR PARKING MEMORY PROTECTION MODE...
- Page 6 The size and appearance of the components depicted above may be different from the real components. Specifications and components may be changed without notice for quality assurance. We highly recommend that a GNET Genuine Memory Card be used with all GNET products.
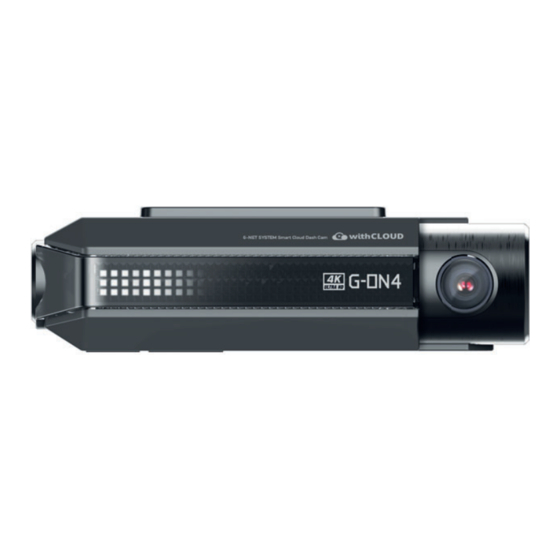
- Page 7 NAME OF EACH PART 01. BEFORE USE Front Camera Rear camera connector port Front camera lens Wi-Fi connection button Security LED Manual recording button OBD2 connector port Front camera bracket Power button Micro SD card cover GPS LED Wi-Fi USB dongle port REC LED Power connector port (DC-IN)
- Page 8 NAME OF EACH PART 01. BEFORE USE Rear Camera Camera lens Rear cam mount Rear cam connector port Status LED...
- Page 9 256GB : 16hrs 30mins / 512GB : 33hrs / 1TB : 66hrs 3G/4G/Router (Optional) Connect to withCLOUD via 3G/ 4G/ Router telecommunication Wi-Fi (Optional) Connect to GNET Smart phone application via Wi-Fi dongle G-Sensor Event recording by External Shock Speaker...
- Page 10 INSTALLATION 01. BEFORE USE How to install Dash cam Assemble the front camera with the provided bracket in the order displayed. Make sure bracket is hooked correctly. Push and align it until a sound is heard. ( , ). Once the bracket is secure, ensure that the memory card has been inserted. Proceed to peel the cover from the double sided tape on the bracket.
- Page 11 INSTALLATION 01. BEFORE USE Install the front camera onto the front windshield of the vehicle making sure the angle and location is properly aligned. ear] [Front] [Rear] TIP: The adhesive is extremely sticky. Avoid touching the adhesive to the windshield until the mount is properly positioned and aligned. Depending on the vehicle, the front angle may be different.
- Page 12 Rear cable [CAM1] DC-IN CAUTION GNET strongly recommends having an experienced installer with the proper knowledge of electrical systems install the device. Incorrectly wiring the power cable can result in damage to the vehicle or the battery and can cause bodily injure.
- Page 13 Rear connection cable CAUTION GNET strongly recommends having an experienced installer with the proper knowledge of electrical systems install the device. Incorrectly wiring the power cable can result in damage to the vehicle or the battery and can cause bodily injure.
- Page 14 INSTALLATION 01. BEFORE USE How to Install Fuse Cable Please refer to the car manual because the fuse box is differ depending on car model. It is recommended that install the power from the automobile shop. We are not responsible for any damage caused by self-installation. Find the Fuse box using electric tester from fuse box of the vehicle.
- Page 15 INSTALLATION 01. BEFORE USE Connect [GND] line to vehicle (Do not connect the volt which is connected to dash board. Current is not flowing) Connect the power cable to confirm the operation of product. And organize cables to finish installation work...
- Page 16 INSTALLATION 01. BEFORE USE Inserting the Memory Card Please be fully aware of the orientation of the Micro SD Memory Card. Push the Micro SD Memory card into the memory card slot until you hear 'clack' sound. When using memory card for the first time or when the memory card is reused after format, the system will be in stand-by mode for 3~5 minutes to create system files and checking the memory card.
- Page 17 INSTALLATION 01. BEFORE USE SD Card Secure Cover Open the SD card cover and insert the memory card.
- Page 18 INSTALLATION 01. BEFORE USE SD Card Secure Cover Then slide the SD cover into the hole as shown, and fasten the screw to the body. Covering the SD card is completed.
-
Page 19: Function
*Notice : You need to set the CLOUD as [OFF] in the viewer, only if you want to convert Wi-Fi USER [withCLOUD] to GNET APP after you use [withCLOUD] APP. REGISTRATION If you press the power button 1sec twice, you can turn on/off... - Page 20 HOW TO USE 02.FUNCTION ADAS Function - Android Set the ADAS function at the GNET application. ADAS ON/OFF Turn on and off all sub-features of ADAS at once. LDWS(Lane Departure Warning System) When the car leaves the lane, the detection alarm will go off.
- Page 21 HOW TO USE 02.FUNCTION ADAS Lane correction - Android To improve the ADAS recognition rate, it is recommended to adjust the G-ON2 dash camera position by matching the end of the vehicle bonnet line on condition that "the lane correction button" is turned on in the real time screen.
- Page 22 HOW TO USE 02.FUNCTION Dash cam Power On/Off Press the power button to turn the system off. To restart the system, press and hold the power button. On/Off ‘Hold’ In case of turn the system off by holding the power button, you have to press and hold the power button again in order to restart the system.
- Page 23 HOW TO USE 02.FUNCTION Wi-Fi Power On/Off Wi-Fi Power On The Wi-Fi power will be on when you press the power button for two times or press Wi-Fi button for 1 time. ‘Press 1sec, twice’ ‘Press’ Wi-Fi Power Off The Wi-Fi power will be off when you press the power button for two times. ‘Press 1sec, twice’...
- Page 24 HOW TO USE 02.FUNCTION Change Into Wi-Fi or Cloud Mode The Wi-Fi mode is changed to the CLOUD mode or the CLOUD mode is changed to the Wi-Fi mode if you press the Wi-Fi button for 3~4 seconds. (At this time, when switching to the Wi-Fi mode or the CLOUD mode, dash cam is on and does not reboot)
- Page 25 HOW TO USE 02.FUNCTION Manual Recording Manual recording begins when you press the button once.
- Page 26 HOW TO USE 02.FUNCTION Recording Mode - When the power is connected, the normal recording will start. Normal Recording - Security LED flickers left and right every 2 seconds. - If there is impact or shock, the record LED will flicker and record in event recording mode.
- Page 27 HOW TO USE 02.FUNCTION Voice Guidance CONTENTS VOICE GUIDANCE Start recording. Normal recording Shut down the system. System Off Recording does not have enough available. Overwriting Please check overwriting setting. GPS connection GPS connected. Abnormal recording Video is not being entered. Enable registration Stand-by mode for Wi-Fi registration.
- Page 28 HOW TO USE 02.FUNCTION Voice Guidance CONTENTS VOICE GUIDANCE Change to cloud mode Change to cloud mode. Change to Wi-Fi mode Change to Wi-Fi mode. Wi-Fi power On Wi-Fi power is on Wi-Fi power Off Wi-Fi power is off. Change the Smartphone setting Setting changed and reboot.
- Page 29 MEMORY CARD 02.FUNCTION VIDEO FOLDER Remove the memory card after the device turns off. Insert the removed memory card into the memory reader and connect it to the USB port on your PC. Select the removable disk in the explorer folder. - Folders in the removable disk are displayed as shown on the following page.
- Page 30 02.FUNCTION VIDEO FOLDER Predictable recording time of SD memory capacity (Default: All cameras : Max. 30 FPS) 32GB(2hrs), 64GB(4hrs), 128GB(8hrs 20mins), 256GB(16hrs 30mins), 512GB(33hrs), 1TB(66hrs) Total recording time may be different depending on use conditions and environment. Config Log.txt : It records the device's statement in a log file. (Manage system) Version.ini : Saving version information of device.
-
Page 31: Application
BEFORE WI-FI CONNECTION 03. APPLICATION Download our smartphone app - Available for Android and Apple iOS. Search ‘GNET’ on Google Play and App Store. - Simply scan and access the QR code below. Precaution before connecting the Smartphone - Set the time zone on the GNET app or the viewer. - Page 32 SMARTPHONE CONNECTION 03. APPLICATION How to connect an Apple iOS smartphone Install the GNET application on the smartphone. * G-net application is not available while cloud mode is on. Press the Wi-Fi® button on the dash camera to enter standby mode with the voice message. (last 2 minutes) Enter the Settings menu and proceed to locate and connect to the dash camera’s Wi-Fi network...
- Page 33 SMARTPHONE CONNECTION 03. APPLICATION How to connect an Android smartphone Install the GNET application on the smartphone. * G-net application is not available while cloud mode is on. Press the Wi-Fi® button on the dash camera to enter standby mode with the voice message. (last 2 minutes) Touch the "+"...
- Page 34 SMARTPHONE CONNECTION 03. APPLICATION APP Main Screen Description This function allows you to connect other dash cams or delete the registered devices. ※ Supported only on Android mobile Real-Time Video Select this button to view a live video feed from the dash camera.
- Page 35 USING「withCLOUD」 04. withCLOUD Both mobile apps(Android / iOS) and web are available. withCLOUD USER GUIDE withCLOUD...
- Page 36 HOW TO USE 04. withCLOUD Main (PC) Menu button Location search(Enter City or Address) : The map moves to the area you searched for. Event alarm : It is displayed when an event occurs, and when you press an event on the list, the video is played.
-
Page 37: Withcloud
04. withCLOUD Main (Mobile) Menu button Event alarm : It is displayed when an event occurs, and when you press an event in the list, the video is played. User icon : You can select Channel / Settings / Logout Location search(Enter City or Adress) : The map moves to the area you searched for. - Page 38 HOW TO USE 04. withCLOUD Live video / Recommended Live video You can check the real-time image by selecting the vehicle icon of the user who shared your vehicle or location/video on the map. Recommended The function of recommending videos with high views and likes. If you press ‘More’...
- Page 39 HOW TO USE 04. withCLOUD Event videos / Channel Event videos A screen where I collect event videos of my vehicle. You can set up or delete sharing, and search for videos by date/vehicle/event. Channel You can view the event video shared by the user, the subscription channel, and the shared video that you like.
- Page 40 HOW TO USE 04. withCLOUD Vehicle management / GPS Tracking Vehicle management In the registered vehicle, such as setting the location of my vehicle, setting the black box, and setting the cloud plan, all settings related to it are possible. You can check by selecting the photo/text mode of the list.
-
Page 41: Pc Viewer
PC VIEWER INSTALLATION 05. PC VIEWER The PC specification should be over ‘CPU i5 3.0 GHz, Memory 4GB’ to play the Full HD If the PC specification is lower than standard, it is possible to happen "No-play back" or disconnect PC viewer program is not installed in case of first use or when format the memory card. - Page 42 PC VIEWER INSTALLATION 05. PC VIEWER Install the [Viewer.exe] file in the Micro SD memory card as picture shown. Click the [YES] button on the user control menu. Click the [Next] button and click the [Installation] button.
- Page 43 Click the [Execute a viewer] button to start viewer program. When the installation is completed, the PC Viewer program runs automatically and Gnet icon will be created on the computer. Gnet icon ▶ [Open the file] When click the file button( the browse folder will appear like picture.
- Page 44 SCREEN GUIDE 05. PC VIEWER PC Viewer (Window) ① Tool Box G-sensor (acceleration) graph Save Folder Open Speedometer Print Setting (It can be used only when GPS is connected) Google Map Play a recorded video When GPS and internet are connected, it will work normally Reverse and forward play Playlists and Information Display...
- Page 45 SCREEN GUIDE 05. PC VIEWER How to Check G-sensor data When you play the video, three-dimensional coordinate system information (G-sensor data) on the X-axis(progress direction), Y-axis (left-right), and Z-axis (height) of the image currently being played at the G-sensor data location is output.
- Page 46 QUESTION & ANSWER Q&A The dash cam makes a “ding dong” sound while driving. As an impact detection sensor inside the dash cam detects impact or curve while driving, there is a buzzer sound with LED flickering. It means that the dash cam is working correctly. If the sound from the device bothers you, you can configure the sound and buzzer to turn on/off...
- Page 47 For your information, GPS needs to be far away from the dashcam to prevent interruption of GPS reception inside the car. How can I set the date and time through GNET viewer? Insert the memory card into your PC and open the dedicated PC viewer.
- Page 48 QUESTION & ANSWER Q&A If the dash cam is connected with a constant power cable, won't the car battery discharge? Our dash cam has a function that automatically turns off when the voltage value of the car engine is below. The feature, LBP(Low Battery Protector) prevents car battery discharge and it gives the minimum battery charge rate so that the driver can activate the engine without failure.
- Page 49 Q&A Is dash cam used with AC adapter? Our products are only for car and it is not available to use with AC adapter. There is noise in the recordings. Dash cam records any sound in your vehicle by amplifying the sound for better recordings.
- Page 50 If the voice recording is not working properly, please check the feature in the Gnet App and the Viewer whether its function is off. If the function is on but you cannot hear any sounds, the speaker is probably damaged.
- Page 51 QUESTION & ANSWER Q&A The voice repeats from the camera. If you have any trouble with voice guidance repeated, there are some solutions you should try on. i) Please turn off the power of dash cam. ii) Take out the memory card and insert it into your PC to format the SD card. iii) Check if the rear/ inner camera is connected well.
- Page 52 It is different system depends on the manufacture. A. Samsung : My file → Device Internal storage → DCIM → GNET B. LG : File management → All files (or Internal storage → DCIM → GNET) C. iphone : Camera roll (on Photo album)
- Page 53 QUESTION & ANSWER Q&A What is the G-Sensor? The G-sensor (Gravity Sensor) is a sensor that recognizes the movement or tilt of an object due to the action of gravity on the Earth. Z-axis X-axis Y-axis X axis: Front and rear shock and acceleration (+) and deceleration (-) are shown in red. Y axis: On the left (+) and right (-) sides, the impact and left/right Tovement (turn left, turn right) are shown in green.
- Page 54 QUESTION & ANSWER Q&A What is the LBP? LBP stands for Low Battery Protector, which checks the voltage of the car battery in real-time to prevent the car battery from discharging by turning off the dash cam at low voltage. The purpose is to save the minimum power of the vehicle battery to be able to start the vehicle.
- Page 55 QUESTION & ANSWER Q&A What is the Parking mode ? Parking mode means the dash cam records and stores videos when the vehicle is not being driven. In the case of using a 3-wire constant power cable, if the ACC power cuts off after parking which means you turn off your vehicle, it enters the parking mode immediately.
- Page 56 QUESTION & ANSWER Q&A How can I change the time of device without LCD screen ? In PC VIEWER, you can enter the Setting > System > Standard time zone as below...
- Page 57 QUESTION & ANSWER Q&A How to use direct power cable ( 3 Wired Type ) 1. For the continuous recording even when the ignition is turned off, please refer to each cable below. Black cable(Ground) should be connected to the ground on a car. Yellow cable(VCC) should be connected continued the power supply of a fuse in the fuse box.
- Page 58 QUESTION & ANSWER Q&A 2. If you do not want to record when the ignition is turned off, please refer to below. Black Cable (Ground) should be connected to the ground of the car. Twist Yellow Cable (VCC) with the Red cable (ACC) as shown below. These twisted cables should connect to the power supply of a fuse which is operated when turning on the ignition.
- Page 59 Regarding of rear camera, you should check the connection between the cables. However, if a video from the front camera doesn't appear, it may occur by the damaged image sensor. Please ask the seller or customer service center at Gnet System.
- Page 60 TROUBLE SHOOTING TROUBLE SHOOTING SD card damage Turn off the dash cam and take off the SD card. And then, reinsert it and turn the dash cam on. Otherwise, it is related to the life of the SD card. If you experience the same symptoms afterward, contact us within 3 months of warranty.
- Page 61 TROUBLE SHOOTING TROUBLE SHOOTING Recovery Inquiry 1. Video that has been stored for a long time is overwritten, making it difficult to restore. 2. If the user checked the SD card on the computer and accidentally deleted the JDR file from the data/events folder (or for any reason), insert the the SD card into the device and boot ->...
- Page 62 WARRANTY CARD GNET Dash cam G-ON4 Product Model Serial Number Purchasing Date Name Consumer Information Address Seller / Vendor Dash Camera : 1 Year Warranty Period Micro SD card : 3 months * If you require product repair, service and/or support,...
- Page 63 www.gnetsystem.com/eng www.g-on-the-road.com info@gnetsystem.com 6F Lotte IT Castle II Gasan Digital 2ro 98, Geumcheon-gu, Seoul, Korea...
Need help?
Do you have a question about the G-ON4 and is the answer not in the manual?
Questions and answers
Как организовать на удалении просмотр событий через облако. Через WiFi в приложении все вижу, но это только в машине
To set up remote event viewing through the cloud for the Gnet G-ON4:
1. Insert a SIM card with a mobile data plan into the optional SIM WiFi adapter.
2. Connect the SIM WiFi adapter to the car via USB.
3. Connect the Gnet G-ON4 dashcam to the WiFi network using the app.
4. Create a free WithCloud account.
5. Use the app or PC to access the WithCloud system.
6. Once connected, you can view live images, receive parking mode notifications, and review saved event footage remotely.
The free account includes 2GB of cloud storage and up to 10 minutes of saved footage for 2 days.
This answer is automatically generated
Hi I have the dash cam in my Mazda three but I’ve bought a new car and so I need to remove the dash cam and and then have it reinstalled in the new car. Will that mean the bracket will stay on the windscreen of the Mazda or does it peel off? Any advice is appreciated thank you.