Table of Contents
Advertisement
Advertisement
Table of Contents

Related Manuals for Hitachi KC95E


Summary of Contents for Hitachi KC95E
- Page 1 Instruction Manual KC95E Projection Alarm Clock Radio ...
-
Page 3: Table Of Contents
Content Safety Warnings ........................6 Unpacking ..........................8 Product Overview .........................9 Front View ...............................9 Top View ................................9 Side View ..............................10 Rear View ..............................10 Power Source ........................11 Mains Power ..............................11 Backup Battery Power ..........................12 Handling the Batteries ..........................12 Getting Started ........................13 Setting the Time Zone .......................... - Page 4 SOME DOS AND DON’TS ON THE SAFE USE OF EQUIPMENT This equipment has been designed and manufactured to meet international safety standards but, like any electrical equipment, care must be taken if you are to obtain the best results and safety is to be assured. read the operating instructions before you attempt to use the equipment.
- Page 5 Used correctly, domestic batteries are a safe and dependable source of portable power. Problems can occur if they are misused or abused – resulting in leakage or, in extreme cases, fire or explosion. Here are some simple guidelines to safe battery use designed to eliminate any such problems.
-
Page 6: Safety Warnings
Safety Warnings • Read all the instructions carefully before Moisture using the unit and keep them for future • To reduce the risk of fire, electric shock or reference. product damage, do not expose this unit • Retain the manual. If you pass the unit or the mains adapter to rain, moisture, onto a third party make sure to include this dripping or splashing. - Page 7 Interference Service • Do not place the unit on or near appliances • To reduce the risk of electric shock, do not which may cause electromagnetic remove screws. The unit does not contain interference. If you do, it may adversely any user-serviceable parts.
-
Page 8: Unpacking
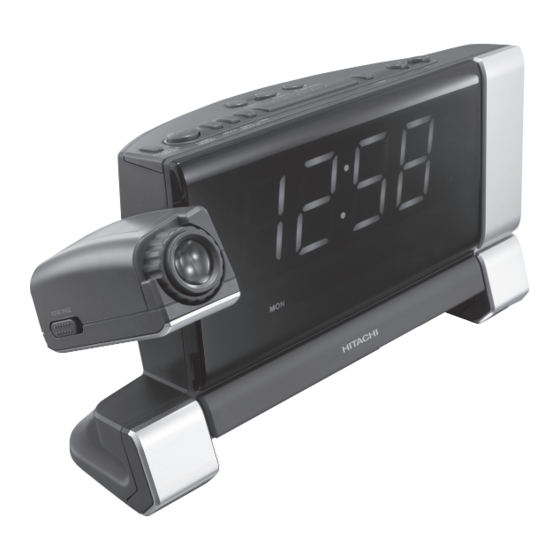
Congratulations on the purchase of your new Hitachi Projection Alarm Clock Radio. We recommend that you spend some time reading this instruction manual in order that you fully understand all the operational features it offers. You will also find some hints and tips to help you resolve any issues. -
Page 9: Product Overview
Product Overview Front View ALARM 1 Indicator LED Display ALARM 2 Indicator Low Battery Indicator Day of Week Indicator Night Light Indicator Top View S N O O Z E 7 8 9 12 13 ALARM1 Button DATE/MONTH Button ALARM2 Button TIME Button ALARM MODE Button 10. -
Page 10: Side View
Side View VOLUME Control Projector Lens MW/FM Selector Projector TUNING Control ROTATE IMAGE Switch Rear View AC ~6.5V 400mA Speaker ALARM1 Selector (RADIO/BUZZ/OFF) NIGHT LIGHT ON/OFF ALARM2 Selector Selector (RADIO/BUZZ/OFF) FM Aerial DIMMER Selector Backup Clock Battery (HI/LOW) Compartment AC Socket... -
Page 11: Power Source
Power Source Mains Power Before use, make sure that the rated voltage of your radio matches your local voltage. This unit operates with a AC 6.5V 400mA mains adapter (included). Connecting the unit to any other power source may cause damage to AC ~6.5V 400mA the unit. -
Page 12: Backup Battery Power
Backup Battery Power Low Battery When the backup clock battery power drops below a certain level, the Indicator will flash on the LED. When you see this indicator, you should change the battery as soon as it is convenient for you to do so. To fit a battery, unscrew the screw that holds the battery compartment to the rear of the unit. -
Page 13: Getting Started
Getting Started Setting the Time Zone There are 24 time zones programmed into the unit as follows: UTC –8 UTC +8 UTC –1 UTC –9 UTC +7 UTC –2 UTC –10 UTC +6 UTC –3 UTC –11 UTC +5 UTC –4 UTC +/–12 UTC +4 UTC –5... -
Page 14: General Operation
General Operation Setting the Alarm Press and hold the ALARM 1 or ALARM 2 button on the top of the radio. At the same time press the SET buttons repeatedly to adjust the time minute digits. Alternatively press and hold the SET buttons to fast forward/reverse the time minute digits. -
Page 15: Snooze Function
Snooze Function Press the SNOOZE button when the alarm sounds. The alarm will go off and will then sound again in approximately 9 minutes. After pressing the SNOOZE button, the alarm indicator AL. 1 or AL. 2 will flash to inform you which alarm you have set. To turn off the alarm, press the ALARM 1 or ALARM 2 button when the alarm sounds. -
Page 16: Using The Projector
Using the Projector Press the PROjECTOR ON/OFF button on the top of the radio to turn on the projector function and then turn the projector anti-clockwise toward the wall. Time image will be projected onto the wall or ceiling. Slide the ROTATE IMAGE switch to turn the image 180° if necessary. Turn the FOCUS ADjUSTMENT control to adjust the focus of the image on the wall or ceiling. -
Page 17: Night Light On/Off Button
Night Light ON/OFF Button Switch the NIGHT LIGHT ON/OFF Selector to the ON position at the rear of the unit. NIGHT LIGHT AC ~6.5V 400mA ON/OFF Selector Rear View The BLUE LED light will show at the bottom of the unit. BLUE LED Bottom View Dimmer Control... -
Page 18: Radio Operation
Radio Operation Press the RADIO ON/OFF button on the top of radio to turn the radio ON. The channel frequency will show on LED display. Adjust the MW/FM selector to a desired mode (MW / FM). Turn the TUNING control to tune to a station. For Better Reception FM: Fully unwind the FM aerial. -
Page 19: Hints And Tips
AL. 1 or AL. 2 indicator. • Is the alarm time and Day of Week correctly set? • Check the volume level. Specification Model KC95E Power output AC 6.5V 400mA Power source AC 230V ~ 50Hz For the clock and alarm memory power backup function: 3V... - Page 20 Importer: Elkjøp, Solheimsveien 6-8, PB 153, NO 1471 Lørenskog, Norge Norge: 815 32 000 Sverige: 0771 115 115 Danmark: 70 80 70 70 Suomi: 020321321 Manufacturer: Hitachi Europe Ltd., Whitebrook Park, Lower Cookham Road, Maidenhead, Berkshire SL6 8YA U.K. IB-KC95E-GB-130313V3...
Need help?
Do you have a question about the KC95E and is the answer not in the manual?
Questions and answers