
Related Manuals for Ewellix CAMT20


Summary of Contents for Ewellix CAMT20
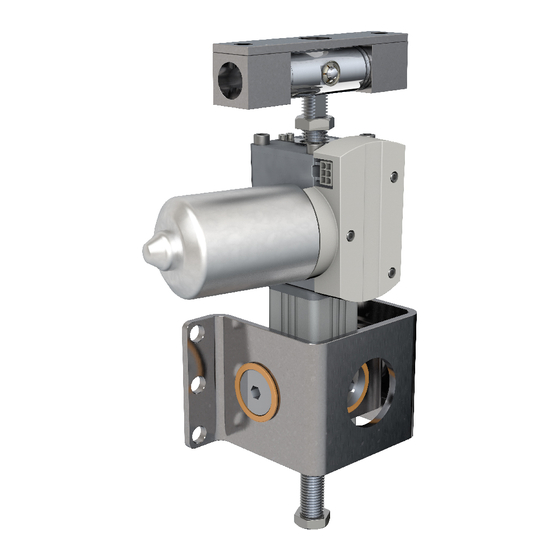
- Page 1 I N S TA L L AT I O N , O P E R AT I O N A N D M A I N T E N A N C E M A N UA L CAMT20 Linear actuator...
-
Page 3: Table Of Contents
Contents 1.0 General information ............4 6.0 Installation and first operation .........28 1.1 Information in this manual ..........4 6.1 Safety ................28 1.2 Explanation of symbols and signal words ......4 6.2 Installation location ............28 1.3 Limitation of liability ............5 6.3 Inspections prior to initial operation ......28 1.4 Copyright .................5 6.4 Installation ..............29 1.5 Spare parts ..............5... -
Page 4: General Information
C A M T 2 0 1.0 General information 1.1 Information in this manual This manual provides important information on how to work DANGER with the actuator (also called the device) safely and effi- Indicates a dangerous situation, which ciently. The Manual is part of the device, must always be will lead to death or serious personal kept and should be available for personnel to read at any injury, if the precautionary measures are... -
Page 5: Limitation Of Liability
1.6 Warranty terms Where the device has been customized, the actual product delivered maybe different from what is described in this manual. In this case, ask Ewellix for any additional instruc- The applicable and effective warranty terms are those con- tions or safety precautions relevant to these actuators. tained in the manufacturer’s terms and conditions of sale contained in the Ewellix sales contract that governs this We reserve the right to make technical modifications in order ... -
Page 6: Safety
C A M T 2 0 2.0 Safety This section provides an overview of important safety as- 2.1.1.1 Product lifetime pects of installing, operating and maintaining this device. The linear actuator CAMT is designed for a service life of 10 Disregarding this Manual and safety regulations specified ... -
Page 7: Responsibility Of The Owner And Processor
2 .0 S afe t y 2.3.1 Qualifications 2.2 Responsibility of the The following qualifications are specified for different areas owner and processor of activity listed in this manual: • An instructed person (operator) The device is designed for commercial applications by its owner or processor. The processor is the contracting part- Instructed by the customer in an orientation session on the ner of the reseller or the manufacturer. -
Page 8: Safety Equipment
C A M T 2 0 WARNING Injury due to cracks and related openings in the housing of NOTE the actuator and/or its accessories. The processor decides whether the intended application requires If the housing is damaged due to stock, beakage or heavy wear, the installation of an emergency patient release system. -
Page 9: Modifications Of Device
To avoid hazardous situations and to ensure optimal or functions are performed properly. Unacceptable risks for performance, do not make changes or modifications to the patients, operators or others are performed and assessed to device unless they have been specifically authorized by Ewellix. prevent or reduce harm. 2.7.1 Warning labels The follow points identify and describe the EMC-risks about... - Page 10 C A M T 2 0 Connection cable (CAMT <-> Control unit SCU; SCU <-> Operating elements) Description Plug Drawing-No Type Length Connecting cable straight: 2 x AWG16 & DIN 8p – Molex 6p 777400-1000 CAMT – SCU 4 x AWG24 Connecting cable straight: DIN 8p –...
- Page 11 2 .0 S afe t y 2.8.2.1 Compliance for each Emissions and Immunity standards The Telescopic pillar CAMT (CAMT & SCU) is intended for use in the electromagnetic environment specified. It com- plies with the standard for emission class and group and im- munity test level as follows. a) CAMT stand-alone CISPR 14-1 The CAMT is intended for use in the electromagnetic environment specified below. The customer or the user of the CAMT should assure ...
- Page 12 C A M T 2 0 b) CAMT and SCU CISPR 14-1 The CAMT is intended for use in the electromagnetic environment specified below. The customer or the user of the CAMT should assure that it is used in such an environment. Emissions test Compliance Electromagnetic environment - guidance RF emissions Complies The CAMT is not suitable for interconnection with other CISPR 14-1 equipment.
- Page 13 2 .0 S afe t y c) CAMT stand-alone / CAMT and SCU Electromagnetic immunity environment tested Portable and mobile RF communications equipment should be used no closer to any part of the CAMT, including cables, than the recommended separation distance calculated from the equation applicable to the frequency of the transmitter. These guidelines may not apply in all situations. Electromagnetic propagation is affected by absorption and reflection from structures, ...
- Page 14 C A M T 2 0 Recommended separation distances between portable and mobile RF communications equipment and the CAMT The CAMT is intended for use in the electromagnetic environment in which radiated RF disturbances are controlled. The customer or the user of the CAMT can help prevent electromagnetic The CAMT is intended for use in the electromagnetic environment in which radiated RF disturbances are controlled.
-
Page 15: Technical Data
3 .0 Te c h n i c a l d a t a 3.0 Technical data 3.1 Ambient conditions • Indoor use only • Ambient temperature +10 to +40 °C • Atmospheric humidity from 5% to 85% • Air pressure from 700 to 1 060 hPa 3.2 Product label Type label (without options) 9. -
Page 16: Structure And Function
The actuator requires an external control unit to power the motor. The control unit is connected to the ac- tuator via a detachable connection cable. The Ewellix oper- ating control element is also connected to the control unit. - Page 17 4 .0 S tr u c t u r e a n d f u n c ti o n WARNING 4.5 Requirements for third party control units (manda- Safety hazard caused by interference tory in medical applications) (⮑ page 23) and chapter 4.6 When using a short protction tube in combination with a long Connections (⮑ page 23).
- Page 18 Ewellix advises to use one of the following control units to- gether with the CAMT actuator: When an end-stop hits a fixed surface on the housing or cover, the external control unit detects the peak of current Control units that results of this and consequently cuts it off, preventing ...
-
Page 19: Attachment Options
(H7) to keep the play in the attachment reduced to the minimum. The 1 and 2 degree-of freedom rear brackets are designed to fit directly on a Ewellix telescopic pillar (CPMT, TLG and TLT) and respectively allow the 1 or 2-axis movements nec- essary to the application. - Page 20 C A M T 2 0 It should be noted that in order to keep a low play configura- NOTE tion, the clevis pins used both for the front and rear attach- If the bore will be used as the pivot point, it is recommended to ments should be of matching dimension/tolerance. use a DIN 6325 cylinder pin with Ø...
- Page 21 (⮑ fig. 13). in place. Fig. 14 The rear bracket fits to the size of the outer tube of several Ewellix telescopic pillars and it should be fastened using 6 standard M10 screws. Fig. 13 WARNING Safety hazard caused by wrong attachment The front bracket is designed and tested to be working with the load in axial direction.
- Page 22 U-bracket can be used together with an adaptor plate to be connected to the telescopic pillar. Fig. 16 The rear bracket fits to the size of the outer tube of several Ewellix telescopic pillars and it should be fastened using 6 standard M10 screws. WARNING WARNING Safety hazard caused by wrong attachment...
-
Page 23: Requirements For Third Party Control Units (Mandatory In Medical Applications)
• Connect the hall sensor outlets to the supply with pull-up resistors so that the signal of the open collector outlets Control units not approved by Ewellix for CAMT linear actua- can be analyzed. tor, are treated as third party control units. -
Page 24: Operating Elements
(Means of protection: 1 Mean Of Patient Protection [MOPP]). NOTE The device does not feature its own operating elements. The operation takes place via Ewellix operating element at an external Ewellix control units (see related operating manual). - Page 25 4 .0 S tr u c t u r e a n d f u n c ti o n 4.8.2 Optional features Distance between front pivot and gear box (offset “X”) Defines the distance between the pivot point of the front at- tachment to the front cover of the gear box. Depending to the selected front attachment option the distance might vary. The standard offset is defined to allow full motion angle ...
-
Page 26: Transport, Packaging And Storage
• Do not remove the Operating elements and Accessories from its conditions (refer to chapter ⮑ 5.5 Storage, page 27). packaging until just before installation. 3. Send to manufacturer. Contact Ewellix service to obtain • Note storage requirements for return transport of the device to a shipment address. -
Page 27: Storage
5 .0 Tr a n s p o r t, p a c k a g i n g a n d s to r a g e 5.5 Storage • Keep the device in its original packaging for storage. • ... -
Page 28: Installation And First Operation
C A M T 2 0 6.0 Installation and first operation 6.2 Installation location This chapter is intended for technicians and those involved with further processing. It provides the information needed to assemble, connect and start up the device. Adhere to the technical data in accordance with operating conditions. -
Page 29: Installation
The following sequence then describes a typical way to The fig. 17 describes a typical installation of CAMT: mount a CAMT actuator onto a Ewellix telescopic pillar and is valid for both 1 and 2-DOF configurations. Yet, depending A CPMT telescopic pillar providing the elevation, working to- on the personal configurations, this procedure may be ... - Page 30 3. Rotate the front interface at an angle sufficient to clear the access to the holes completely (⮑ fig. 18). Fig. 18 Screws to use: Attachment direct to Ewellix pillar • Screws: ISO4762, M10x16, class 8.8, Zn plated • Tightening torque in pillar: 25 ±1.5 Nm 4. Insert and torque the fixation screws as follows: • Lock washer M10 • ...
-
Page 31: Connection To The Control Unit
Therefore: • It is recommended that an Ewellix control unit be used • When using a third-party control unit, the requirements stipulated for the third-party control unit must be adhered to chapter 4.5 Requirements for third-party control units (mandatory in medical applications) (⮑ page 24). -
Page 32: Connection To Operating Element
C A M T 2 0 CAUTION 6.6 Connection to Damage due to wrong lubricants The use of incorrect additives may cause significant material operating element damage Therefore: • Use only the auxiliary products listed by the manufacturer. NOTE Operational conditions are not displayed on CAMT linear 3. Insert DIN-8 plug (3) into the connecting socket (1) of the actuators. -
Page 33: Operation
7.0 O p e r a ti o n 7.0 Operation 7.1 Safety 7.2 Turn on NOTE WARNING Risk of crushing The device does not features ots own operating control While moving onto solid objects, the force of the device may elements. -
Page 34: Actions During Operation
C A M T 2 0 7.5 Actions during 7.6 Emergency operation disengagement In hazardous situations, all movements of the device must 7.5.1 Normal operation be stopped as quickly as possible and the power supply During normal operation, the linear actuator lifts or lowers turned off. -
Page 35: Maintenance
8 .0 M a i n te n a n c e 8.0 Maintenance Personnel • The maintenance work described here can be performed by the operator unless otherwise indicated. • Some maintenance tasks should only be carried out by es- pecially trained, qualified personnel, or exclusively by the ... -
Page 36: Maintenance Plan
C A M T 2 0 8.1 Maintenance plan Maintenance tasks that are required for optimal and trou- ble-free operation are described in the sections below. If increased wear is detected during regular inspections, shorten the required maintenance intervals according to the actual indications of wear. -
Page 37: Measures Following Completed Maintenance
8 .0 M a i n te n a n c e CAUTION 8.2.2 Inspections and readings Device damage due to damagd or wrong sealing rings • To be performed by a professional electrician. Damaged or wrong sealing rings cannot guarantee protection • ... -
Page 38: Malfunctions
C A M T 2 0 9.0 Malfunctions This chapter describes potential causes of equipment mal- Actions during malfunctions 1. In the event of a malfunction that may present an imme- function and the work required to restore operation. In the event of more frequent malfunctions, shorten the mainte- diate danger to persons or assets, turn off the actuator or ... -
Page 39: Malfunction Table
Qualified personnel temperature safety shut off Wait 20 minutes and try again Device cannot be set in motion by any Contact Ewellix service Qualified personnel of the suggested repair measures Lifespan of the drive is exceeded Replace the drive, if the drive is older than 10... -
Page 40: Dismantling
C A M T 2 0 10.0 Dismantling 10.1 Dismantling This chapter is intended for technicians and those carrying out further processing. It provides all the information needed for removal the devices from service, including dismantling The linear actuator CAMT is to be removed from service in and disposal. -
Page 41: Appendix
The technical information and operating data can be found in the current data sheet. Data sheet for linear actuator for surgical tables and proce- dure chairs – Series CAMT PUB IL-07014-EN-October 2019 Current data sheets are available on the Ewellix website (see ewellix.com). Unit CAMT20 Rated push load... -
Page 42: Plans And Diagrams
C A M T 2 0 11.3 Standards Compliance The declaration of incorporation according to annex IIB of Directive on machinery 2006/42/EC can be supplied upon request. 11.4 Plans and Diagrams 11.4.1 Dimensional drawing - Clevis attachment (CAMT20-xxxxx-00L-AA- AFx-000) 161,6 24,5 S±2 L±2 59,1... - Page 43 11 .0 A p p e n d i x 11.4.2 Dimensional drawing – 1DOF (degree-of-freedom) attachment 42,5 161,6 2×Ø 11 S±2 L±2 59,1 (Stroke) (Retracted length) 49,1 78,5 X±0,5 29,4 Offset* 6×Ø 11 180±2 Short protection tube Long protection tube Retracted length: L = Stroke (S) + Offset (X) + 50 (long protection tube) L = Offset (X) + 150 (short protection tube)
-
Page 44: Ordering Key
End limit switches Cable options 1 m straight with DIN8 plug 2,3 m straight with DIN8 plug 2,3 m straight with flying leads Without cable Options shown in yellow are only available on request. Contact Ewellix for more information on minimum quantities and additional costs... - Page 46 © Ewellix All contents of this publication are the property of Ewellix, and may not be re- produced or given to third parties (even extracts) without permission. Although great care has been taken in the production of this catalog, Ewellix does not take any responsibility for damage or other loss resulting from omissions or ty- pographical errors.
Need help?
Do you have a question about the CAMT20 and is the answer not in the manual?
Questions and answers