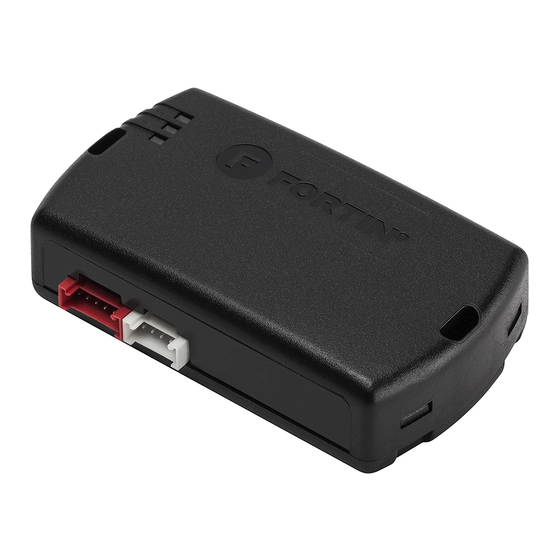
Fortin EVO-ALL Installation Instructions Manual
Rs7 + evo-all + flu t3162 for vehicles equipped with automatic transmission + push to start
Hide thumbs
Also See for EVO-ALL:
- Manual (25 pages) ,
- User manual (16 pages) ,
- Installation manual (11 pages)
Advertisement
Quick Links
TIP SHEET
T3162
Installation instructions: RS7 + EVO-ALL + FLU
For vehicles equipped with automatic transmission + PUSH TO START
Thank you for purchasing your remote start from MyPushcart.com - an industry leader in
providing remote starts to do-it-yourself installers since 1999. We've put this tip sheet together
to help you with your installation. The purpose of this sheet is to help you organize your
installation - not to replace your installation manual, you will still need to refer to that, there are
several safety tips in there that you need to know before you start. Avoid using a test light to
probe wires. Test lights can set off air bags if you probe the wrong wire. Your vehicle wiring
chart will identify the correct wires that you'll be tapping on to in your car, verify each using a
digital multi-meter, they're inexpensive and won't set off air bags.
STEP 1: Flash the EVO-ALL module
The EVO-ALL module will need to be flashed with the compatible firmware for your vehicle in order to
perform its functions. Your kit includes the flash link updater. This will be used to accomplish both the
flashing of your module as well as the "DCRYPTOR" step (required for transponder programming)
done in the final module programming once all you connections have been made. For flashing your
EVO-ALL, first you will need to open
www.fortinbypass.com
with your internet browser. At the bottom
of the page, click "Flash-Link Manager" and complete the software installation on your computer.
Then, plug the flash link updater into your computers USB port, and plug the 4-pin data link connector
from the flash link updater into the EVO-ALL module. The software will automatically detect the
Module and bring up a screen that allows you to enter your vehicle info. Once your vehicle info has
been entered, click the "updates" tab at the top of the screen, select the latest recommended
firmware version (usually shown in red), then click "flash" to load the firmware. Once the firmware has
been loaded, unplug the EVO-ALL from the flash link updater, and then plug it back in to ensure the
correct firmware version has been set, all of the previously selected settings should still be set. Once
you are sure the module is flashed accordingly, proceed to the installation of the module in your
vehicle.
1 |
P a g e
Advertisement

Summary of Contents for Fortin EVO-ALL
- Page 1 (usually shown in red), then click “flash” to load the firmware. Once the firmware has been loaded, unplug the EVO-ALL from the flash link updater, and then plug it back in to ensure the correct firmware version has been set, all of the previously selected settings should still be set. Once you are sure the module is flashed accordingly, proceed to the installation of the module in your vehicle.
- Page 2 STEP 2: Starting the installation Need to know where all the components go? See Installer’s Tip #1 later in this tip sheet Need to know how to make the wiring connections? See Installer’s Tip #2 later in this tip sheet -The bulk of the installation takes place right under the dash on the driver’s side.
- Page 3 (plugs in) Optional Wiring Connections: 1. Hood Pin Switch – If your vehicle comes with an OEM factory hood pin, the EVO-ALL will automatically monitor it saving you from the need of making any connection. Some base model vehicles may not have come with a factory hood pin. The purpose of the hood pin is to provide the important safety feature of disabling the remote starter from activating while the hood is open.
- Page 4 Wiring the EVO-ALL: EVO-ALL wire: Description: Location: Color: 20-PIN PLUG: DARK BLUE Status programmable (12-pin plug of RS) YELLOW/BLACK output (-) YELLOW Ignition (+) @ keyless control module- WHITE (along with pink wire in 6- 28-pin tan connector (along with...
- Page 5 P a g e...
- Page 6 NOTE: A door pin input must be used for the manual transmission remote start procedure and is achieved automatically through the EVO-ALL data stream with no need to make any wiring connections. For safety, a door opening will cancel a remote start that was previously “set-up”...
- Page 7 Program the EVO-ALL: P a g e...
- Page 8 STEP 5: Test the system and finish up! Perform the manual transmission “set up” procedure as described in remote start programming above, and then test the function of the remote starter as follows: -Test the lock, unlock, and trunk/back hatch (if equipped) using the RS remotes. -After confirming that everything works properly, cap off or tape the ends of any wires you’re not using to avoid grounding or other contact.
- Page 9 Installer’s Tips: Tip #1 – Where Everything Goes 1. Remote start module – the wiring for the module is done under the dash on the driver’s side, so you’ll want to install the module in that general area. Before you start wiring, look for a location where there’s some open space that will fit the module.
- Page 10 Method 2 – Wrap and tape This is the most popular method and is also very reliable. Strip back a section of the insulation on the wire in the car. On heavy gauge wires, 1” is about the right amount. On lighter gauge wires, ½” is fine. Strip 1” of insulation off the end of the remote start wire.


Need help?
Do you have a question about the EVO-ALL and is the answer not in the manual?
Questions and answers