Table of Contents
Advertisement
Available languages
Available languages
Advertisement
Chapters
Table of Contents

Related Manuals for Fairland Turbo Silence IXR36


Summary of Contents for Fairland Turbo Silence IXR36
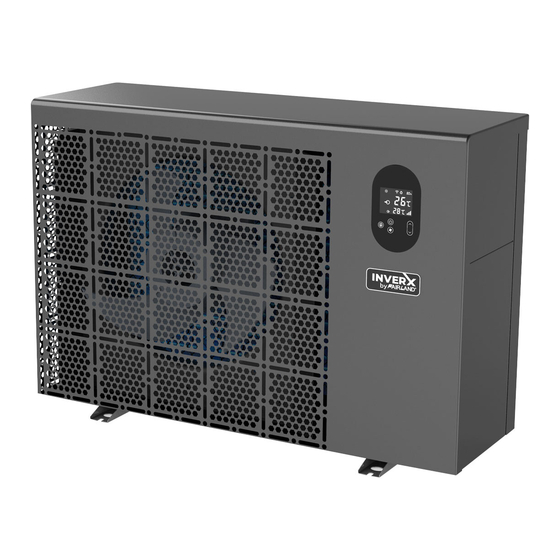
- Page 1 INSTALLATION AND USER MANUAL Thank you for choosing Fairland Turbo Silence heat pump This manual provides you necessary information for optimal use and maintenance, please read it carefully and keep it for subsequent use. EN/NL/FR...
-
Page 2: Table Of Contents
Summary For users . P.1-P.9 1. General information ..................- 3 - 1.1. Contents: ....................... - 3 - 1.2. Operating conditions and range: ..............- 3 - 1.3. Advantages of different modes: ..............- 3 - 1.4. Kind reminder: ....................- 4 - 2. -
Page 3: For Users
For users Warning: a. Please read the following tips before installation, use and maintenance. b. Installation, removal and maintenance must be carried out by Professional personional in accordance with the instructions. c. Gas leakage test must be done before and after installation. 1. - Page 4 For users c. Vacuum completely before welding, field welding is not allowed, welding can only be performed by professional personnel in professional maintenance center. d. Installation must be stopped if any gas leakage, and the unit must be returned to professional maintenance center.
-
Page 5: General Information
For users 1. General information 1.1. Contents: After unpacking, please check if you have all the following components. 1.2. Operating conditions and range: Items Range Operating range Air temp -7℃~43℃ Temp. setting heating 18℃-40℃ ℃~ ℃ The heat pump will have ideal performance in the operation range Air 15 1.3. -
Page 6: Kind Reminder
For users 1.4. Kind reminder: This heat pump has Power-off memory function. When the power is recovered, the heat pump will restart automatically. 1.4.1. The heat pump can only be used to heat the pool water. It can NEVER be used to heat other flammable or turbid liquid. - Page 7 For users 1.4.6. If any abnormal circumstances occurred, e.g.: abnormal noises, smells, smokes and leakage of electricity, switch off the main power immediately and contact your local dealer. Don’t try to repair the heat pump by yourselves. 1.4.7. The main power switch should be out of the reach of Children. 1.4.8.
-
Page 8: Operations
For users 2. Operations 2.1. Notice before using 2.1.1. For longer service life, please ensure water pump is on before heat pump is on, and water pump is off after heat pump is off. 2.1.2. Ensure no water leakage on piping system, then unlock screen and press power on heat pump. - Page 9 For users a. Press for 3 seconds to unlock screen and it will be lit up. b. Only after screen is unlocked, any other buttons can be functioned. Water inlet temperature Water outlet Smart/Silence temperature mode Heating Heating capacity percentage Wifi connection Water inlet Water outlet...
-
Page 10: Daily Maintenance And Winterizing
For users screen shows . Press again, the screen shows and return to Smart mode. Attention: a. When use the booster mode, you should select it every time, the machine will not automatically enter the booster mode. b. During the booster mode, when the machine reaches the set temperature, it will automatically return to the smart mode. -
Page 11: Technical Specification
For users 3. Technical specification Model IXR36 IXR46 IXR56 IXR66 IXR80 Advised pool volume 25~45 30~55 40~75 50~95 65~120 Working air temp ( ) ℃ -15~43 Performance Condition: Air 26°C, Water 26°C, Humidity 80% Heating capacity (kW) 11.0 14.0 18.0 22.0 27.5 in Smart mode... -
Page 12: For Installers And Professionals
For installers and professionals 1. Transportation 1.1. When storing or moving the heat pump, the heat pump should be at the upright position. 1.2. When moving the heat pump, do not lift the water union since the titanium heat exchanger inside the heat pump will be damaged. 2. -
Page 13: Installation Instruction
For installers and professionals 2.2. Installation instruction 2.2.1. Location and size To avoid air recirculation, the heat pump should be installed in a place with good ventilation or should reserve sufficient space for installation and maintenance. Please refer to the schema below: - 11 -... - Page 14 For installers and professionals UNIT=MM IXR36 IXR46 IXR56 IXR66 1125 IXR80 1074 ※ Above data is subject to modification without notice. 2.2.2. Heat pump installation. The frame must be fixed by bolts (M10) to concrete foundation or brackets. The concrete foundation must be solid; the bracket must be strong enough and anti-rust treated;...
-
Page 15: Trial After Installation
For installers and professionals 1. Wiring diagram A. For power supply: 230V 50Hz Distribution Box(Customer prepare) Swimming Pool Heat Pump Wiring Board Power Cord Power Supply Fuse 230V 50Hz Breaker Earthing B. For power supply: 400V 50Hz Distribution Box(Customer prepare) Swimming Pool Heat Pump Wiring Board Power Cord Power Supply... -
Page 16: Maintenance And Winterizing
For installers and professionals 2.3.1.Inspection before use Check installation of the whole heat pump and the pipe connections according to the pipe connecting drawing; Check the electric wiring according to the electrical wiring diagram and earthing connection; Make sure that the main power is well connected; Check if there is any obstacle in front of the air inlet and outlet of the heat pump 2.3.2.Trial The user is advised to start the water pump before the heat pump, and turn off the heat pump before... -
Page 17: Trouble Shooting For Common Faults
For installers and professionals 3 . Trouble shooting for common faults Failure Reason Solution No power Wait until the power recovers Power switch is off Switch on the power Heat pump doesn’t run Fuse burned Check and change the fuse The breaker is off Check and turn on the breaker evaporator blocked... -
Page 18: Failure Code
For installers and professionals 4. Failure code Display Not failure description No water protection Power supply excesses operation range Excessive temp difference between inlet and outlet water(Insufficient water flow protection) Ambient temperature too high or too low protection Anti-freezing reminder Display Failure description High pressure protection... -
Page 19: Appendix 1: Wiring Diagram For External Control (Optional)
For installers and professionals Appendix 1: Wiring diagram for external control (Optional) Breaker/fuse Power Cord (Customer prepare) Earthing Power Supply 230V~/50Hz Customer remote control switch connector Breaker/fuse (Customer prepare) Power Cord Power Supply 400V~/50Hz Earthing Customer remote control switch connector - 17 -... -
Page 20: Wifi Setting
For installers and professionals 5. Wifi setting 1) APP Download Android mobile please download from iphone please download from 2) Account registration a) Registration by Cell phone number/Email - 18 -... - Page 21 For installers and professionals b) Cell phone number registration 3) Create family Please set family name and choose the room of device - 19 -...
- Page 22 For installers and professionals APP Binding Please make sure your cell phone has connected the Wifi Wifi connection: Press for 3 seconds after screen unlock, will be flashing to enter Wifi binding program. b) Click "Add device", follow indication to finish binding. display on the screen once Wifi connection success.
- Page 23 For installers and professionals 5) Operation For heat pump with Heating function only Please pay attention: As booster function in APP is not available now, if you pressed Booster mode on display, and then want to control HP by phone, please press silent mode in APP first, and then you can adjust Smart/Silent mode in APP.
- Page 24 For installers and professionals 6) Share devices to your family members After binding, if your family members also want to control the device. Please let your family members register the APP first, and then the administrator can operate as below: - 22 -...
- Page 25 For installers and professionals Then your family members can log in as below: Notice: 1. The weather forecast is just for reference. 2. APP is subject to updating without notice. - 23 -...
- Page 26 INSTALLATIE EN GEBRUIKSHANDLEIDING Wij danken u voor het kiezen van een Fairland Turbo Silence warmtepomp. Deze handleiding biedt u de nodige informatie voor optimaal gebruik en onderhoud, gelieve deze zorgvuldig te lezen. EN/NL/FR...
- Page 27 Overzicht Voor gebruikers . P.1-P.10 1. Algemene informatie ..................- 3 - 1.1. Inhoud: ......................- 3 - 1.2. Werkomstandigheden en het bereik: ............. - 3 - 1.3. Voordelen van de verschillende programma’s:..........- 3 - 1.4. Vriendelijke herinnering: ................- 3 - 2.
- Page 28 OPMERKING: a. Gelieve de volgende tips te lezen voor installatie, gebruik en onderhoud. b. Plaatsing, verwijderen en Onderhoud moet uitgevoerd worden door een professionele installateur volgens de opgegeven instructies. c. Er dient een gaslek inspectie te gebeuren voor en achter installatie. 1.
- Page 29 c. Vacuümeer volledig voor lassen, lassen ter plaatse is niet toegestaan. Het lassen kan enkel worden uitgevoerd door professioneel personeer in een professioneel onderhoudscentrum. d. Indien een gaslek wordt vastgesteld moet de installatie gestopt worden en de warmtepomp moet terug gestuurd worden naar een professioneel onderhoudscentrum. 3.
-
Page 30: Voor Gebruikers
Voor gebruikers 1. Algemene informatie 1.1. Inhoud: Na het uitpakken, gelieve te controleren of bijhorende onderdelen aanwezig zijn. 1.2. Werkomstandigheden en het bereik: Items Range Actieradius Lucht temperatuur -7℃~43℃ Temperatuur installatie Verwarming 18℃~40℃ ℃- ℃. De warmtepomp zal de ideale prestatie leveren in een omgevingstemperatuur van 15 1.3. -
Page 31: Vriendelijke Herinnering
Voor gebruikers 1.4. Vriendelijke herinnering: Deze warmtepomp heeft een Power-off geheugenfunctie. Als de stroom wordt hersteld, zal de warmtepomp automatisch herstarten. 1.4.1. De warmtepomp kan alleen gebruikt worden om het zwambadwater te verwarmen. Het kan nooit gebruikt worden om andere brandbare of troebele vloeistoffen te verwarmen. - Page 32 Voor gebruikers 1.4.6. Als er zich een abnormale omstandigheid zich heeft voorgedaan: bijv.: abnormale geluiden, geuren, rook en elektriciteit lek, onmiddellijk uitschakelen aan de hoofdschakelaar en contacteer uw lokale verdeler. Probeer de warmtepomp niet zelf te herstellen. 1.4.7.De hoofdschakelaar moet zich buiten het bereik van kinderen bevinden. 1.4.8.
-
Page 33: Werking
Voor gebruikers 2. Werking 2.1. Opmerking alvorens gebruik 2.1.1. Voor een langere levensduur, zorg ervoor dat de waterpomp eerst aan staat alvorens de warmtepomp is aangezet en dat de waterpomp uit staat nadat de warmtepomp wordt uitgeschakeld. 2.1.2. Zorg ervoor dat er geen waterlek is in de leidingen, en ontgrendel het scherm en druk om de warmtepomp aan te zetten. - Page 34 Voor gebruikers c. Druk 3 seconden op om het scherm te vergrendelen, het scherm zal hierna zwart worden. ② Scherm vergrendelen: a. Druk 3 seconden in om het scherm te ontgrendelen, het scherm zal oplichten. b. Pas nadat het scherm is ontgrendeld, kunnen andere knoppen worden gebruikt. Température de l’eau en entrée Température...
-
Page 35: Dagelijks Onderhoud En Winterklaar
Voor gebruikers Opgelet: a. De Booster mode moet iedere keer geselecteerd worden, het toestel gaat niet automatisch naar booster mode. b. Wanneer het toestel in booster mode de gevraagde temperatuur bereikt gaat het automatisch terug in Smart mode. 5.Ontdooien a. Automatisch ontdooien: Wanneer de warmtepomp aan het ontdooien is, zal dit knipperen. -
Page 36: Technische Specificaties
Voor gebruikers 3. Technische specificaties Model IXR36 IXR46 IXR56 IXR66 IXR80 Geadviseerd zwembad 25~45 30~55 40~75 50~95 65~120 volume(m Luchttemperatuur(℃) -15~43 Prestatie voorwaarden: Lucht 26°C, Water 26°C, Vochtigheid 80% Verwarlmingscapaciteit 11.0 14.0 18.0 22.0 27.5 (kW) in Smart modus Verwarmingscapaciteit 13.0 17.0 21.5... -
Page 37: Voor Installateurs En Professionals
Voor installateurs en professionals 1. Transporteren 1.1. Bij het opslaan of verplaatsen van de warmtepomp moet de warmtepomp zich in de staander positie bevinden. 1.2. Niet opheffen aan de wateraansluiting bij het verplaatsen van de warmtepomp aangezien de titanium warmtewisselaar in de warmtepomp beschadigd kan worden. 2. -
Page 38: Instructies Voor Installatie
Voor installateurs en professionals 2.2. Instructies voor installatie 2.2.1. Locatie en grootte Om te vermijden dat de lucht ronde warmtepomp blijft circuleren moet deze in een goed geventileerde plaats geplaatst worden met voldoende ruimte rondom voor plaatsing en onderhoud. Controleer het installatie plan hieronder: Minimale afstand Filter Water behandeling... - Page 39 Voor installateurs en professionals Grootte =MM IXR36 IXR46 IXR56 IXR66 1125 IXR80 1074 ※ Bovenstaande gegevens zijn onderhevig aan verandering zonder kennisgeving. 2.2.2. Warmtepomp installatie. Het frame moet worden vastgemaakt door bouten (M10) op een betonnen funderingen of beugels. De betonnen fundering moeten stevig zijn; de beugel moet voldoende sterk zijn en anti-roest behandeld.
-
Page 40: Test Na Installatie
Voor installateurs en professionals 1. Aansluitschema A. Voor voeding van: 230V 50Hz Verdeel kast (door gebruiker te voorzien) Aansluitklemmen warmtepomp Voedingskabel Voeding Glaszekering 230V 50Hz Zekering Aarding B. Voor voeding van: 400V 50Hz Verdeel kast (door gebruiker te voorzien) Aansluitklemmen warmtepomp Voedingskabel Voeding Glaszekering... -
Page 41: Onderhoud En Winterklaar
Voor installateurs en professionals 2.3.1.Inspectie voor gebruik Controleer de installatie van de hele warmtepomp en pijpverbindingen volgens het aansluitschema. Controleer de bedrading volgens het elektrisch schema en aarding aansluiting. Zorg ervoor dat de hoofdschakelaar goed verbonden is. Controleer of er geen obstakels staan voor de luchtinlaat en -uitlaat van de warmtepomp 2.3.2.Test procedure De gebruiker wordt geadviseerd om de filterpomp op te starten voor de warmtepomp, en om de warmtepomp af te leggen voor de filterpomp voor een lange levensduur. -
Page 42: Het Oplossen Van Problemen Voor Veel Voorkomende Fouten
Voor installateurs en professionals 3 . Het oplossen van problemen voor veel voorkomende fouten Fout Reden Oplossing Geen stroom Wachten op stroomtoevoer Uit-schakelaar staat aan Leg de aan-schakelaar aan Warmtepomp werkt niet Glaszekering verbrand Controleer en verander de zekering De zekering is uitgeschakeld Leg de zekering aan Verdamper is geblokkeerd Verwijder de obstakels... -
Page 43: Foutcode
Voor installateurs en professionals 4. Foutcode Scherm Beschrijving detectiecode Geen debiet bescherming Abnormale voeding bescherming Overmatig temperatuurverschil tussen in- en uitlaat water (onvoldoende debiet bescherming) Omgevingstemperatuur te hoog/laag bescherming Anti-vries herinnering Scherm Beschrijving foutcode Bescherming hoge koelmiddeldruk Bescherming lage koelmiddeldruk Fase controller –... -
Page 44: Bijlage 1: Aansluitschema Voor Externe Controle (Optioneel)
Voor installateurs en professionals Bijlage 1: Aansluitschema voor externe controle (Optioneel) Automaat/zekering Voedingskabel (voorbereiding klant) Aarding Spanningsbron 230V~/50Hz Aansluiting voor externe controle Automaat/zekering (voorbereiding klant) Voedingskabel Spanningsbron 400V~/50Hz Earthing Aansluiting voor externe controle - 17 -... -
Page 45: Wifi-Instelling
Voor installateurs en professionals 5. wifi-instelling 1) APP downloaden Voor een Android mobiele telefoon kunt u downloaden van Voor een iphone kunt u downloaden van 2) Account registratie Registratie m.b.v. mobiel telefoonnummer/Email - 18 -... - Page 46 Voor installateurs en professionals Registratie m.b.v. mobiel telefoonnummer 3) Creëer familie Gelieve de familienaam in te stellen en de kamer van het apparaat te kiezen. - 19 -...
- Page 47 Voor installateurs en professionals 4) APP verbinden Zorg ervoor dat uw mobiele telefoon verbonden is via Wifi. a) Wifi-verbinding: Druk gedurende 3 seconden na het ontgrendelen van het scherm, zal knipperen om de Wifi-verbinding modus te openen b) Klik op "Toevoegen apparaat" en volg de aanwijzingen om de verbinding modus te beëindigen.
- Page 48 Voor installateurs en professionals 5) Werking Voor warmtepompen met alleen verwarmingsfunctie Meer apparaten delen Vermeld de status van verwarming Percentage verwarmingscapaciteit ℃ ℃ Selecteer De huidige watertemperatuur van het zwembad De insteltemperatuur Timer Selecteer Slimme/Stille modus Aan/uit Gelieve voor onderstaande op te letten: Daar de booster functie niet op de APP beschikbaar is, moet je, wanneer je op de display de booster functie hebt geactiveerd en nadien toch via smartphone de warmtepomp wilt sturen, eerst in de app op de silence modusdrukken en nadien kun je...
- Page 49 Voor installateurs en professionals 6) Apparaten delen met uw gezinsledenU na de verbinding, als uw gezinsleden het apparaat ook willen controleren. Laat uw gezinsleden eerst de APP registreren en dan kan de beheerder zoals hieronder beschreven te werk gaan: - 22 -...
- Page 50 Voor installateurs en professionals Daarna kunnen uw gezinsleden inloggen zoals hieronder: Let op: 1. De weersvoorspelling is slechts ter referentie. 2. De APP kan zonder voorafgaande kennisgeving worden bijgewerkt. - 23 -...
- Page 51 MANUEL D’UTILISATION ET INSTALLATION Merci d’avoir choisi la pompe à chaleur Fairland Turbo Silence. Ce manuel fournit les informations nécessaires pour une utilisation optimale et la maintenance, liez s’il vous plaît soigneusement et gardez-le. EN/NL/FR...
- Page 52 Résumé Pour les utilisateurs . P.1-P.9 1. Informations générales ..................- 3 - 1.1. Contenu ......................- 3 - 1.2.Les conditions d’exploitation et la gamme: ............. - 3 - 1.3.Les avantages des différents modes: ............. - 3 - 1.4. Rappel amical ....................- 3 - 2.
- Page 53 Attention: a. Veuillez lire les conseils suivants avant installation, utilisation et maintenance. b. Installation, démontage et maintenance doivent être effectués par des professionnels et ce conformément aux instructions. c. Un test de fuite de gaz doit être réalisé avant et après l’installation. 1.
- Page 54 c. Vacuum completely before welding, field welding is not allowed, welding can only be performed by professional personnel in professional maintenance center. d. Installation must be stopped if any gas leakage, and the unit must be returned to professional maintenance center. 3.
- Page 55 Pour les utilisateurs 1. Informations générales 1.1. Contenu Après le déballage, s’il vous plaît vérifier si vous avez tous les éléments suivants : 1.2.Les conditions d’exploitation et la gamme: Articles Plage Plage de fonctionnement Température de l’air -7℃~43℃ Réglage de la température Chauffage 18℃~40℃...
-
Page 56: Rappel Amical
Pour les utilisateurs 1.4. Rappel amical Cette pompe à chaleur a une fonction de mémoire de mise hors tension. Lorsque la puissance est récupéré, la pompe à chaleur redémarre automatiquement. 1.4.1. On peut seulement utiliser la pompe à chaleur pour chauffer l’eau de la piscine. Il ne peut jamais être utilisée pour chauffer un autre liquide inflammable ou trouble. - Page 57 Pour les utilisateurs 1.4.6. Si des circonstances anormales se sont produits, Par exemple: Bruit anormaux, les odeurs, les fumées et les fuites d’électricité, couper la puissance principale immédiatement et contactez votre revendeur local. N’essayer pas de réparer la pompe à chaleur vous-mêmes. 1.4.7.
-
Page 58: Opérations
Pour les utilisateurs 2. Opérations 2.1. Avis avant d’utiliser 2.1.1 Pour une plus longue durée de vie, merci de vérifier que la pompe est allumée avant que la pompe à chaleur est allumée, ainsi que la pompe est déconnectée après que la pompe à... - Page 59 Pour les utilisateurs Déblocage de l’écran: a. Poussez durant 3 secondes pour débloquer l’écran qui s’éclaircira. b. Vous devez débloquer l’écran avant que vous pouvez utiliser les autres boutons. Température d'eau entrée Température Smart/Silence d'eau sortie mode chauffer Puissance capacité chauffer en pourcentage Wifi connexion Entrée d’eau Sortie d’eau...
-
Page 60: L'entretien Quotidien Et Hivernage
Pour les utilisateurs N.B. A. Lorsque vous utilisez le Booster mode, vous deviez le sélectionner à chaque fois, la machine ne passera pas automatiquement en Booster mode. B. En Booster mode, lorsque la machine atteint la température réglée, elle revient automatiquement en mode intelligent. -
Page 61: Spécifications Techniques
Pour les utilisateurs 3. Spécifications techniques Model IXR36 IXR46 IXR56 IXR66 IXR80 Volume de piscine (m 25~45 30~55 40~75 50~95 65~120 Temp d’air (℃) -15~43 Prestatie voorwaarden: Lucht 26°C, Water 26°C, Vochtigheid 80% Capacité de chauffage(kW) 11.0 14.0 18.0 22.0 27.5 en Smart mode Cap. -
Page 62: Pour Les Installateurs Et Les Professionnels
Pour les installateurs et les professionnels 1. Transport 1.1. Lors du stockage ou de déplacer la pompe à chaleur, la pompe à chaleur doit être à la position verticale. 1.2. Ne soulevez pas par les raccords lors du déplacement de la pompe à chaleur parce qu’on peut endommager l'échangeur en titane à... -
Page 63: Instructions D'installation
Pour les installateurs et les professionnels 2.1.2.Afin de garantir l’efficacité du chauffage, la longueur du tuyau d’eau doit être ≤10m entre la piscine et la pompe à chaleur. 2.2. Instructions d’installation 2.2.1. Emplacement et les dimensions Pour éviter la recirculation de l'air, la pompe à chaleur doit être installée dans un endroit bien ventilé... - Page 64 Pour les installateurs et les professionnels Dim.=MM IXR36 IXR46 IXR56 IXR66 1125 IXR80 1074 ※ Les données ci-dessus sont sujettes à modification sans préavis. 2.2.2. L’installation de pompe à chaleur. Le cadre doit être fixé par des boulons (M10) à une fondation en béton ou crochets. La fondation de béton doit être solide;...
-
Page 65: Essai Après L'installation
Pour les installateurs et les professionnels 1. La schéma de câblage. A. Pour Alimentation de puissance: 230V 50Hz Boîte de connexion(fournit par l’utilisateur) Bornier d’alimentation pomp à chaleur Câble d’alimentation Puisance Fuse 230V 50Hz Interrupteur Terre B. Pour alimentation de puissance: 400V 50Hz Boîte de connexion(fournit par l’utilisateur) Bornier d’alimentation pomp à... -
Page 66: L'entretien Et L'hivernage
Pour les installateurs et les professionnels 2.3.1.Inspection avant l’utilisation Vérifier l’installation de l’ensemble de pompe à chaleur et les raccords de tuyaux selon le dessin de tuyau de raccordement. Vérifier le câblage électrique selon le schéma de câblage électrique et la connexion de la mise à la terre. -
Page 67: Dépannage Des Défauts Communs
Pour les installateurs et les professionnels 3 . Dépannage des défauts communs Echec Raison Solution Aucune puissance Attendre jusqu’à ce que la puissance est rétabli Interrupteur est éteint Mettre sous tension Pompe à chaleur ne Fusible brûlé Vérifier et changer le fusible fonctionne pas Le disjoncteur est éteint Vérifiez et installez le disjoncteur... -
Page 68: Code Défaut
Pour les installateurs et les professionnels 4. Code défaut Affichage Description de pas de panne Protection manque du débit d’eau (pas de panne) Anomalie dans la puissance d’alimentation Différence température entre l’entrée et la sortie trop élevée (de protection du débit d’eau insuffisant) Protection température ambiante trop élevée/faible Rappel anti-congélation... -
Page 69: Annexe 1: Schéma De Câblage Pour Le Contrôle Externe (Optionel)
Pour les installateurs et les professionnels Annexe 1: Schéma de câblage pour le contrôle externe (Optionel) Disjoncteur Câble d’alimentation (preparation client) Terre Alimentation électrique 230V~/50Hz Commande à distance du client Disjoncteur (preparation client) Câble d’alimentation Alimentation électrique 400V~/50Hz Terre Commande à distance du client - 17 -... -
Page 70: Wifi Réglage
Pour les installateurs et les professionnels 5. WIFI réglage 1) APP Télécharger Au Android système, téléchargez-le sur Au système Iphone, téléchargez-le sur 2) Inscription a) Inscription avec Numéro Mobile ou E-mail. - 18 -... - Page 71 Pour les installateurs et les professionnels b) Numéro Mobile Inscription 3) Créer une famille Veuillez définir le nom de famille et choisir la pièce sur l’appareil. - 19 -...
- Page 72 Pour les installateurs et les professionnels 4) APP Reliure Merci de verifier d’abord la connexion de WIFI sur votre mobile. a) Wifi connexion Pressez pour 3 seconds puis le déverrouge de l’écran, clignotera et entra dans le programme de reliure Wifi. b) Cliquez le touche AJOUTER UN DEVICE, puis suivez les indications sur APP pour terminer la reliure.
- Page 73 Pour les installateurs et les professionnels 5) Opération Pour PAC avec seul mode Chauffer : Plus Partager des devices Indication du mode chauffer Puissance de chauffer en pourcentage ℃ ℃ Choisir Le température actuelle d’eau dans la piscine La température de consigne Régler l’heure Choisir la mode Smart/Silence On/Off...
- Page 74 Pour les installateurs et les professionnels 6) Partager des devices à vos membres familiaux Après avoir réalisé la reliure APP, si vos membres familiaux veulent contrôler en même temps le device : Veuillez demander avant tout à vos membres familiaux de s’inscrire dans APP, en tant que l’administeur, vous pouvez manupuler en suivant les étapes : - 22 -...
- Page 75 Pour les installateurs et les professionnels Vos membres familiaux peuvent ainsi entrer dans l’APP : Attention : 1. La météo est juste pour référence. L’APP peut être mis à jour sans préavis. - 23 -...
- Page 76 Version: C02Xr32...
Need help?
Do you have a question about the Turbo Silence IXR36 and is the answer not in the manual?
Questions and answers
How do you fix error code e1
Error code E1 indicates high pressure protection. To fix this:
1. Check for blocked air outlets or obstacles around the unit and remove them.
2. Ensure the fan is running properly.
3. Make sure the evaporator is not blocked.
4. If the issue persists, do not attempt repair yourself—contact your installer with detailed information and the model number.
This answer is automatically generated
How to fix errorcode e3
Error code E3 on the Fairland Turbo Silence IXR36 indicates "No water protection." To fix it:
1. Check if there is water flow in the system.
2. Ensure the water pump is running properly.
3. Make sure there are no blockages or closed valves in the water circuit.
If the issue persists, contact the installer and do not attempt to repair it yourself.
This answer is automatically generated