Table of Contents
Advertisement
Available languages
Available languages
SMA 45
D Maniküre-Pediküre-Station
Gebrauchsanweisung...............2
G Manicure/pedicure station
Instructions for use.................13
F Station de manucure-pédicure
Mode d'emploi .......................23
I Set per manicure/pedicure
Istruzioni per l'uso ..................34
r Набор для маникюра и педи-
кюра
Инструкция по применению ..45
Service-Adresse:
Hans Dinslage GmbH
Riedlinger Straße 28
88524 Uttenweiler
GERMANY
Tel.-Nr.: +49 (0)7374-915766
E-Mail: service@sanitas-online.de
Advertisement
Chapters
Table of Contents

Related Manuals for Sanitas SMA 45


Summary of Contents for Sanitas SMA 45
- Page 1 D Maniküre-Pediküre-Station Gebrauchsanweisung....2 G Manicure/pedicure station Instructions for use....13 SMA 45 F Station de manucure-pédicure Mode d’emploi .......23 I Set per manicure/pedicure Istruzioni per l‘uso ....34 r Набор для маникюра и педи- кюра Инструкция по применению ..45 Service-Adresse: Hans Dinslage GmbH Riedlinger Straße 28...
-
Page 2: Table Of Contents
• Verwenden Sie das Gerät nicht, wenn es sichtbare Schäden aufweist, nicht ordnungsgemäß funktioniert oder der Netzadapter oder die Netzleitung be- schädigt ist. Kontaktieren Sie in besagten Fällen den Kundendienst. Lieferumfang 1 SMA 45 Basisstation 1 SMA 45 Maniküregerät 1 Netzadapter 11 Nagelpflege-Aufsätze 1 Nagelhautschieber Bestimmungsgemäße Verwendung... - Page 3 Sicherheitshinweise Zeichentabelle Folgende Symbole werden in der Gebrauchsanweisung bzw. auf dem Typenschild des Geräts verwendet. Warnung Warnhinweis auf Verletzungsgefahren oder Gefahren für Ihre Gesundheit. Achtung Sicherheitshinweis auf mögliche Schäden am Gerät/Zubehör. Hinweis auf wichtige Informationen. Entsorgung gemäß Elektro- und Elekt ronik-Altgeräte EG-Richtlinie WEEE (Waste Electrical and Elec tronic Equipment).
-
Page 4: Zum Kennenlernen
• Die Aufsätze dürfen aus hygienischen Gründen nur von einer Person genutzt werden. 2. Zum Kennenlernen Die Maniküre-Pediküre-Station SMA 45 ist mit 11 hochwertigen und langlebigen Nagelpflege- Aufsätzen ausgestattet. Die Nagelpflege-Aufsätze besitzen eine langlebige Saphirbeschich- tung, beziehungsweise Polierfilz und eignen sich daher optimal zur individuellen Behandlung und genügen höchsten Ansprüchen. -
Page 5: Gerätebeschreibung
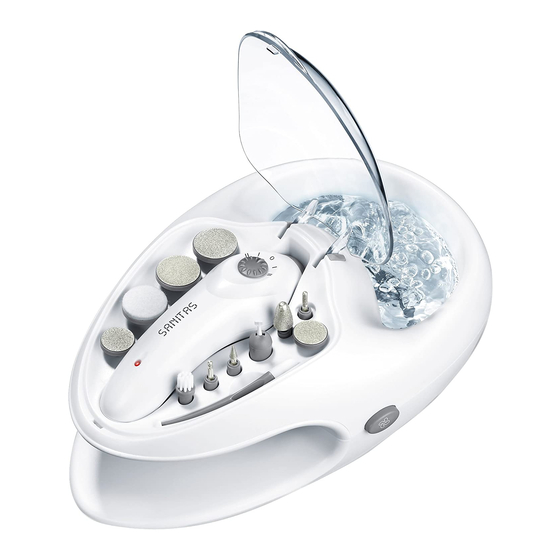
3. Gerätebeschreibung Basisstation 1. Nagelpflege-Aufsätze 2. Drehschalter Maniküregerät 3. Wasserbad 4. An-/Aus-Taste für Nageltrockner 5. Nageltrockner 6. Maniküregerät-Anschluss 7. Maniküregerät 8. Lade-Leuchte 9. An-/Aus-Taste für Wasserbad 10. Netzadapter-Anschluss Nagelpflege-Aufsätze Warnung Verwenden Sie die Nagelpflege-Aufsätze mit besonderer Vorsicht. Bei unsachgemäßem Ge- brauch könnten Sie sich, speziell bei höheren Geschwindigkeiten, verletzen. -
Page 6: Inbetriebnahme
Zylinderfräser Geeignet zum Abschleifen verholzter Fußnageloberflächen sowie grobes Glätten derselben. Hierzu legen Sie den Zylinderfräser waagrecht zur Na- geloberfläche an und tragen in langsamen kreisenden Bewegungen die gewünschte Nagelschicht ab. Dünner Saphirkegelaufsatz Geeignet zum Lösen eingewachsener Nägel. Führen Sie hierzu den dünnen Saphirkegelaufsatz vorsichtig an die zu behandelnde Stelle hin und tragen Sie die nötigen Nagelteile ab. - Page 7 Akku aufladen Achtung Bevor Sie das Gerät zum ersten Mal in Betrieb nehmen, laden Sie es vollständig auf (Dauer ca. 2 Stunden) und gebrauchen Sie es anschließend, bis der Akku wieder vollständig entladen ist. Sie haben die Möglichkeit den Akku des Maniküregeräts über die Basisstation oder direkt über das Maniküregerät aufzuladen.
-
Page 8: Bedienung
5. Bedienung Warnung Kontrollieren Sie während der Behandlung die Ergebnisse. Dies gilt besonders für Diabetiker, da sie an Händen und Füßen weniger sensibel sind. Sobald die Anwendung unangenehm wird, beenden Sie die Behandlung. Achtung Achten Sie darauf, dass sich die Achse immer frei drehen kann und die Aufsätze fest einge- steckt sind. - Page 9 Maniküre-Vorbehandlung Um bei der Maniküre optimale Ergebnisse zu erzielen, weichen Sie Ihre Finger und Fingernägel vor der Maniküre-Behandlung für ca. 5 Minuten im Wasserbad der Basisstation ein. Um mit der Maniküre-Vorbehandlung zu beginnen, befolgen Sie die folgenden Anweisungen: Warnung Befüllen Sie das Wasserbad der Basisstation niemals direkt unter dem Wasserhahn. Es könnte außerhalb des Wasserbads Wasser auf die Basisstation gelangen und zu Stromschlägen füh- ren.
- Page 10 5 . Glätten Sie damit vorsichtig die Kanten der zuvor gekürzten Finger- oder Fußnägel. Führen Sie auch hier immer die Schleifscheibe von der Außenseite des Nagels zur Nagelspitze. Nagelhaut entfernen Benötigte Aufsätze: Nagelhautschieber, Elektrischer Nagelhautschieber 1 . Weichen Sie vor der Nagelhaut-Behandlung Ihre Nägel ein (siehe Maniküre-Vorbehandlung). 2 .
-
Page 11: Reinigung
6. Reinigung Warnung Bevor Sie mit der Reinigung beginnen, ziehen Sie immer den Netzadapter aus der Steckdose und aus dem Maniküregerät! • Reinigen Sie die Basisstation und das Maniküregerät mit einem leicht angefeuchteten Tuch. Bei stärkerer Verschmutzung können Sie das Tuch auch mit einer leichten Seifenlauge be- feuchten. -
Page 12: Entsorgen
Diese Zeichen finden Sie auf schadstoffhaltigen Batterien: • Pb = Batterie enthält Blei, • Cd = Batterie enthält Cadmium, • Hg = Batterie enthält Quecksilber. 10. technische Daten Modell-Nr. SMA 45 Drehzahl Stufe I: 6600 U/min ± 10% Stufe II: 9500 U/min ± 10% Stromversorgung Eingang:100 – 240 V~, 50/60 Hz, 0.3 A Ausgang: 3,8 V... -
Page 13: Important Notes
eNGLISH contents 1. Important notes ........... 13 6. Cleaning .............. 21 2. Getting to know your instrument ......15 7. What if there are problems? ........ 21 3. Unit description ........... 15 8. Replacement parts and wearing parts ....22 4. - Page 14 Safety notes Symbols The following symbols appear in these instructions or on the type plate of the device: Warning Warning notice indicating a risk of injury or damage to health. Important Safety note indicating possible damage to the unit/accessory. Note on important information. Disposal in accordance with EC Directive WEEE (Waste Electrical and Electronic Equipment).
-
Page 15: Getting To Know Your Instrument
• Only use the device with the supplied accessories. • The mains part plug must only be operated using the voltage specified on it. • Always monitor the device when it is in operation. • Store the device out of the reach of children. The device is not suitable for children. • Never use the device under a blanket, pillow or cushion, etc. - Page 16 Sapphire cone Suitable to quickly remove hard skin and large calluses on the sole of the foot and heel This attachment is intended for application on large areas. Do not remove all calluses to maintain natural skin protection. Large sapphire wheel, fine Suitable to file and treating nails, fine-grain sapphire wheel.
-
Page 17: Initial Use
electrical cuticle remover Suitable for pushing back the edges of the cuticles. cuticle remover Suitable for manually pushing back the cuticle. 4. Initial use • Check to ensure that the package contains all the parts that should be included in the delive- ry. -
Page 18: Operation
Insert nail care attachment 1 . Open the base station cover. Important Ensure that the rotary switch on the manicure device is set to 0. 2 . Insert the attachment you wish to use into the drive axle on the manicure device from above. - Page 19 4 . Take a foot bath following the callus treatment. This will remove any remaining callus resi- due on the feet and will also prepare the feet optimally for a pedicure treatment. Removing corns Attachments required: rounded sapphire attachment 1 . Attach the rounded sapphire attachment to the manicure device and set the desired speed and direction of rotation using the rotary switch.
- Page 20 Danger Keep long hair away from moving parts. 1 . Attach one of the coarse sapphire wheels (large or small) to the manicure device. 2 . Switch on the manicure device at the rotary switch. 3 . Use the coarse filing disc to carefully shorten and shape your finger- nails or toenails.
-
Page 21: Cleaning
3 . Dry your nails in the base station air dryer. In order to do this, follow the steps below: The air for the dryer is sucked in below the base station. To prevent dirt and scratches on the nail polish, ensure that the base station is positioned on a clean surface. 4 . -
Page 22: Replacement Parts And Wearing Parts
The codes below are printed on batteries containing harmful substances: • Pb = Battery contains lead • Cd = Battery contains cadmium • Hg = Battery contains mercury 10. technical data Model no. SMA 45 Speed Setting I: 6600 rpm ± 10% Setting II: 9500 rpm ± 10% Power supply Input: 100 – 240 V~, 50/60 Hz, 0.3 A Output: 3.8 V , 0.8 A... -
Page 23: Conseils Importants
Dans les cas précités, contactez le ser- vice client. contenu de la livraison 1 station de base SMA 45 1 appareil de manucure SMA 45 1 adaptateur secteur 11 embouts de manucure... - Page 24 consignes de sécurité tableau des symboles Les pictogrammes suivants sont employés dans le mode d’emploi et sur la plaque si- gnalétique de l’appareil. Avertissement Ce symbole vous avertit des risques de blessures ou des dangers pour votre santé. Attention Ce symbole vous avertit des éventuels dommages au niveau de l’appareil ou d’un accessoire.
-
Page 25: Familiarisation Avec L'appareil
• Les embouts ne doivent être utilisés que par une seule personne pour des raisons d’hygiène. 2. Familiarisation avec l’appareil La station de manucure-pédicure SMA 45 est équipée de 11 embouts de manucure de haute qualité et longue durée. Les embouts de manucure disposent d’un revêtement saphir longue durée et d’un feutre de polissage, soit une solution optimale pour une utilisation personnelle satisfaisant les plus hautes exigences. -
Page 26: Description De L'appareil
3. Description de l’appareil Base 1. Embouts de manucure 2. Bouton de l’appareil de manucure 3. Bain d’eau 4. Touche Marche/Arrêt du sèche-ongles 5. Sèche-ongles 6. Prise de l’appareil de manucure 7. Appareil de manucure 8. Voyant de chargement 9. Touche Marche/Arrêt du bain d’eau 10. -
Page 27: Mise En Service
Fraise cylindre Conçu pour le limage et le lissage brut de surfaces d’ongles d’orteils dur- cies. Pour ce faire, placez la fraise cylindre en position horizontale sur la surface de l’ongle et éliminez lentement la couche souhaitée en effectuant des mouvements circulaires. embout saphir conique plus fin Conçu pour supprimer les ongles incarnés. - Page 28 charger la batterie Attention Avant de mettre l’appareil en service la première fois, chargez-le complètement (durée env. 2 heures) et utilisez-le ensuite jusqu’à ce que la batterie soit entièrement déchargée. Vous avez la possibilité de charger la batterie de l’appareil de manucure via la station de base ou directement sur l’appareil de manucure. Charger la batterie sur la station de base 1 . Sur l’appareil de manucure, tournez le bouton sur 0. 2 .
-
Page 29: Utilisation
5. utilisation Avertissement Contrôlez le résultat au cours de l’utilisation. Ce conseil s’adresse tout particulièrement aux diabétiques, dont les mains et les pieds sont moins sensibles. Cessez l’utilisation dès que celle-ci devient désagréable. Attention Assurez-vous que l’axe peut toujours tourner librement et que les embouts sont bien insérés. L’axe ne doit pas être bloqué de façon prolongée, sans quoi l’appareil de manucure pourrait surchauffer et être endommagé. Lors du limage, procédez toujours du côté... - Page 30 Traitement préalable à la manucure Afin d’obtenir des résultats optimaux, trempez vos doigts et ongles pendant env. 5 minutes dans le bain d’eau de la station de base avant la manucure. Pour débuter le traitement préalable, suivez les consignes suivantes : Avertissement Ne remplissez jamais le bain d’eau de la station de base directement sous le robinet.
- Page 31 Élimination des cuticules Embouts nécessaires : repousse cuticule, repousse cuticule électrique 1 . Ramollissez vos ongles avant le traitement des cuticules (voir Traite- ment préalable à la manucure). 2 . Repoussez les cuticules avec le repousse cuticule mécanique. 3 . Repoussez avec précautions les cuticules vers le bord à l’aide du repousse cuticule électrique.
-
Page 32: Nettoyage
6. Nettoyage Avertissement Avant de procéder au nettoyage, débranchez toujours l’adaptateur secteur de la prise et de l’appareil de manucure ! • Nettoyez la base et l’appareil de manucure à l’aide d’un chiffon légèrement humide. En cas de salissures plus importantes, vous pouvez également humidifier légèrement le chiffon avec de la lessive. • Pour des raisons d’hygiène, vous pouvez si nécessaire nettoyer les embouts à l’aide d’un chiffon ou d’une brosse légèrement imbibé(e) d’alcool. Puis laissez les embouts sécher soi- gneusement. • Pour le nettoyage, n’utilisez pas de détergent chimique ou d’abrasif. • Assurez-vous que l’eau ne s’infiltre pas à... -
Page 33: Élimination
Ces pictogrammes se trouvent sur les piles à substances nocives : • Pb = pile contenant du plomb, • Cd = pile contenant du cadmium, • Hg = pile contenant du mercure. 10. Données techniques No du modèle SMA 45 Vitesse de rotation Niveau I : 6 600 tr/min ± 10 % Niveau II : 9500 tr/min ± 10 % Alimentation électrique Entrée :100 – 240 V~, 50/60 Hz, 0.3 A Sortie : 3,8 V... -
Page 34: Indicazioni Importanti
• Non utilizzare l'apparecchio se mostra danni visibili, non funziona corretta- mente o se l'adattatore o il cavo di rete è danneggiato. In questi casi con- tattare il servizio clienti. Fornitura 1 unità di base SMA 45 1 apparecchio per la manicure SMA 45 1 adattatore 11 accessori per il trattamento delle unghie 1 spingi cuticole uso conforme Utilizzare l'apparecchio esclusivamente per il trattamento di mani (manicure) e piedi (pedicure). - Page 35 Gli 11 accessori per il trattamento delle unghie forniti con il set SMA 45 sono adatti ai diabeti- ci. Tenere comunque una velocità bassa e maneggiare l'apparecchio con particolare cautela.
-
Page 36: Introduzione
• In caso di difetti o malfunzionamenti, spegnere immediatamente l'apparecchio. • Le riparazioni possono essere effettuate solo dal Servizio clienti o da rivenditori autorizzati. Non tentare in nessun caso di riparare da soli l'apparecchio! In caso contrario la garanzia decade. • Utilizzare l'apparecchio solo con gli accessori in dotazione. -
Page 37: Descrizione Dell'apparecchio
3. Descrizione dell'apparecchio unità di base 1. Accessori per il trattamento delle unghie 2. Interruttore dell'apparecchio per manicure 3. Vasca 4. Pulsante On/Off per l'asciugatura 5. Asciuga unghie 6. Ingresso apparecchio per manicure 7. Apparecchio per manicure 8. Spia di carica 9. -
Page 38: Messa In Servizio
Fresa a cilindro Adatta per la rimozione della superficie indurita delle unghie dei piedi e le- vigatura grossolana delle stesse. Appoggiare la fresa a cilindro in posizione orizzontale sulla superficie dell'unghia e rimuovere lo strato desiderato con movimenti circolari lenti. Lima in zaffiro sottile Adatta per rimuovere le unghie incarnite. - Page 39 caricamento della batteria Attenzione Caricare completamente la batteria prima di mettere in funzione l'apparecchio per la prima vol- ta (per ca. 2 ore) e utilizzarlo finché la batteria non è completamente scarica. È possibile caricare la batteria tramite l'unità di base oppure direttamente nell'apparecchio per manicure. Caricamento della batteria tramite l'unità di base 1 .
-
Page 40: Funzionamento
5. Funzionamento Pericolo Durante il trattamento controllare regolarmente i risultati. Ciò vale in particolare per i diabetici che hanno mani e piedi meno sensibili. Interrompere il trattamento se risulta fastidioso. Attenzione Verificare che il perno sia sempre libero di ruotare e che gli accessori siano inseriti saldamente. Il perno non deve essere bloccato completamente per evitare il surriscaldamento e il danneg- giamento dell'apparecchio per manicure. - Page 41 Pericolo Non riempire la vasca dell'unità di base direttamente sotto al rubinetto. L'acqua potrebbe fuo- riuscire dalla vasca all'unità di base e provocare folgorazione. Riempire sempre la vasca con un contenitore separato. 1 . Prima di iniziare la preparazione per la manicure, rimuovere completamente lo smalto dalle unghie.
-
Page 42: Pulizia
Rimozione delle cuticole Accessori richiesti: Spingi cuticole, spingi cuticole elettrico 1 . Prima del trattamento delle cuticole, mettere sempre a mollo le un- ghie (vedere Preparazione per la manicure). 2 . Spingere indietro le cuticole con lo spingi cuticole meccanico. 3 . -
Page 43: Che Cosa Fare In Caso Di Problemi
• Pulire l'unità di base e l'apparecchio per manicure con un panno leggermente umido. Se l'apparecchio è molto sporco, inumidire leggermente il panno con acqua e sapone. • Per motivi igienici gli accessori possono essere puliti con una spazzola o un panno inumidito con alcol. Poi asciugare accuratamente gli accessori. • Per la pulizia non utilizzare detergenti chimici né prodotti abrasivi. • Accertarsi che non penetri acqua nell'apparecchio. -
Page 44: Smaltimento
I simboli riportati di seguito indicano che le batterie contengono sostanze tossiche. • Pb = la batteria contiene piombo, • Cd = la batteria contiene cadmio, • Hg = la batteria contiene mercurio. 10. Dati tecnici Codice SMA 45 Regime Livello I: 6600 giri/min ± 10% Livello II: 9500 giri/min ± 10% Alimentazione Ingresso: 100 - 240 V~, 50/60 Hz, 0.3 A... -
Page 45: Важные Указания
если он работает некорректно, а также в случае повреждения сетевого адаптера или кабеля. В этих случаях необходимо обратиться в сервис- ную службу. комплект поставки 1 подставка SMA 45 1 прибор для маникюра SMA 45 1 сетевой адаптер 11 съемных насадок для ухода за ногтями 1 лопатка для отодвигания кутикулы... - Page 46 использование по назначению Используйте прибор исключительно для ухода за ногтями и кожей рук (маникюр) и ног (педикюр). Прибор должен использоваться только в целях, описываемых в данной инструкции по применению. Производитель не несет ответственности за ущерб, причиненный вследствие использования прибора не по назначению или халатного обращения с ним. Прибор...
-
Page 47: Для Ознакомления
• Из гигиенических соображений насадками может пользоваться только один человек. 2. Для ознакомления В набор для маникюра и педикюра SMA 45 входят 11 высококачественных и прочных насадок для ухода за ногтями. Насадки для ухода за ногтями имеют долговечное сапфи- ровое покрытие или покрыты полировальным войлоком, поэтому они идеально подходят... -
Page 48: Описание Прибора
3. Описание прибора Подставка 1. Насадки для ухода за ногтями 2. Поворотный переключатель прибора для маникюра 3. Ванночка для воды 4. Кнопка вкл./выкл. сушилки для ногтей 5. Сушилка для ногтей 6. Разъем для подключения прибора для маникюра 7. Прибор для маникюра 8. - Page 49 Малый сапфировый диск, жесткий Подходит для подпиливания и обработки ногтей, имеет крупнозерни- стую структуру. При помощи данной насадки Вы можете самостоя- тельно укоротить даже очень толстые ногти, подпилив их. Поскольку данная насадка быстро спиливает большие поверхности ногтя, ее так- же необходимо использовать с осторожностью. Цилиндрическая...
-
Page 50: Ввод В Эксплуатацию
4. Ввод в эксплуатацию • Проверьте комплектность поставки. Если какие-либо детали отсутствуют или повреж- дены, обратитесь в сервисную службу. • Полностью снимите упаковку. Предостережение • Не разрешайте детям играть с упаковочным материалом. Они могут задохнуться. • Установите прибор на устойчивую, чистую, ровную и сухую поверхность. Зарядка... -
Page 51: Применение
Внимание! Электрическая лопатка для отодвигания кутикулы должна быть прочно вставлена в ве- дущую ось. Для этого на боковой поверхности лопатки есть специальный усик. Воткните усик лопатки для отодвигания кутикулы в паз прибора для маникюра, как показано на рисунке. 3 . Закончив обработку, поверните переключатель в положение 0 и снова снимите насад- ку. - Page 52 Удаление мозолей Необходимые насадки: Сферическая сапфировая насадка 1 . Наденьте сферическую сапфировую насадку на прибор для маникюра и установите на поворотном переключателе нужную скорость и направление вращения. 2 . Бережно обработайте мозоль сферической сапфировой насадкой. 3 . После обработки мозоли сделайте ванночку для ног. Таким образом Вы оптимальным образом...
- Page 53 Опасность Уберите волосы, чтобы они не попали в двигающиеся детали. 1 . Наденьте на прибор для маникюра один из жестких сапфиро- вых дисков (большой или малый). 2 . Включите прибор для маникюра с помощью поворотного пере- ключателя. 3 . При помощи жесткого шлифовального диска осторожно под- коротите...
-
Page 54: Очистка
Очистка, покрытие лаком и сушка ногтей Необходимые насадки: Щетка 1 . Перед тем как наносить на ногти лак, очистите их насадкой-щет- кой. 2 . Нанесите лак на ногти. 3 . Подсушите ногти в воздушной сушилке, встроенной в подставку. Для этого выполните следующие действия: Bоздух... -
Page 55: Запасные Детали И Детали, Подверженные Быстрому Износу
8. Запасные детали и детали, подверженные быстрому износу Запасные детали и детали, подверженные быстрому износу, можно приобрести в соот- ветствующих сервисных центрах, указав номер детали в каталоге. Запасная деталь Номер в каталоге Большой сапфировый диск, 163.396 мягкий Большой сапфировый диск, 163.397 жесткий Малый сапфировый диск, 163.398 мягкий... -
Page 56: Технические Характеристики
10. Технические характеристики № модели SMA 45 Число оборотов Ступень I: 6 600 об/мин. ± 10% Ступень II: 9 500 об/мин. ± 10% Электропитание Вход:100–240 В~, 50/60 Гц, 0.3 A Выход: 3,8 В , 0,8 A Аккумуляторы 2x NiMH AA 600 мА·ч 11. Гарантия Мы предоставляем гарантию на дефекты материалов и изготовления на срок 12 месяцев...
Need help?
Do you have a question about the SMA 45 and is the answer not in the manual?
Questions and answers