Table of Contents
Advertisement
Available languages
Available languages
Quick Links
Montageanleitung Rohbau
DE
für PushPull Lüftungssysteme
Shell mounting instructions
UK
for PushPull ventilation systems
Notice de montage Gros œuvre
FR
pour systèmes de ventilation PushPull
www.maico-ventilatoren.com
PP 45 RHK
PP 45 RHL
PP 45 AK
PP 45 AE
PP 45 AW
PP 45 AS
PP 45 LE
PP 45 LEV
PP 45 LEW90
PPB 30 AK
PPB 30 AE
PPB 30 AW
PPB 30 AS
!
VENTILATOREN
Advertisement
Chapters
Table of Contents

Related Manuals for Maico PushPull PP 45 RHK


Summary of Contents for Maico PushPull PP 45 RHK
- Page 1 PP 45 RHK PP 45 RHL PP 45 AK PP 45 AE PP 45 AW PP 45 AS PP 45 LE PP 45 LEV PP 45 LEW90 PPB 30 AK PPB 30 AE PPB 30 AW PPB 30 AS www.maico-ventilatoren.com...
-
Page 4: Table Of Contents
PP 45 AE verwendet. Technische Daten PPB 30 ....9 Anzahl Lüftungsgeräte ......10 8 Montagevorbereitungen .......10 Montagehinweise ........10 Impressum: © Maico Elektroapparate-Fabrik GmbH. 9 Montage der Wandhülse und Außen- Deutsche Originalanleitung. Druckfehler, Irrtümer und abdeckung ..........11 technische Änderungen vorbehalten. Die in diesem Dokument erwähnten Marken, Handelsmarken und... -
Page 5: Qualifikation Fachinstallateur
2 Qualifikation Fachinstallateur | DE ● PPB 30 ARW (Ausgleichsrahmen weiß) mit Zur Verfügung stehen PP 45-Geräte in den dem Befestigungsblech PPB 30 ARW BB Ausführungen Objekt „O“, Komfort „K“ und die wird für die Montage von PPB 30 AW und funkgesteuerten Varianten „RC“. PP 45 AK/PP 45 AW verwendet. -
Page 6: Sicherheitshinweise Und Warnungen
DE | 4 Sicherheitshinweise und Warnungen Explosionsgefahr: Explosionsfähige 4 Sicherheitshinweise und Gase und Stäube können entzündet wer- Warnungen den und zu schweren Explosionen oder Brand führen. Lüftungsgerät auf keinen Fall in Warnhinweise: Symbole, Bedeutung explosionsfähiger Atmosphäre einsetzen. GEFAHR: Zeigt eine mögliche Gefahren- Explosionsgefahr: Explosionsfähige situationen, die zum Tod oder ernsten Verlet- Stoffe in Laborabsaugungen können... - Page 7 4 Sicherheitshinweise und Warnungen | DE PPB 30-Lüftungsgeräte vorzugsweise Verletzungs- und Gesundheitsgefahr in Ablufträumen einsetzen (Bad, WC bei Einsatz von nicht zugelassenen oder Küche mit Fenster). Zubehörkomponenten. Das Lüftungsgerät PPB 30-Lüftungsgeräte nur nach Abstim- ist mit Original-Zubehörkomponenten (z. B. mung mit dem Eigentümer in Zulufträumen Luftfilter) getestet und zugelassen.
-
Page 8: Anwendungsbeispiele
DE | 5 Anwendungsbeispiele Beispiel 2: Lüftungslösung für eine 3-Zimmer 5 Anwendungsbeispiele Etagenwohnung mit Lüftungsgeräten PPB 30 K Beispiel 1: Einzelraumanwendung mit einem (Bad) und PP 45 (Wohnräume). PP 45-Gerätepaar Das PPB 30 K be- und entlüftet gleichzeitig das Badezimmer im balancierten Betrieb. Ein PPB 30 K-Ventilator belüftet den Raum mit der im Wärmetauscher vorerwärmten Luft. -
Page 9: Anforderungen Aufstellungsort
6 Anforderungen Aufstellungsort | DE Zulässige Leitungslänge Ab Sternpunkt max. 6 Anforderungen Aufstellungsort bei kabelgebundenem 25 m je Lüftungsgerät Anschluss ● Umgebungstemperatur - 15 °C bis + 40 °C. Funk-Komponenten: 868,35 MHz ● Fördermitteltemperatur max. 40 °C. Frequenzbereich ● Max. zulässige Feuchte im Aufstellraum (nach EN 300220-1) PP 45: 70 % / PPB 30: 90 % (bei 20 °C). -
Page 10: Anzahl Lüftungsgeräte
DE | 8 Montagevorbereitungen 8 Montagevorbereitungen 7.3 Anzahl Lüftungsgeräte Kombinationen Anzahl Lüftungsgeräte 8.1 Montagehinweise Lüftungsgeräte Max. 6 PP 45-Geräte ● PP 45-Geräte sind nur für Zulufträume PP 45 O/K + (3 x 2 Gerätepaare). geeignet. Raumluftsteuerung Ab Sternpunkt 25 m ●... -
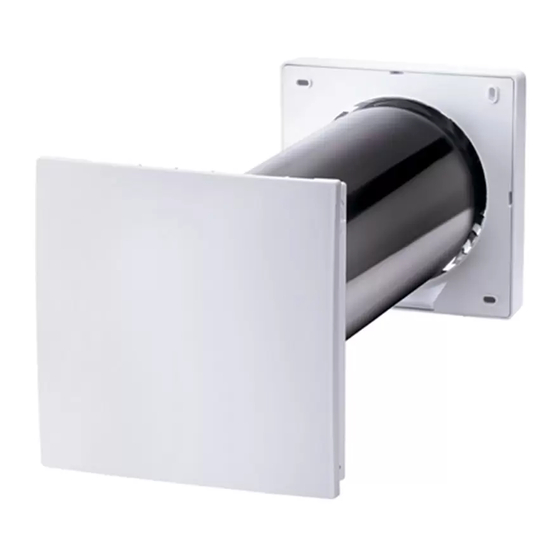
Page 11: Montage Der Wandhülse Und Außenabdeckung
9 Montage der Wandhülse und Außenabdeckung | DE Ausgleichsrahmen (Tiefe 55 mm) sind stapel- 9 Montage der Wandhülse und bar. Bei der Montage von Ausgleichsrahmen Außenabdeckung aus Edelstahl ausschließlich Edelstahlschrau- ben verwenden. 9.1 Montage Wandhülse ● Elektrische Zuleitung entsprechend der Gerätevariante beachten: PP 45 RHK/RHL für PP 45-Geräte PP 45 O/K: Steuerleitung J-Y (ST) Y... - Page 12 DE | 9 Montage der Wandhülse und Außenabdeckung Positionierung der Wandhülse ! WARNUNG Verletzungsgefahr, falls sich eine Wand- hülse oder Außen-/Innenabdeckung löst. Montage nur an Wänden mit ausreichender Tragkraft vornehmen. Die Wandhülse muss fest eingeputzt werden. 1. Montageort(e) bestimmen. Einbaumaße und Mindestabstände zur Wand und Decke beachten.
-
Page 13: Montage Außenabdeckung
9 Montage der Wandhülse und Außenabdeckung | DE Dichtungsstreifen auf die Wandhülse Montage kleben. Geeignetes Dichtungsmaterial ist ! VORSICHT bauseitig bereitzustellen. Vorsicht beim Umgang mit scharf- kantigen Gehäuseteilen, z. B. bei 9.2 Montage Außenabdeckung Edelstahl-Außenabdeckungen Außenabdeckung erst nach Abschluss Schutzhandschuhe benutzen. der Außenputzarbeiten montieren. - Page 14 DE | 9 Montage der Wandhülse und Außenabdeckung Montage PPB 30 AK und PPB 30 AE/AW/AS – nach Fertigputz der Außenwand – Position der Außenabdeckung und Wandhülse Bohrschablone verwenden! 1. Putzschutzdeckel entfernen, Bohrschablo- ne über die Wandhülse setzen, ausrichten und Befestigungslöcher markieren. Positi- on TOP beachten.
- Page 15 9 Montage der Wandhülse und Außenabdeckung | DE PPB 30 AE/AW/AS: Frontabdeckung anbringen ! VORSICHT Vorsicht beim Umgang mit scharf- kantigen Gehäuseteilen, z. B. bei Edelstahl-Außenabdeckungen. Schutzhandschuhe benutzen. 5. Gehäuse [G] mit 4 Schrauben an der Außenwand festschrauben. Geeignetes Befestigungsmaterial ist bauseitig bereit- zustellen.
-
Page 16: Montage Laibungselemente Pp 45 Le, Pp 45 Lev Und Pp 45 Lew90
DE | 10 Montage Laibungselemente PP 45 LE, PP 45 LEV und PP 45 LEW90 ACHTUNG 10 Montage Laibungselemente PP 45 LE, PP 45 LEV und Einbauposition Innenwand: Wandhülse muss nach Anbringung von Putz, Tapete etc. PP 45 LEW90 putzbündig mit der Innenwand abschließen. PP 45 LE/LEV/LEW90 nicht für Einbauposition Fensterlaibung: Die Kon- PPB 30-Geräte geeignet –... - Page 17 10 Montage Laibungselemente PP 45 LE, PP 45 LEV und PP 45 LEW90 | DE ACHTUNG Gerätebeschädigung und Beschädigung des Mauerwerks durch Kondensat bei falscher Montage, wenn Kondenswasser bei zu geringem Gefälle von Wandhülse und Laibungskanal in Richtung Innenwand läuft. Wandhülse und Laibungskanal mit 1 bis 2 % Gefälle zur Kondensatauslaufseite hin montieren.
- Page 18 DE | 10 Montage Laibungselemente PP 45 LE, PP 45 LEV und PP 45 LEW90 6. Zweiteiliges-Edelstahlgitter [4] und [5] vor Montage arbeiten demontieren. 7. Edelstahl-Aufnahme [4] in den Laibungs- kanal drücken und mit 4x beiliegenden Edelstahl-Spax schrauben [4.2] vorsich- tig verschrauben (nicht zu fest).
-
Page 19: Weitere Vorgehensweise Bei Der Endmontage
11 Weitere Vorgehensweise bei der Endmontage | DE 11 Weitere Vorgehensweise bei 12 Einbaumaße der Endmontage PP 45 AK Montagehinweise Unterputzdose Für die Montage der unten aufgeführten Steuerungskomponenten empfehlen wir handelsübliche Unterputzdosen. DN 60 mm, Tiefe 66 oder 61 mm für ●... - Page 20 DE | 12 Einbaumaße PP 45 LEV (nicht mit PPB 30 kombinierbar) PP 45 LEW90 PPB 30 O/K PPB 30 O/K + PP 45 VS Weitere Abmessungen Komponente Abmessungen (BxHxT) RLS 45 O / RLS 45 K 80 x 80 x 49 mm Raumluftsteuerung DS45 RC 80 x 80 x 15 mm...
-
Page 21: Scope Of Delivery
Technical data for PPB 30 ....26 Number of ventilation units ....27 8 Mounting preparations ......27 Acknowledgements: © Maico Elektroapparate-Fabrik GmbH. Transla- Mounting information ......27 tion of the original German instructions. We cannot 9 Mounting the wall sleeve and external be held responsible for mistakes or printing errors cover ............28... -
Page 22: Specialist Installer Qualification
UK | 2 Specialist installer qualification ● PPB 30 ARW (white compensating frame) PPB 30 are balanced ventilation units, which are the ideal choice for use in exhaust air with PPB 30 ARW BB fixing plate are used for mounting PPB 30 AW and PP 45 AK/ PP rooms (bathroom, WC or kitchen with win- 45 AW. -
Page 23: Safety Instructions And Warnings
4 Safety instructions and warnings | UK Risk of explosion: Explosive substanc- 4 Safety instructions and warnings es in lab extraction units may ignite and cause serious explosions or fire. Aggressive Warnings: Symbol, meaning substances may damage the ventilation unit. ... - Page 24 UK | 4 Safety instructions and warnings Read and observe the following Risk of injury and health risk when using accessories which have not safety instructions. been approved. The ventilation unit is tested Risk of injury if work is carried out by and approved with original accessories (e.g.
-
Page 25: Application Examples
5 Application examples | UK Example 2: Ventilation solution for a 3-room 5 Application examples flat with PPB 30 K (bathroom) and PP 45 Example 1: Single-room application with a (living spaces) ventilation units. PP 45 unit pair The PPB 30 K aerates and ventilates the bathroom at the same time with balanced operation. -
Page 26: Requirements At The Installation Site
UK | 6 Requirements at the installation site Power consumption 1.2 / 1.7 / 2.1 / 6 Requirements at the installation 2.8 / 3.5 W site Permissible ducting From star point max. lengths with wired 25 m per ventilation ● Ambient temperature - 15 °C to + 40 °C. connection unit ●... -
Page 27: Number Of Ventilation Units
8 Mounting preparations | UK 8 Mounting preparations 7.3 Number of ventilation units Combinations Number of ventilation 8.1 Mounting information units ● PP 45 units are only suited for supply air Ventilation units Max. 6 PP 45 units rooms. PP 45 O/K + (3 x 2 unit pairs). -
Page 28: Mounting The Wall Sleeve And External Cover
UK | 9 Mounting the wall sleeve and external cover ● Observe electrical supply line to suit unit 9 Mounting the wall sleeve and variant: external cover PP 45 O/K: Control cable J-Y (ST) Y 2 x 2 x 0.8 mm. Max. 25 m from star point, 9.1 Mounting wall sleeve up to star point max. - Page 29 9 Mounting the wall sleeve and external cover | UK Positioning of wall sleeve ! WARNING Risk of injury if a wall sleeve or external/ internal cover come loose. Only mount on walls with sufficient load-bearing capacity. The wall sleeve must be firmly plastered in. 1.
- Page 30 UK | 9 Mounting the wall sleeve and external cover Mounting Mounting external cover Only mount external cover once the ! CAUTION external plastering is complete. Only Exercise caution when handling use stainless steel screws when housing parts with sharp edges, mounting external covers made of e.g.
- Page 31 9 Mounting the wall sleeve and external cover | UK Mounting PPB 30 AK and PP 30 AE/AW/AS – once external wall is fully plastered – Position of external cover and wall sleeve Use drilling template! 1. Remove plaster protective cover, place drilling template over the wall sleeve, align it and mark the fixing holes.
- Page 32 UK | 9 Mounting the wall sleeve and external cover PPB 30 AE/AW/AS: Attaching front cover ! CAUTION Exercise caution when handling housing parts with sharp edges, e.g. stainless steel external covers. Wear protective gloves. 5. Screw housing [G] to external wall with 4 screws.
-
Page 33: Mounting Of Soffit Elements Pp 45 Le, Pp 45 Lev And Pp 45 Lew90
10 Mounting of soffit elements PP 45 LE, PP 45 LEV and PP 45 LEW90 | UK NOTICE 10 Mounting of soffit elements PP 45 LE, PP 45 LEV and Installation position, internal wall: Once the plaster has been applied or wallpaper put PP 45 LEW90 up etc., the wall sleeve must end flush with PP 45 LE/LEV/LEW90 not suited for the internal wall. - Page 34 UK | 10 Mounting of soffit elements PP 45 LE, PP 45 LEV and PP 45 LEW90 NOTICE Damage to unit and damage to brickwork caused by condensate in the event of in- correct mounting where condensate runs towards the internal wall if the wall sleeve and soffit duct are at too slight an incline. Mount wall sleeve and soffit duct with incline of 1 to 2 % to the condensate outlet side.
- Page 35 10 Mounting of soffit elements PP 45 LE, PP 45 LEV and PP 45 LEW90 | UK 6. Remove two-part stainless steel grille [4] and [5] before mounting work commen- ces. 7. Press stainless steel holder [4] into soffit duct and carefully screw down with the 4 stainless steel Spax screws [4.2] provided (but not too tightly). Ensure that the holder is sealed completely at the bottom.
-
Page 36: Next Steps For Final Mounting
UK | 11 Next steps for final mounting 11 Next steps for final mounting 12 Installation dimensions Mounting information for recessed- PP 45 AK mounted box We recommend standard recessed-mounted boxes for mounting the control components listed below. Ø 60 mm, depth of 66 or 61 mm for ● RLS 45 O room air control ●... - Page 37 12 Installation dimensions | UK PP 45 LEV (cannot be combined with PPB 30) PP 45 LEW90 PPB 30 O/K PPB 30 O/K + PP 45 VS Other dimensions Component Dimensions (WxHxD) RLS 45 O/RLS 45 K 80 x 80 x 49 mm room air control DS45 RC 80 x 80 x 15 mm...
-
Page 38: Volume De Fourniture
6 Exigences sur le lieu d’installation ..44 7 Caractéristiques techniques....44 Caractéristiques techniques PP 45..44 Mentions légales : © Maico Elektroapparate-Fabrik GmbH. Traduction Caractéristiques techniques PPB 30 ..45 de la notice allemande d'origine. Sous réserve de Nombre d’appareils de ventilation ..45 fautes d'impression, d'erreurs et de modifications techniques. -
Page 39: Qualification De L'installateur Spécialisé
2 Qualification de l’installateur spécialisé | FR Cadre d’adaptation PPB 30 ARE / ARW 3 Utilisation conforme (0093.1501 / 0093.1525) Les appareils de ventilation PP 45/PPB 30 à ● Cadre d’adaptation pour le montage sur des récupération de chaleur servent à évacuer / murs minces. insuffler l’air des appartements, bureaux ●... -
Page 40: Consignes De Sécurité Et Avertissements
FR | 4 Consignes de sécurité et avertissements ● Commande RLS 45 O ou RLS 45 K 4 Consignes de sécurité et pour PP 45 O/K et PPB 30 O/K. avertissements ● Interrupteur radio DS 45 RC pour PP 45 RC. Ou bien avec RLS 45 K + module d’exten- Avertissements : Symboles, significa- sion radio PP 45 EO. - Page 41 4 Consignes de sécurité et avertissements | FR Des vapeurs de graisse et d’huile Ne jamais utiliser l’appareil de ventilation si en provenance de hottes aspirantes un foyer dépendant de l’air ambiant raccordé risquent d’encrasser l’appareil de ventila- à une installation d’évacuation de gaz à garni- tion et de réduire son efficacité.
- Page 42 FR | 4 Consignes de sécurité et avertissements Risque de blessure lors des travaux Danger de mort dû à la présence de en hauteur. monoxyde de carbone en cas d’uti- Utiliser des auxiliaires d’accès vertical lisation avec des foyers dépendants de (échelles) appropriés.
-
Page 43: Exemples D'application
5 Exemples d’application | FR Exemple 2 : Solution de ventilation dans 5 Exemples d’application un appartement 3 pièces avec appareils de Exemple 1 : Application dans une seule ventilation PPB 30 K (salle de bains) et PP 45 pièce avec une paire d’appareils PP45 (pièces d’habitation) Le PPB 30 K ventile et aère simultanément la salle de bains en cas de fonctionnement... -
Page 44: Exigences Sur Le Lieu D'installation
FR | 6 Exigences sur le lieu d’installation 6 Exigences sur le lieu 7 Caractéristiques techniques d’installation 7.1 Caractéristiques techniques PP 45 ● Température ambiante de - 15 °C à + 40 °C. ● Température des fluides max. 40 °C. Diamètre extérieur Ø... -
Page 45: Nombre D'appareils De Ventilation
7 Caractéristiques techniques | FR 7.2 Caractéristiques techniques PPB 30 7.3 Nombre d’appareils de ventilation Diamètre extérieur Ø 160 Combinaisons Nombre d'appareils de ventilation Gaine murale PP 45 RHK : 500 mm (longueur max.) PP 45 RHL 800 mm Appareils de ventilation 6 appareils PP 45 max. -
Page 46: Préparatifs De Montage
FR | 8 Préparatifs de montage (air d’appoint). Pour cela, réduire exacte- Appareils de ventilation 3 PPB 30 K ou ment le tube de prolongation. PPB 30 K + 2 PPB 30 K + ● PPB 30 : Pour les épaisseurs du mur de Commande d'air am- 2 PP 45 O/K ou biant RLS 45 K ou... -
Page 47: Montage De La Gaine Murale Et De La Protection Externe
9 Montage de la gaine murale et de la protection externe | FR ● Valeurs de mesure erronées en cas d’ins- PP 45 RHK/RHL pour appareils PPB 30 tallation inapproprié de la commande et de détecteurs externes. Éviter les perturbations et l’ensoleillement direct. -
Page 48: Montage De La Protection Externe
FR | 9 Montage de la gaine murale et de la protection externe 3. Réduire la gaine murale. Respecter la La saillie de la gaine Épaisseur saillie de la gaine murale par rapport murale prescrite pour du mur au mur extérieur ! Données pour le mur PP 45 RHK/RHL intérieur et extérieur une fois crépi. - Page 49 9 Montage de la gaine murale et de la protection externe | FR 1. Dès que le crépi extérieur est posé, retirer Formation de rouille de surface : suite le couvercle de protection du crépi. à des influences extérieures (par ex. air chargé...
- Page 50 FR | 9 Montage de la gaine murale et de la protection externe Montage de PPB 30 AK/AE/AW/AS – une fois le mur extérieur crépi – Position de la protection externeet de la gaine murale Utiliser le gabarit de perçage ! 1.
- Page 51 9 Montage de la gaine murale et de la protection externe | FR PPB 30 AE/AW/AS : monter le cache de protection ! PRUDENCE Manipuler avec prudence les pièces de boîtier à arêtes coupantes telles que les protections externes en acier inoxydable. Porter des gants de protection. 5. Visser le boîtier [G] sur le mur extérieur avec 4 vis.
- Page 52 FR | 10 Montage des éléments d’embrasure PP 45 LE, PP 45 LEV et PP 45 LEW90 ATTENTION 10 Montage des éléments d’embra- sure PP 45 LE, PP 45 LEV et PP 45 Position de montage – mur intérieur : Après application du crépi, du papier peint, LEW90 etc., la gaine murale doit être en affleurement...
-
Page 53: Montage Des Éléments D'embra-Sure Pp 45 Le, Pp 45 Lev Et Pp 45 Lew90
10 Montage des éléments d’embrasure PP 45 LE, PP 45 LEV et PP 45 LEW90 | FR ATTENTION Risque d‘endommagement de l‘appareil et de la maçonnerie par le condensat suite à un montage incorrect, lorsque l‘eau de condensation s‘écoule en direction du mur intérieur en raison d‘une inclinaison trop faible de la gaine murale et du canal d‘em- brasure. - Page 54 FR | 10 Montage des éléments d’embrasure PP 45 LE, PP 45 LEV et PP 45 LEW90 3. Aligner le canal d‘embrasure et s‘assurer 5. Fixer l‘élément d‘embrasure sur le mur d‘une inclinaison de 1 à 2 % en direction (par ex.
-
Page 55: Suite De La Marche À Suivre Lors Du Montage Final
11 Suite de la marche à suivre lors du montage final | FR 11 Suite de la marche à suivre lors 12 Cotes de montage du montage final PP 45 AK Consignes de montage du boîtier encastré Pour le montage des composants de com- mande mentionnés ci-dessous, nous conseil- lons l’emploi des boîtiers encastrés en vente dans le commerce. Ø... - Page 56 80 x 80 x 15 mm Module d'extension 80 x 80 x 49 mm PP 45 EO EnOcean Détecteurs externes 80 x 80 x 49 mm Filtre à air G3 (non-tissé) MAICO Elektroapparate-Fabrik GmbH Steinbeisstr. 20 78056 Villingen-Schwenningen ● ● ● Germany Service +49 7720 6940 info@maico.de...
Need help?
Do you have a question about the PushPull PP 45 RHK and is the answer not in the manual?
Questions and answers