Table of Contents
Advertisement
Advertisement
Table of Contents

Related Manuals for A&D FC-50Ki


Summary of Contents for A&D FC-50Ki
- Page 1 ふ Counting Scale FC-50Ki FC-20Ki FC-10Ki FC-5000i WM : PD4000541...
- Page 2 This manual and Marks All safety messages are identified by the following, “WARNING” or “CAUTION”, of ANSI Z535.4 (American National Standard Institute: Product Safety Signs and Labels). The meanings are as follows: A potentially hazardous situation which, if not avoided, could result in WARNING death or serious injury.
-
Page 3: Table Of Contents
Contents 1. INTRODUCTION......................3 1-1. Unpacking........................3 1-2. Setting Up Your Scale ....................3 1-3. Standby and Operating Mode ..................5 1-4. Simple Operation Mode .....................5 1-5. kg or lb Weighing Units ....................5 1-6. Last Unit Weight Used Feature ..................6 Front Panel Overview ......................7 2. - Page 4 10-2. ACAI Automatic Operation ..................40 10-3. ACAI Manual Operation ..................41 11. RS-232C SERIAL INTERFACE ...................42 11-1. RS-232C Specifications ..................42 11-2. Data Output Mode....................43 11-3. Connecting the AD-8121 Printer / MODE 1 or MODE 2 .........44 11-4. Connecting the AD-8121 Printer / MODE 3............44 11-5.
-
Page 5: Introduction
1. INTRODUCTION 1. INTRODUCTION 1. INTRODUCTION 1. INTRODUCTION 1-1. Unpacking 1-1. Unpacking 1-1. Unpacking 1-1. Unpacking q Unpack the scale carefully and keep the packing material if you are likely to transport the scale again in the future. q In the carton you should find this manual plus: •... - Page 6 q The display comes ON After running through a self-check that will show various segments, the weighing display will appear. 1111111 9999999 ------- àà àà àà àà waiting for weighing self-check data to become stable TARE ZERO STABLE SCALE TOTAL ENTERED && 8888880...
-
Page 7: Standby And Operating Mode
1-3. Standby and Operating Mode 1-3. Standby and Operating Mode 1-3. Standby and Operating Mode 1-3. Standby and Operating Mode The FC-i scale has two principal modes: Standby mode and operating mode. Standby mode: When the scale has power supplied to it, either by the AC Adapter or the battery pack, and the display is not indicate, the scale is in the standby mode. -
Page 8: Last Unit Weight Used Feature
1-6. Last Unit Weight Used Feature 1-6. Last Unit Weight Used Feature 1-6. Last Unit Weight Used Feature 1-6. Last Unit Weight Used Feature There are a number of ways to register a unit weight to count. The FC-i scale has a feature to keep the last unit weight used in memory. -
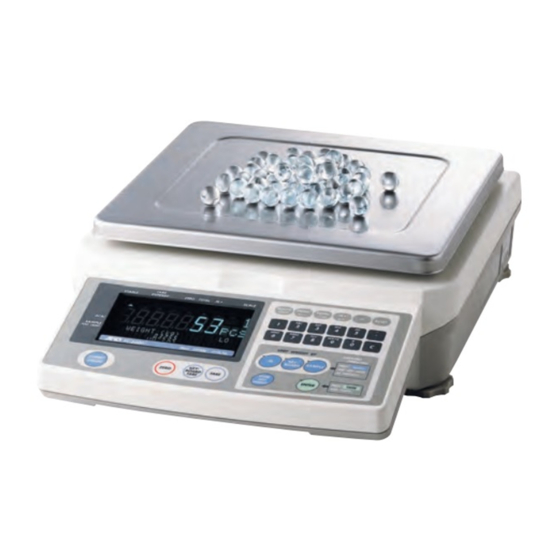
Page 9: Front Panel Overview
Front Panel Overview Front Panel Overview Front Panel Overview Front Panel Overview SCALE The REMOTE SCALE TOTAL The TOTAL key key displays TARE ENTERED indicator comes 1: main scale is used. key switches between displays the comparator limits and indicator comes 2: remote scale is the main and a time &... -
Page 10: Basic Operations
2. BASIC OPERATIONS 2. BASIC OPERATIONS 2. BASIC OPERATIONS 2. BASIC OPERATIONS 2-1. Basic Operations 2-1. Basic Operations 2-1. Basic Operations 2-1. Basic Operations Turn The Display ON and OFF Turn The Display ON and OFF Turn The Display ON and OFF Turn The Display ON and OFF TARE ZERO... - Page 11 TARE TARE TARE TARE q The TARE key will subtract the displayed TARE ZERO STABLE SCALE TOTAL ENTERED container weight. && 8888810 1. Remove everything from the weighing pan and press the ZERO key to zero the scale. W E I G H T ( k g ) 12 13 45 67 89 0.
-
Page 12: To Start Counting
2-2. To Start Counting 2-2. To Start Counting 2-2. To Start Counting 2-2. To Start Counting 1. Press the STANDBY/OPERATE key to turn the scale on when displaying the standby indicator. Or press the RESET key to clear TARE ZERO STABLE SCALE TOTAL... -
Page 13: Unit Weight By Samples
2-3. Unit Weight By Samples 2-3. Unit Weight By Samples 2-3. Unit Weight By Samples 2-3. Unit Weight By Samples 10 Sample Size 10 Sample Size 10 Sample Size 10 Sample Size 1. The three UNIT WEIGHT BY LED’s should be blinking at this point, if not, press the RESET key to clear any unit weight. - Page 14 5, 25, 50 or 100 Sample Size 5, 25, 50 or 100 Sample Size 5, 25, 50 or 100 Sample Size 5, 25, 50 or 100 Sample Size 1. The three UNIT WEIGHT BY LED’s should be blinking at this point, if not, press the RESET key to clear any unit weight.
- Page 15 Desired Sample Size Desired Sample Size Desired Sample Size Desired Sample Size 1. The three UNIT WEIGHT BY LED’s should be blinking at this point, if not, press the RESET key to clear any unit weight. lf you are going to use a tare container, place it on the weighing pan.
- Page 16 Desired Sample Size Desired Sample Size Desired Sample Size Desired Sample Size Not To Use The Not To Use The Not To Use The Not To Use The SAMPLE SAMPLE SAMPLE SAMPLE 1. The three UNIT WEIGHT BY LED’s should be blinking at this point, if not, press the RESET key to clear any unit weight.
-
Page 17: Unit Weight By Keyboard
2-4. Unit Weight By KEYBOARD 2-4. Unit Weight By KEYBOARD 2-4. Unit Weight By KEYBOARD 2-4. Unit Weight By KEYBOARD 1. The three UNIT WEIGHT BY LED’s should be blinking at this point, if not, press the RESET key to clear any unit weight. lf you are going to use a tare container, place it on the weighing pan and press the TARE key to tare the container. -
Page 18: Unit Weight By Id Number
2-5. Unit Weight By ID Number 2-5. Unit Weight By ID Number 2-5. Unit Weight By ID Number 2-5. Unit Weight By ID Number 1. If there are no unit weight’s stored in memory, refer to “4-1. Store Unit Weight by 4-1. -
Page 19: Entering A Tare Weight
3. ENTERING A TARE WEIGHT 3. ENTERING A TARE WEIGHT 3. ENTERING A TARE WEIGHT 3. ENTERING A TARE WEIGHT There are two methods of tare operations. q Using the TARE key to subtract the displayed container weight directly. Please refer to “2-1. -
Page 20: To Clear Tare
3-2. To Clear TARE 3-2. To Clear TARE 3-2. To Clear TARE 3-2. To Clear TARE TARE Either: Either: Either: Either: ZERO STABLE SCALE TOTAL ENTERED && 888-554 1. Have nothing on the weighing pan. q If the ZERO indicator is not displayed, press the ZERO key to zero the scale. -
Page 21: Store Unit Weight
4. STORE UNIT WEIGHT 4. STORE UNIT WEIGHT 4. STORE UNIT WEIGHT 4. STORE UNIT WEIGHT 4-1. Store Unit Weight by ID Numbers 4-1. Store Unit Weight by ID Numbers 4-1. Store Unit Weight by ID Numbers 4-1. Store Unit Weight by ID Numbers The scale can store up to 500 unit weights by 6 digit ID numbers, from 000001 to 999999. -
Page 22: Clearing A Stored Unit Weight
4-2. Clearing A Stored Unit Weight 4-2. Clearing A Stored Unit Weight 4-2. Clearing A Stored Unit Weight 4-2. Clearing A Stored Unit Weight 1. Press and hold the C key, then press STORE UNIT the STORE UNIT WEIGHT key – release both. WEIGHT 2. -
Page 23: Store Item Code By Id Number
4-3. Store Item Code by ID Number 4-3. Store Item Code by ID Number 4-3. Store Item Code by ID Number 4-3. Store Item Code by ID Number Item code of up to 12 alphanumeric characters can be set using the 10-key pad, and it will be stored with the ID numbers. - Page 24 && -----10 11. Press the ENTER key. The ID number is stored with Item code and the display returns to W E I G H T ( k g ) normal. 12 35 16 -1 -- 1. 1 10 8i d -1 23 45 6 ENTER 2 3 S 1 A A U U W ( g ) A &...
-
Page 25: Unit Weight, Tare, Comparator Limits & Total Count Stored
4-4. Unit Weight, Tare, Comparator Limits & Total Count Stored 4-4. Unit Weight, Tare, Comparator Limits & Total Count Stored 4-4. 4-4. Unit Weight, Tare, Comparator Limits & Total Count Stored Unit Weight, Tare, Comparator Limits & Total Count Stored The scale is initially set to store the ID numbers with a unit weight and an item code only. -
Page 26: Using The M+ Memory
5. USING THE M+ MEMORY 5. USING THE M+ MEMORY 5. USING THE M+ MEMORY 5. USING THE M+ MEMORY 5-1. The M+ Memory Function 5-1. The M+ Memory Function 5-1. The M+ Memory Function 5-1. The M+ Memory Function q The scale can accumulate count data by pressing the M+ key, or automatically (refer to the next page). -
Page 27: Viewing The M+ Total
Automatic M+ Accumulation Mode Automatic M+ Accumulation Mode Automatic M+ Accumulation Mode Automatic M+ Accumulation Mode q M+ Accumulation can also be done automatically each time you count a different batch, As soon as you have a stable count, it will be added to the M+ memory and the scale will beep¯. -
Page 28: Comparator Function
6. COMPARATOR FUNCTION 6. COMPARATOR FUNCTION 6. COMPARATOR FUNCTION 6. COMPARATOR FUNCTION q The scale contains a comparator function that checks the amount on the weighing pan against set acceptable count or weight && 888-100 levels. When the comparator function is activated, “... - Page 29 5. Use the 0 à 5 keys to display && f-05-01 the number of the desired setting. example, let’s select “1” C o m p a r a t o r 12 34 56 78 C0 00 04 56 78i d -0 00 compare all data.
-
Page 30: Time And Date Function
7. TIME AND DATE FUNCTION 7. TIME AND DATE FUNCTION 7. TIME AND DATE FUNCTION 7. TIME AND DATE FUNCTION q The FC-i scale has a time and date function and that data can be sent through the RS-232C interface. There are two ways to set time and date. To Set in the F-Function Settings To Set in the F-Function Settings To Set in the F-Function Settings... -
Page 31: Calibration
8. CALIBRATION 8. CALIBRATION 8. CALIBRATION 8. CALIBRATION q Calibration of the FC-i scales is required when it is initially installed, if it is moved often, or it is moved a substantial distance. Calibration is also necessary in regular scale maintenance due to normal mechanical wear-and-tear, changes in seasonal temperature, humidity, air pressure, etc. - Page 32 3. Press the ENTER key. && 8Call00 The calibration weight stops blinking and “Cal 0” appears. C a l i b r a t i o n Z e r o ENTER Ca la 0 C a l i b r a t i o n w e i g h t ( k g ) 12 34 56 78 90 12 34 56 789 0 121 0.
-
Page 33: Gravity Compensation
8-2. Gravity Compensation 8-2. Gravity Compensation 8-2. Gravity Compensation 8-2. Gravity Compensation When the scale is first used or has been moved to different place, it should be calibrated using a calibration weight. But if the calibration weight cannot be prepared, the gravity acceleration correction will compensate the scale. -
Page 34: F-Function Parameters
9. F-FUNCTION PARAMETERS 9. F-FUNCTION PARAMETERS 9. F-FUNCTION PARAMETERS 9. F-FUNCTION PARAMETERS 9-1. To Change or View F-Function Settings 9-1. To Change or View F-Function Settings 9-1. To Change or View F-Function Settings 9-1. To Change or View F-Function Settings q Start with the scale in standby mode that the display is turned off. -
Page 35: F-Functions
6. Press the ENTER key to save any && f-05-02 changes and/or move to next. C o m p a r a t o r ENTER 12 34 56 78 C0 00 04 56 78i d -0 00 2 3 S A M U U W ( g ) 1 2 C l e a r I D 12 34 56 70. - Page 36 q Auto REMOTE SCALE After Unit Weight Registration. The scale can be set to the remote scale after unit weight f-01-03 f-01-03 f-01-03 f-01-03 registration, instead of having to manually press the REMOTE SCALE key. Please note that this does not affect any other use of the REMOTE SCALE key.
- Page 37 F-02-X ACAI Operation & Min. Unit Weight F-02-X ACAI Operation & Min. Unit Weight F-02-X ACAI Operation & Min. Unit Weight F-02-X ACAI Operation & Min. Unit Weight q ACAI Mode When Unit Weight Entered by Sample Pieces. 0 0 0 0 f-02-01 f-02-01 f-02-01...
- Page 38 F-04-X Environment and Beeper F-04-X Environment and Beeper F-04-X Environment and Beeper F-04-X Environment and Beeper q Zero Tracking. Zero tracking traces a drift from zero caused by temperature f-04-01 f-04-01 f-04-01 f-04-01 changes etc., and stabilizes the zero point. 0 0 0 0 ! Zero tracking ON.
- Page 39 q Upper Limit. f-05-03 f-05-03 f-05-03 f-05-03 Enter via the 10-key pad. 0 0 0 0 Use the - or . key to “set minus value. q Lower Limit. f-05-04 f-05-04 f-05-04 f-05-04 Enter via the 10-key pad. 0 0 0 0 Use the - or .
- Page 40 q Data to be Sent. 00100 00100 00100 00100 f- X -02 ! Count data sent. Date/Time Unit You select which data to be sent by keying in a Weight 0 or 1 for the data: Date, ID no., PCS (count), weight or unit weight.
- Page 41 F-10-X External Control Signal Input F-10-X External Control Signal Input F-10-X External Control Signal Input F-10-X External Control Signal Input q Control Signal Input #1 and #2. Select an input (key function) as listed below for each f-10-01 f-10-01 f-10-01 f-10-01 Functions f-10-01 and f-10-02.
-
Page 42: Acai Function
10. ACAI FUNCTION 10. ACAI FUNCTION 10. ACAI FUNCTION 10. ACAI FUNCTION 10-1. ACAI 10-1. ACAI 10-1. ACAI 10-1. ACAI Automatic Counting Accuracy Improvement Automatic Counting Accuracy Improvement Automatic Counting Accuracy Improvement Automatic Counting Accuracy Improvement TARE The ACAI (Automatic Counting Accuracy ZERO STABLE SCALE... -
Page 43: Acai Manual Operation
Pcs On the ACAI 63~123 Weighing Pan Addition Range 13~27 73~139 23~50 83~153 33~71 93~167 43~90 103~300 53~107 over 200 203~493 STABLE STABLE STABLE ACAI ! ACAI ! ACAI As you add, the ACAI When you stop adding After the new unit indicator will be ON and the display becomes weight is calculated,... -
Page 44: Rs-232C Serial Interface
11. RS-232C SERIAL INTERFACE 11. RS-232C SERIAL INTERFACE 11. RS-232C SERIAL INTERFACE 11. RS-232C SERIAL INTERFACE q The FC-i scale has not only a standard RS-232C interface but also optional interfaces, Ch.1 and Ch.2. q The specifications described in this section are common to all of the RS-232C interfaces. 11-1. -
Page 45: Data Output Mode
11-2. Data Output Mode 11-2. Data Output Mode 11-2. Data Output Mode 11-2. Data Output Mode q The data output modes and parameters are set by F-Functions in f-06 f-06 08-X as f-06 f-06 described in the F-Function parameters, section 9. 11-5. -
Page 46: Connecting The Ad-8121 Printer / Mode 1 Or Mode 2
Data Format ( Data Format ( f-06 Data Format ( Data Format ( f-06 / / / / 07 07 / / / / 08-03 08-03 ) ) ) ) f-06 f-06 08-03 08-03 q Format for AD-8121 MODE 1 or 2. (f-06 f-06 f-06 f-06... -
Page 47: Command Mode
q To print date/time, set f-06 f-06 08-02 08-02 at "1####" (# = 0 or 1). f-06 f-06 08-02 08-02 q The total data (accumulated by the M+ key) will be printed along with the number of additions to M+ memory. The AD-8121 / MODE 3 does not have statistical functions. - Page 48 Command Definition Notes “G,0.123C ” sets the unit Set a known unit weight. weight as "0.123kg" (or "0.123 lb"). Same as the REMOTE SCALE key. Key command Same as the TOTAL key. Same as the M+ key. Key command Same as the STANDBY/OPERATE key. Send data immediately.
- Page 49 Acknowledgment and Error Codes Acknowledgment and Error Codes Acknowledgment and Error Codes Acknowledgment and Error Codes When the FC-i scales receives an external command, it reacts as follows: q If the command requests a data reply, the scale will send the data. For other commands, the scale will send an acknowledgment <AK>...
- Page 50 q Weight data Command ? W T C Reply Stable positive data S T , + 0 0 1 . 2 3 4 6 k g C Stable negative data S T , - 0 0 2 . 7 2 5 5 l b C Unstable negative data U S ,...
- Page 51 Command Request the contents of the next ID. ? M R C Reply M R , 0 0 0 1 2 4 , A B C D E F G H I J K L , 2 3 . 4 5 6 7 8 , + 0 0 0 . 2 3 4 5 , + 0 0 0 0 1 3 5 7 , + 0 0 0 0 1 2 4 6 , + 0 2 3 4 5 6 7 8 , 0 0 0 0 2 3 4 5 C q Store the unit weight and tare weight into a specified ID memory.
- Page 52 q Request the FC-i scales to reply with the F-Function settings. Request the setting of f-05-01. Command ? F C , 0 5 0 1 C f-05-01 = 0 Reply F C , 0 5 0 1 , 0 C Setting value Command Request to reply with the setting of the next F-Function.
-
Page 53: Options
12. OPTIONS 12. OPTIONS 12. OPTIONS 12. OPTIONS 12-1. OP-02 Ni-MH Battery Pack 12-1. OP-02 Ni-MH Battery Pack 12-1. OP-02 Ni-MH Battery Pack 12-1. OP-02 Ni-MH Battery Pack Using OP-02 Battery Pack Using OP-02 Battery Pack Using OP-02 Battery Pack Using OP-02 Battery Pack q By using the OP-02 Ni-MH battery pack, the scale can be operated for around 10 hours, after a full charge and using no other options... -
Page 54: Rs-232C
Recharging Recharging the Recharging Recharging the Battery Battery Battery Battery 1. Turn the battery switch off on the battery pack. 2. Fully loosen the lock screw and remove the battery. q If you want to recharge the battery while it is still in the scale, you may do so. In that case, disregard step 2 –... -
Page 55: Rs-232C And Comparator Relay Output
12-3. OP-04 RS-232C and Comparator Relay Output 12-3. OP-04 RS-232C and Comparator Relay Output 12-3. OP-04 RS-232C and Comparator Relay Output 12-3. OP-04 RS-232C and Comparator Relay Output Multiple RS-232C interfaces and relay output for the comparator results are obtained by installing OP-04. -
Page 56: Remote Scale Interface
12-4. OP-05 Remote Scale Interface 12-4. OP-05 Remote Scale Interface 12-4. OP-05 Remote Scale Interface 12-4. OP-05 Remote Scale Interface A two-scale system using the FC-i scales is possible by installing OP-05 and connecting a remote scale. You can use any load cell platform that meets the conditions in this section. - Page 57 The Load Cell and Input Sensitivity The Load Cell and Input Sensitivity The Load Cell and Input Sensitivity The Load Cell and Input Sensitivity The relationship between load cell and input sensitivity (X) for the FC-i scales is: q Example Load Cell Capacity 100kg “A”...
- Page 58 Remote Scale kg/lb relationship Remote Scale kg/lb relationship Remote Scale kg/lb relationship Remote Scale kg/lb relationship USA Version ONLY q When the capacity was set by “kg”: Let capacity x minimum division = Ws x W (kg) When: d = 1, then W (lb) = W (kg) x 2 d = 2, then W...
- Page 59 3. Use the 0 à 9 and ..10-key pad && 88Cal10 to display the desired capacity. (Example of capacity 2000kg) M a x i m u m C a p a c i t y ( k g ) Ca l4 56 78 90 12 3a aa aaa a aa 12 00 0 [ T A R E ] G r a v i t y A c c e l e r a t i o n...
-
Page 60: Specifications
13. SPECIFICATIONS 13. SPECIFICATIONS 13. SPECIFICATIONS 13. SPECIFICATIONS MODEL FC-5000 FC-10K FC-20K FC-50K Capacity (k)g 5000 g 10 kg 20 kg 50 kg Resolution (k)g 0.5 g Capacity lb 10 lb 20 lb 50 lb 100 lb Resolution lb 0.0001 lb 0.002 lb 0.005 lb 0.01 lb... -
Page 61: Gravity Acceleration Map
14. GRAVITY ACCELERATION MAP 14. GRAVITY ACCELERATION MAP 14. GRAVITY ACCELERATION MAP 14. GRAVITY ACCELERATION MAP Values of gravity at various locations Amsterdam 9.813 m/s Manila 9.784 m/s Athens 9.807 m/s Melbourne 9.800 m/s Auckland, NZ 9.799 m/s Mexico City 9.779 m/s Bangkok 9.783 m/s... - Page 62 World map...
Need help?
Do you have a question about the FC-50Ki and is the answer not in the manual?
Questions and answers