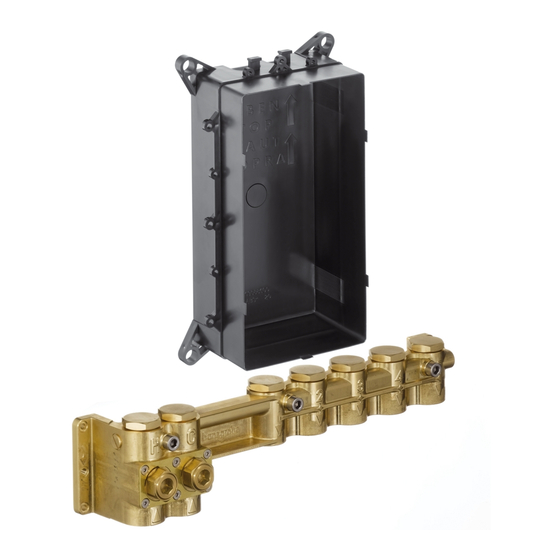
Hans Grohe RainBrain 15840180 Assembly Instructions Manual
Hide thumbs
Also See for RainBrain 15840180:
- Assembly instructions manual (36 pages) ,
- Assembly instructions manual (36 pages)
Advertisement
Quick Links
Advertisement

Summary of Contents for Hans Grohe RainBrain 15840180
- Page 1 DE Montageanleitung FR Instructions de montage EN assembly instructions IT Istruzioni per Installazione ES Instrucciones de montaje NL Handleiding PL Instrukcja montażu 安装说明 RU Инструкция по монтажу 仕様表 AR ﺗﻌﻠﻴﻤﺎت اﻟﺘﺠﻤﻴﻊ RainBrain 15840180...
-
Page 2: Technische Informationen
Deutsch Technische Informationen Verlegezonen elektrische Anla- Bei der Berechnung der Speichergröße und des Warnung vor gefährlicher gen (Seite 25) Ablaufes ist zu berücksichtigen, dass je nach dem elektrischer Spannung was für Brausen kombiniert werden bis zu 42,5l/min Installationszone 1 bei 0,3 MPa Mischwasser benötigt werden. Achtung! • Kabel und Leitungen sind nur innerhalb der Installationszonen zu verlegen. Muss genau beachtet werden! • In Decken und Fußböden sind die kürzes- ten Kabel- und Leitungsführungen mög- HINWEIS lich. Weist auf Informationen hin, deren Technische Daten • Senkrechte Installationszonen reichen Inhalt wichtig ist und berücksichtigt Betriebsdruck: max. 1 MPa jeweils von Deckenunterkante bis zur werden muss. Empfohlener Betriebsdruck: 0,1 - 0,5 MPa Fußbodenoberkante. - Page 3 Audio Verstärker Installationspläne von Hansgrohe empfohlen Das Hansgrohe Bedienpanel liefert ein Stan- dard Signal (L,R; Audio GND) mit Pegel 0dbu siehe Seite 26/27 Hinweis: Anschlußblock darf nicht eingeputzt (0,775V). werden. Als Ergänzung zu dem Hansgrohe RainBrain emp- Kopfbrause 3-fach fehlen wir die Axor Starck Lautsprecher (Artikel 40874-000/40876-180) in Verbindung mit dem Kopfbrause 2-fach Aktivverstärker A403 von DeToma (www.detoma. com) oder das Lautsprecher- / Verstärkerset Q110 Kopfbrause 1-fach aktiv der Firma DeToma. Die Produkte der Firma Einbaumaße (Seite 25) DeToma sind über den Radio- / Fernsehfachhandel erhältlich. D = Basisinstallation E = Komfortinstallation mit Audioverstärker und Lichtrelais (Artikel 27189000) Alle Maße in mm. Zeichenerklärung Warnung vor gefährlicher Leerrohr EN20 / EN25 Wasseranschluss / elektrischer Spannung Kaltwasser Potentialausgleich Kopfbrause...
-
Page 4: Specifications
English Specifications Routing zones for electrical When calculating the accumulator size and the Warning systems (Page 25) drain, you must consider that up to 42,5 litres/min hazardous electrical voltage may be required for 0.4 MPa mixing water - depen- Installation zone 1 ding on which showers will be combined. Attention! • Cables and wires must only be routed within the installation zones. Must be adhered to! • In the ceilings and floors, the shortest cable and wire guides are possible. NOTE • Vertical installation zones usually extend Indicates information, whose content Specifications from the bottom edge of the ceiling to the is important and must be observed. -
Page 5: Audio Amplifier
Audio amplifier Installation diagrams by Hansgrohe The Hansgrohe operating panel sends out a standard signal (L,R; Audio GND) with level 0dbu recommended - see Note: The terminal block must not be plastered (0,775 V). page 26/27 As a supplement for the HansGrohe Rainbrain, we recommend Axor Starck speakers (part no. Head shower 3-fold 40874-000/40876-180) in connection with the active amplifier A403 by DeToma (www.detoma. Head shower 2-fold com) or the speaker/amplifier kit Q110 aktiv made Head shower 1-fold by DeToma. DeToma products can be purchased from radio/TV dealerships. Installation dimensions (Page 25) D = Basic installation E = Comfort installation with audio amplifier and light relay (part no. 27189000) All dimensions in mm. Explanation of symbols Warning - hazardous electrical E mp t y co nd u it E N 20 / Water connection / voltage EN25... - Page 6 Polski Informacje techniczne Strefy ułożenia instalacji elektry- Ostrzeżenie przed niebez- cznych (strona 25) piecznym napięciem elektry- cznym Strefa instalacyjna 1 Dane techniczne Uwaga! • Kable i przewody należy ułożyć jedynie w granicach stref instalacyjnych. Należy dokładnie przestrzegać Ciśnienie robocze: maks. 1 MPa niniejszych wskazówek! Zalecane ciśnienie robocze: 0,1 - 0,5 MPa • W sufitach i w podłogach możliwe jest Ciśnienie kontrolne: 1,6 MPa ułożenie najkrótszych kabli i przewo- WSKAZÓWKA (1 MPa = 10 bar = 147 PSI) dów.
-
Page 7: Wymiary Montażowe
Wzmacniacza audio Plany instalacji zale- Rysunek 10: cane przez Hansgrohe Panel obsługi Hansgrohe emituje standardowy Nanieść na ścianę PCI-Lastogum lub porówny- sygnał (L,R; Audio GND) o poziomie 0 dBu patrz strona 26/27 walny materiał uszczelniający zgodnie z danymi (0,775 V). producenta. Jako uzupełnienie do Hansgrohe RainBrain Rysunek 11: Prysznic sufitowy potrójny zalecamy użycie głośnika Axor Starck (artykuł 40874-000/40876-180) w połączeniu ze Przełożyć manszetę uszczelniającą przez Prysznic sufitowy podwójny wzmacniaczem aktywnym A403 firmy DeToma obudowę z tworzywa sztucznego i wcisnąć do... - Page 8 min. min. Fliesenoberkante Face avant min. du carrelage Wall surface Parte esterna della piastrella max. max. 1 - 5...
- Page 9 max. 10.000 min.1m Ø 4 mm² 1 - 5 G3/4 G3/4 G3/4...
- Page 12 max 500 Watt Raindance Rainfall Ø 4 mm² 28411000 EN20 5 7 0 27189000 40874000 01800180 40876180 27581000 EN20 15841000 EN25 15841XXX 15842000 15842XXX 28477XXX 15840180 15840180 27453xxx DN20 DN20...
- Page 13 Raindance Rainfall...
- Page 14 G ¾ G ¾...
- Page 15 SW12 mm SW12 mm SW12 mm...
- Page 16 SW12 mm EN25 EN20...
- Page 18 8x1,5 6x1,5 23x2,5 8x1,5 29x2,5 95597000 17x2,0 40916000 95598000 19x2,5 95580000...
- Page 20 Hansgrohe · Postfach 1145 · D-77761 Schiltach · Telefon +49 (0) 78 36/51-1282 · Telefax +49 (0) 7836/511440 E-Mail: info@hansgrohe.com · Internet: www.hansgrohe.com...


Need help?
Do you have a question about the RainBrain 15840180 and is the answer not in the manual?
Questions and answers