
Subscribe to Our Youtube Channel
Related Manuals for Midland MULTI RIDER BTX2 PRO


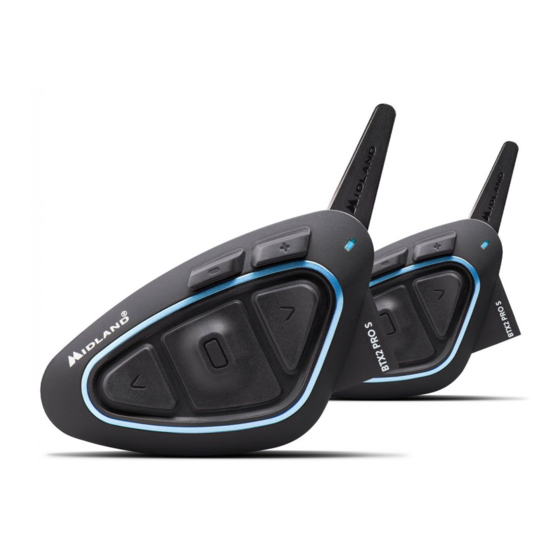
Summary of Contents for Midland MULTI RIDER BTX2 PRO
- Page 1 › MANUALE D’USO › INSTRUCTION GUIDE › BEDIENUNGSANLEITUNG › MANUAL DE INSTRUCCIONES › GUIDE D’UTILISATION › HANDLEIDING...
-
Page 3: Table Of Contents
Accensione e spegnimento del Midland BTX2 PRO .........................................5 Modalità operative ..................................................5 Come abbinare un altro dispositivo Midland BTX2 PRO ......................................5 Come abbinare più di due dispositivi ad un Midland BTX2 PRO .....................................6 Conference ....................................................7 Talk 2 All - Universal Intercom per dispositivi non Midland ......................................8 Compatibilità... -
Page 4: Principali Caratteristiche
Bluetooth, quali Telefonino/MP3 player, Na- › 2 microfoni a braccetto e 2 microfoni a filo vigatore GPS e, se abbinato ad un altro Midland BTX2 PRO, anche come sistema intercom › 2 sistemi di fissaggio bi-adesivo... -
Page 5: Ricarica Delle Batterie
Il microfono può essere fissato al casco in due modi: Avanti Centrale Indietro Il dispositivo Midland BTX2 PRO è dotato di 5 pulsanti, tutti nella parte frontale. I tre pulsanti principali sono pulsanti multifunzione: pulsante Avanti (a sinistra), pulsante Centrale e pulsante Indietro (a destra). www.midlandeurope.com... - Page 6 Sgancio Descrizione sistema di fissaggio al casco Il Midland BTX2 PRO è fornito con il sistema di fissaggio al casco, tramite base con biadesivo. Il dispositivo può essere sganciato dal sistema di fissaggio ogni volta che si rende necessaria la ricarica o per custodirlo altrove.
-
Page 7: Accensione E Spegnimento Del Midland Btx2 Pro
Se invece i dispositivi non fanno parte della stessa confezione o avete acquistato un altro In base alla modalità attiva in un dato momento, le funzioni del Midland BTX2 PRO Midland BTX2 PRO in un secondo momento (per esempio per il passeggero), dovete cambiano e di conseguenza anche i tre pulsanti centrali assumono funzionalità... -
Page 8: Come Abbinare Più Di Due Dispositivi Ad Un Midland Btx2 Pro
2 toni audio a conferma della disattivazione. Un dispositivo Midland BTX2 PRO può essere abbinato ad un massimo di altri tre dispo- sitivi per un totale di 4 (uno dei quali può essere un Universal Intercom). Il Midland BTX2 Attivazione vocale (VOX): PRO ha tre pulsanti disponibili: Avanti, Centrale oppure Indietro. -
Page 9: Conference
Per utilizzare i due dispositivi è necessario uscire dalla modalità di abbinamento (setup): › Fare un doppio click sul pulsante “Centrale” . La luce Rossa si spegne e al suo posto lampeggia la luce Blu. Ora potete utilizzare il Midland BTX2 PRO Utilizzo della funzionalita’ Intercom con più di due dispositivi Per utilizzare la funzionalità... -
Page 10: Talk 2 All - Universal Intercom Per Dispositivi Non Midland
“AVANTI” e “CENTRALE” per 3 secondi. L’avviso vocale “Conference” indicherà Sul Midland BTX2 PRO entrate in modalità setup, (spegnete il dispositivo e tenete pre- l’attivazione. muto il pulsante “Centrale” fino a che la luce non rimane di colore rosso fisso). Tenete ›... -
Page 11: Compatibilità Con I Bt Midland
Attenzione: in questa configurazione il dispositivo non Midland non potrà utilizzare il te- disponibile. lefono (essendo già stato abbinato il Midland BTX2 PRO al posto del telefono stesso). Attenzione: le sorgenti audio A2DP stereo sono supportate solo sul pulsante Vol+. Il se- Compatibilità... - Page 12 è stato completato con successo. Dalla tastiera del telefonino: 5. Il Midland BTX2 PRO uscirà dalla modalità setup (luce rossa fissa) e passerà automa- Comporre il numero sulla tastiera del telefonino ticamente allo stato di funzionalità normale (luce blu lampeggiante). Ora il telefono Premere il pulsante “Invio”...
-
Page 13: Condividere La Musica
A2DP e AVRCP, i quali consentono di ascoltare musica stereo e di comandare le prin- Il GPS può essere abbinato tramite il pulsante “Volume+” oppure “Volume-“. cipali funzioni dell’MP3 player. E’ infatti possibile utilizzare i pulsanti presenti sul Midland Pulsante “Vol+” (supporto per l’audio stereo A2DP) BTX2 PRO per gestire le seguenti funzioni: Play, Stop/Pause, Avanti ed Indietro. -
Page 14: Utilizzo Della Funzionalita' Radio Fm
Quando entra un annuncio vocale, l’intercom o la radio FM sono interrotti per dare la lo al Midland BTX2 PRO tramite il pulsante “Volume +“ o “Volume-”. Se abbinato al priorità all’annuncio stesso. Questa funzione è attiva di default; è possibile cambiare la pulsante “Volume -”... - Page 15 Tenete ora premuto contemporaneamente i tre pulsanti “Avanti”, “Centrale” e “Indie- tro“ per 3 secondi, la luce Blu si accenderà fissa per un secondo e poi tornerà di colore rosso fisso. Fate doppio click sul pulsante “Centrale” per tornare ad utilizzare il Midland BTX2 PRO Attenzione: questa procedura elimina anche i riferimenti ai dispositivi accoppiati.
-
Page 16: Configurazione E Aggiornamento Firmware
4 livelli di sensibilità del microfono: alta, media bassa e molto bassa. Di default questa funzione è disabilitata. Di fabbrica il Midland BTX2 PRO è preconfigurato con la sensibilità “alta”. Configurazione e aggiornamento firmware In aggiunta, è possibile anche disabilitare completamente la funzione VOX e quindi atti- Midland BTX2 PRO può... -
Page 17: Garanzia
Garanzia La durata della garanzia è di 24 mesi per l’apparato e di 6 mesi per gli accessori (batterie, caricatori, antenne, auricolari e microfoni). Per maggiori informazioni visitate il sito www.midlandeurope.com Certificazioni e Conformità di Sicurezza CE/Informazioni generali Questo prodotto è conforme alla direttiva RED 2014/53/UE e può essere liberamente utilizzato nei paesi dell’UE. - Page 19 Switching ON and OFF your Midland BTX2 PRO ........................................4 Operative “mode” ..................................................5 How to pair two Midland BTX2 PRO units ..........................................5 How to pair the Midland BTX2 PRO to more than two units ....................................6 Conference ....................................................7 Talk 2 All - Universal Intercom with different brand unit......................................8 Compatibility with Midland BT line units ...........................................9...
- Page 20 The units included in the TWIN kit are already paired on Middle button and therefore can operate thanks to the three big buttons placed on the front of the unit. Midland BTX2 PRO be immediately used in Intercom mode.
- Page 21 Charge the unit by inserting the wall-charger into the charging socket (lift the rubber cover to insert the plug). The red LED on the unit will start flashing when charging begins. Allow the headset to charge until the unit stops flashing or the blue LED turns on. When the charge is complete (the red LED is not flashing), release the headset from Charger plug the charger.
- Page 22 Description of the Slide-in mounting kit To fix the Midland BTX2 PRO onto the helmet, you have to install the slide-in mounting kit by using the plate with bi-adhesive strip. This method allows you to safely “fix” the Switching ON and OFF your Midland BTX2 PRO BTX2 PRO unit onto your helmet and to remove it at any time in order to recharge or store it.
- Page 23 Press and hold both “Middle” and “Backward” buttons together for approximately 3 The two units supplied in the same Midland BTX2 PRO box, are already paired and re- seconds until the RED indicator flashes 3 times, thus lessening the chances that you ady to use, which mean you don’t need to perform this procedure.
- Page 24 5. Now the pairing procedure is complete, you can go on pairing other units on diffe- The Midland BTX2 PRO has three main buttons (Forward, Middle and Rear). It is up to rent button or just exit the setup mode to start using the units: you which button use to pair and activate the “Intercom”, you are totally free to choose...
- Page 25 The Midland BTX2 PRO unit can work as usually, with “one to one” communication up unit, the intercom will be automatically closed and the new connection will be opened.
- Page 26 Attention: In order to use the the “Talk2All-Universal Intercom” feature the pairing on the will automatically open the conference to all the unit connected. other unit must be done as a phone. The other intercom (not Midland brand) will be able to be paired to a phone only if two phones are supported.
- Page 27 When paired the max distance of the intercom is defined from the lower possible. “Background” feature just press long the “Vol-” button, the voice “Background ON” The BTX2 PRO is compatible with the previous line of Midland BT (BT Next, BTX2 and will tell you that now is active.
- Page 28 ne” mode in order to use it. Press the middle button until you hear “Phone” from the Phone on Vol-: Press“Backward”button for 3 seconds in order to redial the last number voice announcement. Now all the three main buttons are dedicated to the phone (see (you will hear one audio confirmation tone).
- Page 29 (maximum distance 10mt), you must press the “Backward” button long (3 sec.) In general it is possible to pair the Midland BTX2 PRO to all the GPS for motorbike that while the music is playing. The passenger must be either in “Phone” or “Intercom” mode support Bluetooth headset connection.
- Page 30 The station is saved over the last recorded station used. to pair the phone to the Midland BTX2 PRO unit. You can overcome this limit by pairing Thanks to the RDS system, the FM Radio will choose the strongest signal available for the phone directly to the GPS and then the GPS to the Midland BTX2 PRO unit.
- Page 31 Setting mode by double clicking the “Middle” button. Once the manently. red light turns off, the blue led starts blinking. Now you can use your Midland BTX2 › Then simultaneously press and hold down all the three buttons “Forward”-“Midd- le”-“Backward”...
- Page 32 › Press and hold down the “Middle” button 7 sec., until the Red light is on permanently. › Press the “Forward” and “Middle” button together for 3 seconds. The blue LED will flash three times. › Double click on the “Middle” button to exit the “Setup” mode and use the Midland BTX2 PRO Enabling: Follow the same procedure up described;...
- Page 33 Warranty › Increase the separation between the equipment and receiver. › Connect the equipment into an outlet on a circuit different from that to which the The warranty lasts 24 months for the main device and 6 months for the accessories receiver is connected.
- Page 35 INHALT Hauptmerkmale .....................................................2 Technische Daten des Midland BTX2 PRO ..........................................2 Aufladen des Akkus ..................................................3 Ein-/Ausschalten des MIDLAND BTX2 PRO ..........................................5 Betriebsarten ....................................................5 Koppeln (Pairen) von Zwei BTX2 PRO- Geräten ........................................5 Kopplung des BTX2 PRO zwischen mehr als zwei Geräten ......................................6 Konferenz .......................................................8...
-
Page 36: Hauptmerkmale
Gegensprechanlage für mehrere Motorradfahrer › 1 Slide-In Halterungssatz mit zwei Hi-Fi Stereolautsprechern Das Midland BTX2 PRO ist eine Gegensprechanlage mit Konferenzfunktion für › 1 Klapphelmmikrofon und 1 Integralhelmmikrofon Motorradfahrer. Alle wichtigen Funktionen sind dank der drei großen Tasten auf der ›... -
Page 37: Aufladen Des Akkus
Kabelverbindungen: Lautstärke - Lautstärke + › Für Stereo-Tonquellen wie iPod/MP3-Player (mit optionalem Kabel) Achtung: Das Midland BTX2 PRO ist regen- und wasserfest konzipiert. Stellen Sie aber dennoch sicher, dass bei Regen die Gummischutzkappen die Anschlüsse vollständig abdecken. Aufladen des Akkus Achtung: Stellen Sie sicher, dass das Gerät vor der Verwendung vollständig aufgeladen... - Page 38 Verkehrsgeräusche und Ihre Blinker hören können. Slide-In Halterungssatz Das Midland BTX2 PRO kann am Helm befestigt werden, indem man die Slide-In Halterung mittels des Klebestreifens anbaut. Mit diesem Verfahren können Sie das BTX2 PRO sicher an Ihrem Helm befestigen und es jederzeit wieder abnehmen, um es aufzuladen oder zu lagern.
-
Page 39: Ein-/Ausschalten Des Midland Btx2 Pro
Gerät vorher mit einem anderen BT-Gerät oder einem Handy gekoppelt wurde. Wenn Sie wissen möchten, in welchem Modus sich das Gerät gerade befindet, drücken Ein-/Ausschalten des MIDLAND BTX2 PRO Sie einfach gleichzeitig die Tasten „Lautstärke +“ und „Lautstärke –“ für 3 Sekunden. Einschalten des Geräts: Eine Sprachansage teilt Ihnen den aktuellen Modus mit. -
Page 40: Kopplung Des Btx2 Pro Zwischen Mehr Als Zwei Geräten
Intercomanlage benötigt einige Sekunden zur Aktivierung. Sie hören einen Signalton, Kopplung des BTX2 PRO zwischen mehr als zwei Geräten wenn die Intercom-Funktion aktiviert ist. Eine Midland BTX2 PRO Einheit kann mit maximal drei weiteren BT Einheiten Sprachsteuerung (VOX) gekoppelt werden. - Page 41 Kopplung des Midland BTX2 PRO mit einem anderen Midland BTX2 PRO Taste drücken. Um zwei Midland BTX2 PRO miteinander zu koppeln, müssen diese zuerst in den Wenn nötig, können Sie die VOX-Funktion deaktivieren, indem Sie einfach die Setupmodus gebracht werden: „Zurück“-Taste für 7 Sek.
-
Page 42: Konferenz
In “Intercom Modus” und ohne Audio, halten Sie den Vorwärts und Mitte Knopfe für Sie können bis zu 2 nicht-Midland Geräte verbinden: eines auf der „Vorwärts“- und 3 sek. gedrückt. Wenn Sie sich im Intercom Modus befinden, zeigt die Sprachansage eines auf der „Zurück“-Taste. -
Page 43: Kompatibilität Mit Geräten Der Midland Bt-Produktlinie
› Halten Sie jetzt die „Vorwärts“ oder „Zurück“ für ca. 7 Sekunden gedrückt. Die rot- PRO ist mit Geräten der vorigen Midland BT-Produktlinie (BT Next, BTX1 und BTX2) nur kompatibel, wenn sie auf eine Firmware-Version von 2014 oder neuer aktualisiert blaue LED blinkt zuerst schnell und danach (während Sie weiter die Taste gedrückt... -
Page 44: Verbindung Zu Einem Oder Zwei Telefonen
LED blinken. Nach einigen Sekunden sehen Sie im Display des Telefons werden soll) oder die „Vol-“Taste verbunden werden „Midland BT NEXT“ . Befolgen Sie den Kopplungsvorgang Ihres Telefons. Wenn ein Wenn Sie einen weiteren Anruf auf dem 2.Telefon erhalten, ertönt ein Signalton. - Page 45 Einen Anruf beantworten Anruf beenden Es gibt verschiedene Wege, einen Anruf zu beenden: Wenn Sie das Telefon klingeln hören, können Sie auf zwei Arten antworten: › Warten Sie, bis die angerufene Person den Anruf beendet. Sprachgesteuert: › Halten Sie die „Vorwärts“-Taste für 3 Sekunden gedrückt (Sie hören einen Einfach ein Wort sagen, um den Anruf anzunehmen und Sie können das Gespräch Bestätigungston).
-
Page 46: Music Share (Musik Weiterleiten)
Sie können nun Ihr BTX2 PRO benutzen und die GPS Navigationsansagen sind immer Stereo (A2DP)-Routenanweisungen des Navigationsgerätes im Hintergrund zu hören. Das Midland BTX2 PRO unterstützt Stereo (A2DP)-Routenanweisungen von Wenn Sie das BTX2 PRO mit einem GPS-Navigationsgerät über die Taste „Lautstärke Navigationsgeräten, wenn Sie auf der „Lautstärke+“-Taste gekoppelt sind. Bei einem +“... -
Page 47: Verwenden Eines Pmr 446 Funkgeräts Mit Integriertem Bluetooth
Bedienung eines GPS-Navigationsgeräts über das BTX2 PRO Drücken Sie die „Vorwärts“ – oder „Zurück“-Taste kurz, um nach neuen Radiostationen zu suchen. Wenn das GPS-Navigationsgerät mit der Taste „ Lautstärke –“ gekoppelt wurde, wird Wenn Sie die „Vorwärts“ – oder „Zurück“-Taste lange drücken, können Sie die 6 es automatisch verbunden und die Sprachansagen erfolgen stets im Hintergrund, auch gespeicherten Sender auf- oder abwärts durchschalten. - Page 48 UKW-Radio und Intercom betreiben Alle Pairing- (Kopplungs-) Informationen zurücksetzen Während des Radiohörens können Sie das Intercom nicht manuell starten, sondern Sie Wurde Ihr BT Next bereits öfter mit anderen Geräten gekoppelt, dann kann die Zahl der können nur die VOX Funktion benutzen. Das funktioniert durch einfaches Sprechen, gekoppelten Verbindungen irgendwann unübersichtlich werden und es kann angebracht aber nur dann, wenn Sie vorher das jeweils gewünschte Partnergerät auf die mittlere sein, alle im BTX2 PRO gespeicherten Kopplungsdaten zu löschen (Reset).
-
Page 49: Setup Und Firmware-Aktualisierung
1x Aufblinken = VOX deaktiviert Die Firmware Ihres BTX2 PRO kann mittels einer USB-Verbindung mit Ihrem PC 2x Aufblinken = niedrige Empfindlichkeit konfiguriert und aktualisiert werden. Auf der Website von Midland 3x Aufblinken= mittlere Empfindlichkeit www.midlandeurope.com oder unter www.btupdater.de finden Sie auf der BTX2 4x Aufblinken= hohe Empfindlichkeit (Standard) PRO-Seite die PC-Software und die neuen Firmware-Aktualisierungen, falls verfügbar. - Page 50 Gewährleistung Sie sofort die Lautstärke oder schalten Sie das Gerät aus. Bei ständigem Gebrauch mit hohen Lautstärken kann sich Ihr Gehör and den erhöhten Lautstärkepegel so Gewährleistungsfrist beträgt 24 Monate ab Kauf-/Lieferdatum (bei Teilen mit gewöhnen, dass die Folge eine permanente Hörschädigung sein kann. beschränkter Lebensdauer wie, Akkus, Ladegeräte, Headsets, mikrofone und Antennen Bitte benutzen Sie dieses Gerät nur mit einer sicheren Lautstärke.
- Page 51 Modos Operativos ..................................................5 Cómo sincronizar otro BTX2 PRO ..............................................5 Cómo emparejar el Midland BTX2 PRO a más de dos unidades ....................................6 Talk 2 All - Universal Intercom: sincronización con Intercomunicadores de otras marcas .............................8 Compatibilidad con unidades de la línea Midland BT .........................................8 Sincronizar BTX2 PRO a dispositivos Bluetooth........................................9...
-
Page 52: Características Principales
› 2 micrófonos de varilla regulable y 2 micrófonos de hilo situados en el frontal del dispositivo. Midland BTX2 PRO se fija al casco mediante la lám- › 2 sistemas de fijación al casco con biadhesivo ina con biadhesivo o mediante mordaza. -
Page 53: Descripción Del Dispositivo Y Del Sistema De Montaje
Carga de la batería La misma toma microUSB puede usarse para conectar una fuente de audio, como un iPod o resproductor MP3. Atención: compruebe que la unidad está totalmente cargada antes de su uso. Antes del Atención: es necesario un cable AUX opcional no incluido en la caja. primer uso efectúe una carga de al menos 3 horas. -
Page 54: Encender Y Apagar El Btx2 Pro
Desbloquear Descripción del sistema de montaje en el casco El Midland BTX2 Pro puede fijarse al casco usando la lámina con biadhesivo. Esto Encender y apagar el BTX2 PRO método permite tanto fijar de forma segura el BTX2 PRO al casco como retirarlo en cualquier momento para cargarlo o guardarlo. -
Page 55: Modos Operativos
Si las unidades no Midland BTX2 PRO puede operar de tres modos diferentes: Intercom, Teléfono y Ra- son del mismo kit o se han comprado separadamente, necesita sincronizarlas para poder dio FM. -
Page 56: Cómo Emparejar El Midland Btx2 Pro A Más De Dos Unidades
Azul durante un segundo y después volverán al modo configuración (luz Roja siempre encendida). Un Midland BTX2 PRO puede ser emparejado a un máximo de tres otras unidades de 5. Ahora que el emparejamiento está completado, puede proceder a emparejar otras BT, es decir, cuatro en total. - Page 57 Cómo utilizar el Intercom con más de dos dispositivos Para utilizar el modo Intercom, asegúrese que todas las unidades estén encendidas y sincronizadas entre ellas correctamente. Activación manual: Con las unidades encendidas, pulse la tecla correspondiente a la unidad con la que quie- re comunicarse.
-
Page 58: Talk 2 All - Universal Intercom: Sincronización Con Intercomunicadores De Otras Marcas
4 usuarios con tan sólo un click. Presione brevemente el botón “central” y anterior línea de Midland BT (BT Next, BTX2 y BTX1) si ésta se actualiza a la versión de automáticamente se iniciará la conferencia con todos los dispositivos enlazados. -
Page 59: Sincronizar Btx2 Pro A Dispositivos Bluetooth
› Active el Bluetooth de su teléfono movil. › Pasados unos segundos, en el teléfono aparecerá “Midland BTX2 PRO”, selección- elo y siga las instrucciones del teléfono para aceptar la sincronización. Cuando lo pida Atención: las fuentes de audio A2DP estéreo sólo se pueden enlazar a la tecla Vol+. El se- gundo teléfono enlazado en la tecla Vol- sólo funcionará... - Page 60 El teléfono móvil, cuando está emparejado con “Vol +” se puede utilizar como repro- número (escuchará un tono de confirmación) ductores MP3 estéreo. El Midland BTX2 PRO soporta completamente los protocolos Marcación por voz : A2DP y AVRCP, los cuales permiten escuchar música estéreo y gestionar las funciones principales de reproductor MP3.
-
Page 61: Compartir Música
Navegador GPS › En el GPS aparecerá “Midland BTX2 PRO”, selecciónelo y siga las instrucciones Un navegador GPS puede sincronizase usando las teclas de “Vol +” o “Vol -” para aceptar la sincronización. Si lo pide el GPS, teclee el código “0000” (cuatro ›... -
Page 62: Uso De La Función Radio Fm
cionamiento normal (LED azul intermitente). Ahora, el GPS está sincronizado cor- el contrario mantiene pulsada durante 3 segundos cualquiera de las dos teclas, se de- rectamente. splazará por las 6 emisoras memorizadas. Cada vez que pasa de una memoria a otra, un anuncio vocal le indicará... -
Page 63: Configuraciones Especiales
Intercom con Radio FM Para un resultado óptimo, se puede seleccionar entre cuatro niveles de sensibilidad del micrófono: alto, medio, bajo y muy bajo. El ajuste por defecto es “bajo”. También es po- En modo “Radio FM” no se puede activar el Intercom en modo manual pero puede usar sible desactivar el VOX para activar el Intercom y la respuesta de llamadas de teléfono la activación vocal (VOX) sólo hacia el dispositivo enlazado en el pulsador “Central”. -
Page 64: Setup Y Actualización De Firmware
El BTX2 PRO permite configurar el dispositivo y actualizar el firmware a través del Conexión por cable siempre en segundo plano PC, conectándolo con un cable USB estándar. En nuestra página web www.midland. es, encontrará toda la información actualizada sobre su dispositivo y se podrá descargar Esta funcionalidad permite mantener la conexión por cable siempre activa, incluso... -
Page 65: Garantía Limitada De Midland Iberia
© MIDLAND IBERIA. Queda prohibida la reproducción total o parcial sin el permiso Esta garantía sólo es válida en el país donde se ha adquirido el producto. - Page 67 Comment coupler deux modules BTX2 PRO ..........................................5 Comment coupler le BTX2 PRO a plus de deux modules ......................................6 Associez le Midland BTX2 PRO à un autre Midland BTX2 PRO .....................................6 Conférence ....................................................7 Talk2All – Couplage avec un interphone d’une autre marque ....................................8 Compatibilité...
-
Page 68: Caractéristiques Principales
› Pour une source audio stéréo tel qu’un lecteur iPod/MP3 (avec un câble optionnel) BTX2 PRO SINGLE Attention: Le Midland BTX2 PRO a été conçu pour résister à la pluie et à l’eau. Cependant, › 1 Module BTX2 PRO › 1 Kit de montage glissière avec deux oreillettes stéréo Hi-Fi s’il pleut vérifiez que les capuchons en caoutchouc des connecteurs sont bien en place. -
Page 69: Rechargement Des Batteries
Rechargement des batteries sur le module peut être utiliser pour connecter une source audio tel que un lecteur stéréo iPod/MP3. Attention: Assurez vous que le module soit complètement charger avant la première utili- Attention: Il faut avoir un câble AUX (en option) sation. - Page 70 Débloquer Description du kit de montage à glissière Le Midland BTX2 PRO peut être fixé sur votre casque en utilisant le kit de montage à glissière avec la plaque adhésif double face. Ce méthode vous permette de fixer en toute sécurité votre module BTX2 PRO sur votre casque et de le retirer à n’importe quel moment pour le recharger ou le ranger.
-
Page 71: Allumer Et Eteindre Votre Midland Btx2 Pro
Allumer et eteindre votre Midland BTX2 PRO Distance maximale Vous pouvez atteindre une distance intercom de 1km s’il n’y a pas d’obstacle ou d’inter- Allumage: Appuyez et maintenez la touche “Milieu” enfoncée pendant environ 3 se- ference (Le conducteur doit être toujours a vue). -
Page 72: Comment Coupler Le Btx2 Pro A Plus De Deux Modules
L’interphone à besoin de quelques secondes pour s’activer, vous entendez un bip sonore lorsque l’Intercom est ouvert. Un Midland BTX2 PRO peut être jumelé à trois autres unités BT maximale, cela veut Activation vocale (VOX) dire quatre au total. Le Midland BTX2 PRO dispose de trois boutons principaux (avant, Il suffit de commencer à... -
Page 73: Conférence
de configuration (lumière rouge toujours). Module déjà occupé 5. Maintenant, la procédure de couplage est terminée, vous pouvez aller sur l’appa- Si vous essayez d’ouvrir une connexion Intercom avec une personne qui est déjà occupé riement autre unité sur le bouton différent ou tout simplement quitter le mode de avec quelqu’un d’autre (ou qui est au milieu d’une conversation téléphonique), vous en- configuration pour commencer à... -
Page 74: Talk2All - Couplage Avec Un Interphone D'une Autre Marque
Attention: lorsque le mode « conférence » est active, la fonction « Talk2All- Universal Inter- com » (pour parler avec un interphone n’etant pas de la marque Midland) n’est pas disponible. Aussi, si une unité a été jumelé sur le bouton CTRL (milieu), il est temporaire indispo- nible, vous devez désactiver le mode “conférence”... -
Page 75: Compatibilité Avec Modules De La Gamme Midland Bt
‘Vol –‘ . De cette façon la communication Intercom ne sera pas interrompue de la gamme Midland BT (BT Next, BTX2 and BTX1) seulement si ces dernier ont leur ; par example avec les indications routières sur le GPS. - Page 76 », les lumières bleu et rouge s’allumeront. Après quelques secondes votre téléphone Il y a plusieur façon de passer un appel. affiche « Midland BTX2 PRO ». Suivez la procédure de couplage du téléphone. Si un Depuis le clavier du téléphone : code PIN est nécessaire il faut entrer “0000”...
-
Page 77: Partage De Musique
porte la reconaissance vocale, vous entendez un message qui vous invite à prononcer le Contrôles disponibles: nom du contact à appeler › Lecture/pause : Appuyez sur la touche “Centrale”. Priorité: Les appels ont une priorité haute, ce qui signifie que toutes les communications sont ›... -
Page 78: Comment Ecouter La Radio Fm
“radio FM” vocalement. Maintenant, toutes les trois touches 4. Après quelques secondes “MIDLAND BTX2 PRO” sera affiché sur votre GPS. sont dédiées à la Radio FM (voir la table C). -
Page 79: Installation Et Configuration Speciale
Lorsque vous appuyez longuement sur la touche avant ou arrière, vous scannez vers Pour effectuer cette opération vous devez d’abord entrer en mode configuration: le haut ou le bas les 6 stations enregistrées. Un bip sonore sépare chaque station en- ›... -
Page 80: Configuration Et Mise À Jour Logiciel
5 fois = Sensibilité très haute Le voyant est revenu au Rouge fixe (“Mode Setup”) et les changements sont utilisant la connexion USB vers votre PC. Sur le site web Midland www.midlandeurope. confirmés. com à la page BTX2 PRO vous pouvez trouver le logiciel Pc et le firmware pour la mise 7. - Page 81 Garantie La garantie s’appliquant à l’appareil principal est d’une durée de 24 mois ; elle est de 6 mois pour les accessoires (batteries, chargeurs, antennes, casques d’écoute, micropho- nes). Pour davantage d’informations au sujet de la garantie, veuillez vous rendre sur le site : www.midlandeurope.com Certification de notice européenne CE et informations d’agrément aux fins de sécurité...
- Page 83 Je Midland BTX2 PRO AAN en UIT zetten ..........................................4 Twee Midland BTX2 PRO units aan elkaar koppelen ........................................5 De Midland BTX2 PRO koppelen aan meer dan twee units .....................................6 Conferentie-modus ..................................................7 Talk2All – Universele Intercom met unit van een ander merk ....................................8 De Midland BTX2 PRO koppelen aan Bluetooth apparaten ....................................8...
- Page 84 › 1 USB kabel met dubbele uitgang ning. De Midland BTX2 PRO bevestig je aan de helm met het hechtplaatje of met het De units in de TWIN kit zijn vooraf al onderling gekoppeld en zijn dus direct klaar voor schroefplaatje.
- Page 85 De batterij opladen NB: de hiervoor benodigde AUX kabel zit niet standaard in de verpakking. NB: voor eerste gebruik volledig opladen. Trek tenminste drie uur uit voor de eerste keer opladen voorafgaand aan de eerste ingebruikname. Om de unit op te laden, de muurlader in het laadstation pluggen (voor dit doel het rubberen hoesje opzij schuiven).
- Page 86 Beschrijving van het schuifsysteem om de kit te bevestigen Je Midland BTX2 PRO AAN en UIT zetten Het bevestigen van de Midland BTX2 PRO aan de helm kan van het schuifsysteem met De unit inschakelen: het schroefplaatje. Met deze methode wordt de BTX2 PRO veilig aan je helm ‘bevestigd’...
- Page 87 Om de Midland BTX2 PRO te koppelen aan een andere Midland BTX2 PRO unit, ga › In de FM radio-modus luister je in stereo naar je favoriete radiostation, kun je zoeken je naar de installatiemodus.
- Page 88 Zeg iets willekeurigs, en na enkele seconden zal de communicatie tot stand komen en Een enkele Midland BTX2 PRO kan aan maximaal drie andere BT units worden gekop- geactiveerd blijven zolang je blijft praten. Als er niet wordt gesproken, zal de intercom peld, dus vier in totaal.
- Page 89 Conferentie-modus de unit van die persoon gekoppeld is. De eerdere verbinding wordt dan automatisch verbroken en de nieuwe verbinding komt tot stand. In de conferentie-modus kun je met vier personen tegelijkertijd in gesprek. Met de Mi- Stemactivering/voice activation (VOX) dland BTX2 PRO kun je ook met tot vier personen een één op één gesprek voeren (in de klassieke intercom-modus).
- Page 90 Om te koppelen maak je gebruik van de Vooruit-knop. met A2DP audio of externe mono/stereo A2DP dongel. › Ga op je Midland BTX2 PRO naar de installatie-modus door CTRL zo’n 7 seconden Apparatuur die gekoppeld is via VOL+ heeft voorrang op alle overige communicatie, ingedrukt te houden totdat de LED ononderbroken rood blijft branden.
- Page 91 4. Schakel zichtbaarheid van en voor Bluetooth apparaten in op je telefoon. › Dongle (HFP/A2DP Stereo) 5. Na enkele seconden verschijnt de tekst ‘Midland BTX2 PRO’ op het scherm van je telefoon. Doorloop de stappen om je telefoon te koppelen. Als er wordt gevraagd om een pincode, voer je ‘0000’...
- Page 92 A2DP en AVRCP om in stereokwaliteit muziek te luisteren en de muziekspeler van je telefoon op afstand te bedienen. Je kunt de knoppen op de Midland BTX2 PRO zelfs Als je telefoon gekoppeld is via VOL+: druk kort op Vooruit. Als je telefoon via spraak gebruiken om af te spelen, te pauzeren en vooruit- of terug te spoelen.
- Page 93 › Druk nu stevig VOL+ of VOL- in; het blauwe en het rode lichtje beginnen nu te knipperen. In het algemeen is het mogelijk om de Midland BTX2 PRO te koppelen aan alle voor motoren geschikte navigatiesystemen die voorzien zijn van Bluetooth. Om de koppeling ›...
- Page 94 Standaard staat RDS uitgeschakeld. In- en uitschakelen doe je door VOL+ en Soms kan het nodig zijn om alle koppelingen uit het geheugen van de Midland BTX2 VOL- drie seconden lang ingedrukt te houden terwijl de radio speelt. De systeemstem PRO te wissen.
- Page 95 Doorloop de stappen zoals hiervoor omschreven voor het instellen van de gevoeligheid › Dubbelklik CTRL om de installatiemodus te verlaten en de Midland BTX2 PRO in Met deze procedure wis je alle gekoppelde apparaten uit het geheugen en kun je weer en kies voor de optie waarbij de LED 1 keer oplicht.
- Page 96 Installatie en bijwerken van firmware Garantie Je kunt de firmware voor je Midland BTX2 PRO configureren en bijwerken met een De garantie op de unit zelf geldt voor een duur van 24 maanden. Voor de accessoires USB verbinding aan je PC. Via www.midlandeurope.com vind je de de software en (batterijen, oplader, antennes, headsets, microfoons) geldt een garantieduur van zes eventuele nieuwe firmware voor je BTX2 PRO op de productpagina.
- Page 97 IT / RSM ως προς τις βασικές απαιτήσεις και άλλες σχετικές διατάξεις του Κανονισμού 2014/53/UE. Cte International Srl dichiara che il prodotto è conforme ai requisiti essenziali e alle Η δήλωση συμμόρφωσης είναι διαθέσιμη στην ιστοσελίδα http://www.midlandeurope. disposizioni della Direttiva 2014/53/UE. La Dichiarazione di conformità si può scaricare dal com/it/pagina/10090-certifications sito http://www.midlandeurope.com/it/pagina/10090-certifications...
- Page 98 požiadavkami a ďalšími príslušnými ustanoveniami smernice 2014/53 /UE. Vyhlásenie CTE INTERNATIONAL Srl erklærer at produktet er i overensstemmelse med de viktigste o zhode je k dispozícii na webových stránkachhttp://www.midlandeurope.com/it/ kravene og andre relevante betingelser i Direktivet 2014/53/UE. Samsvarserklæringen finnes pagina/10090-certifications tilg jengelig på...
- Page 99 INFORMAZIONE AGLI UTENTI: i sensi dell’art. 13 del decreto legislativo Alle Artikel, die auf der Verpackung oder der Gebrauchanweisung dieses Symbol 25 luglio 2005, n.151 “Attuazione delle Direttive 2002/95/CE, 2002/96/ tragen, dürfen nicht in den normalen Mülltonnen entsorgt werden, sondern CE e 2003/108/CE, relative alla riduzione dell’uso di sostanze pericolose nelle müssen an gesonderten Sammelstellen abgegeben werden.
- Page 100 I / RSM από το σώμα σας. Importante: L’apparato deve essere utilizzato ad una distanza superiore a 5 cm dal corpo Važno: Oprema se mora koristiti na udaljenosti većoj od 5 cm od tijela UK / CY / IRL/ M Important: The equipment must be used at least 5cm away from the body of use Fontos! Használat közben győződjön meg arról, hogy az eszköz legalább 5cm-re a testétől van.
- Page 101 Vertrieb durch: Bihr S.A.S. www.bihr.eu. Vor Benutzung Bedienungsanleitung beachten. Importado por: MIDLAND IBERIA, SA C/Cobalt, 48 - 08940 Cornellà de Llobregat, Barcelona - España. Antes de utilizar, lea atentamente el manual de uso. Distributed by: BIKEIT Unit 9, Oriana Way Nursling Industrial Estate Southampton, Hampshire SO16 0YU United Kingdom - www.bikeittrade.com.
- Page 102 www.midlandeurope.com...
Need help?
Do you have a question about the MULTI RIDER BTX2 PRO and is the answer not in the manual?
Questions and answers