Midland BTX1 PRO Instruction Manual
Advanced intercom system
Hide thumbs
Also See for BTX1 PRO:
- Installation manual ,
- Instruction manual (106 pages) ,
- Pocket manual (10 pages)

Related Manuals for Midland BTX1 PRO


Summary of Contents for Midland BTX1 PRO
- Page 1 › MANUALE D’USO › INSTRUCTION GUIDE › BEDIENUNGSANLEITUNG › MANUAL DE INSTRUCCIONES › GUIDE D’UTILISATION › マニュアル...
-
Page 2: Table Of Contents
Modalità operative ...................................................... 6 Come abbinare un altro dispositivo BTX1 PRO ............................................6 Compatibilità con i dispositivi della linea BT Midland ..........................................7 Talk 2 All - Universal Intercom per dispositivi non Midland........................................7 Funzione Background ....................................................8 Condivisione della musica ..................................................10 Utilizzo del Navigatore GPS ..................................................11... -
Page 3: Principali Caratteristiche
(distanza massima 300mt). Grazie al suo design sottile, aerodinamico mente la funzione Intercom. ed ai suoi tre tasti centrali grandi e ben riconoscibili Midland BTX1 PRO è la soluzione più avanzata e ideale per il motociclista. Caratteristiche tecniche Midland BTX1 PRO... -
Page 4: Ricarica Delle Batterie
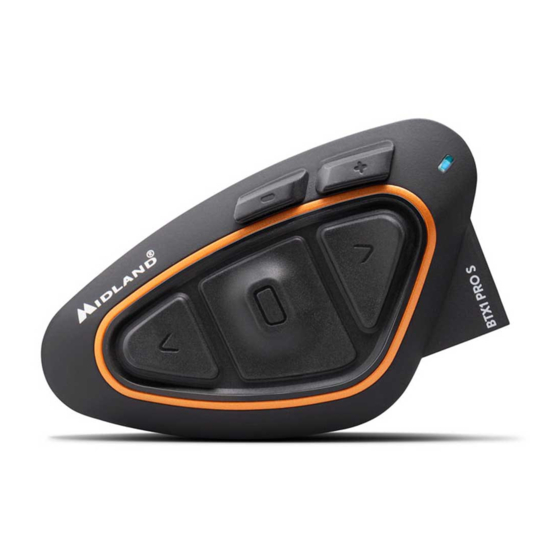
Descrizione BTX1 PRO Il dispositivo BTX1 PRO è dotato di 5 pulsanti, tutti nella parte frontale. I tre pulsanti principali sono pulsanti multifunzione: pulsante Avanti (a sinistra), pulsante Centrale e pulsante Indietro (a destra). - Page 5 Descrizione sistema di fissaggio al casco Il Midland BTX1 PRO è fornito con due sistemi di fissaggio al casco, uno tramite base con biadesivo e l’altro con aggancio a morsetto. Il dispositivo può essere sganciato dal sistema di fissaggio scelto ogni volta che si rende necessaria la ricarica o per custodirlo altrove.
-
Page 6: Accensione E Spegnimento Del Btx1 Pro
Midland BTX1 PRO ha tre modalità di funzionamento distinte: Intercom, Telefono e Radio FM In base alla modalità attiva in un dato momento, le funzioni del BTX1 PRO cambiano e di conseguenza anche i tre pulsanti centrali assumono funzionalità diverse. -
Page 7: Compatibilità Con I Dispositivi Della Linea Bt Midland
Se invece i dispositivi non fanno parte della stessa confezione o avete acquistato un altro manubrio. Potrebbero essere necessari alcuni secondi per l’effettiva apertura della co- BTX1 PRO in un secondo momento (per esempio per il passeggero), dovete prima ese- municazione intercom (un tono audio vi avvisa dell’apertura). Se nessuno parla, dopo 40 guire la procedura di abbinamento. -
Page 8: Funzione Background
Il BTX1 PRO è compatibile anche con le precedenti serie MIDLAND BT (BT Next, BTX1 e Abbinamento al pulsante Vol-: per un secondo telefono con audio mono (protocollo BTX2) solo se aggiornate con la versione firmware 2014 o successive. HFP), dispositivi GPS/Radar detect con audio mono o altri dispositivi con audio mono. - Page 9 Risposta manuale: 2. Attivate la modalità “Setup: spegnete il BTX1 PRO e tenete premuto il pulsante “Centrale” fino a che la luce non rimane di colore rosso fisso. Premere brevemente il pulsante “Avanti” ed iniziare a parlare. 3. Premere il pulsante “Volume+” o “Volume -” fino a quando la luce lampeggia Rosso Rifiutare una chiamata e Blu.
-
Page 10: Condivisione Della Musica
AVRCP, i quali consentono di ascoltare musica stereo e di comandare le principali fun- “Avanti”, l’ultimo numero utilizzato verrà richiamato (sentirete un tono audio di zioni dell’MP3 player. E’ infatti possibile utilizzare i pulsanti presenti sul BTX1 PRO per conferma) gestire le seguenti funzioni: Play, Stop/Pause, Avanti ed Indietro. -
Page 11: Utilizzo Del Navigatore Gps
Utilizzo della funzionalita’ Radio FM Navigatore sempre in sottofondo (funzione background). Il BTX1 PRO è dotato di un ricevitore radio FM integrato. Per utilizzarlo è sufficiente passare alla modalità “FM Radio”. Se si desidera che le indicazioni vocali provenienti dal GPS siano sempre in sottofondo e Modalità... -
Page 12: Utilizzo Dell'ingresso Audio A Filo
Tenete premuto per 3 secondi il pulsante Centrale. Un annuncio vocale vi indicherà in quale modalità state entrando, quando sentirete “FM Radio” potrete utilizzare i pulsanti BTX1 PRO ha un ingresso audio per collegare una sorgente audio a filo, per esempio un del BTX1 PRO per gestire il ricevitore radio (vedi tabella). -
Page 13: Configurazioni Speciali
2. Premete brevemente il pulsante “Indietro” fino a che la luce Blu si accenderà fissa. Spegnete il BTX1 PRO. Tenere premuto il pulsante centrale (“Centrale”) fino a che la 3. Ora premete “Volume +” o “Volume -“ per aumentare o diminuire la sensibilità. La luce non rimane di colore rosso fisso. -
Page 14: Garanzia
Configurazione e aggiornamento firmware possibilità di utilizzo dell’apparecchio ed invalidano la garanzia. Midland BTX1 PRO può essere configurato e aggiornato tramite connessione USB al Per ulteriori informazioni, fate riferimento al nostro sito web: www.midlandeurope.com vostro PC, per migliorare la compatibilità con i dispositivi Bluetooth, quali telefoni e GPS o per risolvere problematiche legate alla funzionalità. - Page 15 Technical specifications of Midland BTX1 PRO .............................................16 Charging batteries ..................................................... 17 Unit and fixing system description ................................................17 Switching ON and OFF your Midland BTX1 PRO ..........................................19 Operative “mode” ......................................................19 How to pair two BTX1 PRO units ................................................19 Set up of the AGC system ..................................................20 Compatibility with older Midland BT line units ............................................20...
-
Page 16: Main Features
› 1 micro USB wall-mounting power supply with double plug BTX1 PRO is fixed on the helmet using the adhesive plate or the screw mounting clamp. The units included in the TWIN kit are already paired and can therefore be immediately Thanks to the audio kit with ultra slim speakers you can enjoy high quality stereo music used in Intercom mode. -
Page 17: Charging Batteries
BTX1 PRO description nector on the microphone allows you choose the microphone that best suits the helmet The BTX1 PRO has five buttons on the front; the main three big button are multi fun- you are using. ctions buttons: the Forward (on the left), the middle button and the Backward (on the right), the two squared buttons are the Volume + and Volume -. - Page 18 By either using the plate with bi-adhesive strip, or the screw plate. These methods allow you to safely “fix” the BTX1 PRO unit onto your helmet and to remove it at any time in order to recharge or store it.
-
Page 19: Switching On And Off Your Midland Btx1 Pro
› In “FM Radio mode” you can listen to your favourite radio station in stereo, seek for a The BTX1 PRO can be easily fitted onto the helmet by sliding it downwards on the sliding specific radio station and save it (6 memories are available). -
Page 20: Set Up Of The Agc System
PRO to a different brand intercom available on the market. Voice activation (VOX) 1. On the BTX1 PRO enter the setup mode: (With the unit OFF press and hold down the Simply say something, after some seconds the communication will be opened and will Middle button about 7 sec., until the Red light is on permanently. -
Page 21: Pairing The Btx1 Pro To Bluetooth Devices
Attention: we can’t guarantee this feature because it is depending on third part device. The BTX1 PRO Conference unit can be paired to other Bluetooth devices, like Pho- ne, GPS Navigator or PMR446 Radio with built-in or external Bluetooth (dongle). - Page 22 Phone on Vol-: Press“Backward”button for 3 seconds in order to redial the last number (you will hear one audio confirmation tone). After pairing your phone to the BTX1 PRO unit you must switch to the “Phone” mode in To make a voice call: order to use it.
-
Page 23: Music Share
Pause, Forward and Backward of the songs. How to pair the BTX1 PRO to a GPS In general it is possible to pair the BTX1 PRO to all the GPS for motorbike that support Bluetooth headset connection. To pair the BTX1 PRO to a GPS, you must first enter the setup mode: 1. -
Page 24: How To Listen To The Fm Radio
Radio” mode in order to use it. Long press the middle button until you hear “FM radio” › Double click on the “Middle” button to exit the “Setup” mode and use the BTX1 PRO. from the voice announcement. Now all the three main buttons are dedicated to the FM Radio (See Table). -
Page 25: Emergency Stop Light
Wired audio input ple when you ride with a passenger), just press long “Backward” and Your Midland BTX1 PRO can be connected to a wired audio source, like an iPod (or any “Forward” button togheter while in “Phone” or “Intercom” mode other MP3 Player). -
Page 26: Setup And Firmware Update
RED. Follow all the procedure described in the previous steps and choose the option of only › Double click on the “Middle” button to exit the “Setup” mode and use the BTX1 PRO. one flash (VOX disabled). This procedure deletes all the paired Bluetooth devices stored in the memory therefore you will not have “Phone”... -
Page 27: Warranty
Use at your own risk The use of the device will impair your ability to hear other sounds and others around you. Listening to music or speaking on a telephone may prevent you from hearing others around you and distract you from riding safely. The use of such device while riding may endanger you and others, and its use, in some areas, could not be allowed. - Page 28 Inhalt Hauptmerkmale ......................................................29 Technische Daten des Midland BTX1 PRO ............................................29 Aufladen des Akkus ....................................................30 Beschreibung des Geräts und Montagehalterung ..........................................30 Ein-/Ausschalten des Midland BTX1 PRO ............................................32 Betriebsarten ......................................................32 Koppeln (Pairen) von Zwei BTX1 PRO- Geräten ..........................................33 Kompatibilität mit älteren Geräten der Midland BT-Produktlinie .......................................33...
-
Page 29: Hauptmerkmale
› 1 Micro-USB-Netzteil Multi-Rider Intercom-System BTX1 PRO Twin- Intercom Set Beim BTX1 PRO handelt es sich um eine sehr kompakte und aerodynamische Gegenspre- › 2 BTX1 PRO Geräte Sets ch-Kommunikationssystemlösung für Motorradfahrer. Alle wichtigen Funktionen sind dank › 2 Slide-In Halterungssätze mit zwei Stereolautsprechern der drei großen Tasten auf der Vorderseite des Gerätes einfach zu bedienen. -
Page 30: Aufladen Des Akkus
Sie es einschalten, nachdem Sie das Netzteil angeschlossen haben. Beschreibung des Geräts und Montagehalterung Ladeanschluss Das BTX1 PRO hat fünf Tasten auf der Vorderseite, wobei die drei großen Tasten Mul- Audiopaket tifunktionstasten sind: Vorwärts (links), die mittlere Taste und Zurück (rechts); die zwei Das Audiosystem umfasst zwei extrem flache Stereo-Lautsprecher und zwei austau- rechteckigen Tasten sind für Lautstärke+ und Lautstärke–. - Page 31 Verkehrsgeräusche und Ihre Blinker hören können. Das Mikrofon kann auf zwei Weisen im Helm befestigt werden: Slide-In Halterungssatz Das Midland BTX1 PRO kann am Helm befestigt werden, indem man die Slide-In Hal- Schwanenhalsmikrofon terung auf zwei verschiedene Weisen anbaut: entweder mittels des Klebestreifens oder Befestigen Sie den Bereich mit dem Klettband/Klebestreifen zwischen der Polsterung mittels der Schraubenplatte.
-
Page 32: Ein-/Ausschalten Des Midland Btx1 Pro
Befestigen und Entfernen des Midland BTX1 PRO Das BTX1 PRO kann problemlos am Helm befestigt werden, indem es nach unten auf die Slide-In Halterung geschoben wird. Das BTX1 PRO wird durch den Befestigungsclip auf der Oberseite (A) in Position gehalten. -
Page 33: Koppeln (Pairen) Von Zwei Btx1 Pro- Geräten
Sie die Taste erneut, bis die Sprachansage die Aktivierung zugekauft wurde, müssen Sie die Geräte zuerst koppeln. bestätigt. Die aktuelle Einstellung wird auch nach Ausschalten des Gerätes beibehalten. Um ein BTX1 PRO mit einem anderen BTX1 PRO zu koppeln, müssen Sie zunächst den Anpassen der Lautstärke Setup-Modus aufrufen: 1. -
Page 34: Talk 2 All - Kopplung (Pairing) Mit Einem Intercom Gerät Anderer Marken
BTX1 FM kompatibel. Wenn sie gekoppelt sind, hängt die Reichweite der Gegensprechfun- GPS Navigationsgerät oder PMR446 Funkgeräten mit eingebautem oder externem ktion von dem Gerät ab, das die geringere Reichweite hat. Das BTX1 PRO ist mit Geräten (Dongle) Bluetooth. der vorigen Midland BT-Produktlinie (BT Next, BTX2 und BTX1) nur kompatibel, wenn sie Die Kopplung wird mittels des „Volume+“... - Page 35 Sie können die Verbindung des Gerätes, das über Vol- verbunden ist, immer im Hinter- Um das BTX1 PRO mit einem Mobiltelefon zu koppeln, müssen Sie zunächst den Se- grund laufen lassen. Dadurch wird die Intercom Verbindung z.B. nicht mehr durch Na- tup-Modus aufrufen: vigationsansagen oder Audio Mono Geräte unterbrochen.
-
Page 36: Das Btx1 Pro Mit Einem Gps-Navigationsgerät Koppeln
Ihnen ermöglichen, Stereo-Musik zu hören und Ihren MP3 Player im Mobiltelefon Mit der Tastatur des Mobiltelefons: fernzusteuern. Sie können auch die Tasten am BTX1 PRO Gerät nutzen, um die Abspiel- Wählen Sie die Nummer auf der Tastatur des Mobiltelefons: funktionen (Wiedergabe, Pause, Vorspulen und Zurückspulen) zu steuern:... -
Page 37: Music Share (Musik Weiterleiten)
„Vorwärts“- und „Zurück“-Taste gedrückt. Sie hören einen Bestätigungs-Signalton. › Starten Sie die Bluetooth Suche auf Ihrem Navigationsgerät. › Nach einigen Sekunden wird „Midland BTX1 Pro“ auf dem Display angezeigt. Der Sender überschreibt den vorbelegten Sender, der zuletzt verwendet wurde. › Befolgen Sie die Anweisungen Ihres Navigationsgerätes. Falls eine PIN benötigt wird Dank des RDS-Systems wählt das UKW-Radio für das aktuelle Radioprogramm das... -
Page 38: Verwenden Eines Pmr 446 Funkgeräts Mit Integriertem Bluetooth
Um das Intercom manuell zu aktivieren müssen Sie zuerst in den Sie können Ihr Midland BTX1 PRO mit einer kabelgebundenen Tonquelle wie zum Bei- „Intercom“-Modus wechseln. spiel einem iPod oder einem anderen MP3-Player verbinden. Aktivierung / Deaktivierung des UKW Radios Musik wiedergeben Standardmäßig ist das UKW Radio aktiviert. -
Page 39: Bremslicht
Die Werkseinstellung Alle Pairing- (Kopplungs-) Informationen zurücksetzen des BTX1 PRO ist „niedrig“. Sie können die VOX Funktion auch deaktivieren, um die Wurde Ihr BTX1 PRO bereits öfter mit anderen Geräten gekoppelt, dann kann die Zahl Gegensprech- und Telefon-Antwortfunktion nur im manuellen Modus zu aktivieren. -
Page 40: Setup Und Firmware-Aktualisierung
3. Drücken Sie erneut die „Zurück“-Taste. Die blaue LED blinkt mehrmals auf, um Ihnen die ausgewählte Empfindlichkeit anzuzeigen: Die Firmware Ihres BTX1 PRO kann mittels einer USB-Verbindung mit Ihrem PC kon- 1x Aufblinken = VOX deaktiviert figuriert und aktualisiert werden. Auf der Website von Midland www.midlandeurope.com 2x Aufblinken = niedrige Empfindlichkeit oder unter www.btupdater.de finden Sie auf der BTX1 PRO-Seite die PC-Software und... - Page 41 sätzliche Herstellergarantie gewährt wird, kann der Kunde sich auch direkt an den Her- Die Gewährleistung deckt auch keine Defekte oder Folgeschäden ab, die durch mis- steller oder seinem autorisierten Servicepartner wenden. Zusätzliche Garantieleistungen sbräuchliche Nutzung des Produktes, zusätzliche Software oder Zubehörteile von Frem- sind freiwillige zeitlich beschränkte Zusatzleistungen von Alan Electronics GmbH für in dherstellern, die nicht vom Hersteller geliefert oder als geeignet deklariert wurden, oder Deutschland verkaufte Geräte und gelten nur, wenn die zusätzliche Herstellergarantie in...
- Page 42 Indice Características principales ..................................................43 Especificaciones técnicas del Midland BTX1 PRO ..........................................43 Carga de baterías ......................................................44 Descripción del dispositivo y del sistema de montaje ...........................................44 Encender y apagar el BTX1 PRO ................................................46 Modos de operación ....................................................46 Cómo sincronizar otro BTX1 PRO................................................46 Talk 2 All - Universal Intercom: sincronización con Intercomunicadores de otras marcas ..............................
-
Page 43: Características Principales
› 1 kit de montaje con dos altavoces estéreo › 1 micrófono de varilla regulable y 1 micrófono de hilo Atención: Midland BTX1 PRO se ha diseñado para resistir la lluvia. Verifique siempre que las › 1 sistema de fijación al casco con biadhesivo gomas de protección estén bien cerradas. -
Page 44: Carga De Baterías
Los dos altavoces estéreo llevan una tira de velcro adhesiva que permite su fijación en el BTX1 PRO dispone de cinco teclas en el frontal: las tres grandes teclas principales son interior del casco. Tenga en cuenta no cubrir completamente su oreja con los altavoces, multifunción: Adelante (izquierda en el dibujo), Central y Atrás (derecha) y los dos boto-... - Page 45 Descripción del sistema de montaje en el casco El Midland BTX1 Pro puede fijarse al casco de dos formas: usando la lámina con biadhesivo o la lámina con mordaza. Estos métodos permiten tanto fijar de forma segura el BTX1 PRO al casco como retirarlo en cualquier momento para cargarlo o guardarlo.
-
Page 46: Encender Y Apagar El Btx1 Pro
El BTX1 PRO se puede fijar al casco fácilmente deslizándolo hacia abajo en el soporte mensaje vocal le dirá en que modo se encuentra. La secuencia del cambio de modo es hasta que encaje en la ranura. El BTX1 PRO se mantiene en posición gracias al clip de la siguiente: fijación de la parte superior del soporte (A) -
Page 47: Talk 2 All - Universal Intercom: Sincronización Con Intercomunicadores De Otras Marcas
El BTX1 PRO sólo es compatible con la anterior línea Activación manual: de Midland BT (BT Next, BTX2 y BTX1) si ésta se actualiza a la versión de firmware de 2014 o posterior. Con las unidades encendidas, pulse la tecla central en una de las dos unidades. La comuni- cación se activa y permanece de este modo hasta que se vuelve a pulsar la tecla central. -
Page 48: Sincronizar Btx1 Pro A Dispositivos Bluetooth
GPS con audio A2DP, o conector externo mono/estéreo A2DP. › Todos los dispositivos sincronizados con la tecla “Vol+” tienen mayor prioridad e inter- El BTX1 PRO permite mantener siempre de fondo la conexión de audio del dispositivo rumpirán las otras comunicaciones (como Intercom, radio FM y la música). - Page 49 Cómo sincronizar el teléfono Rellamar al último número : Para sincronizar el BTX1 PRO al teléfono, sólo es necesario entrar en modo “Setup” : Teléfono en “Vol +”: Presione la tecla “Adelante” durante 3 segundos para llamar al últ- › Apague la unidad imo teléfono (escuchará...
-
Page 50: Compartir Música
A2DP y AVRCP, los cuales permiten escuchar música estéreo y gestionar las funciones Se puede sincronizar cualquier navegador GPS específicamente diseñado para la moto principales de reproductor MP3. De hecho es posible utilizar las teclas del BTX1 PRO que acepte un auricular Bluetooth para las siguientes funciones: Play, Stop/Pause, Adelante y Atrás. - Page 51 Intercom de forma manual deberá salir del modo “Radio FM” y pasar a modo “Intercom”. El BTX1 PRO integra un receptor de Radio FM con RDS. Para utilizarlo, sólo tiene que entrar en modo “Radio FM”. Desactivar/Activar la Radio FM Modo “Radio FM”...
-
Page 52: Entrada De Audio Por Cable
› Pulse al mismo tiempo las teclas “Volume+” y “Volume-” durante 3 segundos. El LED azul se enciende durante 1 segundo y volverá a rojo fijo En la parte trasera del kit de montaje de su BTX1 PRO tiene una luz de frenada de emer- www.midlandeurope.com... -
Page 53: Setup Y Actualización De Firmware
› Haga doble click en la tecla “Central” para salir del modo “Setup” y usar el BTX1 PRO de ser la sensibilidad. En un casco tipo Jet y una “custom” se debe ajustar una sensibilidad baja o muy baja. Por el contrario, en un scooter con casco modular o integral, la sensibilidad Atención: este proceso no elimina las referencias a los equipos acoplados... -
Page 54: Garantía Limitada De Alan Communications
peligro para Usted y los de su alrededor y, en algunos países, existen claras restricciones › La factura original de compra, con el nombre y la dirección del distribuidor y la fecha legales al respecto. y el lugar de compra El uso de este a un volumen alto, puede producir perdida permanente de audi- dispositivo... - Page 55 Las modificaciones que no están aprobadas por el fabricante invalidan la garantía. © MIDLAND IBERIA. Queda prohibida la reproducción total o parcial sin el permiso por escrito del titular. Para más información, visite nuestra web: www.midland.es...
- Page 56 Sommaire Caractéristiques principales ..................................................57 Spécification technique du Midland BTX1 PRO ........................................... 57 Rechargement des batteries ..................................................58 Description du module et fixation ................................................58 Allumer et eteindre votre Midland BTX1 PRO............................................60 “Mode” de fonctionnement ..................................................60 Comment coupler deux modules BT X1 ..............................................60 Configurer le système AGC ..................................................61...
-
Page 57: Caractéristiques Principales
› 1 plaque avec adhésif double face pour fixer le module sur le casque Attention: Le Midland BTX1 PRO a été conçu pour résister à la pluie et à l’eau. Cependant, s’il › 1 plaque avec vis de serrage pour fixer le module sur le casque pleut vérifiez que les capuchons en caoutchouc des connecteurs sont bien en place. -
Page 58: Rechargement Des Batteries
Le BTX1 PRO possède 5 touches sur l’avant. Les trois principaux sont : Avancé (sur la Le mini-connecteur sur le microphone vous permet de choisir le type de microphone qui gauche), la touché... - Page 59 à le bloquer en place. Description du kit de montage à glissière Le Midland BTX1 PRO peut être fixé sur votre casque en utilisant le kit de montage à glissière de deux façon différentes, soit en utilisant la plaque avec adhésif double face ou alors la plaque avec vis.
-
Page 60: Allumer Et Eteindre Votre Midland Btx1 Pro
Le BTX1 PRO peut fonctionner de trois façons différentes : Intercom, Téléphone et Ra- Le BTX1 PRO peut être facilement mise en place sur le casque en le faisant glisser vers le dio FM Les 3 touches multi fonctions ont différentes fonctionnalité qui dépendent du bas sur le kit de montage à... -
Page 61: Comment Coupler Deux Modules Bt X1
Si les appareils ne font pas partie du même kit ou les unités ont été acheté séparément, vous devez d’abord les coupler afin de les utiliser. Réglage du volume Pour coupler le BTX1 PRO à un autre BTX1 PRO, vous devez tout d’abord entrer en Votre Midland... - Page 62 Pour activer la communica- › Phone (HFP/A2DP Stereo) › Phone (HFP Mono) tion intercom avec le BTX1 PRO suivez les instructions “Activation manuelle”; sur l’autre › GPS (HFP/A2DP Stereo) › GPS mono ›...
- Page 63 Comment coupler le BTX1 PRO avec un telephone Répondre à un appel Pour coupler le BTX1 PRO avec un téléphone , il faut d’abord entrez dans le mode de Quand vous entendez la sonnerie, vous pouvez répondre de deux manières :...
-
Page 64: Partage De Musique
Quand le partage de la musique est actif, vous ne pouvez pas maintenir ouverte la com- munication intercom. Comment connecter le BTX1 PRO à un GPS En général il est possible de connecter le BTX1 PRO à tous les GPS pour moto qui sup- porte le protocole Bluetooth “headset”. www.midlandeurope.com... -
Page 65: Comment Écouter La Radio Fm
Comment écouter la radio FM Pour connecter le BTX1 PRO a un GPS, vous devez d’abord entrez en configuration : › Éteignez le module. Le récepteur radio FM est intégré dans l’appareil. Vous avez juste besoin de basculer en › Appuyez sur la touche centrale et maintenez-la pendant 7secondes, jusqu’à ce que le mode “Radio FM”... -
Page 66: Entrée Audio Filaire
Entrée audio filaire (par exemple lorsque vous roulez avec un passager), il suffit d’ap- Votre Midland BTX1 PRO peut être connecté à une source audio filaire, comme un iPod puyer longuement et simultanément sur les touches “arrière” et (ou tout autre lecteur MP3). -
Page 67: Installation Et Configuration Speciale
Installation et configuration speciale BTX1 PRO est “faible “. Il est également possible de désactiver la fonction VOX pour activer l’Intercom et appel téléphonique fonctionnalités répondant uniquement en mode Remise à zéro manuel. Parfois, il peut être nécessaire de supprimer toutes les références de couplage enregi- Régler la sensibilité... -
Page 68: Configuration Et Mise À Jour Logiciel
Pour de plus amples informations, veuillez visiter notre site Internet: www.midlandeurope. Il est possible de configurer et de mettre à jour le logiciel embarqué du BTX1 PRO en utilisant la connexion USB vers votre PC. Sur le site web Midland www.midlandeurope.com à... - Page 69 www.midlandeurope.com...
- Page 70 目次 BTX1 PRO Intercom System の特徴 ..................................................73 安全にお使いいただくために ....................................................73 各部の名称 ............................................................74 使い方 ..............................................................74 操作モード ............................................................76 ペアリングのしかた ........................................................77 インターカムの使用方法 ......................................................78 携帯電話/ミュージックプレイヤーとのペアリング (Bluetooth) ....................................79 GPS ナビ/レーダーとのペアリング (Bluetooth) ............................................80 ペアリング情報のリセット ....................................................81 FM ラジオを聞く ...........................................................82 外部入力端子への接続 ......................................................83 その他の機能 ..........................................................83 こんなときは? ..........................................................84 www.midlandeurope.com...
-
Page 71: Btx1 Pro Intercom System の特徴
BTX1 PRO インターカムシステムをご購入いただき誠にありがとうございます。 警告 故障かな?と思ったら、ページの 「こんなときは?」 に該当する症状がないかご確 本製品を道路上で使用する場合は、各地方自治体の条例、各都道府県 認ください。 の道路交通法に従ってください。 それでも正常に動作しないときは、販売店にご相談ください。 大音量を聞きながら運転しないでください。 運転に必要な様々な音が聞き取れなくなり、重大な事故の原因となります。 また、音に集中すると運転意識の低下につながります。 BTX1 PRO Intercom System の特徴 医療機器などの近くでは電源を切ってください。 Bluetooth の電波は微弱ですが、医療向け計測器、心臓ペースメーカーなど ●大きな3つのボタンでかんたん操作 の近くでは使用を控えてください。 ●ウルトラスリムスピーカーを使用したハイクオリティーな音質 飛行機の中では使用しないでください。 ●周囲の雑音やスピードに応じボリュームを自動コントロール (AGC 機能) ●通話距離 300m (妨害電波が無く、相手が見通せる環境下) 電波が影響を及ぼし、事故の原因になる恐れがあります。 ●最大2台 (ミッドランド社製:1 台 他社製1台) までインカムを登録 本製品を分解・改造しないでください。 ● Talk2All-Universal Intercom 機能 (他社のインターカムとの通話が可能)... -
Page 72: 各部の名称
各部の名称 使い方 ■ 本体 ⑤ ④ 使用時に、製品本体のゴムキャップを、しっかり閉じてください。 接続端子に雨などが入り故障の原因になります。 ①フォワードボタン ②ミドルボタン 充電のしかた ③バックワードボタン ※ 本製品を使用する前に充電してください。 ④ボリューム⊕ ※ 充電器は、別途 USB 充電器をご用意ください。 ⑤ボリューム⊖ 本体のラバーカバーを外して、チャージ端子に ⑥チャージ端子 マイクロ USB 接続ケーブルを接続する。 minUSB 接続ケーブルを接続し、充電します。 ① ② ③ ⑥ 充電器とマイクロ USB 接続ケーブルを接続する。 ※パソコンと接続して、ソフトウェアアップデートを行う ときにも使用します。 充電器をコンセントに差し込んで、充電を開始する。 ※チャージ端子は、外部入力端子と兼用です。 ※ 充電が開始されると赤色 LED が点滅します。 ⑥外部入力端子... - Page 73 ② ヘルメットの取り付け部分から油分などの汚れを除去して、きれいな状態に 装着のしかた します。 ③ 貼り付け型ブラケットの粘着シートのフイルムをはがし、装着面に貼り付けます。 ステレオスピーカーを取り付ける。 しばらくそのまま固定して、装着を完全にしてください。 ヘルメット内部の耳に当たる部分に付属の両面 テープとマジックテープでスピーカーを取り付 ◦クランプ型ブラケットを使用する場合 けます。 クランプ型ブラケッ ト ※ ブラケットをネジで固定する前に、本体をブラケッ スライド 注意 トに取り付けた状態で最善の装着場所を確認してく マウンティング z 運転中に周囲の交通状況を聞けるよう、両耳を完全にふさいでしまうような キッ ト ださい。 取り付けかたをしないよう注意してください。 ① クランプ型ブラケットとスライドマウンティング キットを付属のネジ (2 本) で仮止めします。 ② ヘルメットの下から挟み込み、ネジを締め付けます。 マイクを取り付ける。 (2 種類) マイクは、2 種類付属しています。 ヘルメッ ト 注意...
-
Page 74: 操作モード
操作モード ● 操作一覧表 ボタン フォワードボタン ミドルボタン バックワードボタン ■ インターカムモード モード インターカム通話を行う時に使用するモードです。 インターカム 短押し:登録した相手との 短押し:登録した相手 短押し:- ミドルボタンを使用して、ライダーとパッセンジャー間のインターカム通話を開始します。 インターカム通話/通話の のインターカム呼出 長押し:- 終了 し/通話の終了 ※ インカムを登録 (ペアリング) するとインターカムモードへの切り替えができます。 長押し:- 長押し:モード切替 ■ フォーンモード フォーン 【ボリューム⊕とペアリン 短押し:音楽の再生 【ボリューム⊖とペアリ (スタンバイ中) グした携帯電話】 長押し:モード切替 ングした携帯電話】 携帯電話の応答や音楽を聴くことができるモードです。 短押し:ボイスダイヤル発信 短押し:ボイスダイヤル ※... -
Page 75: ペアリングのしかた
■ BTX1 PRO 同士のペアリング 本製品の電源を OFF にする。 ミドルボタンを赤色 LED が点灯するまで、約7秒間押し続けてセットアップモード ドライバー 2 にする。 ミドルボタンを約3秒押してペアリングモードにする。 ※ ペアリングモードに入ると青色と赤色の LED が交互に点滅します。 もう 1 台の BTX1 PRO を1. ~3. の手順に従い、ペアリングモードにする。 ドライバー 3 ※ 自動で登録操作が開始されます。 (Talk2All-Universal Intercom 機能 ) ※ 登録が完了すると、青色と赤色の LED の点滅が終了し、赤色 LED が点灯します。 ※ インターカム通話するごとに前のインターカム通話は、切断されます。 ミドルボタンを2回押して、セットアップモードを終了する。... -
Page 76: インターカムの使用方法
※ ミドルボタンに登録されたミッドランド製インカムのみ、インターカム呼び出しが 可能です。 マニュアル操作 ● インターカム通話するには ※ 必ずインターカムモードで操作してください。 マイクに向かって話しかける。 ※ 数秒後にビープ音が聞こえ、インターカム通話が開始されます。 ミッドランドのインカムとインターカム通話する場合 ● インターカム通話するには (呼び出す) ● インターカム通話をやめるには BTX1 PRO:ミドルボタンを押す。 お互いに話をしない状態が約 40 秒間続くと自動的にインターカム通話をやめます。 ※ 数秒後にビープ音が聞こえ、インターカム通話が開始されます。 すぐに通話をやめたい場合は、ミドルボタンを押します。 ● インターカム通話をやめるには (切る) ● ボイスアクティベーション設定 (オン/オフ) を一時的に切り替えるには インターカム通話開始時と同じボタンを再度押します。 バックフォワードボタンを “ボックス機能オン” または “ボックス機能オフ” がガイダン ※ ビープ音が聞こえ、インターカム通話を終了します。 スされるまで約7秒間押します。... -
Page 77: 携帯電話/ミュージックプレイヤーとのペアリング (Bluetooth
※ 音声認識の精度は、携帯電話の音声認識機能に依存します。 状態にする。 ※ お使いの機器 (携帯電話など) に本製品が認識されると、Midland BTX1 PRO と表 電話を切る 示されます。 ※ ペアリングする機器 (携帯電話など) の Bluetooth 登録や操作については、お使い 通話中の電話の切り方は 3 通りあります。 の機器に付属のマニュアルを参照してください。 A:相手が電話を切るまで待つ。 (自動的に電話が切れます。 ) Midland BTX1 PRO を選択し、PIN CODE ( 0000) を入力する。 B:フォワードボタンを押す。 C:携帯電話を操作して電話を切る。 ※ 登録が完了すると、自動でペアリングモードから抜け、青色 LED がゆっくり点滅 し、使用できる状態となります。 www.midlandeurope.com... -
Page 78: Gps ナビ/レーダーとのペアリング (Bluetooth
短縮ダイヤルを使う 音楽をシェアする (ライダーとパッセンジャー) 短縮ダイヤルを1つ登録することができます。 ライダーの聞いている音楽をパッセンジャーが一緒に聞くことができる機能です。 短縮ダイヤルの登録は、BTUPDATER ( WinPC ソフト) ※ インターカム通話、電話で通話中に音楽をシェアすることはできません。 または BTSET アプリ (アンドロイド専用) を使用して登録します。 ※ ミュージックシェアできるインカムは、ライダーのインカムのミドルボタンにペア 短縮ダイヤルの登録方法等は、BT UPDATER または BTSET アプリの説明書を参照してく リングされたインカムのみです。 ださい。 ※ ミュージックシェア中のインカムとの最大通信距離は、10 mです。 BTUPDATER、BTSET アプリのインストール方法および使用方法は、以下の URL を参照し ● ミュージックシェアを開始する てください。 BTUPDATER:http://www.midlandradio.jp/support/dl.html ミドルボタンを3秒間押し、パッセンジャーのインカムをインターカムまたは BTSET アプリ:http://www.midlandradio.jp/support/manual.html フォーンモードにする。 ミドルボタンを3秒間押し、ライダーのインカムをフォーンモードにする。... -
Page 79: ペアリング情報のリセット
する。 する。 ボリューム⊕とボリューム⊖ボタンを同時に約3秒間押し続ける。 ※ 数秒後、GPS ナビの場合、Midland BTX1 PRO と表示されます。 ※ 青色 LED が点灯し、接続機器情報のリセットが開始されます。 ※ ペアリング情報のリセットが終了すると、赤色 LED が点灯します。 Midland BTX1 PRO を選択し、PIN CODE ( 0000) を入力する。 ミドルボタンを 2 回押す。 ※ GPS ナビ等の Bluetooth デバイスのペアリング方法及び操作については、製品付属の セットアップモードを終了し、ペアリング情報をリセットします。 マニュアルを参照してください。 ※ 登録が完了すると、自動でペアリングモードから抜け、青色 LED がゆっくり点滅し、 使用できる状態となります。... -
Page 80: Fm ラジオを聞く
FM ラジオを聞く 登録したラジオ局を聞く ミドルボタンを押して、ラジオを ON にする。 本製品で FM ラジオを聞くことができます。 フォワードボタンまたはバックワードボタンを長押しする。 ミドルボタンを3秒間押し、操作モードを FM ラジオモードにしてページの 「操作一覧 表」 のように操作してください。 メモリー番号がガイダンスされるので、選局したいメモリー番号までフォワードボ ※ FM ラジオモードでは外部入力端子の音声を聞くことができません。 タンまたはバックワードボタンを長押しする。 ● FM ラジオモードでのインターカム通話 FM ラジオを使用しない ミドルボタンに登録されている相手のみ、ボイスアクティベーション機能を使用してイ ンターカム呼び出しができます。 操作モード切替時、FM ラジオモードを出てこないようにすることができます。 ※ マニュアル操作で通話相手を呼び出す場合は、必ず操作モードをインターカムにし ※ “FM ラジオを使用しない “を設定した場合、FM ラジオが聞けなくなります。 て操作してください。 ● 設定方法 電源を... -
Page 81: 外部入力端子への接続
ミドルボタンを赤色 LED が点灯するまで、約7秒間押し続けセットアップモードに ソフトウェア (Firmware) のアップデート する。 PC と本製品を USB ケーブルで接続し、ソフトウェア (Firmware) をアップデートできます。 フォワードボタンとミドルボタンを同時に3秒間押す。 ミッドランドのホームページの BTX1 PRO のページから PC ソフトウェア、アップデート ※ 青色 LED が点滅した後、赤色 LED が点灯し、セットアップモードになります。 マニュアル、ソフトウエア (Firmware) をダウンロードしインストールしてください。 ・青色 LED が1回点滅:ON( 有効 ) ・青色 LED が3回点滅:OFF ( 無効) Web サイト:www.midlandradio.jp/support.html ※... -
Page 82: こんなときは
する。 マイクの白色のマークが口側に向いているか確認してく フォワード、ミドル、バックワードボタンを同時に3秒間押す。 ださい。 ※ 初期化が開始され、青色 LED が点灯します。 マイクと口の間隔を5mm 程度にしてください。 ※ 初期化が終了すると赤色 LED が点灯します。 通話相手の声が聞こえない スピーカーの音量を上げてください。 ミドルボタンを2回押して、セットアップモードを終了する。 オーディオキットが本体に正しく接続されているか確認 してください。 BTX1 PRO が携帯電話とうま 本機の電源が ON になっているか確認してください。 く連動しない バッテリーが十分に充電されているか確認してください。 携帯電話が通話可能かどうか確認してください。 携帯電話の Bluetooth 機能が ON になっているか確認し てください。 本機と携帯電話のペアリングが正常に完了しているか確 認してください。 過度の風切音 風の影響の少ない場所へマイクを移動させてください。 総代理店:株式会社LINKS 〒604-8025 京都市中京区下大阪町349-6 イシズミビル7F TEL:075-708-2362 FAX:075-708-2372... - Page 83 www.midlandeurope.com...
- Page 84 RTTE CTE INTERNATIONAL Srl verklaart dat het product overeenstemt met de voorschriften en andere bepal- I / RSM ingen van de richtlijn 1999/5/EC (uit 13/06/2017, richtlijn 2014/53/UE). De conformiteitsverklaring is Cte International Srl dichiara che il prodotto è conforme ai requisiti essenziali e alle disposizioni della Direttiva voorhanden op de website http://www.midlandeurope.com/it/pagina/10090-certifications 1999/5/CE (dal 13/06/2017 alla Direttiva 2014/53/UE).
- Page 85 CTE International patvirtina, kad šis modelis atitinka visus esminius Direktyvos 1999/5/EC bei su ja susijusių dokumentų reikalavinus (IŠ 13.06.2017, Direktyva 2014/53 / UE). Atitikties deklaracija yra pateikiama http://www.midlandeurope.com/it/pagina/10090-certifications internetinėje svetainėje CTE INTERNATIONAL Srl deklarē, ka produkts atbilst pamatprasībām un citiem ar to saistītajiem Direktīvas 1999/5/EK noteikumiem (NO 13.06.2017, Direktīvu 2014/53 / UE).
- Page 86 • INFORMAZIONE AGLI UTENTI: i sensi dell’art. 13 del decreto legislativo 25 luglio • Alle Artikel, die auf der Verpackung oder der Gebrauchanweisung dieses Symbol tragen, dürfen nicht in den normalen Mülltonnen entsorgt werden, sondern müssen an gesonder- 2005, n.151 “Attuazione delle Direttive 2002/95/CE, 2002/96/CE e 2003/108/CE, ten Sammelstellen abgegeben werden.
- Page 87 Prodotto o importato da: CTE INTERNATIONAL srl Via. R.Sevardi 7 42124 Reggio Emilia - Italia. Prima dell’uso leggere attentamente le istruzioni. Produced or imported by: CTE INTERNATIONAL srl Via. R.Sevardi 7 42124 Reggio Emilia - Italy. Read the instructions carefully before installation and use. Vertrieb durch: ALAN ELECTRONICS GmbH Daimlerstraße 1K - D-63303 Dreieich Deutschland.
- Page 88 DoC nr 2016041201 Firma Manufacturer: CTE INTERNATIONAL srl Address : Via Roberto Sevardi n° 7 - 42124 Mancasale (Reggio Emilia) ITALY BTX1 PRO Product name : Product Type : Bluetooth Headset Intercom Brand : MIDLAND The product described above is in conformity with the following specifciation based on sample testing :...
- Page 89 F / LUX / CH I / RSM Important: l’appareil doit être utilisé à une Importante: O equipamento tem de ser Importante: L’apparato deve essere distance supérieure à 5cm du corps. usado a uma distância do corpo superior utilizzato ad una distanza superiore a 5 a 5cm.
- Page 90 www.midlandeurope.com...
Need help?
Do you have a question about the BTX1 PRO and is the answer not in the manual?
Questions and answers