Table of Contents
Advertisement
Quick Links
INSTALLATION & OPERATION MANUAL FOR
ITW Food Equipment Group, LLC
An Illinois Tool Works Company
701 South Ridge Avenue, Troy, OH 45374
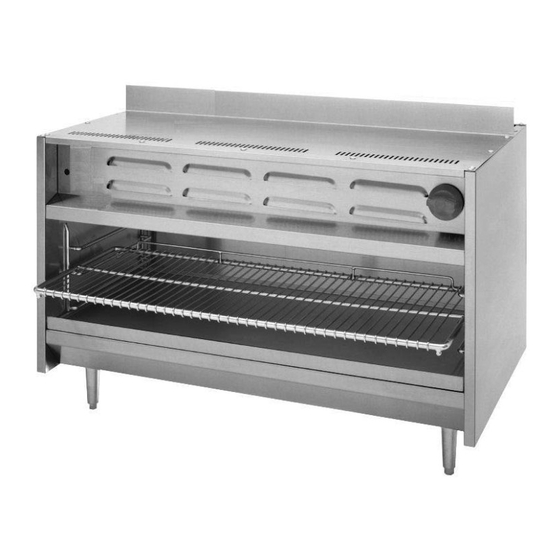
Cheesemelters
MODELS
MLS
VCM24
ML-135124
VCM34
ML-135123
VCM36
ML-135126
VCM48
ML-135127
VCM60
ML-135128
VCM72
ML-135129
www.vulcanhart.com
MODELS
MLS
CMJ24
ML-135124
CMJ34
ML-135123
CMJ36
ML-135126
CMJ48
ML-135127
CMJ60
ML-135128
CMJ72
ML-135129
www.wolfrange.com
FORM F-36954 (06-06)
Advertisement
Table of Contents

Summary of Contents for Vulcan-Hart VCM24 ML-135124
- Page 1 INSTALLATION & OPERATION MANUAL FOR MODELS VCM24 VCM34 VCM36 VCM48 VCM60 VCM72 www.vulcanhart.com ITW Food Equipment Group, LLC An Illinois Tool Works Company 701 South Ridge Avenue, Troy, OH 45374 Cheesemelters ML-135124 ML-135123 ML-135126 ML-135127 ML-135128 ML-135129 MODELS CMJ24 CMJ34 CMJ36 CMJ48 CMJ60...
-
Page 2: Important For Your Safety
IMPORTANT FOR YOUR SAFETY THIS MANUAL HAS BEEN PREPARED FOR PERSONNEL QUALIFIED TO INSTALL GAS EQUIPMENT, WHO SHOULD PERFORM THE INITIAL FIELD START-UP AND ADJUSTMENTS OF THE EQUIPMENT COVERED BY THIS MANUAL. POST IN A PROMINENT LOCATION THE INSTRUCTIONS TO BE FOLLOWED IN THE EVENT THE SMELL OF GAS IS DETECTED. -
Page 3: Installation
INSTALLATION, OPERATION AND CARE OF Cheesemelters are produced with quality workmanship and material. Proper installation, usage and maintenance of your Cheesemelter will result in many years of satisfactory performance. Model VCM24, CMJ24 VCM34, CMJ34 VCM36, CMJ36 VCM48, CMJ48 VCM60, CMJ60 VCM72, CMJ72 Before installing, verify that the type of gas supply (natural or propane) agrees with the specifications on the rating plate located underneath the grease drip pan. -
Page 4: Installation Codes And Standards
The installation location must allow adequate clearances for servicing and proper operation. While another gas-fired cheesemelter can be placed adjacent to this Cheesemelter, there must be no obstruction to the front of the Cheesemelter. A minimum front clearance of 36" (91 cm) is required. Do not obstruct the flow of combustion and ventilation air. -
Page 5: Gas Connections
Fig. 1 1. Remove existing rear shelf and install the reinforced high shelf. 2. Install mounting brackets on both top corners of reinforced shelf, using the four bolts provided. 3. Place and align Cheesemelter on top of brackets; place the back of the unit flush with the rear of the shelf. -
Page 6: Gas Pressure Regulator Installation
GAS PRESSURE REGULATOR INSTALLATION Gas regulator pressure is preset at 5” Water Column (W.C.) for natural gas, and 10” W.C. for propane gas. No further adjustment should be required. Install the regulator as close to the cheesemelter on the gas supply line as possible. Make sure that the arrow on the underside of the regulator is oriented in the direction of gas flow to the cheesemelter (Fig. -
Page 7: Operation
WARNING: THE CHEESEMELTER AND ITS PARTS ARE HOT. BE CAREFUL WHEN OPERATING, CLEANING OR SERVICING THE CHEESEMELTER. CONTROLS Burner Valve — the burner valve regulates the flow of gas throughout the Sliding Shelves (Rack) — Grease Pan (Drip Tray) — Pilot Adjustment Valve —... -
Page 8: Loading And Unloading
LOADING AND UNLOADING Place the rack in the desired position. Pull the rack out for loading. Load as quickly as possible and avoid spillage. Push the rack into place and cook for the appropriate time. Lower and pull the rack out for unloading. CLEANING Interior When the Cheesemelter is cool, remove rack. -
Page 9: Troubleshooting
PROBLEM Uneven heating Side burning Too much top heat Uneven heat, side to side Uneven heat, front to back Dried-out products Pilot outage Poor ignition TROUBLESHOOTING POSSIBLE CAUSES 1. Temperature too low 2. Improper operation of Cheesemelter 3. Fluctuating gas pressure 1.


Need help?
Do you have a question about the VCM24 ML-135124 and is the answer not in the manual?
Questions and answers