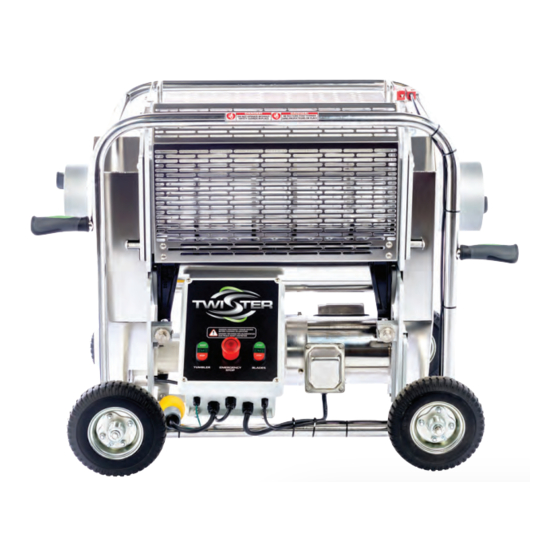
Twister T2 User Manual
Hide thumbs
Also See for T2:
- Owner's manual (72 pages) ,
- User manual (40 pages) ,
- User manual (60 pages)
Table of Contents
Advertisement
Advertisement
Table of Contents

Related Manuals for Twister T2


Summary of Contents for Twister T2
- Page 1 U S E R M A N U A L PN: 21-0122_REV03 T W I S T E R T R I M M E R . C O M...
- Page 2 T W I S T E R T R I M M E R . C O M...
-
Page 3: Table Of Contents
T A B L E O F C O N T E N T S Important Safety Information Machine Overview Initial Setup Control Panel Overview Operation Disassembly Reassembly Inspections Cleaning Maintenance Storage Troubleshooting Warranty Information Specifications Accessories Contact Us T W I S T E R T R I M M E R . C O M p g | 1... -
Page 4: Important Safety Information
• Do not reach inside the tumbler while the T2 is plugged in. • Do not allow water to collect on the ground around the T2. This could cause a slipping hazard. • Keep body parts away from moving parts of the T2. - Page 5 • Confine long hair when operating or conducting maintenance on the T2. • Do not operate or conduct maintenance on the T2 while tired or under the influence of drugs, alcohol, or medications. Replace any safety labels if they •...
- Page 6 Maintenance • Conduct regular maintenance on the T2. • Ensure the T2 is powered off and the machine is unplugged before conducting any Never conduct maintenance, repairs, or maintenance, repairs, or cleaning. cleaning while the T2 is plugged in. •...
-
Page 7: Machine Overview
BLADE ADJUSTMENT CLICKER CONTROL PANEL BLADE MOTOR *Hopper bolts are located on both sides of the T2. Fig. 1 T W I S T E R T R I M M E R . C O M p g | 5... - Page 8 M A C H I N E O V E R V I E W BED KNIFE BRUSH TUMBLER HELIX BLADE UPPER VACUUM SHROUD VACUUM OUTLET LOWER VACUUM SHROUD Fig. 2 p g | 6 T W I S T E R T R I M M E R . C O M...
- Page 9 M A C H I N E O V E R V I E W TUMBLER GUIDE & PIN TUMBLER PLATE TUMBLER HEIGHT LOCKNUT TUMBLER BELT TUMBLER HEIGHT TUMBLER MOTOR ADJUSTMENT PULLEY BOLT TUMBLER BELT HANDLE Fig. 3 SAFETY INTERLOCK BRUSH BEARING FLANGE TUMBLER ROLLER...
-
Page 10: Initial Setup
I N I T I A L S E T U P Step 1: Attach Wheels Slide the axles into the T2 frame (see Fig. 5). Slide the wheels onto the axles (see Fig. 6). Insert the cotter pins into the holes at the end of the axles (see Fig. 7). - Page 11 • With enough space to easily access the tumbler inlet and outlet. *It is highly recommended to operate the T2 in as cold of an environment as possible. Operating the T2 in *It is highly recommended to operate the T2 in as cold of an environment as possible. Operating the T2 in *It is highly recommended to operate the T2 in as cold of an environment as possible.
- Page 12 Set up either the Trim Saver or the Leaf Collector vacuums for operation (for instruction, see the respective vacuum manual). Attach a hose to the vacuum outlet on the T2 and the vacuum inlet on the Trim Saver or the Leaf Collector (see Fig. 9. Trim Saver pictured).
- Page 13 I N I T I A L S E T U P Step 4: Align Conveyors/Attach Hopper To safely feed product into the T2 tumbler, Twister Conveyors or a T2 Hopper is required (for a list of available conveyors and the Twister Hopper, see Accessories on page 52).
- Page 14 Secure the hopper mount bracket to the raised side of the T2 with screws and washers (see Fig. 13): • Use a 1” screw if attaching the hopper to the side of the T2 with the Safety Interlock. • Use a 7/8” screw if attaching the hopper to the side of the T2 without the Safety Interlock.
-
Page 15: Control Panel Overview
C O N T R O L B O X O V E R V I E W EMERGENCY STOP TUMBLER ON BLADES ON TUMBLER OFF BLADES OFF Fig. 15 T W I S T E R T R I M M E R . C O M p g | 1 3... -
Page 16: Operation
O P E R A T I O N Step 1: Pre-Operation Checks The following checks should be completed before each DANGER use of the T2. Before operating, ensure: DO NOT OPERATE THE T2 UNLESS The following are installed: THE MACHINE IS FULLY... - Page 17 • Adjust feeding speed to have the same volume of product exiting and entering the machine simultaneously. Adjust the T2 to operate with the tumbler 1/3 full (see Tilt Guidelines on page 10). • • If wet trimming, spray the brush every 5 minutes with cold distilled water to reduce buildup on the tumbler (if dry trimming, there is no need to spray the brush).
-
Page 18: Disassembly
D I S A S S E M B L Y The T2 needs to be disassembled to conduct routine DANGER cleaning, maintenance, and any repairs. Conduct the following steps in order to disassemble the T2: THE T2 MUST BE UNPLUGGED BEFORE DISASSEMBLY. - Page 19 D I S A S S E M B L Y Fig. 19 Fig. 18 Rotate the tumbler guide out (see CAUTION Fig. 18). Rotate the tumbler belt handle (see THE TUMBLER IS FRAGILE. REMOVE Fig. 19). CAREFULLY. HANDLE THE TUMBLER Lift the tumbler motor pulley (see BY ITS END CAPS AND AVOID Fig.
- Page 20 D I S A S S E M B L Y Step 4: Remove the Brush Remove the set screws on both brush bearing flanges (See Fig. 22). Remove the bolts and washers on the brush bearing flange located on the tumbler belt side of the machine (see Fig.
- Page 21 D I S A S S E M B L Y Fig. 25 Fig. 26 Rotate the lower vacuum shroud up 1/4 turn to clear the blade (see Fig. 27). Carefully pull out the lower vacuum shroud at a slight angle (see Fig. 28). Fig.
-
Page 22: Reassembly
R E A S S E M B L Y DANGER Step 1: Install the Vacuum Shrouds THE T2 MUST BE UNPLUGGED Ensure the T2 is unplugged. DURING REASSEMBLY. Carefully place the lower vacuum shroud above its operating position at a slight angle (see Fig. - Page 23 R E A S S E M B L Y Fig. 32 Fig. 33 Place the brush bearing flange on the end of the brush (see Fig. 34). Secure the brush bearing flange by inserting the bolts and washers (see Fig. 34). Insert and tighten the set screws on both brush bearing flanges (see Fig.
- Page 24 R E A S S E M B L Y Step 3: Install the Tumbler and Tumbler Belt Insert the tumbler (see Fig. 36). Lift the tumbler motor pulley (see Fig. 37). Install the tumbler belt. Allow the tumbler motor to drop. The weight of the motor will provide the necessary tension for the tumbler belt.
- Page 25 Lower the tumbler guard onto the machine (see Fig. 41). Step 6: Connect the Vacuum Connect the hose to the vacuum outlet on the T2. Connect the hose to the vacuum Fig. 41 inlet on the Trim Saver or Leaf Collector vacuum.
-
Page 26: Inspections
I N S P E C T I O N S To ensure optimal performance, of the following DANGER inspections should be made on the T2 on a weekly Ensure the T2 is unplugged before basis. TURN OFF ALL MOTORS, THEN conducting any inspections. - Page 27 Perform a leaf cut test* (see Adjusting the Blade, step 8, on page 31). *Only perform a leaf cut test prior to the T2 being sanitized. T W I S T E R T R I M M E R . C O M...
- Page 28 I N S P E C T I O N S Inspect the Blade Belt Check the belt tension. Ensure the blade spins when the belt is pulled. Inspect the belt for any fraying, kinks, loose links, or any other damage. Inspect all the pulleys, ensuring the bearings spin smoothly and the bolts are tight.
-
Page 29: Cleaning
16). Soak the tumbler, vacuum hoses, and tumbler brush in hot water and mild detergent. Coat the rest of the T2 in a foaming detergent. Allow the detergent to sit for five minutes. Repeat steps 3 and 4 two-three times. -
Page 30: Maintenance
Only grease the blade bearings— greasing . To grease the blade bearings: Ensure the T2 in unplugged. Remove both belt covers (see Step 2: Remove the Belt Covers in Disassembly on page 16 and Fig. 43). Pump grease into the grease nipples (see Fig. 44): •... - Page 31 M A I N T E N A N C E Fig. 44 T W I S T E R T R I M M E R . C O M p g | 2 9...
- Page 32 BLADE ADJUSTMENT TIPS • Make adjustments using a 5/8” wrench. • Adjustment clickers are located on the control panel side of the T2 (see Fig. 45). • Adjustment clickers adjust the bed knife position against the helix blade. • Each adjustment click corresponds to a 0.0007in/0.0018mm bed knife movement.
- Page 33 M A I N T E N A N C E Fig. 45 Fig. 46 Adjusting the Blade Turn the adjustment clickers clockwise so there is no contact between the blades. At one end of the blade, insert a 0.005” shim horizontally between the helix blade and the bed knife (see Fig.
- Page 34 *Due to backlash within the bedbar adjustment mechanism, it is possible that the machine will need up to 10 clicks to achieve the ideal blade contact and resulting friction. This may vary between machines in a tandem setup. **Only perform a leaf cut test prior to the T2 being sanitized. Fig. 47 p g | 3 2 T W I S T E R T R I M M E R .
- Page 35 While the following adjustments allow continued trimming, they will result in decreased trim quality. To make tumbler adjustments. Ensure the T2 is unplugged. Remove the tumbler belt (see CAUTION Disassembly on page 16). Loosen the hex bolts on both sides of IF THE TUMBLER BECOMES the tumbler (see Fig.
- Page 36 M A I N T E N A N C E Turn the tumbler height adjustment bolts on both sides of the tumbler to raise or lower the tumbler (see Fig. 49): • Turn the adjustment bolt clockwise to lower. •...
- Page 37 To replace the blade belt: Ensure the T2 is unplugged Flip the T2 on its handles with the motor plate facing up to make replacement easier (see Fig. 50). Remove the belt cover screws (see Fig. 51).
- Page 38 M A I N T E N A N C E Fig. 52 Fig. 53 Loosen the bolt tightened in step 6 to CAUTION drop the motor. Lift the blade motor from behind so it IF THE BELT CAN BE SQUEEZED drops and gives the desired belt tension SO OPPOSITE ENDS TOUCH, (see Fig.
- Page 39 Over time, the tumbler belt will see natural wear. TURN OFF ALL MOTORS, THEN The tumbler belt should be replaced if it shows any UNPLUG THE T2 BEFORE signs of wear or physical damage. It is recommended CONDUCTING ANY MAINTENANCE.
- Page 40 M A I N T E N A N C E Fig. 58 Fig. 59 Fig. 37 Insert the tumbler guide pin (see Fig. 60). Place the tumbler belt cover over the tumbler belt (see Fig. 61). Insert and tighten the tumbler belt cover screws (see Fig. 61). Fig.
-
Page 41: Storage
S T O R A G E When not in use, the T2 should be stored using the following guidelines to ensure the longevity of the machine. Storage Guidelines Before storage, clean the T2 (see Cleaning on page 27). •... -
Page 42: Troubleshooting
T R O U B L E S H O O T I N G TROUBLESHOOTING PROBLEMS • The Trumbler Makes a Grinding • Product Comes Out of the T2 Sound. Unprocessed • The Blade Motor is Very Hot. •... - Page 43 The blade motor will get hot if run for long periods of time. This is normal. The blade motor is thermally protected and will turn off if it becomes too hot. If this occurs allow it to cool and then restart the T2. •...
- Page 44 The extension cord is too long. • The extension cord is undersized. • The circuit breaker is not sized properly DO NOT INCREASE THE CIRCUIT for the T2 and Trim Saver or Leaf BREAKER SIZE ABOVE Collector. 20A/120V (NORTH AMERICA) •...
- Page 45 The T2 is not cleaned frequently enough. Solutions: • Operate the T2 in a colder environment. Lubricate the brush frequently during wet trimming (see Step 4: Feed the T2 on • page 15). • Clean the T2 after each use.
- Page 46 Keep the tumbler less than half full. • Adjust the tumbler closer to the blades. If this does not work, replace the tumbler. • Give lower density product a second pass through the T2. Suction from the Vacuum Seems Weak Possible Causes: •...
- Page 47 Product is Not Exiting the Tumbler Possible Causes: • The suction is too high. • The T2 is not inclinded enough. Solutions: • Purchase a Vacuum Bypass to reduce the suction (for details on the Vacuum Bypass, see Accessories on page 52).
- Page 48 T R O U B L E S H O O T I N G of both red sensors have text. Ensure the text is facing the same direction on both sensors and the sensors are no more than 1/8” apart (see Fig. 62). •...
- Page 49 T R O U B L E S H O O T I N G Solutions: • Attempt to locate the contact point. Once the contact point is found, adjust the tumbler clear of the interference (see Tumbler Adjustments on page 33). •...
-
Page 50: Warranty Information
The warranty period will begin on the date the machine is purchased by the initial purchaser. The T2 warranty defects can be remedied at any authorized service dealer or directly by Keirton. Any original parts deemed to be defective will be replaced free of charge. Keirton reserves the right to use any manufacturer approved replacement part for warranty repair. - Page 51 Allow only persons who understand this manual to operate the T2. Keirton claims no liability for any damage or injury that results from the use of the T2 by persons who have not read and understood the cautions, warnings, and danger notices contained in this manual or through any Please keep misuse of the T2.
-
Page 52: Specifications
S P E C I F I C A T I O N S North American Specifications Product Number Product Number 02-10006A Certifications Certification CSA/UL Dimensions Machine Height 34.5in/876mm Machine Length 38.1in/968mm 27.5in/699mm Machine Width Tumbler Diameter 6in/101mm Tumbler Slots (standard tumbler) 50 x 0.25in/6.4mm 0.04in/1mm Cut Height... - Page 53 S P E C I F I C A T I O N S European Specifications Product Number Product Number 02-10021A Certifications Certification Dimensions Machine Height 876mm/34.5in Machine Length 968mm/38.1in 699mm/27.5in Machine Width Tumbler Diameter 101mm/6in Tumbler Slots (standard tumbler) 50 x 6.4mm/0.25in 1mm/0.04in Cut Height...
-
Page 54: Accessories
Twister T2 Triple Rail System 24-9036 Twister T2 Quad Rail System 24-9033 *The Twister T2 Rail Extension attaches to the Twister T2 Single Rail to support two T2s. Spare Parts Trim Saver Nylon (70 Micron) Filter Bag 23-0217 Trim Saver White Mesh (40 Micron) Filter Bag... - Page 55 A C C E S S O R I E S Spare Parts (continued) T2 Blade Belt 19-0008 T2 Tumbler Belt 19-0009 Vacuums and Bypass Trim Saver Vacuum 23-0200 Leaf Collector Vacuum 23-0117 Vacuum Bypass 23-0255 T W I S T E R T R I M M E R . C O M...
-
Page 56: Contact Us
C O N T A C T U S Keirton Technical Support is available between 7 a.m. and 7 p.m. Pacific Standard Time, seven days a week at: 1-888-254-3204 • support@keirton.com. • T W I S T E R T R I M M E R . C O M p g | 5 4...
Need help?
Do you have a question about the T2 and is the answer not in the manual?
Questions and answers