Table of Contents
Advertisement
Quick Links
Advertisement
Table of Contents

Related Manuals for Twister T-ZERO


Summary of Contents for Twister T-ZERO
- Page 1 T-ZERO Maintenance and Cleaning Manual Version 1.0 March 2020 21-10098A_REV00...
-
Page 2: Table Of Contents
HEPA Filter Stack (HFS) Overview ....................10 Conveyor Overview .......................... 11 Engineering Mode ..........................12 Engineering Mode Functions ......................13 Adjusting the Tilt on the T-ZERO ..................... 20 Conveyor adjustments ........................23 Adjusting the Conveyor Height ...................... 23 Adjusting Feed Conveyor Chute ....................24 Adjusting Belt Tension on the Conveyor .................. - Page 3 Appendix ............................70 Product Specifications ........................70 Material Specifications ........................71 Air Requirements – Pulse Jet ......................72 T-ZERO Spare Parts ........................73 Spare Parts Kit ..........................73 Additional (Non-Critical) Spare Parts ..................... 75 Service Parts Replacement and Service Schedule ................78...
-
Page 4: Warranty Information
Allow only persons who have read and understood this manual to operate the T-ZERO. Keirton claims no liability for any damage or injury that results from the use of the T-ZERO by persons who have not read and understood the cautions contained in this manual or through any misuse of the T-ZERO. -
Page 5: Important Safety Information
The T-ZERO is a high-powered machine that requires special safety precautions to be practiced while in operation to prevent injury. The T-ZERO uses an industrial grade HEPA Filter Stack and fan. It is your responsibility to understand and take the necessary precautions to minimize the inherent risks associated with combustible dust. -
Page 6: Before Cleaning The T-Zero
EQUIPMENT SHOULD BE PROPERLY ANCHORED TO THE GROUND WITH A SUITABLY SIZED CONCRETE ANCHOR AND ADHERE TO LOCAL CODES AND REGULATIONS. BEFORE CLEANING THE T-ZERO MAKE SURE YOU WEAR PERSONAL PROTECTIVE EQUIPMENT. • Read this Maintenance and Cleaning Manual to familiarize yourself with the T- ZERO’s maintenance and cleaning procedures. -
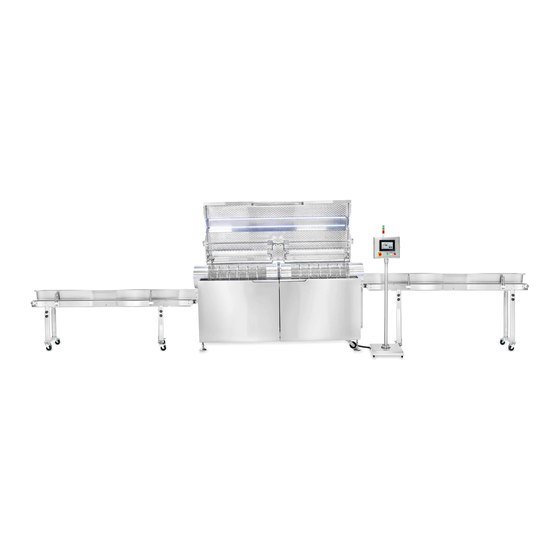
Page 7: System Overview
SYSTEM OVERVIEW DISCLAIMER Keirton reserves the right to make design changes and/or improvements in the products they manufacture at any time. Specifications are subject to change without notice. -
Page 8: Trimmer Overview
TRIMMER OVERVIEW... -
Page 10: Horizontal Cyclone Overview
HORIZONTAL CYCLONE OVERVIEW... -
Page 11: Hepa Filter Stack (Hfs) Overview
HEPA FILTER STACK (HFS) OVERVIEW... -
Page 12: Conveyor Overview
CONVEYOR OVERVIEW... -
Page 13: Engineering Mode
ENGINEERING MODE The T-Zero allows modification of advanced features through a password protected interface called Engineering Mode. To enable Engineering Mode: From Automatic Mode, tap the Advanced Mode button (highlighted below). 2. From Advanced Mode, tap the Engineering Mode button (highlighted below). -
Page 14: Engineering Mode Functions
4. Hit OK to return to the Advanced Mode screen. 5. Tap the Engineering Mode button again to move to the next screen. Note: to log out of Engineering Mode, return to the Automatic Mode screen. ENGINEERING MODE FUNCTIONS Water Sprayer Settings The water sprayer feature automatically applies water to the brush to help lubricate the tumbler and keep the machine clean while trimming wet. - Page 15 § The setpoints in the image at the bottom of page 13 would spray water for 1.5 seconds every 6 seconds. Advanced Mode This button returns the operator to the Advanced Mode screen. Super User Mode Super User Mode unlocks additional buttons in Advanced Mode (as shown in the image to the right) with various functions.
- Page 16 5% for the Vacuum power. Start Delay Timer The boxes in line to the right with Delay Timer show the start sequence of the T-ZERO motors. To adjust the start sequence, tap the boxes and type a new value.
- Page 17 Load Recipe from SD The Load Recipe button retrieves saved recipes from the SD card. Recipe data must be saved first before data can be restored. Dynamic Tumbling Settings The Dynamic Tumbling feature helps optimize the flow of product through the tumbler by setting the tumbler motor to constantly vary the RPM to avoid surging (for more information on surging and optimizing tumbler flow, see Troubleshooting on page 66).
- Page 18 Note: Increase the time if product remains in the tumbler after the empty sequence is complete. Decrease the time if the tumbler is empty while the tumbler motor is still on. NOTE: IF THE TUMBLER IS DIRTY, SOME PRODUCT MAY STAY IN THE MACHINE INDEFINITELY.
- Page 19 Note: Increase the time for systems with custom ducting to ensure the ducting is clean for storage and safety. IMPORTANT SAFETY INFORMATION SETTLED DUST CREATES AN EXPLOSION HAZARD! SYSTEM DUCTING MUST BE CLEARED AFTER EACH MACHINE USE TO PREVENT RISK OF FIRE. Motor Calibration The Calibration feature allows each motor to be calibrated using a Tachometer.
-
Page 21: Adjusting The Tilt On The T-Zero
ADJUSTING THE TILT ON THE T-ZERO The infeed side of the T-ZERO has the powered lifting feature which allows the operator to adjust the tilt on the trimmer to a maximum of 7°. The angle on the T-ZERO plays an important role on how fast product moves through the T-ZERO and how full the tumbler gets during operation. - Page 22 2. Once all motors have come to a complete stop, tap the Advanced Mode button (located at the top right corner of the screen). 3. Check the T-ZERO’s immediate surroundings to make sure no one or anything is near it.
- Page 23 8. Tap the Lower or Raise button to adjust the tilt on the T-ZERO. 9. Monitor the angle reading in Advanced Mode, the actual reading states what angle the machine is currently at. When loading a recipe, adjust the machine until the ACTUAL reading matches the SETPOINT reading to set the trimmer at the correct angle.
-
Page 24: Conveyor Adjustments
CONVEYOR ADJUSTMENTS ADJUSTING THE CONVEYOR HEIGHT IMPORTANT SAFETY INFORMATION o The conveyor motor is heavy. Always use at least two people for the following tasks. o Always move the conveyors away from the machine before adjusting the height. o DO NOT LIFT CONVEYORS FROM THE TENSIONING END (highlighted in green to the right). -
Page 25: Adjusting Feed Conveyor Chute
3. After desired height is achieved, realign the conveyors and spin the tumbler by hand to ensure there is no interference. ADJUSTING FEED CONVEYOR CHUTE The chute will need to be adjusted if the conveyor belt or sidewalls are adjusted. To adjust the conveyor chute: 1. -
Page 26: Adjusting Belt Tension On The Conveyor
ADJUSTING BELT TENSION ON THE CONVEYOR The conveyor belt will stretch slightly over time. If the conveyor stutters or jams it could be caused by a loose belt. To adjust the belt tension on the conveyor: 1. Spin the adjustment nuts at the end of the conveyor (the tensioning roller side) to push the roller away from the conveyor. - Page 27 3. Check the chutes to ensure they are not interfering with the conveyor belt or tumbler after adjustment.
-
Page 28: Disassembling The T-Zero
DISASSEMBLING THE T-ZERO To disassemble the T-ZERO for cleaning or maintenance: 1. Make sure the T-ZERO is off and power is locked out. IMPORTANT SAFETY INFORMATION FOLLOW YOUR FACILITY’S LOCK OUT PROCEDURE. IF ANY CONNECTOR FROM THE MAIN POWER PANEL TO... - Page 29 5. Loosen the tumbler lid knobs and lift the tumbler lids.
- Page 30 6. Open the front doors and release the tumbler belts using the tumbler belt handle. a) Slide the tumblers away from the centre, lift belts and place them between the tumblers (see diagram at top of next page). 7. Remove the tumbler (see diagram at top of next page). IMPORTANT SAFETY INFORMATION TUMBLERS ARE HEAVY! ALWAYS LIFT WITH TWO PEOPLE.
- Page 31 8. Repeat steps 5 to 7 to remove the second tumbler. 9. If vacuum bars are installed, pull them to remove.
- Page 32 10. Remove the four vacuum shrouds: DO NOT a) Release the two vacuum shroud knobs on the bottom. REMOVE FULLY. b) Release the toggle clamps on the shrouds. c) Slide the shroud out. d) Repeat on the front shroud and then opposite side of trimmer.
- Page 33 11. Remove Blade Couplings: a) Rotate metal ring until the pins on the edge align with slots on the plastic centre piece. b) Slide the ring to one side and pull out the plastic coupling. c) Release the bed knife pins with a 5/8” wrench (two bolts per blade) IMPORTANT SAFETY INFORMATION DO NOT TAMPER WITH THE 1”...
- Page 34 d) Carefully flip up the blades. IMPORTANT SAFETY INFORMATION BEWARE OF CUTTING HAZARDS WITH THE BED KNIVES AND HELIX BLADES. WEAR GLOVES, BED KNIVES AND BLADES CAN BE VERY SHARP.
-
Page 35: Reassembling The T-Zero
REASSEMBLING THE T-ZERO To reassemble the T-ZERO: 1. Reinstall blade couplings: a) Rotate the metal ring past one bump on the plastic piece to lock the coupling in place. 2. Rotate the bed knife into position carefully, and reinstall the bed knife pins on all blades. - Page 36 6. Reinstall the brushes and close the main lid. 7. Reposition the Feed and QC conveyors. ENSURE THE CONVEYOR BELTS AND CHUTES ARE NOT RUBBING ON THE TUMBLER. 8. Close the rear doors 9. Reconnect the ducting to the T-ZERO. 10. Reinstall any disconnected cables.
-
Page 37: Cleaning The T-Zero
3. Repeat first two steps 2-3 times to release debris. 4. Pressure wash to remove foam. 5. Dry with compressed air. 6. Spray with isopropyl alcohol. 7. Let alcohol evaporate. Note: it is recommended to use the Twister Foam Cannon (Part# 25-0024-00, pictured above right). - Page 38 5. Clean removable components (tumbler, vacuum shrouds, vacuum bars, brushes, and ducting) separately using the Twister Cleaning Method (see previous page). DO NOT USE STEAM ON BRUSH. PRESSURE WASH AT LEAST 10” AWAY FROM BRUSH TO PREVENT DAMAGE. USE CARE WHILE HANDING THE SHROUDS AND THE TUMBLER TO PREVENT DAMAGE.
-
Page 39: Cleaning Conveyors
(the tensioning roller side). This provides easy access to clean underneath the belt 3. Clean the entire conveyor using the Twister Cleaning Method (for more details see Cleaning the T-ZERO on page 36). 4. Wipe down belts or clean with low-pressure water. -
Page 40: Cleaning The Cyclone And Ducting
CLEANING THE CYCLONE AND DUCTING To clean the cyclone and inlet ducting: 1. Remove bin, and bin lid hose (see diagrams below). - Page 41 2. Wash bin and hose lid ducting using the Twister Cleaning Method (for more details see Cleaning the T-ZERO on page 36). 3. Remove the cyclone-to-filter duct to prevent water entering the HEPA Filter Stack. 4. Inspect cyclone-to-trimmer ducting to ensure there isn’t excessive debris on the sidewalls or caught in elbows.
- Page 42 7. Wash cyclone using the Twister Cleaning Method (for more details see Cleaning the T-ZERO on page 36). 8. Open doors of the HEPA Filter Stack and inspect for product build up. Note: Filter Overbags can be purchased to help prevent build-up in the filter pleats, making cleaning easier (part # 23-10148A).
-
Page 43: Inspecting The Trimmer
Check belt tension. If using a belt tension gauge, the gauge should read 8-12lbs. c) Inspect all pulleys, ensuring bearings spin smooth and bolts are tight. 5. Remove tumbler and disconnect blade couplings (see Disassembling the T-ZERO on page 27). 6. Inspect the blades:... - Page 44 a) Spin each blade by hand, ensuring smooth rotation with light contact. b) Inspect each blade, checking for any damage to the blade edges. c) Perform the paper cut test. IF THE BLADES DO NOT CLEANLY CUT PAPER, BLADE ADJUSTMENT IS REQUIRED (see Adjusting the Blade Contact for instructions on page 58).
-
Page 45: Long Term Maintenance
LONG TERM MAINTENANCE After 3000 hours lubricate the blade bearings using Dow Corning, Molykote G-0052FM Food Grade Grease. To lubricate the blade bearings: 1. Remove bearing caps. 2. Manually clean out as much grease as possible. 3. WEARING NITRILE GLOVES, pack new grease into the bearing with thumb. -
Page 46: Inspecting The Hepa Filter Stack
INSPECTING THE HEPA FILTER STACK The HEPA Filter Stack (HFS) is composed of two filter modules: primary filters, which remove 99.99% of all particles down to 0.5 micron, and a secondary HEPA filter, which removes 99.97% of all particles down to 0.3 micron. Over prolonged use, the filters will need to be replaced. -
Page 47: Weekly Hfs Inspection Procedure
It is recommended to clean the primary filters weekly—especially when dry trimming. When the static pressure reads 5” WC on the digital readout on the Pulse Jet Controller, a replacement filter is recommended. The pressure drop across the HEPA Filter should be 1-2” WC. The HEPA Filter should last 5-10 years in a properly maintained machine. -
Page 48: Long Term Maintenance
IT IS RECOMMENDED TO KEEP A LOG OF HEPA FILTER PRESSURE READINGS, IF THIS NUMBER CHANGES MORE THAN 0.25” OVER A WEEK THERE COULD BE ISSUES WITH THE PRIMARY FILTERS. 7. Turn on the Pulse Jet and ensure compressor is supplying air to the system: a) Check the air lines for any leaks. -
Page 49: Inspecting The Cyclone
INSPECTING THE CYCLONE For the weekly inspection of the Horizontal Cyclone: 1. Check the Trim Bin for any damage: a) Inspect the Trim Bin and lid for any damage, specifically around the sealing surfaces. b) Inspect the lid gasket to ensure it is seated properly in the lid. Ensure there are no cracks or other damage. -
Page 50: Inspecting The Conveyors
INSPECTING THE CONVEYORS For the weekly inspection of the Feed and QC Conveyors: 1. Check belt for any fraying or physical damage: a) Ensure the guide fin on the bottom is not damaged. 2. Check belt tension. Belt should be flat on the conveyor with the fin seated in the conveyor groove: a) Clean the belt and rollers. -
Page 51: Mechanical Adjustments
MECHANICAL ADJUSTMENTS The T-ZERO is shipped from the factory with the optimal settings on the machine. THE FOLLOWING ADJUSTMENTS SHOULD ONLY BE PERFORMED IF PARTS NEED TO BE REPLACED, OR THERE IS AN ISSUE WITH THE MACHINE. IMPORTANT SAFETY INFORMATION... - Page 52 To reset axial rollers: Note: if experiencing interference between the tumbler and blades, skip to step 1 of To reset Lower and Upper Radial Rollers: 1. Raise all the axial rollers to align the tumbler with the motor and pulleys. A 12-point 3/8”...
- Page 53 2. Move the tumblers side to side with the belt installed, and position the tumbler so the belt is straight. 3. Lower rollers “A” and “B” (see diagram above) down so they contact the angled face of the tumbler. Ensure the sub-lid clamps are fully tightened during this step.
- Page 54 5. Once the exit side tumbler is aligned, rotate the tumblers by hand to find the high spot on the feed side. FIND MINIMUM GAP 6. Once the minimum gap is found, place a .060” shim between roller “C” and the tumbler, then tighten it.
- Page 55 Note: Alignment tools (Part#: 11-10051A and 11-10052A) are available for purchase to help set the lower rollers to the optimal position. To reset Lower and Upper Radial Rollers: THE LOWER RADIAL ROLLERS (3-6) MUST BE ADJUSTED BEFORE THE UPPER RADIAL ROLLERS (7-10). Note: The alignment tool (pictured above) is only used on the Lower Radial Rollers.
- Page 56 5. Re-install both tumblers, and rotate to ensure there is no contact between the tumbler and the blades. 6. If the lowest point on the tumbler is larger than .040” away from the blades, shim between the roller and alignment tool to set the rollers lower (left image above).
- Page 57 To reset Tumbler Lid Rollers: 1. Move to the remaining Tumbler Lid Rollers: a) Use a ¼” hex key to loosen all rollers, raise, and lightly tighten them clear of the tumbler FIND MINIMUM GAP 2. Starting with Roller 7, rotate the tumbler by hand to find the point where the tumbler is closest to the roller.
- Page 58 5. Turn the tumbler motor on, and ensure there is no grinding or other noise. The upper radial rollers should not rotate continuously with the tumbler. They should only touch briefly at the high spots. 6. Confirm the Upper Radial Rollers are set at the high spot by rotating both tumblers by hand.
-
Page 59: Adjusting The Blade Contact
Note: A 12-point 3/8” socket with a flexible joint or two-piece extension is required. 1. Remove the Tumblers and Blade Couplings (for instructions, see Disassembling the T-ZERO on page 27). 2. Spin each blade by hand cutting paper along the length to determine which side needs to be adjusted. - Page 60 Note: Every Bed Bar has an adjustment bar on each side, 8 in total. In the image at the bottom of the previous page, adjusters 1 and 2 would correspond to the top right Blades. 4. Adjust the bed knife to or away from helix blade. If paper does not cut cleanly, adjust the bed knife CLOSER to the helix blade.
-
Page 61: Adjusting The Blade Belt Tension
6. If light contact and paper cutting cannot be achieved, call technical support for further troubleshooting (see contact details at back of manual). The end goal is to have a consistent, clean paper cut across all blades with as little blade contact as possible. -
Page 62: Adjusting The Tumbler Belt Tension
ADJUSTING THE TUMBLER BELT TENSION Before adjusting the tumbler belt, ensure the pulley grooves on the tumblers are in-line with the lower pulleys. Do this adjustment with the tumblers and belts installed. -
Page 63: Recalibrating The Tilt Sensor
RECALIBRATING THE TILT SENSOR The tilt feature on the HMI uses an accelerometer to adjust the angle reading on the machine. OVER TIME THIS READING WILL DRIFT AND NEED TO BE RECALIBRATED. To recalibrate the machine: 1. Retract the lifting legs all the way. The legs will automatically stop once retracted. -
Page 64: Adjusting The Pulse Jet Settings
ADJUSTING THE PULSE JET SETTINGS The Pulse Jet has two different running modes: Continuous Cleaning and Clean at High Pressure. Continuous Cleaning triggers the pulse jet at a set time interval. Clean at High Pressure pulses when the filters have a specified pressure drop across them. WHEN TRIMMING DRY IT IS RECOMMENDED TO USE THE CONTINUOUS CLEANING OPTION. - Page 65 the user to enter the same numbers to change any settings. There is no password by default. f) Calibration: only use this if the pressure gauge is reading a number other than zero while the system is off. Hold both the up and down button for two seconds to reset the pressure to zero.
- Page 66 Note: The interval is set based on the capacity of the air compressor (for more details, see Air Requirements – Pulse Jet on page 72). ALL OTHER PARAMETERS WILL BE SET BY KEIRTON. CONTACT TECHNICAL SUPPORT IF THERE IS A NEED TO ADJUST ANY OTHER PARAMETERS (SEE CONTACT DETAILS AT BACK OF MANUAL).
-
Page 67: Troubleshooting
MOTOR WON’T TURN ON If any motor won’t turn: 1. Verify that the T-ZERO is connected to power and that the power is on. 2. Check for the Ack Err (Acknowledge Error) button on the HMI. a) Tap the Ack Err button if it appears on the HMI screen. -
Page 68: Tumbler Hitting Blades Or Vacuum Bar
(see Adjusting the Blade Contact on page 58). 3. Ensure the T-ZERO is off and make sure tumbler is filled approximately ⅓ full. 4. Ensure the feed conveyor is evenly feeding the T-ZERO. -
Page 69: Product Is Sticking To The Inside Of The Tumbler
a) If the tumbler is full, increase the tilt angle or decrease the vacuum motor speed. 6. Observe the product in the tumbler and make sure there is no surging. a) If the product in the tumbler is surging or the vacuum hoses are bouncing, adjust the tumbler’s RPM. -
Page 70: Tumbler Is Bouncing Around While Rotating
TUMBLER IS BOUNCING AROUND WHILE ROTATING If tumbler is bouncing around while rotating: 1. Ensure the sub lid is secured. 2. Ensure the rollers are at the correct height and not damaged. 3. IF DAMAGED, HAVE SERVICE TEAM READJUST THE ROLLERS OR REPLACE THEM. -
Page 71: Appendix
APPENDIX PRODUCT SPECIFICATIONS Power requirements 480 VAC 80 A or 600V 60A, 3-Phase Reel motor 20HP, 460VAC 3-Phase 1750rpm Tumbler motor 3/4 HP, 460VAC 3-Phase 1750rpm Vac motor 25 HP 460VAC 3-Phase Infeed conveyor motor 1/4 HP 460VAC 3-Phase Outfeed QC conveyor motor 1/4 HP 460VAC 3-Phase Cutting system Belt drive quad blade system... -
Page 72: Material Specifications
MATERIAL SPECIFICATIONS Machined parts 304 Stainless steel Frame Welding filler rod 308L Stainless steel Blade pivot screws 316 Stainless steel, nitrided Fasteners 18-8 Stainless steel Blades Nitrided carbon steel Bearings Stainless Steel Bearing Cap O-ring Dow Corning, Molykote 111 food grade grease – Meets NSF Standard 61 lubrication Bearing grease NSF –... -
Page 73: Air Requirements - Pulse Jet
AIR REQUIREMENTS – PULSE JET HEPA Filter Stack Air Consumption (90-105psi recommended) On time: 0.15 seconds Off time (seconds) Air Consumption (CFM) 27.6 13.8... -
Page 74: T-Zero Spare Parts
The T-ZERO Spare Parts Kit (product #: 27-10026A) contains all the common spare parts that will allow you to do this. - Page 75 BELT, V-BELT, HIGH CAPACITY, 53” Service CIRCUMFERENCE, LOWER BLADES, T-ZERO 20-0001 BRUSH, TUMBLER, NYLON, T-ZERO Service 23-10005A FILTER, HFS HEMIPLEAT, GSX, T-ZERO Service 23-10112A ADAPTER, 10” DUCT, ROLLED LIP TO HOSE, 4” Processing LONG, SS304, T-ZERO 23-10124A CLAMP, 10” DUCT, SS304, FDA SILICONE...
-
Page 76: Additional (Non-Critical) Spare Parts
The following spare parts may be required. Each can be purchased individually. Part Item Description Unit of Reason for Number Measure Recommendation 02-10005A T-ZERO WIDE SLOT TUMBLER ASSEMBLY - Processing PACKAGED 02-10017A T-ZERO NARROW SLOT TUMBLER ASSEMBLY - Processing PACKAGED 11-0111A SHEAVE, TUMBLER GEARBOX, T-ZERO... -
Page 77: Service Parts Replacement And Service Schedule
Inspection Maintenance Required Year Year Year Year Year Year Year Year Year Year Trimmer BRUSH, TUMBLER, 20-0001 Weekly NYLON T-ZERO Trimmer FLANGE, BEARING, & 19-0022/13-0212 Weekly PLUNGERS Trimmer BEDKNIVES 11-10005A Weekly Trimmer HELIX BLADES 24-0652/24-0671 Weekly Trimmer AXIAL TUMBLER 24-10014A... - Page 78 Component Maintenance Item Part Number Inspection Maintenance Required Year Year Year Year Year Year Year Year Year Year Trimmer HELIX BLADE Weekly BEARINGS Trimmer VACUUM PLENUMS 24-0616/24-0617 Weekly REPLACE AS REQUIRED Trimmer VACUUM BAR 11-0195 Weekly REPLACE AS REQUIRED Trimmer ELECTRICAL BOX Weekly CONNECTIONS...
- Page 79 Component Maintenance Item Part Number Inspection Maintenance Required Year Year Year Year Year Year Year Year Year Year COMPRESSED AIR Weekly PRESSURE HOPPER Weekly PARTICLE FILTER 14-10154 Weekly PAMIC FILTER 14-10155 Weekly Cyclone TRIM BIN & GASKET 14-0037 Weekly Cyclone INLET, OUTLET, &...
- Page 80 Component Maintenance Item Part Number Inspection Maintenance Required Year Year Year Year Year Year Year Year Year Year Ducting GASKETS 11-0184/11-0186 Weekly Ducting DUCT CLAMPS AND 14-0036/14- Weekly HOSE CLAMP 0070/23010124A/23- 10125A/23-10129A...
-
Page 81: Contact Us
CONTACT US Keirton Technical Support is available at 1-888-254-3204 between 7 a.m. and 7 p.m. Pacific Time, seven days a week.
Need help?
Do you have a question about the T-ZERO and is the answer not in the manual?
Questions and answers