Table of Contents
Advertisement
Quick Links
ACE 010
INSTALLATION, QUICK START
INSTALLATIE, SNEL AAN DE SLAG
INSTALLATION, DÉMARRAGE RAPIDE
INICIO RÁPIDO PARA LA INSTALACIÓN
AUFSTELLUNG, KURZANLEITUNG
INSTALAÇÃO, GUIA DE INICIAÇÃO RÁPIDA
INSTALLAZIONE, GUIDA RAPIDA
INSTALLATION, SNABBGUIDE
INSTALLATION, HURTIG START
INSTALACE, NÁVOD VE ZKRATCE
INSTALLASJON, HURTIG START
INSTALACJA, SKRÓCONA
INSTRUKCJA OBSŁUGI
ASENNUS, PIKAOPAS
УСТАНОВКА, КРАТКОЕ
ÜZEMBE HELYEZÉS, RÖVID
СПРАВОЧНОЕ РУКОВОДСТВО
KEZDÉSI ÚTMUTATÓ
INŠTALÁCIA, ÚVODNÁ PRÍRUČKA
1
Advertisement
Table of Contents

Related Manuals for Whirlpool ACE 010


Summary of Contents for Whirlpool ACE 010
- Page 1 ACE 010 INSTALLATION, QUICK START INSTALLATIE, SNEL AAN DE SLAG INSTALLATION, DÉMARRAGE RAPIDE INICIO RÁPIDO PARA LA INSTALACIÓN AUFSTELLUNG, KURZANLEITUNG INSTALAÇÃO, GUIA DE INICIAÇÃO RÁPIDA INSTALLAZIONE, GUIDA RAPIDA INSTALLATION, SNABBGUIDE INSTALLATION, HURTIG START INSTALACE, NÁVOD VE ZKRATCE INSTALLASJON, HURTIG START INSTALACJA, SKRÓCONA...
-
Page 2: Installation
INSTALLATION MOUNTING THE APPLIANCE separate mounting in- OLLOW THE SUPPLIED structions when installing the appliance. PRIOR TO CONNECTING on the rating HECK THAT THE VOLTAGE if it has a O NOT OPERATE THIS APPLIANCE plate corresponds to the voltage in your damaged mains cord or plug, if it is not home. -
Page 3: Important Safety Instructions
IMPORTANT SAFETY INSTRUCTIONS READ CAREFULLY AND KEEP FOR FUTURE REFERENCE in or to use the appliance NLY ALLOW CHILDREN O NOT HEAT OR USE FLAMMABLE LIQUIDS near the appliance. Fumes can create a under adult supervision and after adequate fire hazard or explosion. instructions have been given, so that the child is able to use the appliance in a safe way and understands the hazards of improper use. -
Page 4: Accessories And Parts
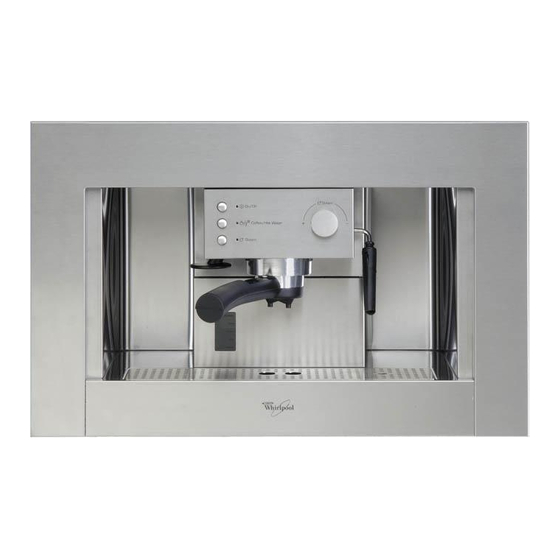
ACCESSORIES & PARTS ONTROL PANEL APPUCCINO MAKER TEAM SELECTOR BUTTON TEAM KNOB OZZLE OFFEE HOT WATER BUTTON ... -
Page 5: Filling The Water Tank
FILLING THE WATER TANK by pulling it out (to- EMOVE THE WATERTANK EVER USE THE APPLIANCE WITHOUT WATER IN wards the front). and always remember to top up THE TANK when the level drops to a couple of cen- timetres from the bottom. - Page 6 HOW TO PREPARE ESPRESSO COFFEE USING THE FILTER HOLDER FOR GROUND COFFEE 1. A the appliance as described 5. P or cups under the filter holder FTER PREHEATING LACE THE CUP above, place the ground coffee fil- spouts. ter in the filter holder, making sure You are rec- the projection is correctly insert- ommended to...
- Page 7 HOW TO PREPARE ESPRESSO COFFEE USING PODS 1. P as described in the sec- 3. I , centring it as far as possible REHEAT THE APPLIANCE NSERT A POD tion “PREHEATING THE COFFEE UNIT”, making on the filter. Always follow the instruc- sure the filter holder is attached.
- Page 8 HOW TO MAKE CAPPUCCINO COFFEE 1. P as described in 6. W REPARE THE ESPRESSO COFFEES HEN THE REQUIRED TEMPERATURE the previous paragraphs, using sufficiently (60°C is ideal), interrupt IS REACHED large cups. steam delivery by rotating the 2. P and wait steam knob clockwise and at the RESS THE STEAM BUTTON...
-
Page 9: Hot Water Production
IMPORTANT: always clean the cappuccino 3. R from the steam EMOVE THE NOZZLE maker after use. Proceed as follows: tube by pulling it downwards. 1. D for a few seconds by ISCHARGE A LITTLE STEAM 4. W ASH THE CAPPUCCINO MAKER rotat- steam nozzle thoroughly with warm ing the... -
Page 10: Cleaning And Maintenance
CLEANING AND MAINTENANCE 3. E the drip tray and drip mesh MPTY AND WASH 1. B operations, EFORE PERFORMING ANY CLEANING frequently. leave the appliance to cool down and unplug 4. C regularly. LEAN THE WATER TANK from the mains socket. IMPORTANT: Never immerse the appliance in 2. - Page 11 CLEANING THE BOILER OUTLET , the espresso boil- 3. C with a damp cloth BOUT EVERY COFFEES LEAN THE BOILER er outlet must be 4. C thoroughly in hot LEAN THE OUTLET cleaned as follows: water using a brush. Make sure the 1.
- Page 12 PROBLEM POSSIBLE CAUSE SOLUTION O ESPRESSO COFFEE IS DELIVERED No water in the tank Fill the tank with water The holes in the fil- Clean the spout holes. ter holder spouts are Clean as described in the blocked. chapter “Cleaning the The espresso boiler outlet boiler outlet”...
- Page 13 PROBLEM SOLUTION POSSIBLE CAUSE The ground coffee is Press the ground coffee HE COFFEE FROTH IS TOO LIGHT (delivered from the spout too not pressed down firmly down more firmly). fast) enough Increase the quantity of There is not enough ground coffee ground coffee Use ground coffee for...
-
Page 16: Troubleshooting Guide
OLTAGE 1100 W ATED OWER NPUT 10 A (UK 13 A) D) 382 UTER DIMENSIONS 5 0 1 9 - 3 0 0 - 0 0 7 5 1 © Whirlpool Sweden AB 2012. All rights reserved. Made in Sweden.
Need help?
Do you have a question about the ACE 010 and is the answer not in the manual?
Questions and answers