
Related Manuals for Saeco DA 7P Plus


Summary of Contents for Saeco DA 7P Plus
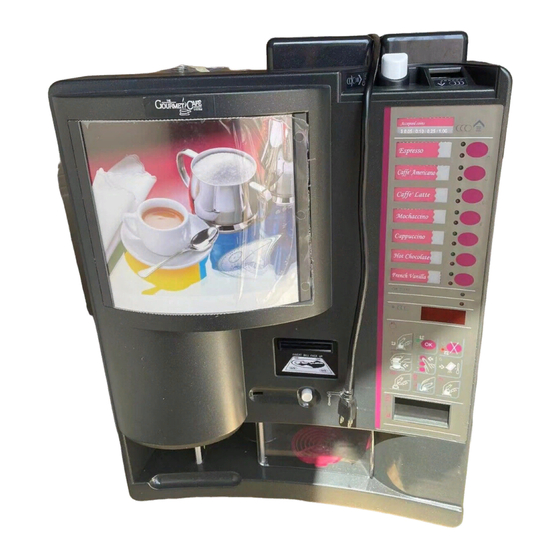
- Page 1 Distributore automatico di bevande Vending machine for hot beverages Heißgetränkeautomat Distributeur automatique de boissons mod. SAECO DA 7P PLUS...
-
Page 2: Table Of Contents
÷ Italiano pag. 5 Indice 1 - Informazioni generali ..........5 7 - Comandi ed informazioni ......... 7 2 - Avvertenze di sicurezza ..........5 8 - Installazione ............. 8 3 - Avvertenze per facilitare la lettura ....... 5 9 - Impiego e caricamento ........... 14 4 - Caratteristiche tecniche .......... - Page 3 Comandi distributore automatico predisposto per monetiera tipo NRI G 13 Controls relevant to a vending machine suitable to a NRI G13 coiner Bedienungselemente des Automaten, vorbereitet für den Einsatz eines Münzprüfers des Typs NRI G 13 Commandes distributeur automatique pour monnayeur de type NRI G 13...
- Page 4 Comandi distributore automatico predisposto per monetiera tipo NRI G 26 Controls relevant to a vending machine suitable to a NRI G26 coiner Bedienungselemente des Automaten, vorbereitet für den Einsatz eines Münzprüfers des Typs NRI G 26 Commandes distributeur automatique pour monnayeur de type NRI G 26...
-
Page 5: English
Legenda Italiano Comandi distributore automatico predisposto per monetiera tipo NRI G 26 1. Contenitore caffè in grani 13. Tanica acqua potabile 25. Chiave nazione 37. Sportello prelievo zucchero 2. Contenitori polveri 14. Tubo di scarico 26. Pulsante programmazione 38. Pulsante recupero monete 3. -
Page 6: Demolizione Della Macchina
Legenda Italiano Comandi distributore automatico predisposto per monetiera tipo NRI G 13 1. Contenitore caffè in grani 13. Tanica acqua potabile 25. Chiave nazione 37. Sportello prelievo zucchero 2. Contenitori polveri 14. Tubo di carico 26. Pulsante programmazione 38. Pulsante recupero monete 3. -
Page 7: General Information
English "DA 7P PLUS" HOT BEVERAGE VENDING MACHINE 1 - GENERAL INFORMATION • This manual provides all technical information necessary for the correct installation, maintenance and operation of the machine. • Always consult this manual before carrying out any operation or procedure. -
Page 8: Technical Specifications
Fig. 2 4.1 Payment system • DA 7P PLUS vending machine has been manufactured to accept the assembly of either the PARALLEL TYPE NRI G 13 coiner, G26 EXECUTIVE coiner, or other payment systems, such as SAECO CARD and banknote readers. -
Page 9: Storage And Unpacking
English STORAGE AND UNPACKING Storage • The machine is packed into a sturdy cardboard box with a rein- forced platform, as shown in figure 4. The boxed machine can be stored in cool, dry, dust-free locations. Warning : Do not stack more than one box on top of another. Unpacking •... -
Page 10: Installation
English 8 - INSTALLATION • Remove the cabinet from the box, taking out all parts packed inside it. • Insert the drip funnel (40) into the surface of the cabinet and connect it to the drain tube (41) (Fig. 6). •... - Page 11 English Electrical connection The equipment has been manufactured for a single-phase voltage, as shown on the rating plate (Fig. 3). Before plugging in the machine, make sure that : 1. The rating plate specifications correspond to the electrical supply voltage (within a tolerance of approx.10% from the rated value).
- Page 12 English • Turn the machine on (main switch on back of the machine to position "1"), then run a rinse cycle through the water system, following the procedure below : • Open the door and insert key (33) into slot (32) enabling safety sensors (Fig. 14). WARNING: Altough the front door of the machine is open, the key (33) enables the machine to remain in operating mode.
- Page 13 English COINS ACCEPTED Button functions 1st BUTTON (UP button) : It is used to scroll up the menus and to increase the values UP button ESPRESSO displayed during programming. LONG DOWN button ESPRESSO 2nd BUTTON (DOWN button) : It is used to scroll down the menus and to reduce the ESPRESSO WITH values displayed during programming.
- Page 14 Tokens are assigned a value which is equal to that of the smallest coin accepted by the coiner. The RS 232 male serial connector (30) is used to operate SAECO CARD only.
- Page 15 English 8.7 Assembly of the NRI G26 coin changer Only an executive type coiner can be used with this equipment. • Assemble the metal cable stopper supplied with the equipment. • Pass the coiner cables trough the cable stopper, making sure they do not block the coin inlet or prevent the correct operation of the coiner release lever (Fig.
-
Page 16: Operation And Re-Filling Products
English 9 - OPERATION AND RE-FILLING PRODUCTS 9.1 Beverage dispensing • Insert the correct amount of change (40) corresponding to the price of the beverage selected. • If coins inserted (39) exceed the amount required, the surplus amount will be stored for approx. 3 minutes and can be used for another beverage (with G13 multi-product dispensing coiner). -
Page 17: Cleaning And Maintenance
English Attention: Cup tubes have dimensions suitable for cups with a max. diameter of 70 mm; cups having a diameter of 58 mm (fig. 27) can also be used by inserting the necessary reduction rings (48). Sugar packet dispenser: • Fill the dispenser fitted on the inside of the door with sugar packets. Attention: Do not use loose sweetener (i.e. - Page 18 English Mixers and dispensing tubes: • Remove the dispensing tubes (7) paying particular attention to the end gaskets. Remove the whipper cap (4) and separate the whipper (5) from the underlying part, also removing the nozzle with silicone tube (Fig. 30). Turn the whipper chamber (6) clockwise and remove it.
-
Page 19: Proper Disposal Of Machine
English • Switch off the machine, open the door, introduce key 33 into the sensor switch, and then simultaneously turn on the machine and press button 28. The first 5 LEDs will light up, and the "Ready for use" and "Water empty" LEDs will alternately blink. Front panel LEDs check: •...
Need help?
Do you have a question about the DA 7P Plus and is the answer not in the manual?
Questions and answers